Posts with «cad» label

Mechanical Keyboard Is Also a Mouse
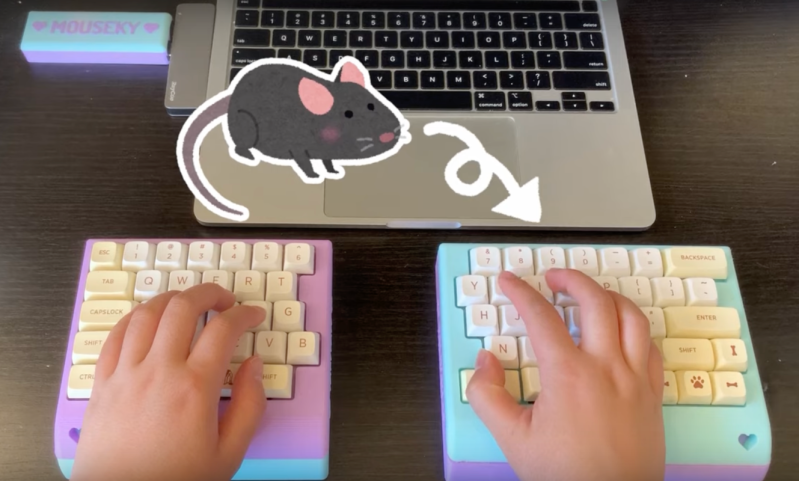
The mechanical keyboard community is a vibrant, if not fanatical, group of enthusiasts determined to find as many possible ways of assembling, building, and using as many high-quality keyboards as possible. With so many dedicated participants, most things that can be done with a keyboard already have been done. So when something as unique as this split keyboard that also doubles as a mouse pops up, we take notice.

The keyboard is a custom build from [Taliyah Huang] which uses a pair of Arduinos, one in each half of the keyboard, to communicate key and mouse information to a third Arduino which is plugged in to her laptop. The right-hand half of the keyboard also includes the circuitry from an optical mouse, which gets powered up when the caps lock button is held down. When activated, this allows the keyboard to be used as a mouse directly. It also includes support for most Mac gestures as well, making it just as useful as a trackpad.

While there were some problems with the design, including being slightly too tall to be ergonomic and taking nearly 24 hours of soldering to complete, the prototype device is an interesting one especially since it allows for full control of a computer without needing a dedicated mouse. For other unique mechanical keyboard concepts, we recently featured this build which takes design and functionality cues from the Commodore 64.

Mouse Enjoys Its Freedom

Although it took a little while to standardize on the two-button-with-scroll-wheel setup, most computers have used a mouse or mouse-like device to point at objects on the screen since the 80s. But beyond the standard “point and click” features of the mouse, there have been very few ground-breaking innovations beyond creature comforts. At least, until the “Space Mushroom” mouse from [Shinsaku Hiura] hit our tips line.

This mouse throws away most of the features a typical mouse might have in favor of a joystick-like interface that gives it six degrees of freedom instead of the usual two — while still being about mouse-sized and held in the hand. It doesn’t even have a way of mapping motion directly to movements on the screen. Instead, it maps each degree of freedom to a similar movement of the mouse itself using these three joystick sensors physically linked together, with some underlying programming to translate each movement into the expected movement on the screen.

While this might not replace a standard mouse for every use case anytime soon, it does seem to have tremendous benefit in 3D modeling software, CAD, or anything where orienting a virtual object is the primary goal. Plus, since there’s no limit to the number of mice that can be attached to a computer (beyond USB limitations) this mouse could easily be used in conjunction with a normal mouse much like macro keyboards being used alongside traditional ones.

Thanks to [Rez] for the tip!

OpenScan 3D Scans All Of The (Small) Things

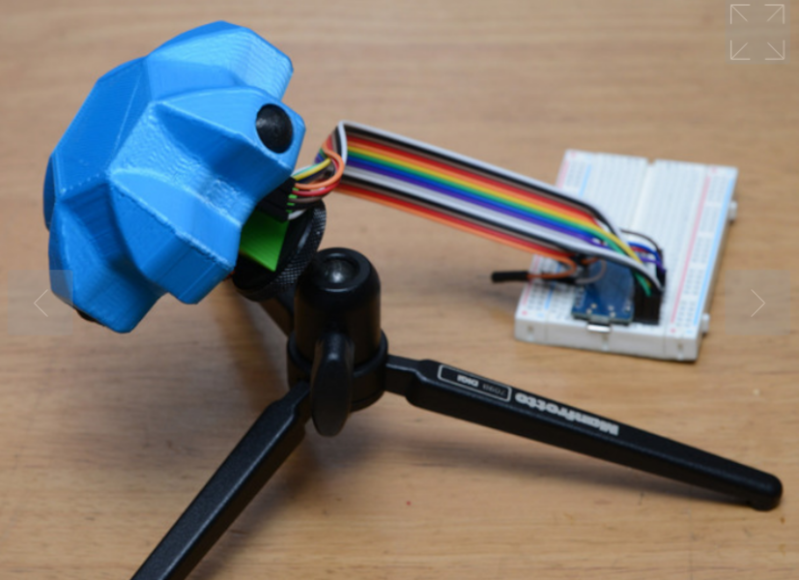
The OpenScan project has been updated quite a bit since its inception. OpenScan is an open source, Arduino or Raspberry Pi-based 3D scanner for small objects that uses 3D printed hardware and some common electronic components to create 3D scans using photogrammetry; a process by which a series of still images from different angles are used to create a 3D point cloud of an object, which can then be used to generate a 3D model.

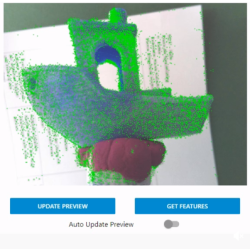
Feature visualization overlays detected features onto the camera preview to help judge quality. Broadly speaking, green is good.

Photogrammetry is a somewhat involved process that relies on consistent conditions, so going through the whole process only to find out the results aren’t up to snuff can be tiresome. Happily, OpenScan offers some interesting new functions such as feature visualization via the web interface, which helps a user judge scan quality and make changes to optimize results without having to blindly cross their fingers quite so much. OpenScan remains a one-person project by [Thomas], who is clearly motivated to improve his design and we’re delighted to see it getting updates.

Embedded below is a video that walks through the installation and web interface. It’s a fairly long and comprehensive, but if you like you can skip directly to [Thomas] demonstrating the interface around the 8:22 mark, or watch it below. Interested in your own unit? [Thomas] has an e-shop for parts and the GitHub repository is right here; the project also has its own subreddit.

Photogrammetry isn’t limited to small objects. We have seen some neat applications in the past, where it was the missing link to modeling a custom control panel and making a 3d scan of a custom-molded ergonomic trackball.

Fake Eyeballs, Digital Koi, and 10 More Amazing Creations from Autodesk’s Artists

The current class of Autodesk Artists in Residence was bigger than ever, and their work was on display at Pier 9 in San Francisco over the weekend. Check out just a sampling of some of our favorites.

Read more on MAKE

The post Fake Eyeballs, Digital Koi, and 10 More Amazing Creations from Autodesk’s Artists appeared first on Make: DIY Projects, How-Tos, Electronics, Crafts and Ideas for Makers.