Posts with «google assistant» label

Cheeseborg is a voice-controlled robot that makes grilled cheese sandwiches

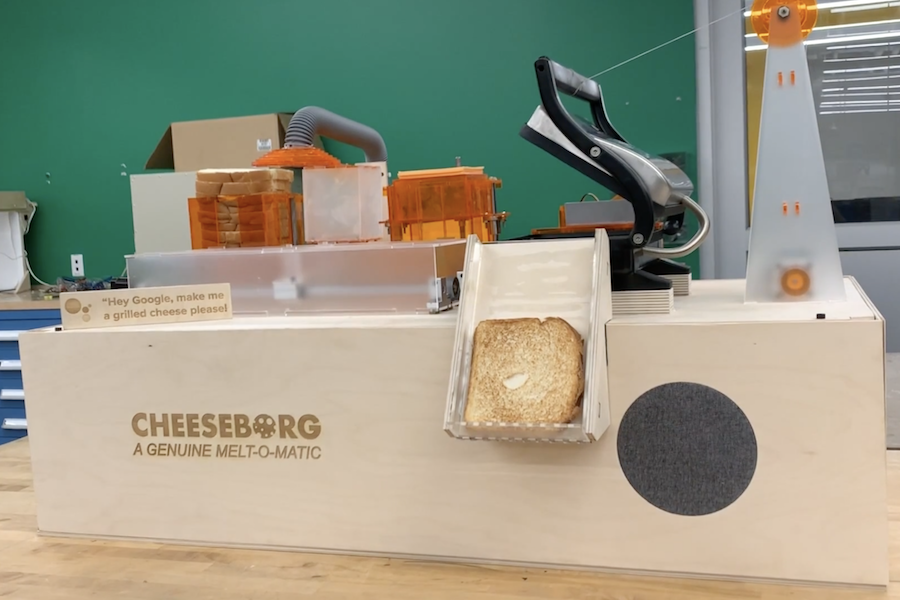
Do you like grilled cheese? Would you rather not make it yourself? If so, then the Cheeseborg by Taylor Tabb, Mitchell Riek, and Evan Hill could be the perfect device for you

This assembly line-like robot first stacks bread-cheese-bread using a vacuum gripper, and passes the unheated sandwich onto the grill via a pusher mechanism. Butter spray is first added to the bottom of the grill, then the top of the sandwich when present in order to coat both sides. Upon heating, the finished sandwich is pushed into a “food slot” for consumption.

Electronics are controlled using an Arduino Mega, while Google assistant running on a Raspberry Pi allows for voice activation. So the next time you’re hungry, all you have to do is ask, “Hey Google, make me a grilled cheese please!”

Our goal was to make an easy snack even easier. The design combines 7 individual subsystems enabling the assembly, cooking, and serving of a perfect, repeatable, tasty grilled cheese. 

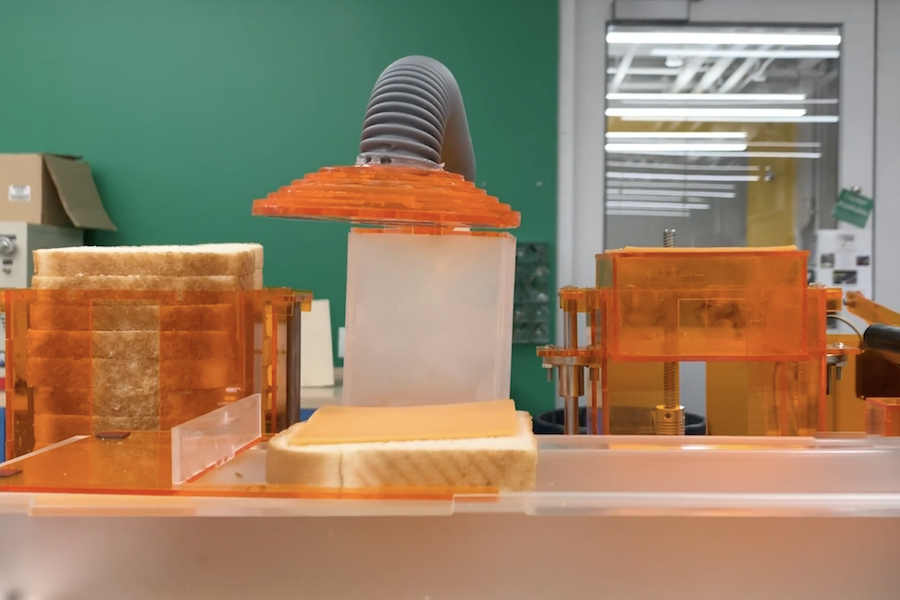
A big learning was how challenging it is to manipulate bread and cheese repeatedly. After several iterations, we converged on a vacuum lift mechanism, inspired by industrial robotic manipulation of small electronics. Due to the porosity of bread and the gloss of cheese, it was very challenging to find a mechanism working for both, but vacuum certainly seemed to do the trick! 

For the actuation of of the electromechanical subsystems, we use stepper motors and servos combined with linkages, lead screws, linear bearings, a winch, and other mechanical components.  For buttering (not pictures) we have a delightful spray butter can attached to an acrylic stand beside the grill.

Beyond the mechanisms, which are controlled by an Arduino Mega, the system is enabled with Google Assistant SDK running on an Raspberry Pi 3B, so the whole thing can be activated just by saying “Hey Google, make me a grilled cheese please!” From there, the machine stacks the bread, cheese, bread, then slides over the platform toward the grill as the buttering station sprays the bottom of the grill. Once the sandwich is placed on the grill, the butter sprays again (to coat the top of the sandwich). Then the grill closes, and cooks for the precise amount of the time for the perfect gooey grilled cheese! Then the grill opens and the sandwich is kicked to the serving slot for a hungry friend to enjoy.

Teddy Ruxpin answers queries with Arduino and Google Assistant

If you have an unused Teddy Ruxpin lying around, you’re in luck. This hack from “Jayden17” turns the iconic ’80s toy from a fancy tape player into your own talking bear assistant!

The build started out with obtaining one of these vintage bears and fixing up the internals, as well as equipping it with a new speaker. An old smartphone was then added, running Google Assistant to take and answer queries. An Arduino Uno is tasked with translating the amplitude of incoming sound into mouth movements with the help of a motor shield.

If you can get your hands on one of these animatronics toys, it’s a relatively simple hack and something that could work with any sort of voice assistant or audio input. Check it out in the video below! 

Teddy Ruxpin: Navigate to 143 Main Street

In the United States, TV and radio stations have to give the opportunity of equal airtime to all candidates. In that spirit, we thought we should show you [Jayden17’s] hack that puts Google Assistant into a Teddy Ruxpin. You can see the hacked bear do its thing in the video below.

Teddy was the best-selling toy for 1985 and 1986, and is still available, so over 30 years there are a lot of these hanging around. If you never looked at how they work, the original ones were quite simple. A cassette player routed one stereo channel to a speaker and used the other channel to control servo motors to move the mouth and eyes. The cassette was eventually replaced with a digital cartridge, and newer versions of Teddy only use two motors instead of the three in the original.

[Jayden17’s] bear was an original “Worlds of Wonder” bear which means it is from the 1985-1990 time period. If you have a newer bear, you might have to work things out a little differently. These bears often have stuck motors, which can be fixed and broken cassette mechanisms. The cassette isn’t used with this project, so that’s not a problem.

The real key to the project is an Arduino that listens to the audio coming in from a smartphone or other source and drives the motors. The project just uses a cable for the phone, although we would have been tempted to put a cheap Bluetooth receiver in there. However, because of the way it is set up, you could easily do that. You could also use a Raspberry Pi or even switch to Alexa. The Arduino doesn’t know anything about the source audio.