Posts with «gameboy» label

An Arduino Tetris console inside of an NES controller
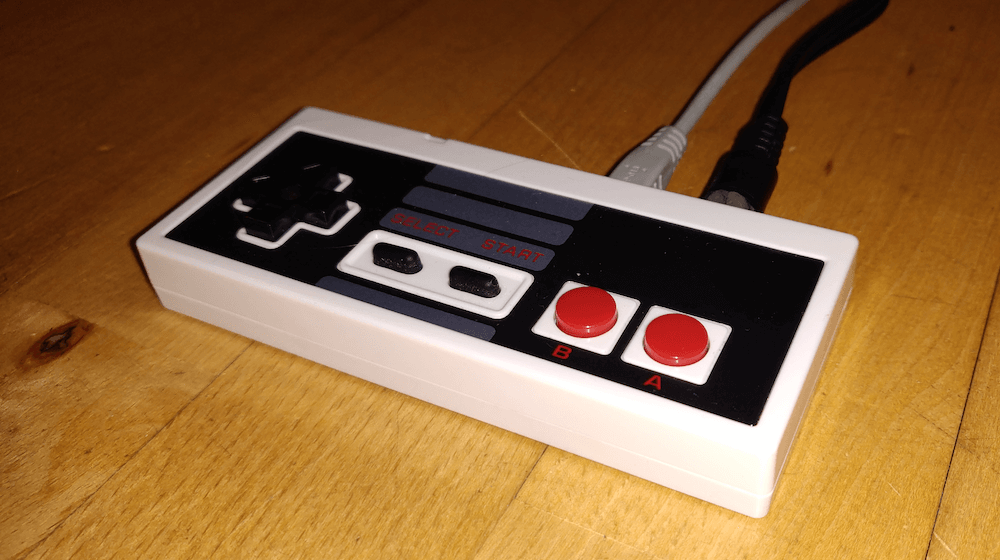
Tetris was as a perfect complement to Nintendo’s original Game Boy when it came out in 1989, and now “Copper Dragon” has been able to fit an entire system for it — sans monitor or speakers — inside of a faux NES controller

Impressively, this feat was accomplished with an Arduino Nano and a few passive components, producing not only very believable grayscale blocks, but also playing the familiar tune to accompany the video.

Two signal pins are used for the gray levels, plus a pin for sync, and video generation is programmed in AVR assembler code. Audio is not just PWM, but a simple DAC circuit created by charging and discharging a capacitor at the video line frequency.

I wanted to build a game console into the case of a small USB game pad (a NES controler look-alike). To make the work a challenge, I wanted to only use an Arduino Nano clocked at 16 MHz and some passive components (diodes are OK) and create the best possible video and audio signal that is imaginable with such restrictions.

As it turned out, a monochrome 288p video signal with 4 gray scales is possible when progamming the controller at machine level. 4-channel music is also possible.

My game of choice is Tetris in a version that comes pretty close to the original GameBoy version with a very similar audio track.

Arduino Blog 03 Mar 20:17

Game Boy camera gun prints when you shoot

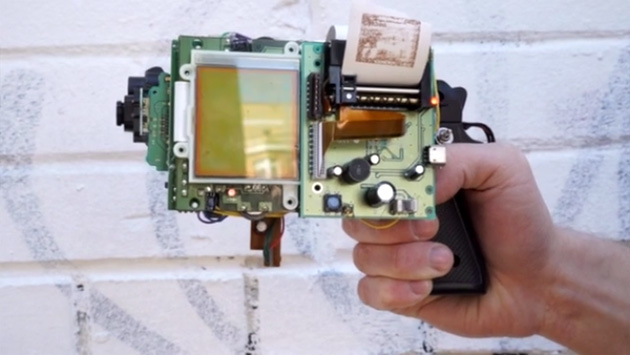
If you had a spare Game Boy Camera and the printer to match, what would you do with them? If you're media artist Dmitry Morozov, you'd make a one-of-a-kind firearm. His GBG-8 gun uses Nintendo's photographic peripherals and an Arduino board to shoot photos (almost literally) and print them on the spot -- effectively, it's a low-resolution Polaroid cam with a trigger. We can't imagine that this would go down well with security officials, but it could be a blast if you want to capture 8-bit memories with more flair than the original Game Boy gear allows. Let's just hope that Morozov offers some instructions so that his picture pistol is easy to reproduce at home.

Filed under: Misc, Gaming, Peripherals, Nintendo

Comments

Via: Geek

Source: Vtol

You can now trade Pokémon with yourself, thanks to Arduino

Gotta catch 'em all. Gotta catch 'em all. Gotta catch 'em all. For some 17 years, those words have reverberated around coder Pepijn de Vos's mind, and thanks to an Arduino and some ingenuity, his dreams have now come true. Well, probably not, but a project like this deserves an epic back story. In reality, hobbyist de Vos has created a system for trading Pokémon from the first generation of the franchise with himself. The setup is actually pretty simple: connect a Game Boy, Game Boy Color or Game Boy Advance to an Arduino board via a Game Link Cable. Then, borrow de Vos's code (available on GitHub), and start trading Pokémon with the Arduino.

Filed under: Gaming

Comments

Via: Gizmodo, Hacker News

Source: Wishful Coding

Engadget 17 Feb 07:02
arduino  gameboy  gaming  pokemon  

ArTICam Interfaces Game Boy Camera with TI Calculators

[Christopher Mitchell] has given Texas Instruments calculators the ability to capture images through a Game Boy Camera with ArTICam. First introduced in 1998, The Game Boy Camera was one of the first low-cost digital cameras available to consumers. Since then it has found its way into quite a few projects, including this early Atmel AT90 based hack, and this Morse code transceiver.

TI calculators don’t include a Game Boy cartridge slot, so [Christopher] used an Arduino Uno to interface the two. He built upon the Arduino-TI Calculator Linking (ArTICL) Library  to create ArTICam. Getting the Arduino to talk with the Game Boy Camera’s M64282FP image sensor turned out to be easy, as there already are code examples available. The interface between the camera sensor and the Arduino is simple enough. 6 digital lines for an oddball serial interface, one analog sense line, power and ground. [Christopher] used a shield to solder everything up, but says you can easily get away with wiring directly the Arduino Uno’s I/O pins. The system is compatible with the TI-83 Plus and TI-84 Plus family of calculators. Grabbing an image is as simple as calling  GetCalc(Pic1) from your calculator program.

So, If you have an old calculator lying around, give it a try to enjoy some 128×123-pixel grayscale goodness!


Filed under: Arduino Hacks, classic hacks

Ode to the Gameboy: 10 Projects Based on the Iconic Portable Nintendo

When the Nintendo Gameboy was first released in 1989, it was a tremendous commercial success. Gameboy developed a following among gamers that is in many ways still alive to this day. Here are 10 awesome projects inspired by the venerable Gameboy. Some merge the latest maker electronics with late-80s Gameboy […]

Read more on MAKE

This Arduino-powered business card looks like a Game Boy and runs Tetris (video)

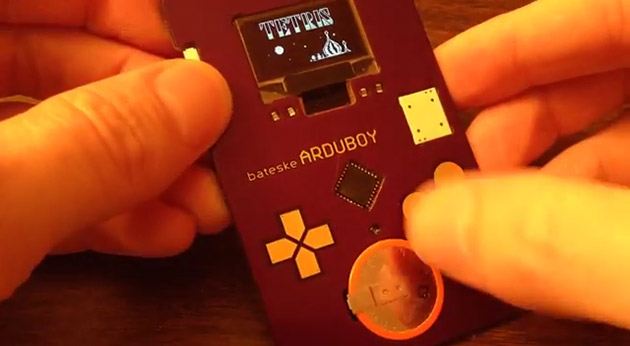
Off-white business cards with Silian Rail lettering are so passé -- these days; it's all about creativity. This Game Boy look-alike, for instance, demonstrates its creator's skills in one fell swoop: It doesn't just display a résumé, it's also a simple gaming handheld that can play Tetris. The device was made by Oregon programmer Kevin Bates, who calls it the Arduboy, because it uses a barebones Arduino board (the tiny computer also found inside Kegbot and Fish on Wheels) connected to an OLED screen. To make the hand-held gaming experience as authentic as possible, he also equipped the card with capacitive touch buttons, a speaker and a replaceable battery that lasts up to nine hours.

Comments

Via: Boing Boing

Source: Bateske