Posts with «pi» label

You Can Send MIDI Over I2C If You Really Need To

The Musical Instrument Digital Interface has a great acronym that is both nice to say and cleanly descriptive. The standard for talking to musical instruments relies on a serial signal at 31250 bps, which makes it easy to transmit using any old microcontroller UART with a settable baud rate. However, [Kevin] has dived into explore the utility of sending MIDI signals over I2C instead.

With a bit of hacking at the Arduino MIDI library, [Kevin] was able to get the microcontroller outputting MIDI data over the I2C interface, and developed a useful generic I2C MIDI transport for the platform. His first tests involved using this technique in concert with Gravity dual UART modules. After he successfully got one running, [Kevin] realised that four could be hooked up to a single Arduino, giving it 8 serial UARTS, or, in another way of thinking, 8 MIDI outputs.

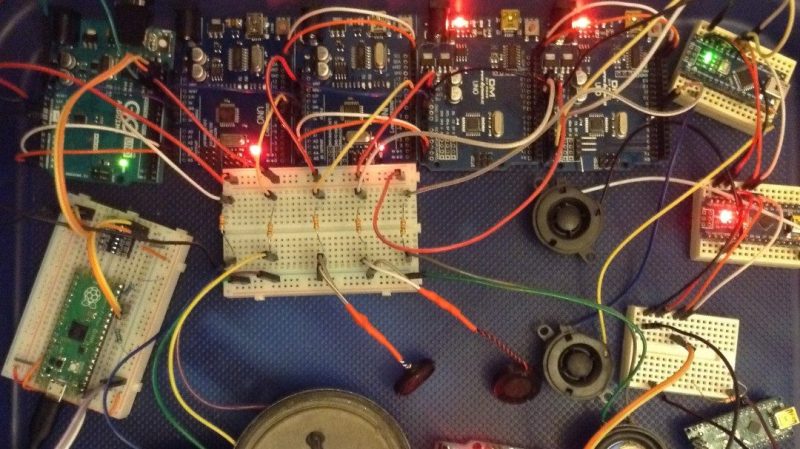
At its greatest level of development, [Kevin] shows off his I2C MIDI chops by getting a single Raspberry Pi Pico delivering MIDI signals to 8 Arduinos, all over I2C. All the Arduinos are daisy-chained with their 5V and I2C lines wired together, and the system basically swaps out traditional MIDI channels for I2C addresses instead.

There’s not a whole lot of obvious killer applications for this, but if you want to send MIDI data to a bunch of microcontrollers, you might find it easier daisy-chaining I2C rather than hopping around with a serial line in the classic MIDI-IN/MIDI-THRU fashion.

We’ve seen [Kevin]’s work before too, like the wonderful Lo-Fi Orchestra. Video after the break.

Hack a Day 16 Feb 06:00

Vintage Sewing Machine to Computerized Embroidery Machine

It is February of 2018. Do you remember what you were doing in December of 2012? If you’re [juppiter], you were starting your CNC Embroidery Machine which would not be completed for more than half of a decade. Results speak for themselves, but this may be the last time we see a first-generation Raspberry Pi without calling it retro.

The heart of the build is a vintage Borletti sewing machine, and if you like machinery porn, you’re going to enjoy the video after the break. The brains of the machine are an Arduino UNO filled with GRBL goodness and the Pi which is running CherryPy. For muscles, there are three Postep25 stepper drivers and corresponding NEMA 17 stepper motors.

The first two axes are for an X-Y table responsible for moving the fabric through the machine. The third axis is the flywheel. The rigidity of the fabric frame comes from its brass construction which may have been soldered at the kitchen table and supervised by a big orange cat. A rigid frame is the first ingredient in reliable results, but belt tension can’t be understated. His belt tensioning trick may not be new to you, but it was new to some of us. Italian translation may be necessary.

The skills brought together for this build were vast. There was structural soldering, part machining, a microcontroller, and motion control. The first time we heard from [juppiter] was December 2012, and it was the result of a Portable CNC Mill which likely had some influence on this creation. Between then, he also shared his quarter-gobbling arcade cabinet with us.

Pi Time – A Fabric RGB Arduino Clock

Pi Time is a psychedelic clock made out of fabric and Neopixels, controlled by an Arduino UNO. The clock started out as a quilted Pi symbol. [Chris and Jessica] wanted to make something more around the Pi and added some RGB lights. At the same time, they wanted to make something useful, that’s when they decided to make a clock using Neopixels.

Neopixels, or WS2812Bs, are addressable RGB LEDs , which can be controlled individually by a microcontroller, in this case, an Arduino. The fabric was quilted with a spiral of numbers (3.1415926535…) and the actual reading of the time is not how you are used to. To read the clock you have to recall the visible color spectrum or the rainbow colors, from red to violet. The rainbow starts at the beginning of the symbol Pi in the center, so the hours will be either red, yellow, or orange, depending on how many digits are needed to tell the time. For example, when it is 5:09, the 5 is red, and the 9 is yellow. When it’s 5:10, the 5 is orange, the first minute (1) is teal, and the second (0) is violet. The pi symbol flashes every other second.

There are simpler and more complicated ways to perform the simple task of figuring out what time it is…

We are not sure if the digits are lighted up according to their first appearance in the Pi sequence or are just random as the video only shows the trippy LEDs, but the effect is pretty nice:


Filed under: Arduino Hacks, led hacks
Hack a Day 17 Apr 03:00

Rainy Day Fun by Calculating Pi

If you need a truly random event generator, just wait till your next rainstorm. Whether any given spot on the ground is hit by a drop at a particular time is anyone’s guess, and such randomness is key to this simple rig that estimates the value of pi using raindrop sensors.

You may recall [AlphaPhoenix]’s recent electroshock Settlers of Catan expeditor. The idea with this less shocking build is to estimate the value of pi using the ratio of the area of a square sensor to a circular one. Simple piezo transducers serve as impact sensors that feed an Arduino and count the relative number of raindrops hitting the sensors. In the first video below, we see that as more data accumulates, the Arduino’s estimate of pi eventually converges on the well-known 3.14159 value. The second video has details of the math behind the method, plus a discussion of the real-world problems that cropped up during testing — turns out that waterproofing and grounding were both key to noise-free data from the sensor pads.

In the end, [AlphaPhoenix] isn’t proving anything new, but we like the method here and can see applications for it. What about using such sensors to detect individual popcorn kernels popping to demonstrate the Gaussian distribution? We also can’t help but think of other ways to measure raindrops; how about strain gauges that weigh the rainwater as it accumulates differentially in square and circular containers? Share your ideas in the comments below.

[via r/electronics]


Filed under: Arduino Hacks, misc hacks
Hack a Day 25 Aug 03:01

Arduino shields on the raspberry pi

Flicking through hackaday as you do and found an article that may be of interest to those using the raspberry pi.


http://hackaday.com/2012/10/10/using-arduino-shields-with-the-raspi/


The article then links here:

http://www.cooking-hacks.com/index.php/documentation/tutorials/raspberry-pi-to-arduino-shields-connection-bridge

Let's Make Robots 10 Oct 17:51
arduino  arm  other  pi  raspberry  shield  

A custom Pi shield or an Arduino?

As more and more people get a Pi they are asking how to interface it to their robot. I do not own a Pi but I looked at the GPIO pins available for interfacing. Apart from general digital I/O pins you have I2C, SPI and Serial interfacing available. I assume there is a library or something that allows these pins to be easily access from within the Linux operating system.

So the question becomes do you just use another MCU such as an Arduino to provide the necessary I/O functionality or do you use a custom shield?

read more

Let's Make Robots 04 Oct 13:38
arduino  i2c  ideas  interface  pi  raspberry  serial  shield  spi