Posts with «python» label

Hackaday Prize Entry: Open Source FFT Spectrum Analyzer

Every machine has its own way of communicating with its operator. Some send status emails, some illuminate, but most of them vibrate and make noise. If it hums happily, that’s usually a good sign, but if it complains loudly, maintenance is overdue. [Ariel Quezada] wants to make sense of machine vibrations and draw conclusions about their overall mechanical condition from them. With his project, a 3-axis Open Source FFT Spectrum Analyzer he is not only entering the Hackaday Prize 2016 but also the highly contested field of acoustic defect recognition.

For the hardware side of the spectrum analyzer, [Ariel] equipped an Arduino Nano with an ADXL335 accelerometer, which is able to pick up vibrations within a frequency range of 0 to 1600 Hz on the X and Y axis. A film container, equipped with a strong magnet for easy installation, serves as an enclosure for the sensor. The firmware [Ariel] wrote is an efficient piece of code that samples the analog signals from the accelerometer in a free running loop at about 5000 Hz. It streams the digitized waveforms to a host computer over the serial port, where they are captured and stored by a Python script for further processing.

From there, another Python script filters the captured waveform, applies a window function, calculates the Fourier transform and plots the spectrum into a graph. With the analyzer up and running, [Ariel] went on testing the device on a large bearing of an arbitrary rotating machine he had access to. A series of tests that involved adding eccentric weights to the rotating shaft shows that the analyzer already makes it possible to discriminate between different grades of imbalance.

The HackadayPrize2016 is Sponsored by:

Filed under: The Hackaday Prize

Machine learning for the maker community

At Arduino Day, I talked about a project I and my collaborators have been working on to bring machine learning to the maker community. Machine learning is a technique for teaching software to recognize patterns using data, e.g. for recognizing spam emails or recommending related products. Our ESP (Example-based Sensor Predictions) software recognizes patterns in real-time sensor data, like gestures made with an accelerometer or sounds recorded by a microphone. The machine learning algorithms that power this pattern recognition are specified in Arduino-like code, while the recording and tuning of example sensor data is done in an interactive graphical interface. We’re working on building up a library of code examples for different applications so that Arduino users can easily apply machine learning to a broad range of problems.

The project is a part of my research at the University of California, Berkeley and is being done in collaboration with Ben Zhang, Audrey Leung, and my advisor Björn Hartmann. We’re building on the Gesture Recognition Toolkit (GRT) and openFrameworks. The software is still rough (and Mac only for now) but we’d welcome your feedback. Installations instructions are on our GitHub project page. Please report issues on GitHub.

Our project is part of a broader wave of projects aimed at helping electronics hobbyists make more sophisticated use of sensors in their interactive projects. Also building on the GRT is ml-lib, a machine learning toolkit for Max and Pure Data. Another project in a similar vein is the Wekinator, which is featured in a free online course on machine learning for musicians and artists. Rebecca Fiebrink, the creator of Wekinator, recently participated in a panel on machine learning in the arts and taught a workshop (with Phoenix Perry) at Resonate ’16. For non-real time applications, many people use scikit-learn, a set of Python tools. There’s also a wide range of related research from the academic community, which we survey on our project wiki.

For a high-level overview, check out this visual introduction to machine learning. For a thorough introduction, there are courses on machine learning from coursera and from udacity, among others. If you’re interested in a more arts- and design-focused approach, check out alt-AI, happening in NYC next month.

If you’d like to start experimenting with machine learning and sensors, an excellent place to get started is the built-in accelerometer and gyroscope on the Arduino or Genuino 101. With our ESP system, you can use these sensors to detect gestures and incorporate them into your interactive projects!

Circuit Bender Artist bends Fresnel Lens for Art

Give some mundane, old gear to an artist with a liking for technology, and he can turn it into a mesmerizing piece of art. [dmitry] created “red, an optic-sound electronic object” which uses simple light sources and optical elements to create an audio-visual performance installation. The project was the result of his collaboration with the Prometheus Special Design Bureau in Kazan, Russia. The inspiration for this project was Crystall, a reconstruction of an earlier project dating back to 1966. The idea behind “red” was to recreate the ideas and concepts from the 60’s ~ 80’s using modern solutions and materials.

The main part of the art installation consists of a ruby red crystal glass and a large piece of flexible Fresnel lens, positioned in front of a bright LED light source. The light source, the crystal and the Fresnel lens all move linearly, constantly changing the optical properties of the system. A pair of servos flexes and distorts the Fresnel lens while another one flips the crystal glass. A lot of recycled materials were used for the actuators – CD-ROM drive, an old scanner mechanism and old electric motors. Its got a Raspberry-Pi running Pure Data and Python scripts, with an Arduino connected to the sensors and actuators. The sensors define the position of various mechanical elements in relation to the range of their movement. There’s a couple of big speakers, which means there’s a beefy amplifier thrown in too. The sounds are correlated to the movement of the various elements, the intensity of the light and probably the color. There’s two mechanical paddle levers hanging in there, if you folks want to hazard some guesses on what they do.

Check out some of [dmitry]’s earlier works which we featured. Here’s him Spinning a Pyrite Record for Art, and making Art from Brainwaves, Antifreeze, and Ferrofluid.


Filed under: hardware, musical hacks

raspberry + arduino / webiopi + firmata (python)

Im buildin internet controlled rc car with arduino, arduino motor shield and raspberry.
So how to use firmata and webiopi at the same time.

read more

Give me your number and get a unique micro-noise piece

Prankophone  is the new interactive installation by Dmitry Morozov (his amazing projects have been featured on this blog ).  This time he created  a sound object, a hybrid of synthesizer, telephone and logic module:

The main principle of the object’s functioning is as follows: depending on the current mode, the apparatus calls to random or pre-defined recipients and plays them algorithmic melodies created from their phone numbers. The speakers transmit both the synthesized sounds and the sound from answering person. The common sound layer is involving a random recipient who doesn’t suspect anything. The person who answers the phone can’t hear any other sounds except for the synthesized ones.

You can play with it in 4 different modes:

Autonomous mode –  it generates the numbers by itself and tries to reach them, and play them the sounds.
Manual mode – when you dial any number by pressing standard phone keys it gets automatically transformed into sounds.
Keyboard mode – mode of dialing the number on the one-octave keyboard where 10 keys correspond to 10 digits.
Live mode – the number is defined by any of the previous methods, but the sounds are reproduced not automatically but from the keyboard, thus the user may “communicate” through sound with the person who answered.
It runs on Arduino Mega and you can listen to its sounds on the following video:

Motion Sensing Water Gun Tweets Photos To Embarrass Enemies

[Ashish] is bringing office warfare to the next level with a motion sensing water gun. Not only does this water gun automatically fire when it detects motion, but it also takes a photo of the victim and publishes it on Twitter.

This hack began with the watergun. [Ashish] used a Super Soaker Thunderstorm motorized water gun. He pulled the case apart and cut one of the battery wires. he then lengthened the exposed ends and ran them out of the gun to his control circuit. He also placed a protection diode to help prevent any reverse EMF from damaging his more sensitive electronics. The new control wires run to a MOSFET on a bread board.

[Ashish] is using a Lightblue Bean board as a microcontroller. The Bean is Arduino compatible and can be programmed via low energy Bluetooth. The Bean uses an external PIR sensor to detect motion in the room. When it senses the motion, it activates the MOSFET which then turns on the water gun.

[Ashish] decided to use Node-RED and Python to link the Bean to a Twitter account. The system runs on a computer and monitor’s the Bean’s serial output. If it detects the proper command, it launches a Python script which takes a photo using a webcam. A second script will upload that photo to a Twitter account. The Node-RED server can also monitor the Twitter account for incoming direct messages. If it detects a message with the correct password, it can use the rest of the message as a command to enable or disable the gun.


Filed under: Arduino Hacks

Eye-Controlled Wheelchair Advances from Talented Teenage Hackers

[Myrijam Stoetzer] and her friend [Paul Foltin], 14 and 15 years old kids from Duisburg, Germany are working on a eye movement controller wheel chair. They were inspired by the Eyewriter Project which we’ve been following for a long time. Eyewriter was built for Tony Quan a.k.a Tempt1 by his friends. In 2003, Tempt1 was diagnosed with the degenerative nerve disorder ALS  and is now fully paralyzed except for his eyes, but has been able to use the EyeWriter to continue his art.

This is their first big leap moving up from Lego Mindstorms. The eye tracker part consists of a safety glass frame, a regular webcam, and IR SMD LEDs. They removed the IR blocking filter from the webcam to make it work in all lighting conditions. The image processing is handled by an Odroid U3 – a compact, low cost ARM Quad Core SBC capable of running Ubuntu, Android, and other Linux OS systems. They initially tried the Raspberry Pi which managed to do just about 3fps, compared to 13~15fps from the Odroid. The code is written in Python and uses OpenCV libraries. They are learning Python on the go. An Arduino is used to control the motor via an H-bridge controller, and also to calibrate the eye tracker. Potentiometers connected to the Arduino’s analog ports allow adjusting the tracker to individual requirements.

The web cam video stream is filtered to obtain the pupil position, and this is compared to four presets for forward, reverse, left and right. The presets can be adjusted using the potentiometers. An enable switch, manually activated at present is used to ensure the wheel chair moves only when commanded. Their plan is to later replace this switch with tongue activation or maybe cheek muscle twitch detection.

First tests were on a small mockup robotic platform. After winning a local competition, they bought a second-hand wheel chair and started all over again. This time, they tried the Raspberry Pi 2 model B, and it was able to work at about 8~9fps. Not as well as the Odroid, but at half the cost, it seemed like a workable solution since their aim is to make it as cheap as possible. They would appreciate receiving any help to improve the performance – maybe improving their code or utilising all the four cores more efficiently. For the bigger wheelchair, they used recycled car windshield wiper motors and some relays to switch them. They also used a 3D printer to print an enclosure for the camera and wheels to help turn the wheelchair. Further details are also available on [Myrijam]’s blog. They documented their build (German, pdf) and have their sights set on the German National Science Fair. The team is working on English translation of the documentation and will release all design files and source code under a CC by NC license soon.


Filed under: Medical hacks, Raspberry Pi, video hacks

HAL is Duct Tape for Home Automation

When it comes to home automation, there are a lot of different products out there that all do different things. Many of them are made by different companies, and they don’t often play very well together. This frustration ultimately led [Daniel] to develop his own Python based middleware solution to get these various components to work as a single cohesive system. What exactly did [Daniel] want to control?

First up was the door lock. [Daniel] lives in an apartment building, so there are actually two locks. First, a visitor must be allowed into the building by pressing a button on the intercom system in the apartment. Second, the apartment door has its own dead bolt lock that needs to be opened and closed. [Daniel] was able to control the building’s front door using just a transistor hooked up to an Arduino to simulate the press of the physical button. The original button remains in tact so [Daniel] can still easily “buzz” in a visitor.

The apartment’s dead bolt was a bit trickier. There are off-the-shelf solutions to control a dead bolt, but they are often expensive. [Daniel] built his own solution using a simple servo motor bolted to the door. The servo is controlled by the Arduino which is in turn controlled via two broken intercom buttons that already existed within the apartment. The buttons were originally used to either speak to or listen to a visitor before buzzing them into the building. They had never worked for [Daniel] so he re-purposed them for his own project. The whole DIY door locker is enclosed in a custom-made laser cut wooden box.

Click past the break for the rest of [Daniel's] story.

When it comes to lighting, [Daniel] has a couple of different brands of automated light bulbs in his apartment. One brand has bulbs that are controlled by a radio frequency signal. That brand comes with a converter box that can accept lighting commands via WiFi. It also uses a simple API that allowed [Daniel] to easily control all of the bulbs from his Python code. The second brand of light bulb did not have a simple API. After some searching around, [Daniel] found an open source project called ouimeaux. Ouimeaux is a Python library that allows you to control this particular brand of automated light bulbs. This was perfect for [Daniel] since he was already using Python in his project. With this library it was trivial for him to control the lights from his web interface.

As a proof of concept, [Daniel] also built a custom WiFi enabled power outlet using a SparkCore module. He has an entire separate post dedicated to that project.

For the brain of the system, [Daniel] chose to use a Raspberry Pi. The Pi runs a web server with a Flask based back-end system. Flask allows him to code the website in Python, which meant he could easily write a website that can interact with the various automation components. The Pi can directly communicate with all of the off-the-shelf components using the various Python libraries. For the door lock, the Pi communicates with the Arduino via pySerial. [Daniel] also used Flask OAuth to limit access to the system to only authorized users. Now whenever [Daniel] wants to turn the lights on or unlock the door for a visitor, all he has to do is press a button on a web page.

[via Reddit]


Filed under: home hacks

Arduino Garage Door Opener is Security Minded

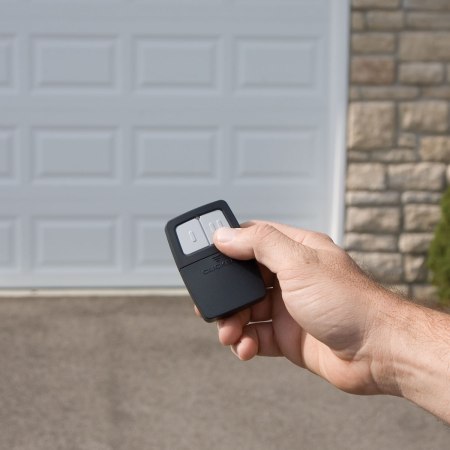
Do it yourself garage door openers must be all the rage nowadays. We just got word of another take on this popular idea. [Giles] was commissioned by his friend to find a way to control the friend’s garage door using a smart phone. The request was understandable, considering the costly garage door remote and the fact that the buttons on the expensive remote tended to fail after a while. The inspiration for this project came from some YouTube videos of other similar projects. Those projects all paired an Arduino with a Bluetooth headset in order to control the door from a mobile phone. [Giles] understood that while this would get the job done, it wouldn’t be very secure. Bluetooth headsets typically connect to mobile phones using a four digit PIN. Many of them have known default PINs and even if the default is changed, it wouldn’t take very long to guess a four digit PIN. [Giles] knew he had to find a more secure way.

While WiFi was an option, [Giles] decided that having the garage door hooked up to the internet would likely be a security risk, even if it did offer some potential interesting use cases.  He therefore opted to stick with Bluetooth, but decided to use the Seedstudio Bluetooth shield instead of a basic headset. The electronics are relatively simple. [Giles] simply plugged the Bluetooth shield into an Arduino Uno. [Giles] did have one problem with the Bluetooth shield though. The Bluetooth module did not accept many standard AT commands. He needed a way to force a disconnect of a mobile device if it failed authentication. After digging around, he discovered that the module had some extra exposed pads that he could likely use to accomplish that goal. The only problem was that they were expecting a 3.3V signal, and the Arduino works at 5V. The solution was simple. He setup a basic voltage divider using two resistors. This lowered the 5V signal from the Arduino to the required 3.3V. This provides the communication functionality to the mobile phone. He then realized that he could use a simple 12V automotive relay to control the garage door. To control the relay, he used the Freetronics relay control shield. The end result is a relatively simple stack of shields hooked up to a relay.

For the smart phone interface, [Giles] started out by trying to write a native Android application. Having little experience in Android development, he soon realized that it was going to take him longer than anticipated to get anything usable this way. He then decided to use SL4A. SL4A provides a scripting environment for Android and supports several different scripting languages. [Giles] was then able to write a Python script that can be executed on the smart phone. Many people would be tempted to write a really simple script that would just open the door and connect without any real thought about security. After all, this is a one-off obscure garage door opener. Security through obscurity! [Giles] is smarter than that.

He instead implemented a challenge handshake authentication mechanism between the Python script and the Arduino. This would ensure that users are authenticated before permitting commands to be executed, and also help prevent replay attacks. The process works like this. First the smart phone connects to the Arduino. The Arduino then generates a pseudo-random string and calculates the expected response, based on a pre-shared key. The phone then receives the string and sends back the appropriate response. If it doesn’t match, the Arduino disconnects the phone. If it does match, the phone then sends back a request for a different pseudo-random command challenge string. Once the phone receives this new string, it is able to use that string in conjunction with a second pre-shared key to generate a one-time use command. Assuming it was calculated correctly, the Arduino will then run the command to open or close the door. If it doesn’t match the phone gets disconnected. All of this is to help prevent replay attacks. Any attacker watching the airwaves would not be able to simply record the signals or commands and play them back. This is because every time the authentication and commands are transmitted, they must be different based on the pseudo-random seed.

While everything seems to work mostly fine, the Arduino tends to crash after about six door cycles. [Giles] believes this may be caused by the MD5 library he is using but has so far been unsuccessful in trying to fix this bug. He also thinks his Python script is messy and somewhat unstable. He’s decided to publish his programs to the internet in hopes that someone else may have the time and drive to figure out what’s going on.


Filed under: Arduino Hacks

Upgrading the OpenWrt-Yun image on the Yún

Today we released the upgraded version of the OpenWrt-Yun image on the Arduino Yún.
This version includes all the latest and greatest from stable OpenWrt, the latest (Python) Bridge (with a php contribution and fixes to the file module), we also added Mailbox support to REST api and other fixes to some open issues.

The new image contains also the fix to the well known Heartbleed bug, a big security issue that impacted on almost all websites of the world.

If you own an Arduino Yún we suggest you to follow the link and read the procedure to update the board.
You’ll need to download the zip file from the download page. Remember that updating the OpenWrt-Yun image will cause the loss of all files and configurations you previously saved on the flash memory of the Yún.
Enjoy!

Arduino Blog 23 Apr 10:00
arduino  hearbleed  openwrt  python  yún