Simple Computer Gesture Control with Arduino and Python
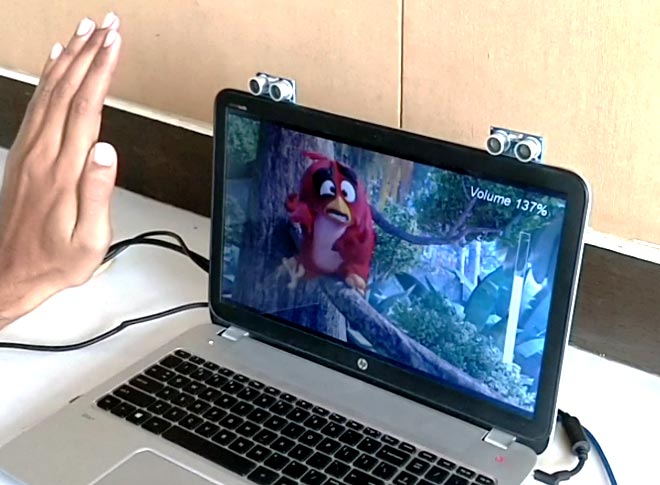
As outlined in this Circuit Digest write-up, with the right hardware, you can now control your computer using hand gestures. While interesting, this kind of technology can be a little expensive. But if you’d like to augment your notebook or laptop via simple gesture capabilities without breaking the bank, B. Aswinth Raj has your answer in the form of an Arduino Uno and two ultrasonic sensors.
His system places the two sensors at the top of a screen, which are read by the Uno. This data is then passed on to a Python program running on the host computer that allows for actions such as play/pause, fast-forward, and volume control while watching videos.
Given the nature of the setup, there’s no reason why more sensors or programming couldn’t be added for further control, perhaps as shortcut “keys” for your favorite design software package! You can read more about the project here, and see a demo of it below.