Posts with «raspberry pi 3» label

The Sensor Array That Grew Into a Robot Cat

Human brains evolved to pay extra attention to anything that resembles a face. (Scientific term: “facial pareidolia”) [Rongzhong Li] built a robot sensor array with multiple emitters and receivers augmenting a Raspberry Pi camera in the center. When he looked at his sensor array, he saw the face of a cat looking back at him. This started his years-long Petoi OpenCat project to build a feline-inspired body to go with the face.

While the name of the project signals [Rhongzhong]’s eventual intention, he has yet to release project details to the open-source community. But by reading his project page and scrutinizing his YouTube videos (a recent one is embedded below) we can decipher some details. Motion comes via hobby remote-control servos orchestrated by an Arduino. Higher-level functions such as awareness of environment and Alexa integration are handled by a Raspberry Pi 3.

The secret (for now) sauce are the mechanical parts that tie them all together. From impact-absorption spring integrated into the upper leg to how its wrists/ankles articulate. [Rongzhong] believes the current iteration is far too difficult to build and he wants to simplify construction before release. And while we don’t have much information on the software, the sensor array that started it all implies some level of sensor fusion capabilities.

We’ve seen lots of robotic pets, and for some reason there have been far more robotic dogs than cats. Inspiration can come from Boston Dynamics, from Dr. Who, or from… Halloween? We think the lack of cat representation is a missed opportunity for robotic pets. After all, if a robot cat’s voice recognition module fails and a command is ignored… that’s not a bug, it’s a feature of being a cat.

[via TheNextWeb]

Rotating Frame Will Change Your View of Vertical Images

[Tim] was tired of compromising his portrait-oriented digital photos by shoehorning them into landscape-only frames. Unable to find a commercial solution, he built his own rotating digital photo frame from a 27″ LCD TV.

It uses a Raspi 3 to find [Tim]’s pictures on a giant SD card. He originally wanted to have the Pi pull pictures from Google Photos and display them randomly, but the API doesn’t work in that direction. Instead, a Python script looks at the pictures on the SD card and determines whether each is landscape or portrait-oriented. If a picture was taken in portrait-mode, the display will rotate 90 degrees. Rotation is handled with an Arduino, a stepper motor, and some 3D-printed herringbone gears. The first version was a bit noisy, so [Tim] re-printed the motor mount and the pinion gear out of flexible filament.

[Tim] designed the mount and frame himself and laser-cut the pieces out of birch plywood. We like that he accounted for the front-heaviness and that he covered the high voltage circuitry with acrylic to mitigate the risk of shock. All the code and design files are available on his project page. Make the jump to see a brief demonstration followed by a walk-through and stay for the six-minute slide show.


Filed under: Arduino Hacks, Raspberry Pi

Sorting cucumbers using AI, Raspberry Pi + Arduino

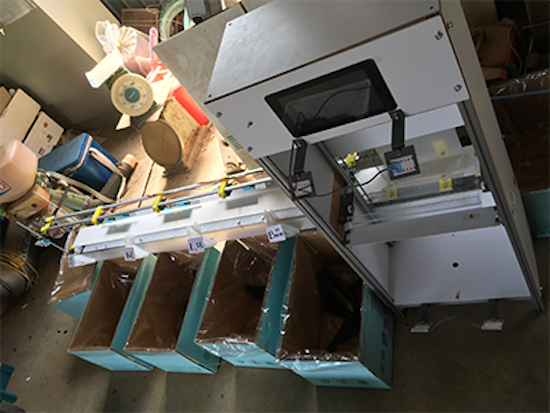
When it comes to farming veggies like cucumbers, the sorting process can often be just as hard and tricky as actually growing them. That’s why Makoto Koike is using Google’s TensorFlow machine learning technology to categorize the cucumbers on his family’s farm by size, shape and color, enabling them to focus on more important and less tedious work.

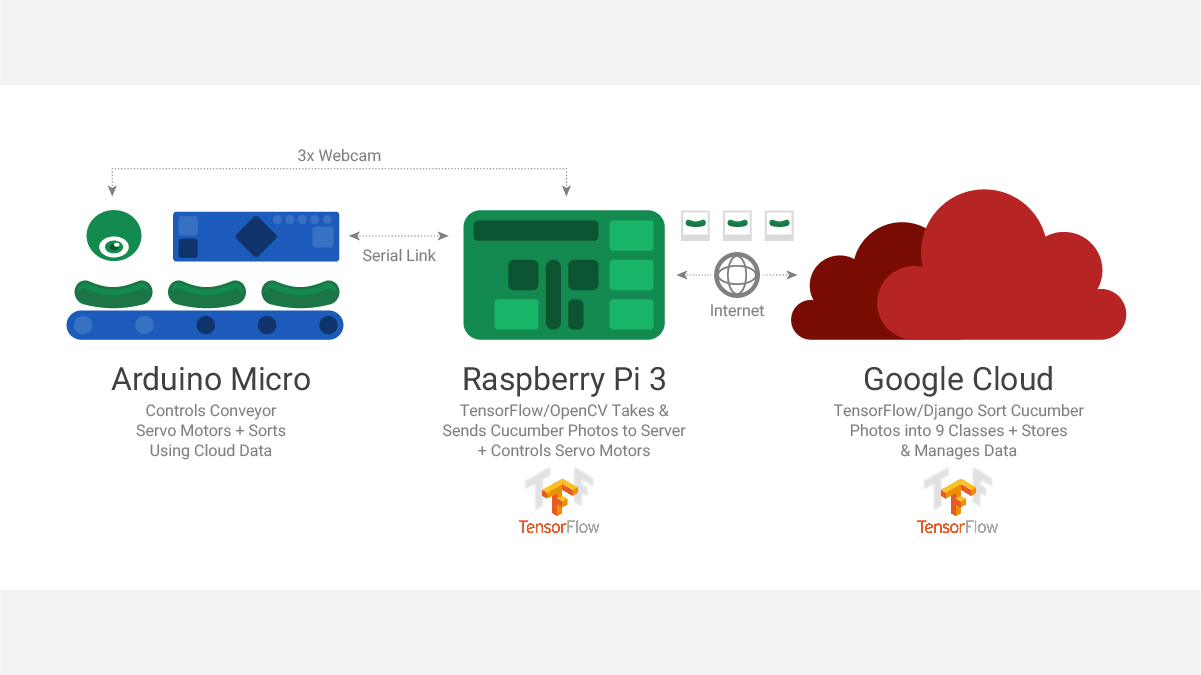
A camera-equipped Raspberry Pi 3 is used to take images of the cucumbers and send them to a small-scale TensorFlow neural network. The pictures are then forwarded to a larger network running on a Linux server to perform a more detailed classification. From there, the commands are fed to an Arduino Micro that controls a conveyor belt system that handles the actual sorting, dropping them into their respective container.

You can read all about the Google AI project here, as well as see it in action below!

Monome + Raspberry Pi + Arduino + Python Step Sequencer

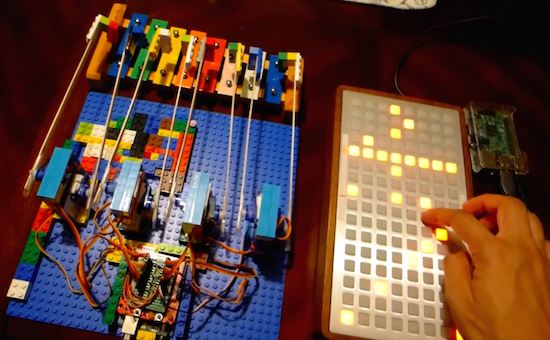
Created by “modulogeek,” the MonomePi is a step sequencer that uses a monome as an input controller and a toy glockenspiel as the output instrument.

The brain of the device is a Raspberry Pi 3, which runs a step sequencer program written in Python. Both the monome and an Arduino Uno are connected to the Pi via USB. The Arduino controls eight servos, each attached to a “mallet” made of LEGO bricks taped onto coffee sticks.

As modulogeek explains, the Arduino is programmed to receive serial commands from the Python program. A command is one byte or 8 bits, each bit representing ‘on’ (play the note) and ‘off’ (do nothing) states of each servo.

The monome is entirely controlled by the Python program, which sends serial commands that, for example, tell the monome which buttons need to light up or turn off. It also receives serial data from the monome, like which buttons are getting pressed and depressed.

You can see it below, as well as check out its GitHub page here.