Posts with «led» label

Display Your City’s Emotional State with Illuminated Snow

[Hunter] wanted to do something a bit more interesting for his holiday lights display last year. Rather than just animated lights, he wanted something that was driven by data. In this case, his display was based on the mood of people in his city. We’ve seen a very similar project in the past, but this one has a few notable differences.

The display runs off of an Arduino. [Hunter] is using an Ethernet shield to connect the Arduino to the Internet. It then monitors all of the latest tweets from users within a 15 mile radius of his area. The tweets are then forwarded to the Alchemy Sentiment API for analysis. The API uses various algorithms and detection methods to identify the overall sentiment within a body of text. [Hunter] is using it to determine the general mood indicated by the text of a given tweet.

Next [Hunter] needed a way to somehow display this information. He opted to use an LED strip. Since the range of sentiments is rather small, [Hunter] didn’t want to display the overall average sentiment. This value doesn’t change much over short periods of time, so it’s not very interesting to see. Instead, he plots the change made since the last sample. This results in a more obvious change to the LED display.

Another interesting thing to note about this project is that [Hunter] is using the snow in his yard to diffuse the light from the LEDs. He’s actually buried the strip under a layer of snow. This has the result of hiding the electronics, but blurring the light enough so you can’t see the individual LEDs. The effect is rather nice, and it’s something different to add to your holiday lights display. Be sure to check out the video below for a demonstration.


Filed under: Arduino Hacks, Holiday Hacks

Now you can 3d print lego- compatible LED bricks

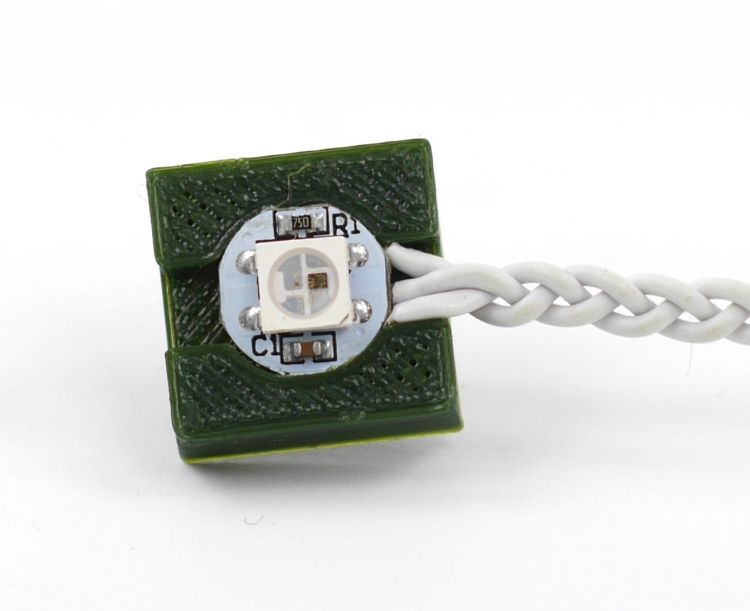
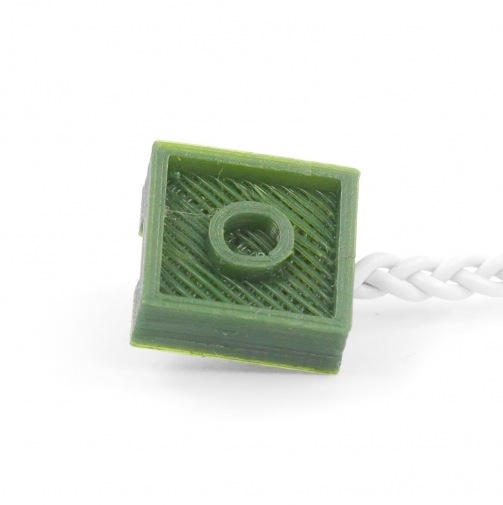
The 3d printing tutorial Kristoffer, our 3d specialist, prepared this week is not part of the ongoing LEGO power functions compatible series but makes you still play around modding the famous bricks to add some cool light effects.

If you follow the 8 easy steps you’ll be able to print bricks with Arduino Materia 101 that can include addressable LED’s in your models. As in the previous tutorials, he modelled it using FreeCAD, but the way he did it should be applicable to just about any CAD-software or 3d modelling software.

Notice that in the last step of the tutorial you can also download the perfect settings to obtain good prints out of small pieces!

Check the previous tutorials on 3d printing with Material 101

Interested in getting in touch and showing your experiments? Join Kristoffer on the Arduino forum dedicated to Materia 101 and give us your feedback.

Arduino Tetris on a Multiplexed LED Matrix

[Alex] needed a project for his microcomputer circuits class. He wanted something that would challenge him on both the electronics side of things, as well as the programming side. He ended up designing an 8 by 16 grid of LED’s that was turned into a game of Tetris.

He arranged all 128 LED’s into the grid on a piece of perfboard. All of the anodes were bent over and connected together into rows of 8 LED’s. The cathodes were bent perpendicularly and forms columns of 16 LED’s. This way, if power is applied to one row and a single column is grounded, one LED will light up at the intersection. This method only works reliably to light up a single LED at a time. With that in mind, [Alex] needed to have a very high “refresh rate” for his display. He only ever lights up one LED at a time, but he scans through the 128 LED’s so fast that persistence of vision prevents you from noticing. To the human eye, it looks like multiple LED’s are lit up simultaneously.

[Alex] planned to use an Arduino to control this display, but it doesn’t have enough outputs on its own to control all of those lights. He ended up using multiple 74138 decoder/multiplexer IC’s to control the LED’s. Since the columns have inverted outputs, he couldn’t just hook them straight up to the LED’s. Instead he had to run the signals through a set of PNP transistors to flip the logic. This setup allowed [Alex] to control all 128 LED’s with just seven bits, but it was too slow for him.

His solution was to control the multiplexers with counter IC’s. The Arduino can just increment the counter up to the appropriate LED. The Arduino then controls the state of the LED using the active high enable line from the column multiplexer chip.

[Alex] wanted more than just a static image to show off on his new display, so he programmed in a version of Tetris. The controller is just a piece of perfboard with four push buttons. He had to work out all of the programming to ensure the game ran smoothly while properly updating the screen and simultaneously reading the controller for new input. All of this ran on the Arduino.

Can’t get enough Tetris hacks? Try these on for size.


Filed under: Arduino Hacks, led hacks

Simple and Inexpensive Heartbeat Detector

There are many ways to detect a heartbeat electronically. One of the simpler ways is to take [Orlando’s] approach. He’s built a finger-mounted pulse detector using a few simple components and an Arduino.

This circuit uses a method known as photoplethysmography. As blood is pumped through your body, the volume of blood in your extremities increases and decreases with each heartbeat. This method uses a light source and a detector to determine changes in the amount of blood in your extremities. In this case, [Orlando] is using the finger.

[Orlando] built a finger cuff containing an infrared LED and a photodiode. These components reside on opposite sides of the finger. The IR LED shines light through the finger while the photodiode detects it on the other side. The photodiode detects changes in the amount of light as blood pumps in and out of the finger.

The sensor is hooked up to an op amp circuit in order to convert the varying current into a varying voltage. The signal is then filtered and amplified. An Arduino detects the voltage changes and transmits the information to a computer via serial. [Orlando] has written both a LabVIEW program as well as a Processing program to plot the data as a waveform. If you’d rather ditch the PC altogether, you might want to check out this standalone heartbeat sensor instead.


Filed under: Arduino Hacks

Sleek Desk Lamp Changes Colors Based on Sun Position

[Connor] was working on a project for his college manufacturing class when he came up with the idea for this sleek desk lamp. As a college student, he’s not fond of having his papers glowing brightly in front of him at night. This lamp takes care of the problem by adjusting the color temperature based on the position of the sun. It also contains a capacities touch sensor to adjust the brightness without the need for buttons with moving parts.

The base is made from two sheets of aluminum and a bar of aluminum. These were cut and milled to the final shape. [Connor] found a nice DC barrel jack from Jameco that fits nicely with this design. The head of the lamp was made from another piece of aluminum bar stock. All of the aluminum pieces are held together with brass screws.

A slot was milled out of the bottom of the head-piece to make room for an LED strip and a piece of 1/8″ acrylic. This piece of acrylic acts as a light diffuser.  Another piece of acrylic was cut and added to the bottom of the base of the lamp. This makes for a nice glowing outline around the bottom that gives it an almost futuristic look.

The capacitive touch sensor is a pretty simple circuit. [Connor] used the Arduino capacitive touch sensor library to make his life a bit easier. The electronic circuit really only requires a single resistor between two Arduino pins. One of the pins is also attached to the aluminum body of the lamp. Now simply touching the lamp body allows [Connor] to adjust the brightness of the lamp.

[Connor] ended up using an Electric Imp to track the sun. The Imp uses the wunderground API to connect to the weather site and track the sun’s location. In the earlier parts of the day, the LED colors are cooler and have more blues. In the evening when the sun is setting or has already set, the lights turn more red and warm. This is easier on the eyes when you are hunched over your desk studying for your next exam. The end result is not only functional, but also looks like something you might find at that fancy gadget store in your local shopping mall.


Filed under: Arduino Hacks

Experiencing the solar flux with an interactive installation

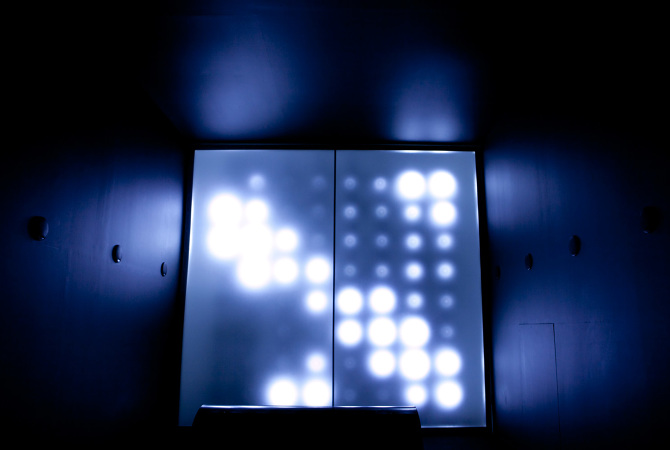
Dmitry Morozov shared with us a new interactive installation called  Solarman at the Polytech Museum in Moscow. 2014 and It’s a work he created with Julia Borovaya and Edward Rakhmanov using 64 ultra bright LEDs, 12-channel sound system and 8 electrical nerve stimulation electrodes controlled by Arduino Mega :

Data on power of X-radiation flux from the Sun is received in real time from the satellite GOES15 which is tracking solar activity. It is being converted into streams of sound, light and electric discharges, thus allowing a spectator to experience in more intensive and evident way the influence of the main luminary of the solar system.

The data, which is measured in watts per square meter, come with a frequency of once per minute. A special computer algorithm transforms it in sound waves, distributed by 12 channels in the space. The radiation power directly controls the height of tones and spectral changes in the sound. The speed of sound displacement in the space is also dependent on these parameters. Light is generated by algorithmic transformation of X-ray emission into physical modeling of light particles, which also affect the muscle stimulators in the chair to produce weak electric discharges.

Check the video below to see the power of the sun:

Arduino Blog 09 Dec 19:57

Pimp your ikea lamp into a customized death star

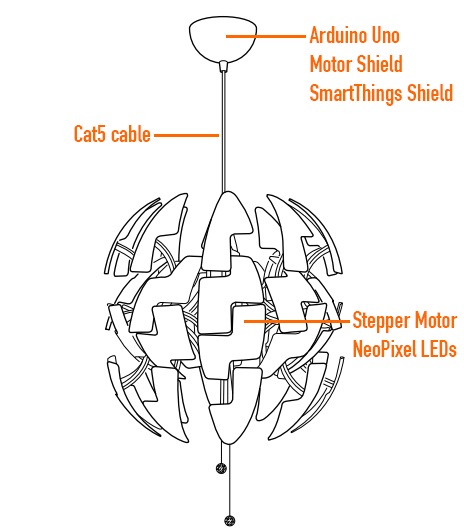
Ikea hacks are well widespread in the maker movement and David Bliss, founder at Nurun, did a great job transforming the Death Star inspired PS 2014 Pendant Lamp into something more dynamic.

The lamp was pimped up with an Arduino Uno and Arduino Motor Shield, NeoPixel LEDs and other components you can see in the illustration.

The detailed description of the project is on his blog , the code on github and the final result in the following video:

Arduino Blog 26 Nov 22:41
arduino  featured  ikea  led  motor  shield  

IcosaLEDron: 20-Sided LED Ball

Bored with playing games with a non-glowing ball? Why not build your own IcosaLEDron, a programmable, LED-enabled glowing contraption about the size of a baseball. This ball, as seen on Instructables, features 20 sides that light up as different colors depending on the situation. An ATmega328p board, which is Arduino-compatible, […]
MAKE » Arduino 21 Nov 21:01

New Project: Color Recognition Lock

How to make an basic electronic color sensor and how to use it to make a color activated lock box

Read more on MAKE

Chameleon Jacket Project Aims to Let People Experience The World Like An Animal

A group in Oslo have created an interactive jacket that changes color based upon what the wearer touches. It is based upon Chameleons' ability to blend into their environment.

Read more on MAKE