Posts with «arduino» label

Incredible RGB LED Cube Tutorial


We’ve seen our fair share of LED light cubes before, but what makes this one different is its incredibly detailed, step-by-step tutorial.   The creator of this light show previously made a one color LED light cube and shared the trials, tribulations and instructions.  He has since decided to go multi-color, again while challenging himself and learning some new tricks along the way.


The project requires 512, 10mm RGB LEDs and an Arduino compatible microcomputer. The creator used wooden strips to create vertical panels of LEDs rather than horizontal layers for ease of building. The building and soldering took about one weekend and the software took about 70 hours. The author saves you time by providing most of the code for you.  Learn how to  fbuild your own RGB LED cube!

Popular LED Projects:

Hack n Mod 11 Jul 11:07

Arduino Camp 2012

Gli hackers credono di poter apprendere lezioni essenziali sui sistemi (sul mondo) smontando le cose, vedendo come funzionano, ed utilizzare questa conoscenza per creare cose nuove e più interessanti.

Steven Levy

Domenica 17 Giugno alle Officine Arduino una quarantina di persone hanno dimostrato la veridicita’ dell’affermazione di S. Levy.

Dall’anno scorso Arduino organizza in Italia l’Arduino Camp , un evento di due giorni che vede il primo giorno dedicato a presentazioni e talk su Arduino, seguito da un secondo giorno di Hack Day su un tema. per vedere video e foto dell’evento consulta il set su Flickr.

Il tema dell’HackDay di quest’anno era costruire un’ orologio/sveglia utilizzando Arduino, un circuito integrato RTC PCF8563 (con quarzo da 32.768 kHz) ed una montagnetta di rifiuti da cui attingere.

Divisi in gruppi di 4 o cinque persone, in poche ore i partecipanti hanno realizzato il proprio progetto. Potete leggere il resoconto della giornata qui.

La giuria (composta da Aurelio Balestra, Massimo Poti’, Fabio Varesano, Uwe Federer e Federico) alle 17 :30 ha iniziato ad esaminare i risultati dei vari gruppi ed ha decretato come vincitori il gruppo Clock Cloud, che ha creato un manufatto riciclando un vecchio giradischi e sostituendo gran parte della meccanica e dell’elettronica interne con una scheda Arduino Uno, uno shield Ethernet , un buzzer, uno stepper motor e varie parti meccaniche per  realizzare un riduttore.


Il gruppo, composto da Stella, Giulio, Bissaorboea e Diego cosi’  descrive il funzionamento dell’ oggetto:

Il sistema sfrutta le API di Google per leggere la presenza di un allarme sul Google Calendar e l’ora corrente. Arduino pilota lo stepper all’ora corretta e se c’è un allarme attivo provvede a far suonare il buzzer. L’intera modifica ha preservato l’aspetto fisico e conservato il design utilizzando i caratteri e i colori del tempo.

Un lavoro ben fatto, che prevedeva addirittura dei gadget per la campagna di lancio sul mercato!

Congratulazioni ai vincitori, un grosso ringraziamento ai partecipanti ed ai volontari che hanno prestato aiuto ed a Toolbox per il supporto.

Arrivederci al prossimo Arduino Camp.


Nerf gun progress

The Nerf gun prototype is coming along nicely.  The students have tested the launcher up to 120 psi, built a prototype tilt and pan mechanism in Lego, and today hooked up a small reservoir behind the solenoid valve on the barrel to a bigger reservoir using an air hose.

They hope to be able to keep the bigger reservoir up to pressure by occasionally turning on a 12v compressor.  The compressor takes 10A and can’t be run for very long at a time (it brings the system up to 120psi  from 0psi in about 15 seconds), so they’ll have to run it off a relay.  I couldn’t find cheap relays that looked easy to use with 5v control and 12v 10A contacts, but automotive relays are cheap (I found 5 relays and 5 sockets for $5 on Amazon AGT (5 Pack) 30/40 AMP Relay Harness Spdt 12V Bosch Style (40AMP-HRNS)—even with shipping that is only $2.25 each for relay plus socket).  The relay can be controlled by half an H-bridge of the Hexmotor board.  The other half of the H-bridge controlling the solenoid should be fine, as we never need to run the compressor and fire at the same time—we can stop the compressor for a fraction of a second while firing.

They want to have the running of the compressor be automatic, which would require a pressure sensor.  The Freescale MPX5999D would work and is one of the few sensors I’ve seen with a large enough range, but I’m not sure how to mount it.  Standard tire-pressure monitoring sensors and transmitters are cool, but I don’t know if they go up to high enough pressures and I don’t know how to interface to their transmitters—that is almost certainly a more expensive solution. Honeywell has a differential sensor with ports that will go to ±150psi, which may be easier to connect up, but it costs about twice as much and is uncompensated and unamplified: I suspect it would be a lot fussier to work with than the Freescale part.  I’ve ordered a sample of the Freescale part, and read their AN936 application note on mounting (epoxy is your friend).

It turns out that the relays may be useful for other functions, like a linear actuator for the tilt mechanism. Two relays can be controlled from one H-bridge to get forward-backward-stop action on motors up to 30 amps (but no PWM!). Unfortunately, 12v linear actuators seem to run $100 and up, which is more that I want to spend on a single part.  I may ask the students to redesign—either building their own lead-screw mechanism or coming up with a different tilt mechanism.  I don’t think a simple servo motor will do—the beefiest one I have claims only 69 oz-in (0.49 Nm) of torque, which I don’t think will be enough to tilt the gun, even if they can get the hinge very close to the center of gravity.

Another problem has come up: getting more darts.  We have 5 darts that fit the barrel perfectly (1.45cm diameter).  There are plenty of darts sold like that, but they almost all now have larger heads on the end, and the heads don’t slide down the barrel.  The new Nerf clip-system darts are all mini-darts, that have a 0.5″ (1.25cm) diameter instead.  These do not fire well from the ½” PVC, which I measured as having an ID of 1.485cm (0.585″). A chart of PVC sizes I found on line says that 1/2″ ID Schedule 40 PVC is supposed to have an inside diameter of 0.622″, which is almost 5/8″, but that ID can vary by 10%, even along a single piece of pipe—only OD is held to tight specs.  Thicker-walled Schedule 80 is supposed to have 0.546″ ID, which would still be too loose for clip-system darts.

I see four possible solutions:

  • Find a source of (probably non-Nerf) foam darts that are 1.45cm (9/16″) diameter with heads that are no wider than the body. I think that they came with an NXT generation crossbow, so replacement foam darts for that may be what we need. They’re nowhere near as cheap as clip-system darts, but this is still probably the cheapest solution.
  • Buy Nerf  (or other) darts with the right size bodies but oversize heads, remove the heads, and make new ones (out of what?). This would be cheap, but tedious, and the darts would probably fly poorly, unless we made the new heads have a decent weight.
  • Use clip-system darts for compatibility with the popular Nerf guns, but find a smaller diameter tube than the ½” PVC pipe (where? and how would it be connected to the solenoid valve?) It looks like Schedule 40 3/8″ steel pipe has a inside diameter of 0.49″, which is just right, but steel pipe is rather heavy.
  • Use clip-system darts, but convert to the Nerf-standard tube-inside-the-dart launching system.  This limits the effective barrel length to the inside length of the dart (about 4.5cm) and the barrel diameter to the inside diameter of ¼”, which will limit the top speed of the darts (OK for safety, but probably not as much fun).

Filed under: Pressure gauge, Robotics Tagged: Arduino, foam darts, linear actuator, Nerf darts, Nerf gun, nerf guns, pressure sensor, relay, rocket

Cheap as chips Arduino Ethernet shield

It’s no secret that Ethernet shields for the Arduino are a little expensive. With the official Ethernet shield selling for about $50 and other options not much cheaper, there’s a lot of room for improvement for Arduinofied Ethernet. [Boris] over at Open Electronics has a solution to this problem: his Ethercard powered by a $3 Ethernet controller.

The Ethercard uses the Microchip ENC28J60, a through-hole Ethernet controller. There isn’t much else on the board apart from an RJ45 jack, caps, resistors, and a cheap buffer chip. This board was designed to be easily produced, and we’re thinking it might be possible to etch this board at home.

There are a few drawbacks to this ENC28J60 Ethernet shield – the official Arduino Ethernet shield has a 10/100 Mbps connection where the Microchip-powered shield is limited to 10 Mbps. Given the reduced cost, ease of assembly, and the fact that it’s pretty hard to saturate a 100Mbps connection with an Arduino this flaw can be easily ignored.

Pretty neat, especially considering how much you can do with an Ethernet connection on your Arduino. Files and code available in the git.


Filed under: arduino hacks, hardware
Hack a Day 10 Jul 23:02

MAKE Asks: First Arduino Projects


Make: Asks is a weekly column where we ask you, our readers, for responses to maker-related questions. We hope the column sparks interesting conversation and is a way for us to get to know more about each other.

Once I learned the basics of Arduino, my first project was a system of tracks that held ping pong balls. At the end of the tracks were solenoids that popped out the ping pong balls in sequence, making music.

This week’s question: What was your first Arduino project that went beyond the basics, and was something that could be called creative?

Post your responses in the comments section.


MAKE » Arduino 10 Jul 20:00

Schools projects with Arduino: Flow Meter

Loccioni Group, is an italian company that sponsors every year a project internship entitled “Classe Virtuale”, dedicated to young students coming from local technical schools.

This year, “Classe Virtuale 2012″ has been composed by 27 students with different backgrounds, selected among 120 candidates. After a stating training period, during the three-weeks internship the team worked on a very nice Arduino-based project: Flow Meter.

Here you may find a brief interview we had with Daniele Caschera, one of the components of “Classe Virtuale 2012″, about Flow Meter and on how Arduino helped in its design.

Alessandro: Daniele, could you describe us what “Classe Virtuale” is, in practice?

Daniele: “Classe Virtuale”, the partnership between Loccioni Group and local technical education institutions, has began in 2001 when Mr. Loccioni decided to invest on young students, by offering training periods and stages inside his company. In 2010 the project, which occours on annual basis, expanded to three more scools and in 2012 it has reached the 12-th edition.

The goal of this collaboration is to train and educate young technicians, by serving as a bridge between school and a real employment.

A: Could you briefly describe us the “Flow Meter” project?

D: “Flow Meter” is a real flow measurer: it has been designed to measure the flow of all the students who have attended to the previous editions of “Classe Virtuale”, starting from the first edition.

First, we have designed a PHP web application usable to collect the information reagarding all the participants to the previous editions and, then, we used some Arduino boards to represent this amount of data into a visible form, by means of several LEDs.

More in details, Flow Meter can be turned on by laying the hands on it, which can be detected by means of some proximity sensors located on the surface.

Then, it begins to show the collected data, starting from the first edition of “Classe Virtuale”, by turning on a set of LEDs, arranged in three rows inside a semi-transparent, white sphere. The first row, composed by red LEDs, represents how many students are currently employed at Loccioni, while the second one, composed by blue LEDs, shows how many people work or study in Italy; the last row (again composed by red LEDs) presents how many people work or study abroad.

By leaving the hands on Flow Meter, it is possible to scroll through all the editions of “Classe Virtuale”.

Finally, four small pillars, placed at the corners of the structure, represent the four schools involved in the 2012 edition of the project: a set of LEDs is used to show how many students come from each institution per year.

A: How Arduino contributed to this Flow Meter?

D: Many of us did not know Arduino at the beginning of “Classe Virtuale 2012″. The board has been introduced us during the initial training period by some electronic engineers at Loccioni. Then, we started to find out more information about it and how to adopt it in our project on the web, on books and so on.

Arduino has been fundamental in our project, simply because it composes the “brain” of Flow Meter, by means of a set 4 Arduino Uno and an Arduino Mega, and because it is used to activate the LEDs composing its “visual” interface.


A: How do you evaluate this internship experience?

D: This experience has been very positive for us, mainly because it gave us the chance to work on a real project together with very skilled people and technicians. Moreover, since the team has been divided into small working groups (e.g., those working on mechanical parts and those working on electronics and programming), we have gained experience on topics that you typically won’t study at school. Everyone has learned a lot during “Classe Virtuale”!

This very nice project, which has been presented on July 19 (the streaming of the event will be available here), represents another example of how open-source solutions can be used as effective enabling technologies, even for educational purposes.

Great job “Classe Virtuale” and thanks for this interview!

Arduino Blog 10 Jul 14:54

Introducing BoardX: The Open Source Miniature Robotics Motherboard

Hi Everybody!

Long time robot enthusiast here, but just joined up after searching for some robotics tutorials. I'm searching for ideas to create a beginners robotics kit for my open source project, BoardX.

I'm going to post some information here, and if anybody is interested in purchasing one, send me an email and I'll give you instructions on how to get a discount!

Here's my site: http://www.upgradeindustries.com

read more

Capacitive sensing, part 2

The obvious next step with the capacitive sensor is to make the sensor actually control something.  This is not essential for the circuits class—for that class it is better to have the students viewing the waveform on the oscilloscope and seeing the frequency of the output vary  as the touch varies.  But I was curious about whether the various grounds (oscilloscope, USB cable, wall wart power supply) were making a difference to the capacitive sensing, so I wanted to redo the capacitive sensor to be a fully battery-based application, with no external ground connections.

To display whether the sensor had been touched or not, I turned on or off the LED on pin 13. I used the same software detection mechanism as in the previous post, counting the number of pulses it takes to get a total time for the signal being low. Touching my laptop (to reduce the resistance to ground) no longer makes a difference in the sensitivity of the switch, now that the battery ground is separated from the laptop ground.

// Capacitive sensor switch
// Mon Jul  9 06:05:54 PDT 2012 Kevin Karplus

// To use, connect the output of the LM555 oscillator to
// pin CAP_PIN on the Arduino.
// The code turns on the LED on pin 13 when a touch is sensed.

// The Arduino measures the number and width of LOW pulses on pin 2 until
//    the sum of the pulse width exceeds TOTAL_PULSE_USEC.
// The LED is turned on if the number of pulses is less than NO_TOUCH_NUM

#define CAP_PIN (2)

#define TOTAL_PULSE_USEC (100)	// total of pulse widths (in  microseconds) before reporting
#define NO_TOUCH_NUM (50)

void setup(void)
{
    pinMode(CAP_PIN,INPUT);
    pinMode(13, OUTPUT);
}

void loop(void)
{
    uint32_t pulse_sum=0;
    uint16_t num_pulses=0;
    while (pulse_sum<TOTAL_PULSE_USEC)
    {   pulse_sum += pulseIn(CAP_PIN,LOW);
        num_pulses++;
    }
    digitalWrite(13, (num_pulses<NO_TOUCH_NUM? HIGH:LOW));
}

I had to set the threshold a bit higher than I expected, indicating that the frequency shift was not as large without all the connections to ground, but the sensor still works with a moderately firm touch. With a light touch, the LED flickers on and off, indicating that the frequency shift is near the threshold. Raising NO_TOUCH_NUM too high has the LED always on. Even raising it from 50 to 55 makes the switch too sensitive—the LED turns on when my finger is still 5mm away from contact. Perhaps the ideal setting is 52, as that detects a light touch fairly reliably, but doesn’t fire until my finger is within about 1mm of the surface.

Note: it might make more sense to leave NO_TOUCH_NUM at 50 and adjust TOTAL_PULSE_USEC down to 96, since the larger number can be adjusted more finely.

If I wanted to avoid the flicker, I would debounce the detection.  I can’t use the Arduino Bounce library for this, as the signal that needs debouncing is in software, not on a pin.  It is a trivial matter to add a delay whenever the output changes, though:

// Capacitive sensor switch
// Mon Jul  9 06:44:33 PDT 2012 Kevin Karplus

// To use, connect the output of the LM555 oscillator to
// pin CAP_PIN on the Arduino.
// The code turns on the LED on pin 13 when a touch is sensed.

// The Arduino measures the number and width of LOW pulses on pin 2 until
//    the sum of the pulse width exceeds TOTAL_PULSE_USEC.
// The LED is turned on if the number of pulses is less than NO_TOUCH_NUM.

// pin that LM555 output connected to
#define CAP_PIN (2)

// total of pulse widths (in  microseconds) before reporting
#define TOTAL_PULSE_USEC (96)

// minimum number of pulses to indicate that sensor is not touched
#define NO_TOUCH_NUM (50)

// time (in milliseconds) to wait after a change in state before
// testing input again
#define DEBOUNCE_MSEC (100)

static uint8_t was_on;

void setup(void)
{
    was_on=0;
    pinMode(CAP_PIN,INPUT);
    pinMode(13, OUTPUT);
}

void loop(void)
{
    uint32_t pulse_sum=0;
    uint16_t num_pulses=0;
    while (pulse_sum<TOTAL_PULSE_USEC)
    {   pulse_sum += pulseIn(CAP_PIN,LOW);
        num_pulses++;
    }
    uint8_t on = num_pulses<NO_TOUCH_NUM? 1:0;
    digitalWrite(13, on);
    if (on!=was_on)
    {   delay(DEBOUNCE_MSEC);
        was_on=on;
    }
}

Debouncing does not completely eliminate multiple flashes. If I hold my finger very steady just touching the sensor or my whole hand flat about 1mm away, the LED will flash on and off about 5 times a second (the speed of the flashing is determined mainly by DEBOUNCE_MSEC).

Really good code would not require fixed NO_TOUCH_NUM and TOTAL_PULSE_USEC, but would learn what values are usual for off and on states and set the thresholds to separate them reliably.  I’ve not figured out a good way to do this as unsupervised learning. It would not be very difficult to have initial settings, gather averages for on and off states, then dynamically adjust the threshold, but I don’t know how stable such threshold setting would be. I suspect that it would end up rather unreliable, and highly dependent on good initial settings.


Filed under: Circuits course Tagged: Arduino, bioengineering, capacitive touch sensor, circuits, course design, LM555, sensors, teaching

Capacitive sensing

I decided that it was time to try a new circuits lab today.  Although I have the INA-126 instrumentation amplifier working (with a 220Ω gain resistor for a gain of about 370), and I did get some EKG stick-on electrodes, I don’t feel like trying to debug the EKG lab today.  I could do a little more with the instrumentation amplifier and the new function generator, adding the function generator output to the microphone output to see try to separate the differential gain from the common-mode gain, but I’m getting a bit tired of op-amp and instrumentation amp circuits.  I’ll try to come back to them later.

Other sensor ideas from What sensors for circuits class? that I have the parts for now include phototransistors, LEDs and IR emitters, and reflectance light sensors, but I don’t feel like playing with phototransistors today either.  That leaves one rather do-it-yourself sensor: a capacitance touch switch.  I was thinking of implementing this with LM555 timer chip as an oscillator, detecting capacitance increase as a change in the frequency of the oscillator.

Design questions include

  • What capacitance do we add by touching something?
  • What frequency should the oscillator run at without the touch?
  • What % change in frequency can we detect reliably? How will we do that detection?

Capacitance

Let’s do a first-principles calculation of capacitance of a touch, using a simple parallel-plate model.  Let’s say that the area of the touch, pressing lightly with a finger, is about 1cm^2.  We need to know the dielectric constant of the insulator and its thickness.  Let’s say we use a cheap plastic  wrap from the grocery store.  According to Wikipedia, common plastic wraps are about 0.5 mils (12.5 µm) thick and are now generally a low-density polyethylene (LDPE).  According to Bert Hickman (referring to sites that no longer exist), the relative dielectric constant for LDPE is 2.2, with a breakdown voltage of 3000v/mil (or 1500v for 0.5mil).  Of course, he also claims that the common wrap material is a mix of PVC and PVDC, which seems to be out of date information. The A to Z of Materials site for LDPE claims

Dielectric Strength (MV/m) 27
Dissipation Factor 1kHz 0.0003
Dielectric Constant  1kHz 2.3

That dielectric strength would be 337V at 12.5µm, which seems more reasonable than Bert Hickman’s numbers.

I also have 3M contractor’s plastic for masking large areas when painting. It claims to be 8.9 µm thick, but I can’t figure out what the material is (they just say “high density plastic”).  If it is HDPE (a possibility), the A to Z of Materials site for HDPE claims

Dielectric Strength (MV/m) 22
Dissipation Factor 1kHz 0.0005
Dielectric Constant  1kHz 2.3

which gives the same dielectric constant as LDPE, but the breakdown voltage would be about 195V at 8.9µm—still plenty for a touch sensor.

If I have 1 cm^2 (1E-4 m^2) area, 5 mil thickness (12.5E-6m), relative dielectric constant of 2.3, and ε0=8.8542E-12 F/m, I get a capacitance of 163pF for the touch.

Frequency

The LM555 can be set up as an astable oscillator:

LM555 astable oscillator circuit from the Fairchild Semiconductor LM 555 data sheet.

The data sheet gives the period of the oscillator as and the frequency as . If I want a slow oscillator, I’ll need to use a large resistance.  The largest resistance they show in the data sheet is RA+2RB=10MΩ, and I happen to have some 3.3MΩ resistors, so 9.9MΩ seems reasonable.  If I had no stray capacitance, 163pF and 9.9MΩ would give a period of 1.6msec (620Hz).  But, of course there will be substantial stray capacitance—probably much larger than the touch capacitance.  In any event, the increment to the period of the oscillator by adding the touch capacitance should be about 1.6msec, so we need to be able to detect that small a change in the period.  The percentage change will depend mainly on the stray capacitance.

One thing that is not clear from the LM555 data sheet is what value should be used for C2.  I suspect that it is just a bypass capacitor to reduce noise in the reference voltages used for the threshold, so a 4.7µF ceramic capacitor (of which I have several) should do fine.  Design notes I’ve seen on the web suggest that 0.1µF is plenty, though a bypass on the Vcc input of that amount is also recommended.

Experiment

I set up the circuit on the breadboard, with RA=RB=3.3MΩ, C1 being just the stray capacitance in the circuit, and C2 being a 4.7µF ceramic bypass capacitor. I also put a 4.7µF bypass capacitor between pins 1 and 8, as well as a 470µF electrolytic capacitor, to make sure that the power supply was clean.

The resulting oscillator has a period of about 0.2msec (4.4kHz), but it fluctuated a lot, so that I could not get a clean trace on my oscilloscope. Touching the insulted sensor pad (made from Al foil and Glad Cling Wrap) caused the period to increase enormously, but to a pulse train of 3 pulses that repeated at 60Hz.  I believe that what I was mainly doing was coupling in a 60Hz noise signal, rather than detecting a change in the capacitance to ground.

I could decrease the sensitivity of the circuit to noise by reducing the resistances and adding some more capacitance to C1. Adding 1nF cleans up the signal, but doesn’t eliminate the problem.  I get 107±1Hz without a touch, and 60Hz with a touch.  I’m still mainly coupling in 60Hz noise!  I’d have to reduce the impedance to reduce the 60Hz coupling, reducing RA and RB.

Leaving in the 1nF capacitor and reducing RA and RB to 100kΩ results in a non-touch frequency of 4.05kHz and a touch frequency of 3.6kHz.  This is about a 30µsec difference in period, consistent with an 150pF change in capacitance. But this frequency change seems to be almost independent of the area of contact, which is not consistent with a parallel plate model.  The lower frequency still seems to be modulated by a 60Hz hum.

Removing the 1nF capacitor, but leaving the 100kΩ resistors, I get a no-touch frequency of 140kHz–156kHz (depending on how close my arm comes to the sensor) and a touch frequency around 45kHz–50kHz, a 15µsec difference in the period. A firm press with all my fingers depresses the frequency further, down to about 20kHz. Touching my laptop (reducing my resistance to ground) decreases the frequency further—pressing with my palm and touching the laptop gets the frequency own to about 13kHz.

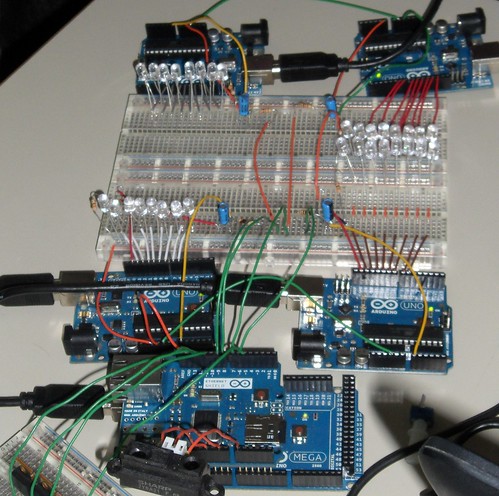
Here is the complete layout for the capacitive touch sensor, showing (clockwise) the aluminum foil wrapped in Glad Cling Wrap (except for the folded over part where the alligator clip is attached, the breadboard with the LM555 chip, and the Arduino board.

I wouldn’t want to use the interrupt-driven timer code to measure this frequency, but a simple busy-wait loop that times the period could work, or I could add a counter to divide the frequency down (and average out many clock cycles).  But this is supposed to be a circuits class, not a digital design class, so adding a counter is probably not appropriate for the lab.  Perhaps a better approach is to measure the duration of the low part of the pulse, which should be about 1/3 of the total period, using the Arduino pulseIn function.  Looking on the scope, the low part of the pulse seems to be closer on 1/6th of the total period than to 1/3 at the high frequency, though the ratios are more reasonable at the low frequency.  I suspect that there are stray capacitance within the LM555 that account for some of the pulse shape error.

By averaging over 500 pulses, I see a switch from 1.15±0.03 µsec for the low pulse in the no-touch configuration to 5.4±0.3µsec for a firm touch and 2.8±0.2µsec for a light touch (and up to 220µsec for a full-palm touch while touching my laptop). Single pulse measurements may be a bit unreliable at those speeds, since pulseIn only has 1µsec resolution, but adding 500 pulses doesn’t take much time, unless the capacitance is very high. Putting the 1nF capacitor back in the circuit makes the low time look more like 1/3 of the period.  The pulse widths are about 78.4±0.05µsec for no-touch and 80µsec–85µsec for a touch.  Those are long enough to be reliably detected with even a single pulseIn call, but the difference is rather small, so setting a fixed threshold would be a bit risky.

An alternative approach to averaging 100s of pulse widths is to collect pulses until the total pulse width exceeds 200µsec and report the number of pulses collected.  That mechanism results in an easily detected change in counts (from over 150 to under 60) and a response time of about 2–5msec (most of which is probably in the serial communication).  A detection threshold would have to be set for each different sensor plate the circuit is connected to, but that is pretty straightforward.

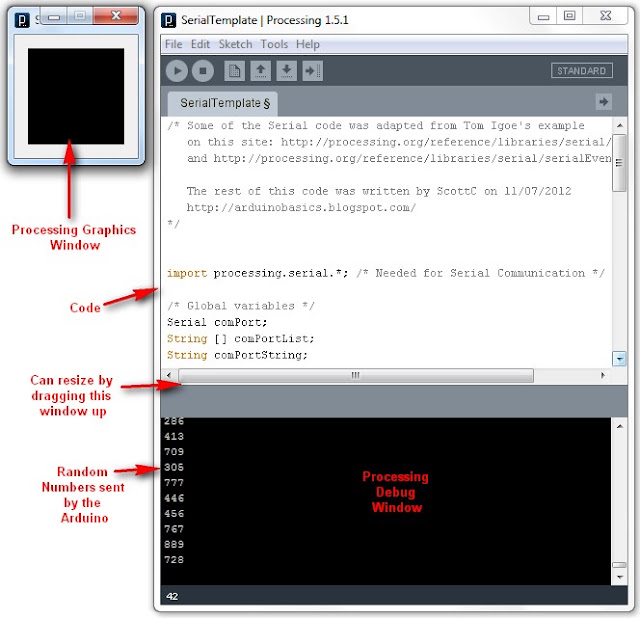
Here is the code I used for detecting sensor touches with summed pulse widths (click to expand):

// Capacitive sensor timer
// Sun Jul  8 17:59:49 PDT 2012 Kevin Karplus
//
// License: CC-BY-NC http://creativecommons.org/licenses/by-nc/3.0/
//
// To use, connect the output of the LM555 oscillator to
// digital pin 2 on the Arduino.
// On initialization, the Arduino will print "Arduino ready." to serial.
// The Arduino measures the number and width of LOW pulses on pin 2 until
//    the sum of the pulse width exceeds TOTAL_PULSE_TIME.
// It then reports 3 numbers to the serial line:
// The first is the time since the start, in microseconds.
// The second is the number of pulses measured.
// The third is the average duration of the pulses.
// Serial baudrate is 115200.
// The start time may be reset by sending the character 'R'.

#define TOTAL_PULSE_TIME (200)	// total of pulse widths (in  microseconds) before reporting

unsigned long first_time;   // what was the time for the first tick since reset?
// All times are in microseconds.

// do_reset() empties the queue and sents the count to 0
void do_reset(void)
{
    noInterrupts();     // don't take interrupts in the middle of resetting
    first_time=micros();
    // let the user know that the Arduino is ready
    Serial.print(F("\nArduino ready.\n"));
    interrupts();
}

// interrupt handler for data becoming available on the serial input
// Reset if an R is received
void serialEvent(void)
{
    if (Serial.read() == 'R')
    {
        do_reset();
    }
}

void setup(void)
{
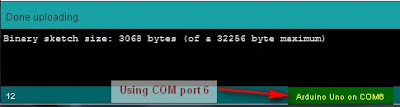
    Serial.begin(115200);       // use the fastest serial connection available
    do_reset();
    pinMode(2,INPUT);
}

void loop(void)
{   // keep trying to print out what is in the queue.
    uint32_t pulse_sum=0;
    uint16_t num_pulses=0;
    while (pulse_sum<TOTAL_PULSE_TIME)
    {    pulse_sum += pulseIn(2,LOW);
        num_pulses++;
    }
    uint32_t datum=micros();
    Serial.print(datum - first_time); // time since start (usec)
    Serial.print("\t");
    Serial.print(num_pulses); // number of pulses
    Serial.print("\t");
    Serial.println(pulse_sum*(1.0/num_pulses), 2); // avg pulse duration
}


Filed under: Circuits course Tagged: Arduino, bioengineering, capacitive touch sensor, circuits, course design, LM555, sensors, teaching

Simple Arduino Serial Communication (Part 2)

In Stages 1 to 5 , we experimented with the Serial Monitor on the Arduino IDE to transmit data to the Arduino and receive data from the Arduino. We performed simple Serial communication of data in both directions.

We then moved from transmitting a String of characters to the more difficult task of transmitting a double or a float.

Finally, we used the Serial monitor to receive sensor data from our Arduino, and played with a couple of Arduino functions.

We will now look at replacing the Serial Monitor with a much more exciting program such as "Processing" which is a free Open Source program that interfaces very easily with the Arduino. It can be downloaded here.

We will use a few processing scripts to bring our Arduino Sensor projects to life !


Stage 6: A simple Processing Sketch: BLINK


Arduino IDE vs Processing IDE


While the processing IDE looks very similar to the Arduino IDE, it is important that you realise that the Processing sketch will run on your computer, and NOT on the Arduino. In fact, you do not even need an Arduino to run a Processing sketch. And that is exactly what we are going to do: Run a Processing sketch without an Arduino.

Parts Required


  • A computer
  • Processing IDE

  • Once you have downloaded and installed the Processing IDE onto your computer, open the program and copy the following sketch into it, and then press the play button. This is different from the Arduino IDE, in that we do not have to upload it to anything, as it will be running from the computer.

    Processing Sketch


    1
    2
    3
    4
    5
    6
    7
    8
    9
    10
    11
    12
    13
    14
    15
    16
    17
    18
    19
    20
    21
    22
    23
    24
    25
    26
    27
    28
    29
    30
    31
    32
    33
    34
    35
    36
    37
    38
    39
    40
    41
    42

    /* Stage 6: Simple Processing Blink Sketch
    Created by ScottC on the 8/7/2012
    http://arduinobasics.blogspot.com/ */


    /* Setup the color variables and switching mechanism */
    color Red=color(255,0,0);
    color White=color(255,255,255);
    Boolean mySwitch=true;


    /* The setup function only runs once */

    void setup(){
    /* Set the size of the window using size(width,height) */
    size(400,400);
    }

    /* The draw function will refresh screen only after it has
    processed all functions within it. Which is why I needed
    a switch to swap between the red and the white background
    The draw() function will run in an endless loop. */

    void draw(){
    blink(mySwitch); //Call to blink function
    delay(2000); //The blinking speed (2 secs)
    }


    /* The blink function switches the background from red to white
    or from white to red. */

    void blink(Boolean swtch){
    /* If swtch is true, make the background red
    otherwise make it white */
    if(swtch){
    background(Red); // red
    }else {
    background(White); // white
    }
    /* Toggle mySwitch between true and false */
    mySwitch=!mySwitch;
    }


    Things to Try


    1. Change the White background to a black background

    2. Insert on line 9: color Black=color(0,0,0);
      Change line 38: background(Black);


    3. Increase the blink rate to 1 second

    4. Change line 25: delay(1000);
      WARNING : Do not increase the speed too much, it may cause an epileptic fit.


    Now that wasn't too hard I hope.
    And if you want a very good site to learn Processing have a look at these


  • The official Processing reference library
  • Official Processing Tutorials
  • Getting started with Processing
  • Daniel Shiffman's Processing Examples and Tutorials


  • Stage 7: Arduino and Processing Unite.


    So how do we get our Arduino to interface with our computer? Well, if the Serial Monitor on the Arduino IDE is not good enough, then you could use any program that is capable of Serial communication. Fortunately, Processing is one of those programs, but you could use C++, Java, Python, Microsoft Excel (using VBA), VB.Net, Gobetwino or some other programming language.

    Two programs will be created: One will be uploaded to the Arduino using the Arduino IDE, and the other will run on the computer. In this example we will use Processing as the program that will run on the computer.

    Enter the following sketch into the Arduino IDE and upload it to the Arduino. It serves to generate a random number between 0 and 400 every 200msec and will send it to the computer via the USB cable , using Serial communication.

    Arduino Sketch


     1
    2
    3
    4
    5
    6
    7
    8
    9
    10
    11
    12
    13
    /* Stage 7: Simple Arduino Serial Random Number Generator
    Written by ScottC on 09/07/2012
    http://arduinobasics.blogspot.com/
    */


    void setup(){
    Serial.begin(9600); //Begin Serial Communication
    }

    void loop(){
    Serial.println(random(1,1000)); //Send Random # to computer
    delay(200); //Delay 200ms between values.
    }


    Instructions

    Once the program has been uploaded to the Arduino, we will want to make sure that it is performing to expectations before moving onto the Processing script.

    Open the Arduino Serial Monitor and make sure that you see a bunch of random numbers scrolling down the page. If not, then go back over your code and try again. Once you see the random numbers, then it is safe to move on to the next step.


    Processing

    The following Processing script will display the Random numbers being sent from the Arduino in the Processing IDE debug window. This particular script is very much like a simplified Arduino Serial Monitor, and it will show you that the Processing Script is successfully communicating with the Arduino.


    Processing Sketch

     1
    2
    3
    4
    5
    6
    7
    8
    9
    10
    11
    12
    13
    14
    15
    16
    17
    18
    19
    20
    21
    22
    23
    24
    25
    26
    27
    28
    29
    30
    31
    32
    33
    34
    35
    36
    37
    38
    39
    40
    41
    42
    43
    44
    45
    46
    47
    48
    49
    50
    51
    52
    53
    54
    /* Some of the Serial code was adapted from Tom Igoe's example
    on this site: http://processing.org/reference/libraries/serial/Serial.html
    and http://processing.org/reference/libraries/serial/serialEvent_.html

    The rest of this Processing code was written by ScottC on 11/07/2012
    http://arduinobasics.blogspot.com/
    */


    import processing.serial.*; /* Needed for Serial Communication */

    /* Global variables */
    Serial comPort;
    String [] comPortList;
    String comPortString;

    /*--------------------------------------------------*/

    void setup(){
    size(100,100); /* Set the size of the window */
    background(0); /* Set the background to black */


    /* Get the available com ports. If there is at least one
    com port available, then start communicating on it.
    If there are more than one com ports available, we will
    only open the first one (i.e. comPortList[0])
    The bufferUntil('\n'); statement will generate a serial Event
    when it reads a carriage return */

    comPortList = Serial.list();
    if(comPortList.length>0){
    comPort = new Serial(this, comPortList[0], 9600);
    comPort.bufferUntil('\n');
    }
    }

    /*--------------------------------------------------*/

    void draw(){
    /* The serialEvent function will update the display */
    }

    /*--------------------------------------------------*/

    void serialEvent(Serial cPort){
    comPortString = cPort.readStringUntil('\n');
    if(comPortString != null) {
    comPortString=trim(comPortString);

    /* Print to the Debug screen in Processing IDE */
    println(comPortString);
    }
    }


    When you run the Processing script, a little black window will appear. This is the Processing Graphics window, which is normally where all the action takes place. However in the sketch above, this window does nothing. Instead we make use of the black Debug window which is part of the Processing IDE (below the code window). If everything went to plan, you should see random numbers scrolling down in a similar fashion to the Arduino Serial monitor. Here is an example of what it should look like.


    Things to Try


    1. If you are having problems with COM port selection. Then have a look at the COM port being used on the Arduino IDE to upload sketches to the Arduino. Processing generally uses the same COM port. So make sure to close the Arduino Serial Monitor before running the Processing Sketches.


    The image above shows that I am currently using COM PORT 6 on my computer to upload Arduino Sketches. In the Processing sketch on line 32-35, I had this code:

    32
    33
    34
    35
      if(comPortList.length>0){
    comPort = new Serial(this, comPortList[0], 9600);
    comPort.bufferUntil('\n');
    }


    We can change line 33 to get Processing to use COM port 6 exclusively. We do this by replacing comPortList[0] with "COM6", as seen below:

    32
    33
    34
    35
      if(comPortList.length>0){
    comPort = new Serial(this, "COM6", 9600);
    comPort.bufferUntil('\n');
    }


    Stage 8 : Arduino and Processing - Random Font Project


    Arduino and Processing are speaking to each other by this stage, and we will keep our original Arduino Sketch to produce random numbers for us. Sure, we don't actually need the Arduino to do this for us, because Processing is more than capable of doing this itself, but we are building up towards an interactive sketch, so lets just go through the motions.

    Just in case your mouse scroll wheel doesn't move upwards, here is the Arduino Sketch again:

    Arduino Sketch


     1
    2
    3
    4
    5
    6
    7
    8
    9
    10
    11
    12
    13
    /* Stage 8: Simple Arduino Serial Random Number Generator
    Written by ScottC on 09/07/2012
    http://arduinobasics.blogspot.com/
    */


    void setup(){
    Serial.begin(9600); //Begin Serial Communication
    }

    void loop(){
    Serial.println(random(1,1000)); //Send Random # to computer
    delay(100); //Delay 100ms between values.
    }


    Upload the Arduino sketch to the Arduino, and then put the following code into the Processing IDE:

    Processing Sketch


    The output of this sketch should look something like this:


    For stages 9 and above: Click Here