

Posts with «arduino» label


Sublime Text as an Arduino IDE
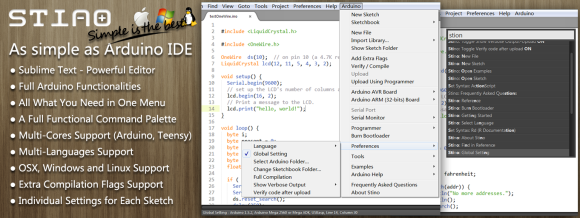
If you’ve played with an Arduino, you’ve probably been frustrated by the IDE. It works, but it’s not the best editor. It’s especially painful for bigger files and larger projects. The Stino plugin for Sublime Text aims to solve this issue by bringing the full functionality of the Arduino IDE to the Sublime Text editor.
Sublime Text is a powerful text editor with support for most programming languages. What it’s missing is support for compiling and uploading code to an Arduino. Stino bridges that gap. Sublime is a commercial product, and retails for $70 USD. However Sublime does have an indefinite trial period, so Stino can be evaluated for free. Stino itself is an open source plugin written in Python, and you can contribute to the project on Github.
After installing Sublime and Stino, you point the plugin at an Arduino install folder. It then allows you to build and flash directly from the editor. For anyone who’s been frustrated with the Arduino IDE, this looks like a slick solution.
[Thanks to Matt for the tip!]
Filed under: Arduino Hacks


Flexible Arduino Sure to Be A Hit

Wearable, lightweight hacks have long been dominated by the Lilypad. This will probably change with the introduction of the Printoo. Using printable circuit technology, the Printoo takes a modular approach to enable hackers, makers, and engineers alike to construct flexible circuits that can be put on almost anything, including paper!
Powered by the all too familiar ATmega328, the Printoo core module is fully compatible with the Ardunio IDE. The modular design enables functionality with several other printed devices including displays, batteries, sensors and even LED strips to make many different projects possible. One of the most interesting modules is the 1.5 volt, 500 micron thick electrochromic display.
Be sure to check out their Kickstarter, which has a nice video that demonstrates the project. If funded, they will be available in October in case you want to get your hands on one. Or feel free to make your own. Just be sure to let us know if you do!
Filed under: Arduino Hacks, wearable hacks


A LIN Bus Signal Injector

[Zapta] tipped us about his latest project: a LIN bus signal injector. For our unfamiliar readers, the LIN bus is a popular automotive bus that is used to interface with buttons, lights, etc. As [Zapta] was tired of having to press the Sport Mode button of his car each time he turned the ignition on, he thought it’d build the platform shown above to automatically simulate the button press.
The project is based around an ATMega328 and is therefore Arduino IDE compatible (recognized as an Arduino Mini Pro), making firmware customization easy. In the car, it is physically setup as a proxy between the LIN master and the slave (which explains the two 3-wires groups shown in the picture). It is interesting to note that the injection feature can be toggled by using a particular car buttons press sequence. The project is fully open source and a video of the system in action is embedded after the break.
Filed under: Arduino Hacks, hardware


Sniffing Vending Machine Buses

We’ve talked about a variety of protocols and how to deal with them in the past. Today, [Dan] is working on sniffing vending machine Multidrop Bus. The Multidrop Bus (MDB) protocol is a standard used in vending machines to connect devices such as currency collectors to the host controller.
To connect to the bus, interface hardware is required. [Dan] worked out compliant hardware and connected it to an Arduino. With the device on the bus, [Dan] got to work on an Arduino sketch to parse the MDB data into a human-readable format. With that working, the bus can easily be sniffed over the Arduino’s serial console.
This is just the start of a more involved project. Since this protocol is used to communicate with a vending machine’s currency collector or card reader, being able to communicate it would allow him to implement his own payment methods. The plan is to augment the vending machine he operates at Vancouver Hack Space to accept Bitcoin. We’re looking forward to seeing that project unfold.
Filed under: Hackerspaces, Network Hacks


New Project: Bricktronics Mini Tank
 Build this simple rolling Mini Tank to learn how to combine Arduino microcontrollers with Lego Mindstorms robotics.
(Mind)Storms are Brewing in the Shed
 Think of the best pairing you know, be it chocolate and peanut butter, rainy days and good books, or the purr of an engine and the open road. Then, imagine pairing one of the best toys of your childhood, Legos, and the hobbyist toy of your adulthood, the Arduino microcontroller. Combined, these […]
How to make your own Primo prototype using digital fabrication and Arduino boards
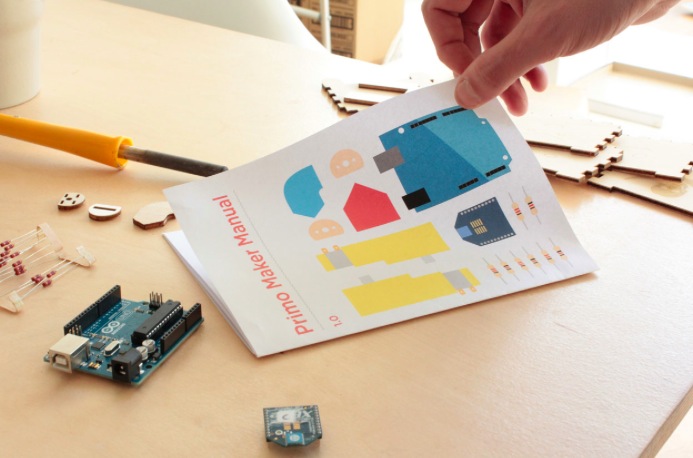
Primo‘s team sent us exciting news from their HQ about their contribution to the open source community. After the successful Kickstarter campaign to launch the wooden play-set that uses shapes, colours and spacial awareness to teach programming logic through a tactile, warm and magical learning experience, they took a step further. They released all the documentation and the instructions to produce a Primo prototype, different from the product that they make and sell.
We just finished the first edition of the Primo play-set open documentation, that includes the design files that we used to make our first prototype and a step-by-step guide to make your own version of the Primo play set. This “maker” version of our product can be assembled using rapid prototyping techniques and common tools like Arduino boards.
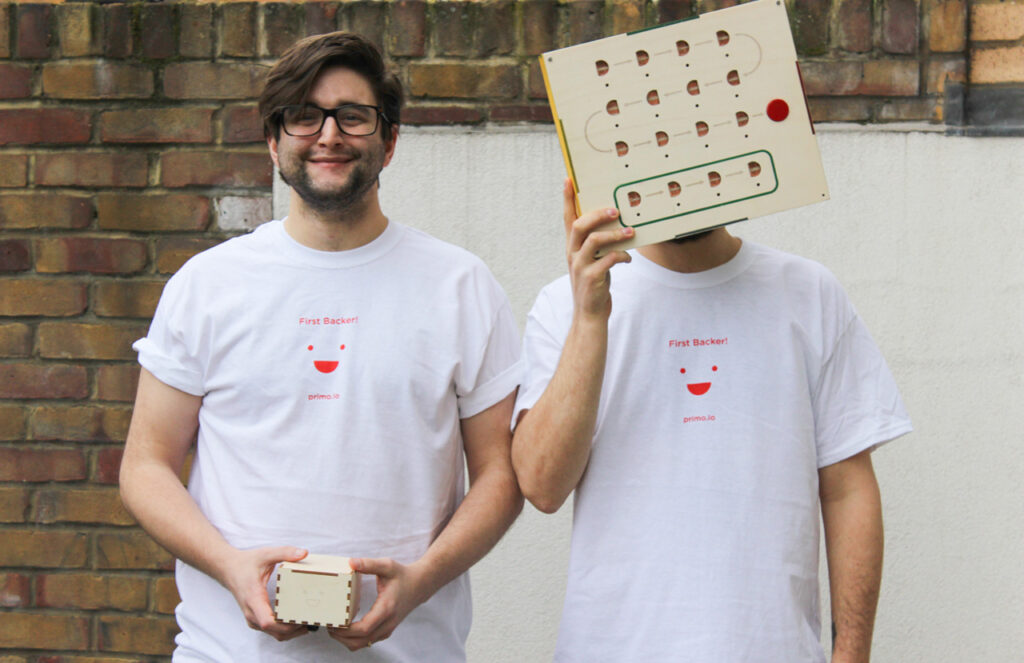
We recently published a preview of this documentation just for our Kickstarter backers, who already started to build their projects and to translate the document in their language. The FabLab in São Paulo for example already translated it in Brasilian Portuguese, while other languages like Dutch, Italian and Japanese are now in progress.
The whole documentation is completely transparent: it’s written in Markdown using Jekyll and GitHub pages. In this way it is very easy for creators to modify, translate and use it as a starting point for their projects.
In parallel we are developing an industrial version of our product, using manufacture-quality materials and custom Arduino-compatible electronic boards.
And if you want to read about the experience of a dad making a DIY version in 1 month and a half of work, follow this link.
Primo is an Arduino At Heart partner. If you have a great project based on Arduino and want to join the program, read the details and then get in touch with us.
Developed on Hackaday: Olivier’s Design Rundown
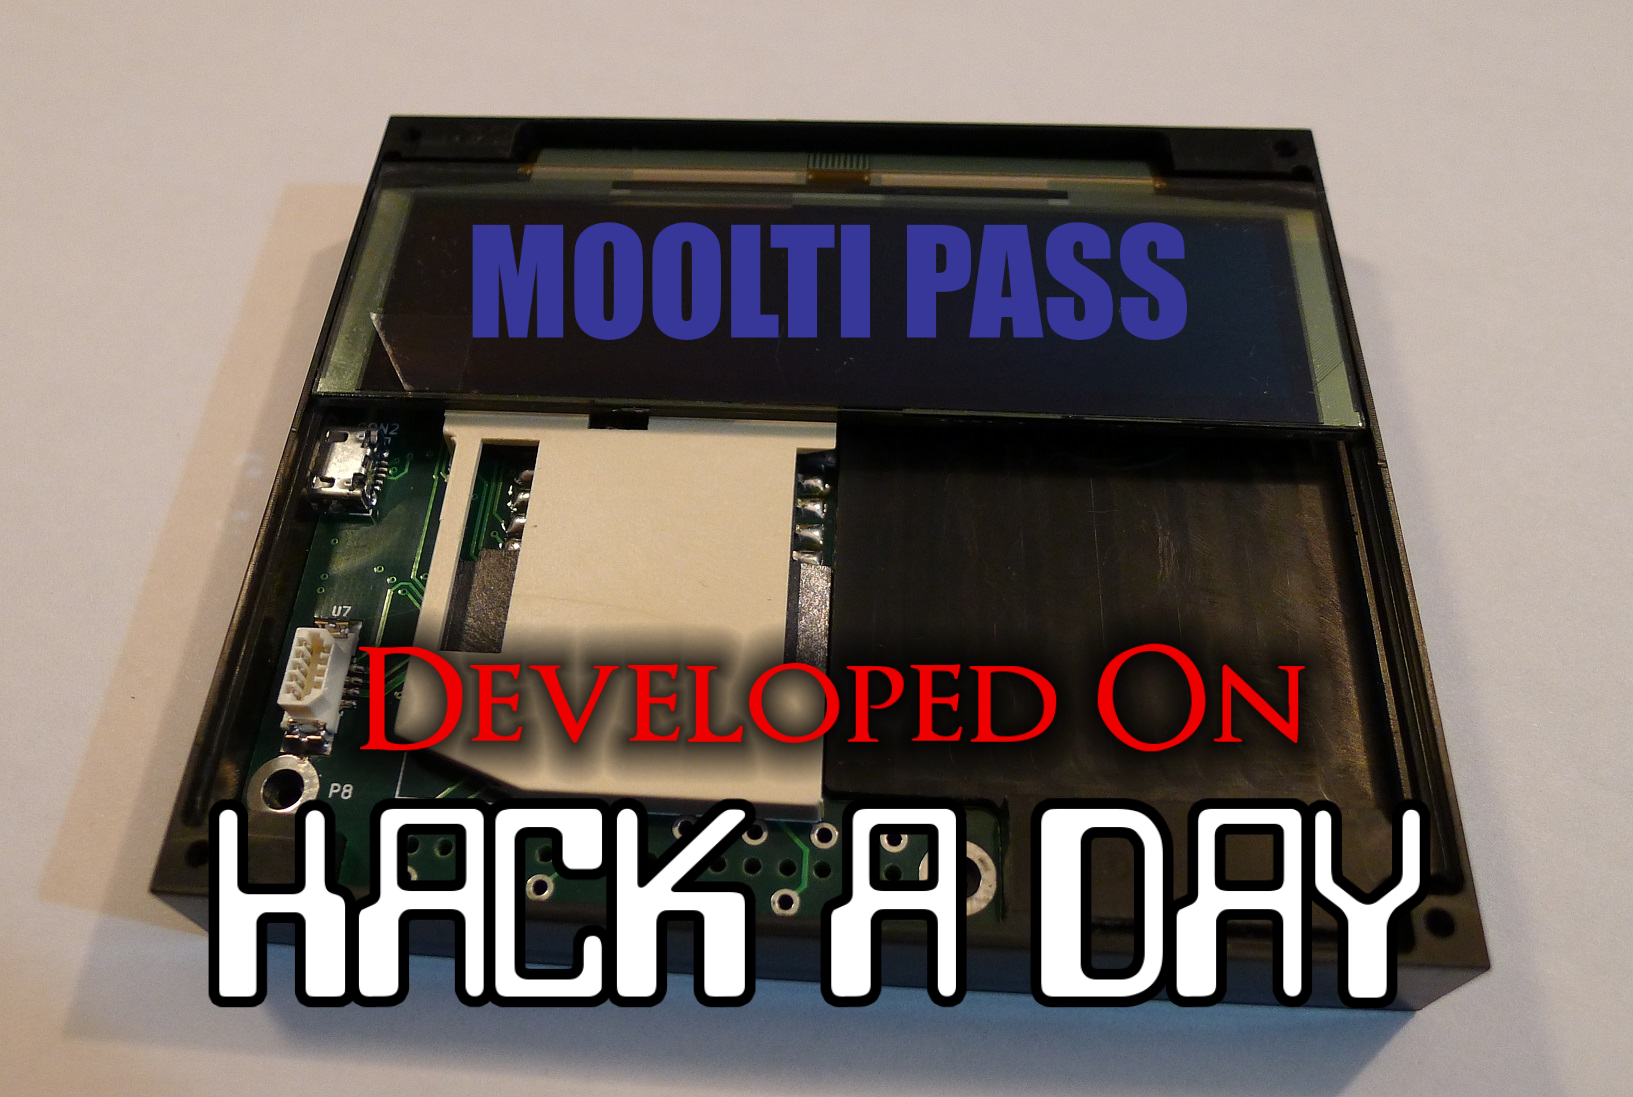
The Hackaday writers and readers are currently working hand-in-hand on an offline password keeper, the Mooltipass. A few days ago we presented Olivier’s design front PCB without even showing the rest of his creation (which was quite rude of us…). We also asked our readers for input on how we should design the front panel. In this new article we will therefore show you how the different pieces fit together in this very first (non-final) prototype… follow us after the break!
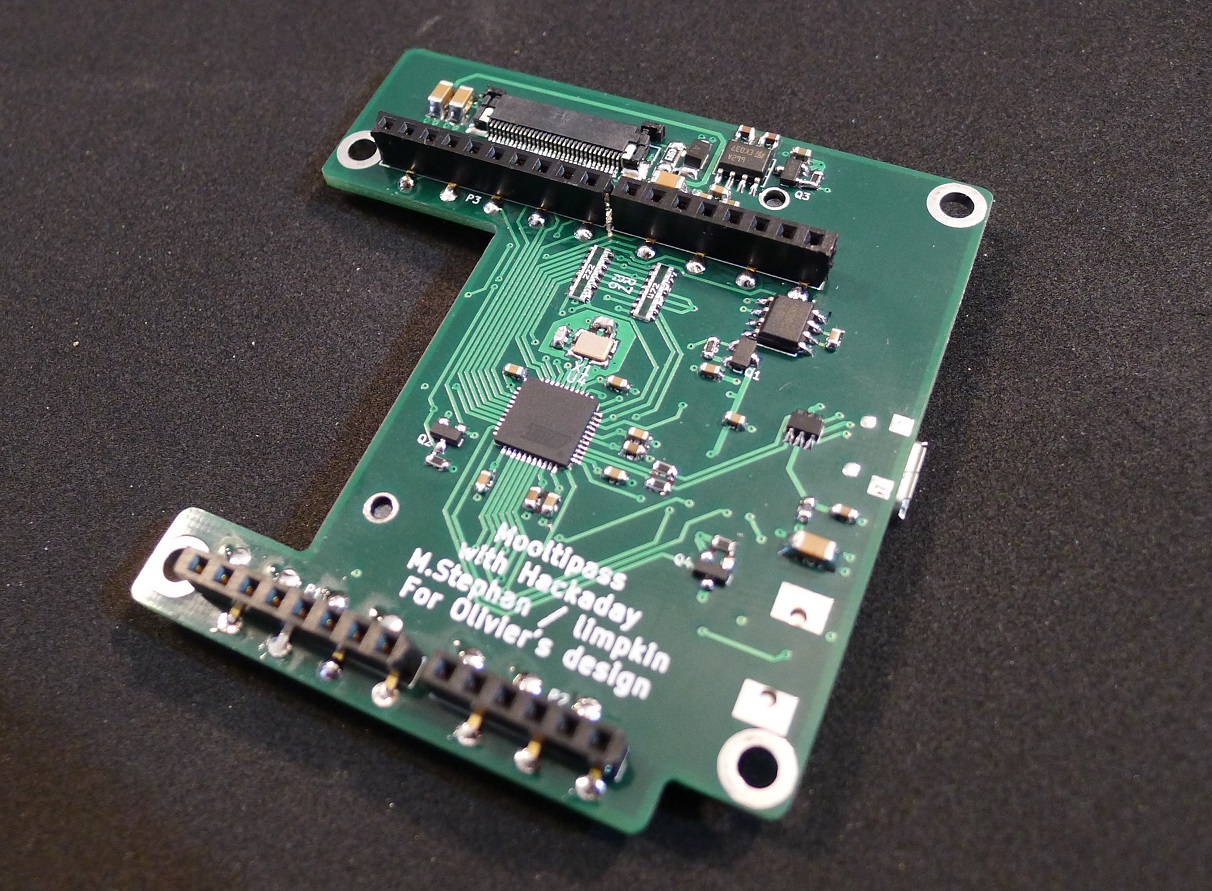
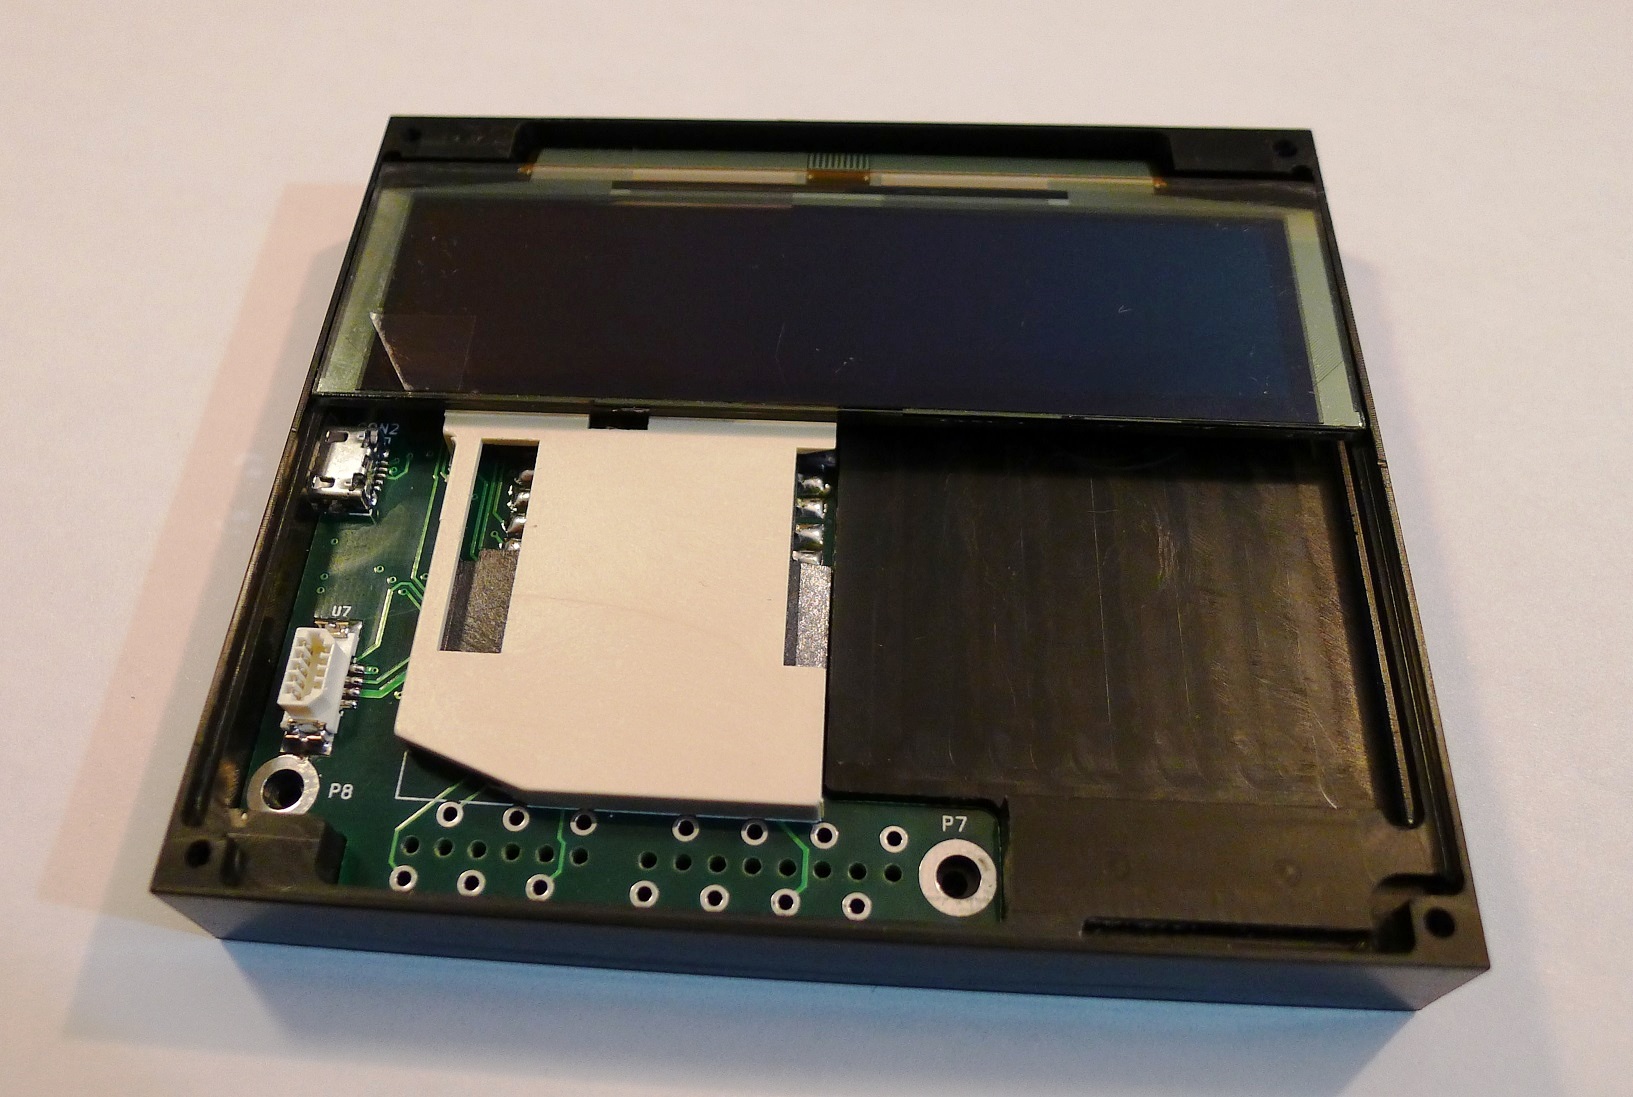
This is the bottom PCB, containing the main micro-controller, the Arduino headers and the FPC connector for the OLED screen. Finding low profile standard .1″ female connectors was one of our longest Google searches. The ones you can see above are pass-through connectors, which means that the pins can go through the PCB.
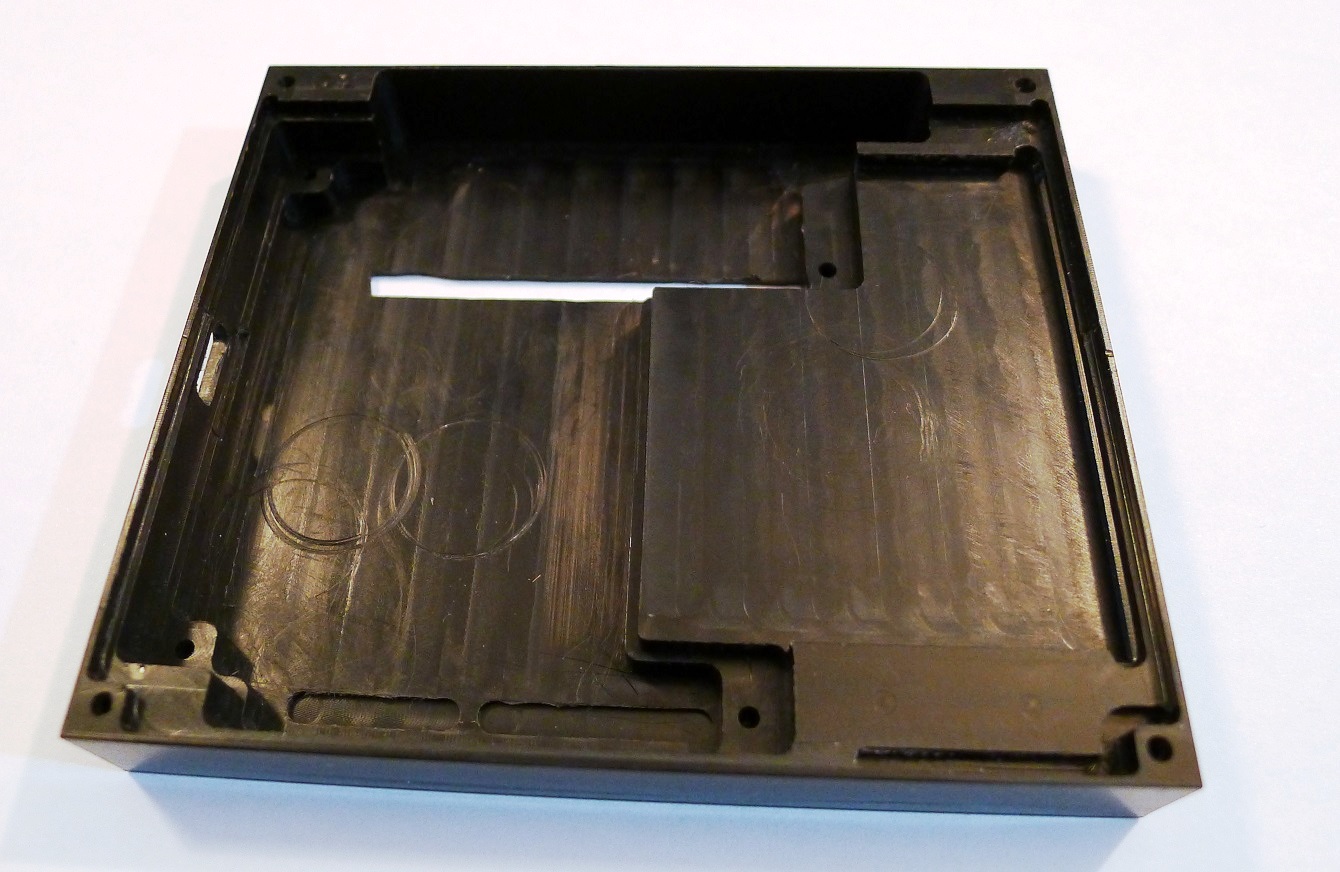
This is the CNC-milled prototype case. On the bottom you may notice two slots having a smaller depth to the other end, positioned right on top of the Arduino connectors. As previously mentioned in our Developed on Hackaday articles, we want to give the final users the ability to convert their secure password keeper into an Arduino platform. As you may have guessed, converting the Mooltipass will be as simple as cutting this thin plastic layer (see top of the picture) to access the Arduino headers and unlock the platform.
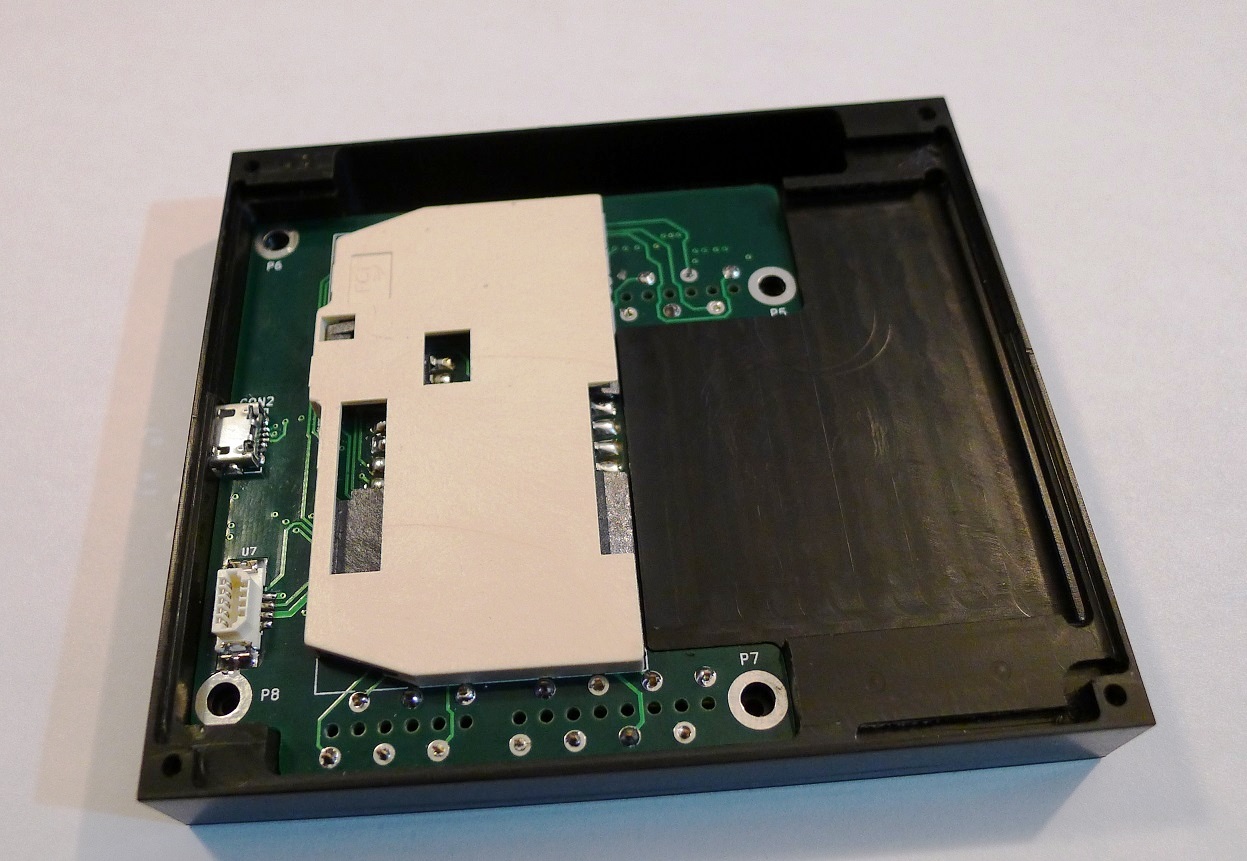
This is how the bottom PCB fits into the case. 4 screws can be used to keep everything in place. The large elevated plastic area serves as a flat surface for the smartcard:
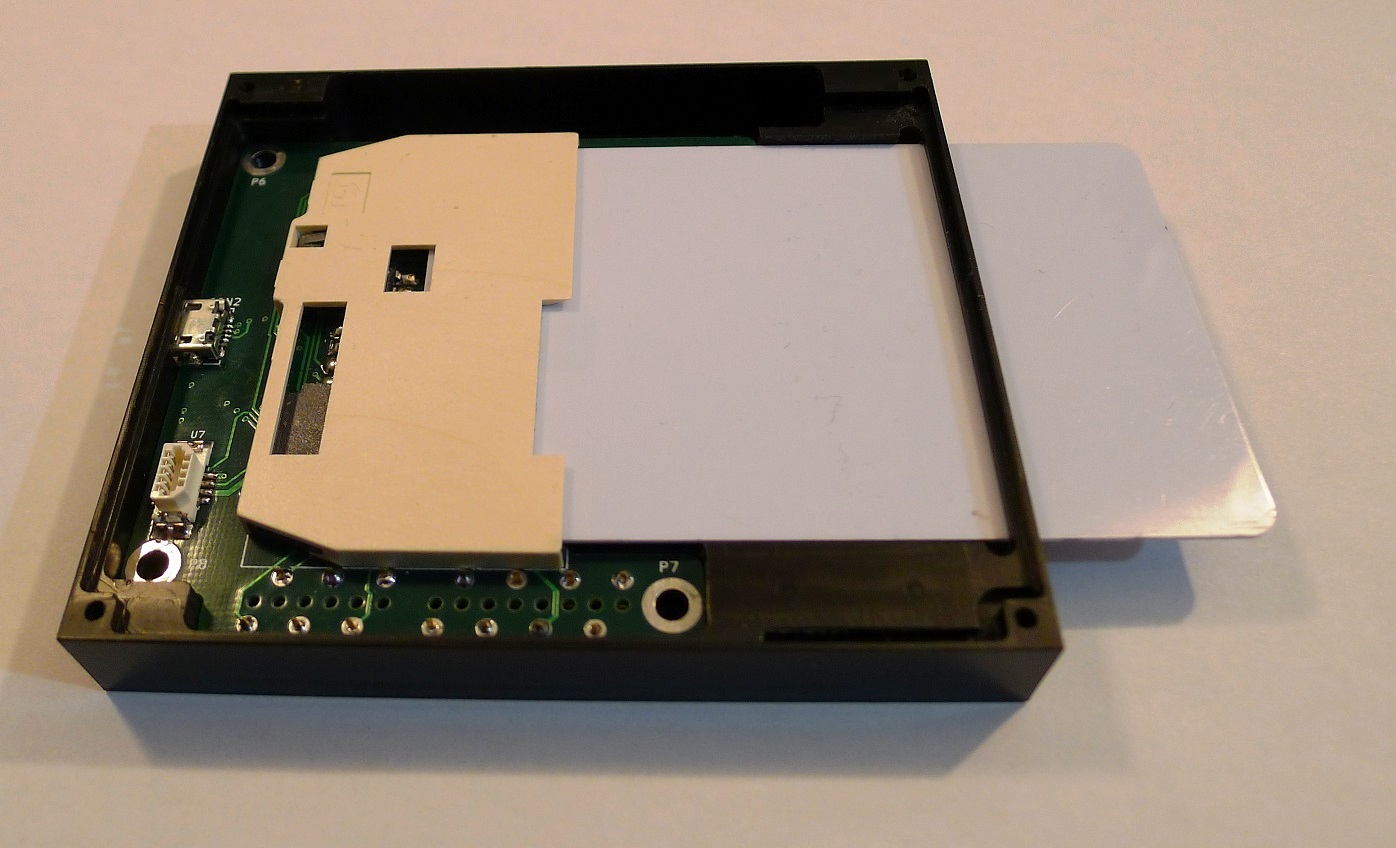
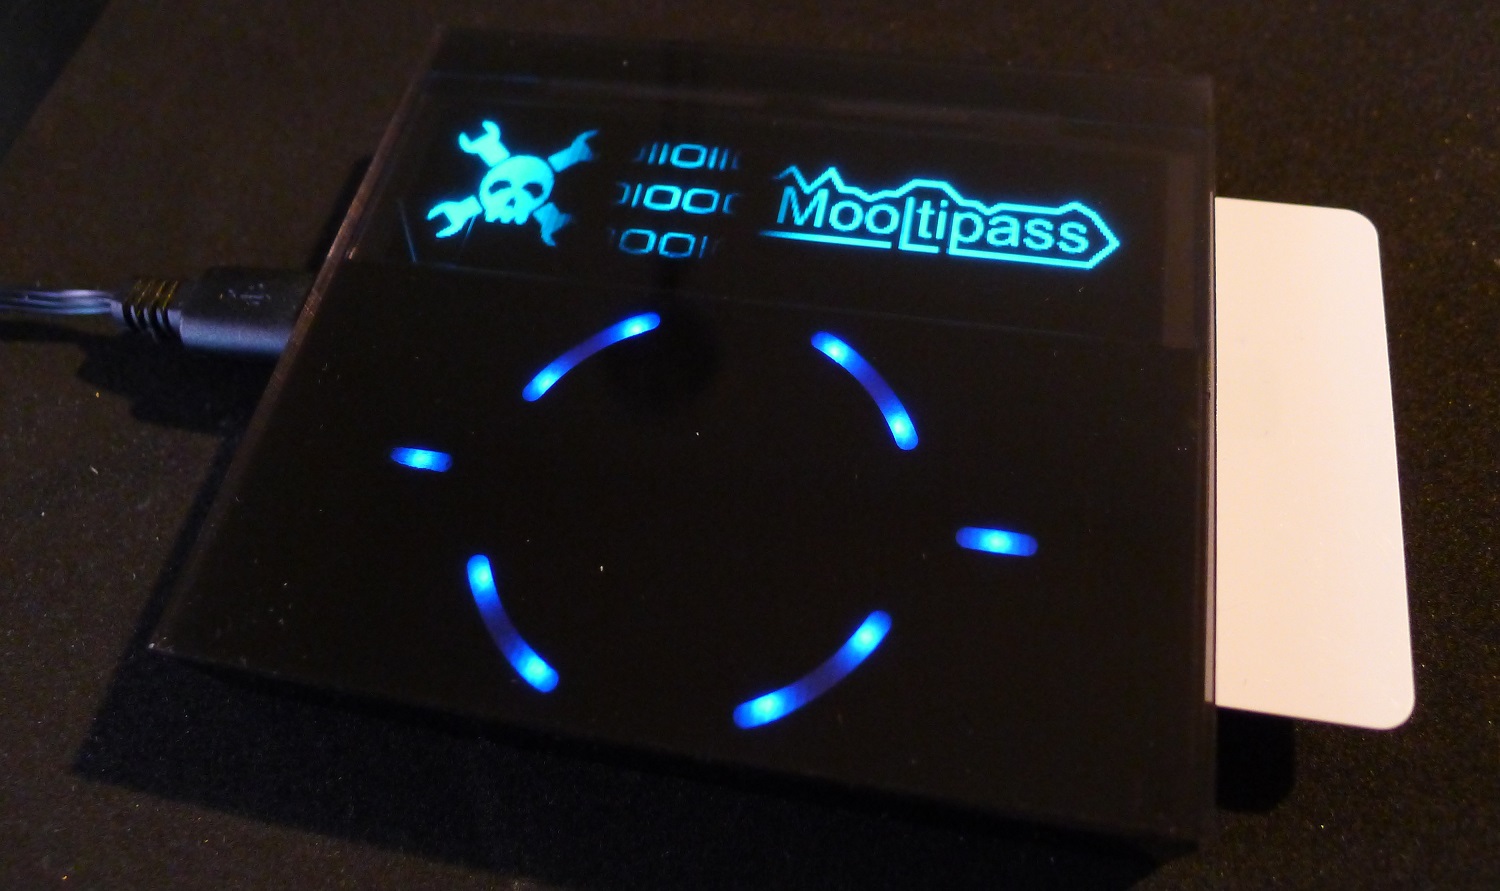
The OLED screen then rests on the case’s sides:
Enough space is left behind the screen for the flex PCB to comfortably bend. Finally, the top board fits in the remaining space and the acrylic panel is put on top of the assembly:
As our last article stated, we obviously still have some things to perfect. In the meantime, we are going to hand solder a few prototypes and ship them out to our current developers.
Want to stay informed? You can join the official Mooltipass Google Group or follow us on Hackaday Projects.
Filed under: Featured, hardware


The most advanced Lamp/Speaker is open source and also Arduino at heart
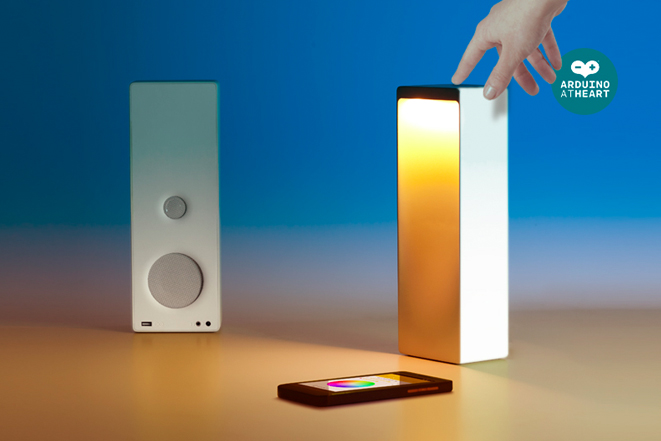
Interacting with objects in a new way has always been the main focus of Digital Habits, a design studio based in Milan. Today we are proud to announce they’ve become a partner of the Arduino At Heart program with their new project called Cromatica (it was exhibited at the coveted Fuorisalone Milan Design Week in the Superstudio Temporary Museum for New Design and started the crowdfunding campaign just some days ago!).
Cromatica is half speaker and half desk lamp: it can be controlled through a natural gestural interface, touch sensors or remotely via the Cromatica Android and iOS app. Designed to deliver both light and sound functions, Cromatica features wireless 4.0 Bluetooth connection for streaming music and a RGB lamp for multiple ambient effects.
Cromatica is embedded with an Arduino allowing for a highly digital, multi-sensory music and desktop working experience. It blends light and sound functionalities in unexpected ways, taking IoT products to a new level of quality. For example you can download the app for natural awakening: light will rise and music streaming will start allowing you to wake up to your favourite playlist, perfect for early mornings.
Take a look at the video for the Natural Interaction:
In the video below you can see how you can create your favorite ambient to match with your mood:
Innocenzo Rifino, Director of Digital Habits, told us:
“The Cromatica is a multi-purpose light-speaker but it is also our vision of the evolution of electronics, a vision that is moving in a more human and open direction. Crowdrooster have helped tremendously by opening our product up to a wider community whilst giving us the chance to generate enough funding to share our concepts more widely.”
The Cromatica is also true to its maker roots being Open Source and hackable, opening the doors for endless innovation from the maker community as it can be adapted to integrate with other tech and the Internet of Things. To enable this there will be a special ‘Maker Edition’ campaign reward complete with digital file to 3D print the shell.
Take a look at their campaign Crowdrooster and make your pledge!
Crowdrooster, the new ‘all tech’ crowdfunding site, introduced Cromatica as the first maker project available for funding on the site.