Posts with «arduino» label
The Fridge Hacking Guide by BrewPi

The team behind BrewPi are at it again! This time they have created an online guide showing how to convert a min-fridge into a Raspberry Pi & Arduino controlled fermentation chamber. In it, they describe 3 possible options:
- Option 1: Make a simple switched power cord, without hacking into the fridge electronics.
- Option 2: Make a switched power cord, but also override or remove the thermostat.
- Option 3: Rip out the thermostat and fully integrate the SSRs into your fridge (which is what [Koen] and [Elco] did).
First things first though. They had to clean the fridge. And depending on they got it or how long it has been unplugged for, the inside might have been pretty rank and disgusting from mold growing out of every corner. This took a good hour or so to clean properly lest the brewing process get infected with external grossness. This is all worth it because a well-controlled fermentation chamber results in a superior batch of beer.
With cleaning behind them the team added some temperature sensors to measure the beer and fridge levels. [Koen] and [Elco] suggest using the OneWire distribution board that comes with their BrewPi kit for this. Then, the cables were routed through the fridge and take control of the compressor.

Because [Koen] and [Elco] decided to go with the SSR method, the good news was: they didn’t need to hack into the start relay, and just left it as it is. But, they did need to gain access to the compressor and make a few changes. For one, the two SSR’s will be added with one of the AC terminals connected to LIVE (brown) and the other to the heater and the compressor.
No matter which method is chosen though, the end product will allow anyone to monitor and easily control the temperature range of your micro-brew, along with being able to log data and produce web-embedded graphs like the one shown below. It works by using the Arduino attached to run the temperature control algorithm autonomously. And, the Raspberry Pi adds stability.

Filed under: Beer Hacks
Repurposed Laptop Batteries With a Twist

Lithium ion batteries are becoming more and more common these days, but some of the larger capacity batteries can still carry a pretty hefty price tag. After finding Acer’s motherboard schematics online and doing a little reverse-engineering, [Tiziano] has found a way to reuse batteries from his dead laptop, not only saving the batteries from the landfill but also cutting costs on future projects.
These types of batteries have been used for many things in the past, but what makes this project different is that [Tiziano] is able to monitor the status of the batteries and charge them using I2C with an Arduino and a separate power supply, freeing the batteries from the bonds of the now-useless laptop.
With this level of communication between the microcontroller and the battery pack, there is little chance of the batteries catching on fire when they’re used in another project. Since the Arduino can also monitor the current amount of charge in the batteries, there is also a reduced risk that they will be damaged from under- or over-charging.
This wasn’t just as simple as hooking up the positive and negative leads of a power supply to the battery. [Tiziano] also had to model the internal resistance of the motherboard that the battery expects to see, and get the supply voltage just right so the battery’s safety protocols wouldn’t kick in to prevent them from charging. After a few other hurdles were jumped, [Tiziano] now has a large capacity lithium ion battery at his disposal for any future projects.
Filed under: laptops hacks
Solar Powered Lawn Mower Cuts the Grass So You Don’t Have To

It takes a lot of power and energy to keep grass levels down to an appropriate level; especially when it’s hot out. If cool glasses of lemonade aren’t around, the task at hand may not be completed any time soon causing the unkempt blades of green (or yellow) vegetation outside to continue their path of growth towards the sun.
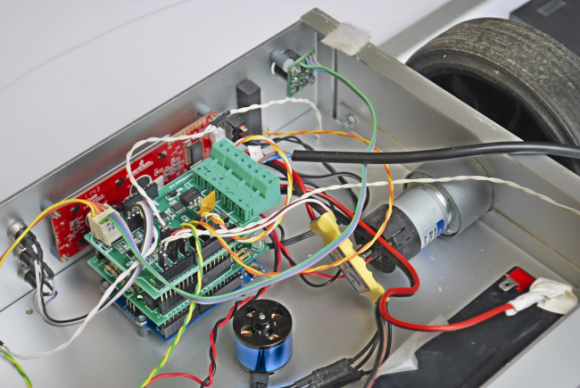
Instead of braving the oven-like temperatures which will inevitably drench the person in sweat, this solar powered robot has been created ready to take on the job. With the heart of an Arduino, this device shaves down the grass on a regular basis, rather than only chopping down the material when it gets too long. This helps to save electricity since the mower is only dealing with young and soft plants whose heads are easily lopped off without much effort.
Internally, the robot’s circuitry interfaces with an underground wiring system that defines the cutting zones within the lawn, and proves to be a simple, accurate, and reliable approach to directing the robot where to go. If the device travels under a shaded area, a battery kicks in supplying energy to the engine. When sunlight is available, that same battery accumulates the electricity, storing it for later.

There is also an interesting mechanism in place that allows the controller to detect if the wheels are moving properly or if one or more of them have locked up. This is done by using a reed sensor that has been added near the rear-pivoting wheel which is then operated by a small magnet that is inserted into that same wheel.
Obstacle recognition is accomplished in the front by an ultrasonic sensor that is connected to the I2C BUS. A brushless motor, used in the field of aeromodelling, was coupled into a cutting blade. With everything set up, the solar powered lawn mower is ready to be unleashed into the outside world of unsuspecting, growing plants.
Now sit back, relax, and let the robot do the work for you.
For more grass cutting related hacks, be sure to check out this remote-controlled lawn mower, and this monster truck lawn tractor that can go through water.
Filed under: tool hacks
Arduino SPI Library Gains Transaction Support

Transaction SPI Timing
To prevent data corruption when using multiple SPI devices on the same bus, care must be taken to ensure that they are only accessed from within the main loop, or from the interrupt routine, never both. Data corruption can happen when one device is chip selected in the main loop, and then during that transfer an interrupt occurs, chip selecting another device. The original device now gets incorrect data.
For the last several weeks, [Paul] has been working on a new Arduino SPI library, to solve these types of conflicts. In the above scenario, the new library will generate a blocking SPI transaction, thus allowing the first main loop SPI transfer to complete, before attempting the second transfer. This is illustrated in the picture above, the blue trace rising edge is when the interrupt occurred, during the green trace chip select. The best part, it only affects SPI, your other interrupts will still happen on time. No servo jitter!
This is just one of the new library features, check out the link above for the rest. [Paul] sums it up best: “protects your SPI access from other interrupt-based libraries, and guarantees correct setting while you use the SPI bus”.
Filed under: Arduino Hacks
20 Arduino ZERO Dev. Edition available for beta-testing – Join us!

Last May at Maker Faire Bay Area Massimo Banzi introduced our new board to the open source community:
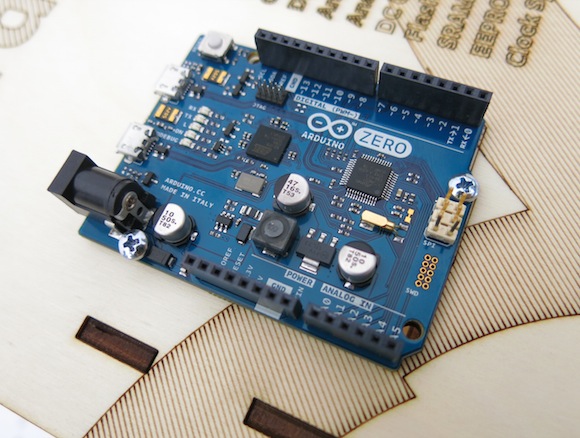
The Arduino Zero, developed in collaboration with Atmel, is a simple and powerful 32-bit extension of the platform established by Arduino UNO. The Zero board aims to provide creative individuals with the potential to realize truly innovative ideas for smart IoT devices, wearable technology, high-tech automation, crazy robotics, and projects not yet imagined. The board is powered by Atmel’s SAMD21 MCU, which features a 32-bit ARM Cortex® M0+ core.
After the great experience we’ve been having with the beta-testing of the the Arduino TRE, we are happy to announce that starting today a limited batch of 20 Arduino ZERO is available for people wanting to join us in the process of beta-testing it..
The ideal beta-tester has time and interest in working on some specific issues we hope to accomplish with the beta-testing: we set up a list of tasks including writing examples, testing libraries and external hardware, and making projects that can be completed in a variety of timeframes.
Ultimately our goal is to make the ZERO welcoming to non-technical customers and useful for tech-savvy customers at the same time, like all of our products. To that end, we’d like feedback from you, as beta testers, about where we could simplify for beginners and explain or document better.
If you want to take part and feel you can spend some time on it, fill this application form by the 17th of August.
By the 21st of August we are going to contact 20 people out of those filling the application. They will receive a coupon to get the Arduino ZERO Developer Edition for free on the Arduino Store.
We will also send them an invite to a Basecamp project where they can get started with the program and sign up for tasks and projects according to their interests, skill-set and time availability.
The beta-testing phase is going to last 1 month (ending around the 20th of September).
Feel like joining us? Fill the form now!
Laser Projected Christmas Lights

It’s August, and of course that means that it’s time for retail stores to put up their Christmas decorations! But seriously, if you’re going to do better than the neighbors you need to start now. [Joey] already has his early start on the decorations, with a house-sized light show using LED strips and a laser projector that he built last Christmas.
What started off as a thought that it would be nice to hang a wreath over the garage soon turned into a laser projector that shows holiday-themed animations on the front of the house. The project also includes a few RGB LED strips which can match the colors displayed by the projector. The LEDs are powered from a custom-built supply that is controlled by a laptop, and the program that runs on the computer averages the colors from the video signal going to the projector which lights up the LED strips to match the projected image. This creates an interesting effect similar to some projects that feature home theater ambient lighting.
The only major problem [Joey] came across was having to account for the lasers’ motion in the projected patterns, which was causing the computer to read false values. This and a few other laser-related quirks were taken care of with a bit of programming to make sure the system was functioning properly. After that it was a simple matter of attaching the projector to the roof and zip-tying the LED strips to the eaves of the house.
The projector is weatherproof, has survived one harsh winter already, and can be up and running for any holiday. With Halloween right around the corner, this could be a great way to spice up some trick-or-treating. Check out the video after the break to see this setup in action.
Filed under: Holiday Hacks
Electricity Monitoring with a Light-to-Voltage Sensor, MQTT and some Duct Tape

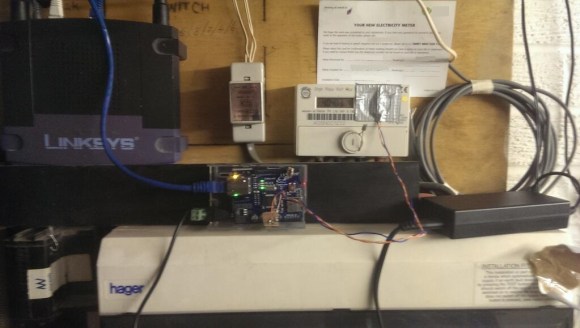
When it comes down to energy management, having real-time data is key. But rarely is up-to-the-minute kilowatt hour information given out freely by a Utility company, which makes it extremely hard to adjust spending habits during the billing cycle. So when we heard about [Jon]‘s project to translate light signals radiating out of his meter, we had to check it out.
From the looks of it, his hardware configuration is relatively simple. All it uses is a TSL261 Light-to-Voltage sensor connected to an Arduino with an Ethernet shield attached. The sensor is then taped above the meter’s flashing LED, which flickers whenever a pulse is sent out indicating every time a watt of electricity is used. His configuration is specific to the type of meter that was installed by his Utility, and there is no guarantee that all the meters deployed by that company are the same. But it is a good start towards a better energy monitoring solution.
And the entire process is documented on [Jon]’s website, allowing for more energy-curious people to see what it took to get it all hooked up. In it, he describes how to get started with MQTT, which is a machine-to-machine (M2M)/”Internet of Things” connectivity protocol, to produce a real-time graph, streaming data in from a live feed.

Now, with all this valuable information, other applications can be built on top of it. Interfacing with something like the Pinoccio microcontroller system can allow for devices to be turned off during peak-power times, helping to reduce the billing price at the end of the month.
Energy-intelligence platforms like this assist in conserving electricity while keeping the rate-payer consistently informed of their power usage habits. A real win, win. However, we still need to figure out how to (legally) extract the data from other types of meters.
One example is to harvest the information wirelessly with a special USB dongle to gather the data emitting from the Utility meter. But this only works for that brand of meter. Another solution is to read infrared flashes with an AVR, a resistor, a capacitor, and a phototransistor, which is similar to what [Jon] created above.
So, what kind of meter do you have? And, do you think there is a better way to extract the kWh data? Let us know in the comments, and let’s see what we can come up with.
Filed under: home hacks
How long can you store food for? Just measure its water activity!
BetaWolf is a scientist fascinated by physics, chemistry, mathematics and especially the symmetry of phenomena in nature and the way humans describe them in the form of fundamental laws. He submitted to our blog a project focused on measuring water activity powered by Arduino Pro Mini :
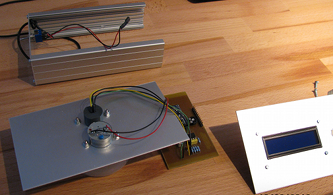
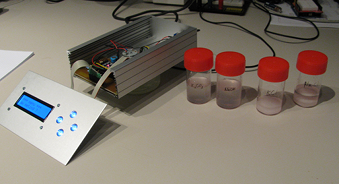
Water activity? And why would I want to measure it? Food always contains a certain amount of ‘free’ or unbound water. The more unbound water is present, the easier it is for micro-organisms like fungi to grow. Hence, the shelf life of food products is shortened by the presence of unbound water. Water activity is a physical quantity that describes the amount of unbound water in a product. Therefore, by measuring the water activity, you can estimate the shelf life of food. Only problem is the incredible amount of money you have to pay for a commercial water activity meter. In this article I describe an easy and cheap water activity meter on the basis of a humidity sensor, an NTC, and an Arduino Pro Mini.
Check his blogpost for all the details about this project.