Posts with «power meter» label

Hackaday Prize Entry: Smart USB Hub And IoT Power Meter

[Aleksejs Mirnijs] needed a tool to accurately measure the power consumption of his Raspberry Pi and Arduino projects, which is an important parameter for dimensioning adequate power supplies and battery packs. Since most SBC projects require a USB hub anyway, he designed a smart, WiFi-enabled 4-port USB hub that is also a power meter – his entry for this year’s Hackaday Prize.

[Aleksejs’s] design is based on the FE1.1s 4-port USB 2.0 hub controller, with two additional ports for charging. Each port features an LT6106 current sensor and a power MOSFET to individually switch devices on and off as required. An Atmega32L monitors the bus voltage and current draw, switches the ports and talks to an ESP8266 module for WiFi connectivity. The supercharged hub also features a display, which lets you read the measured current and power consumption at a glance.
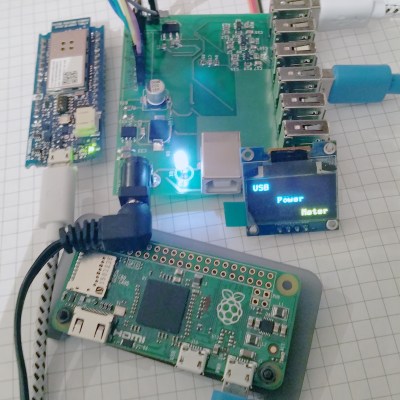
Unlike most cheap hubs out there, [Aleksejs’s] hub has a properly designed power path. If an external power supply is present, an onboard buck converter actively regulates the bus voltage while a power path controller safely disconnects the host’s power line. Although the first prototype is are already up and running, this project is still under heavy development. We’re curious to see the announced updates, which include a 2.2″ touchscreen and a 3D-printable enclosure.


Filed under: The Hackaday Prize

Simple USB Power Meter

The USB interface is being increasingly used as a power supply and charging port for all kinds of devices, besides data transfer. A meter to measure the electrical parameters of devices connected to a USB socket or charger would be handy on any hacker workbench. The folks at [electro-labs] designed this simple USB power meter which does just that.

The device measures voltage and current and displays them, along with the calculated power, on the small 0.5″ OLED display. The circuit is built around an ATmega328. To keep the board size small, and reduce component count, the microcontroller is run off its internal 8MHz clock. A low-resistance shunt provides current sensing which is amplified by the LT6106 a high side current sense amplifier before being fed to the 10 bit analog port of the ATmega. A MCP1525 precision voltage reference provides 2.5V to the Analog reference pin of the microcontroller, resulting in a 2.44mV resolution. Voltage measurement is via a resistive divider that has a range of up to 6V. An Arduino sketch reads voltage and current data on the analog ports and displays measurements on the display. The measured data is averaged to filter out noise.

The OLED display has a SPI interface and requires the u8glib library. The project uses all SMD parts, but is fairly easy to assemble by hand and could be a nice starter project if you want to wet your feet on surface mount assembly techniques. It’s designed using SolaPCB EDA software, and the source files for schematic and board layout are available as a ZIP archive. Download the BoM and Arduino code and you have everything needed to build this nifty device.

Thanks to [Abdulgafur] for sending in this tip. And if you are looking for a more comprehensive solution, check the awesome Friedcircuits USB Tester which we reviewed earlier and is available in the Hackaday Store.


Filed under: Arduino Hacks

Electricity Monitoring with a Light-to-Voltage Sensor, MQTT and some Duct Tape

When it comes down to energy management, having real-time data is key. But rarely is up-to-the-minute kilowatt hour information given out freely by a Utility company, which makes it extremely hard to adjust spending habits during the billing cycle. So when we heard about [Jon]‘s project to translate light signals radiating out of his meter, we had to check it out.

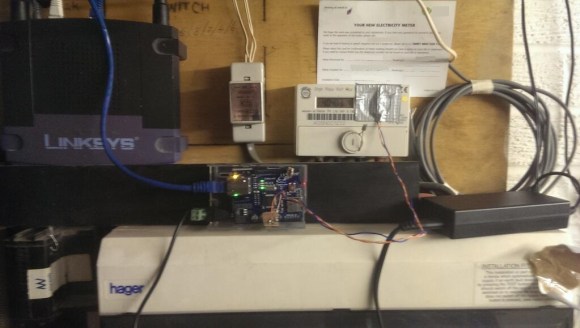
From the looks of it, his hardware configuration is relatively simple. All it uses is a TSL261 Light-to-Voltage sensor connected to an Arduino with an Ethernet shield attached. The sensor is then taped above the meter’s flashing LED, which flickers whenever a pulse is sent out indicating every time a watt of electricity is used. His configuration is specific to the type of meter that was installed by his Utility, and there is no guarantee that all the meters deployed by that company are the same. But it is a good start towards a better energy monitoring solution.

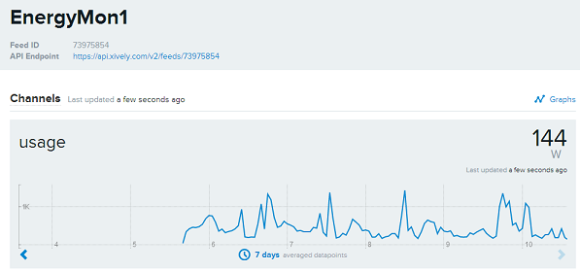
And the entire process is documented on [Jon]’s website, allowing for more energy-curious people to see what it took to get it all hooked up. In it, he describes how to get started with MQTT, which is a machine-to-machine (M2M)/”Internet of Things” connectivity protocol, to produce a real-time graph, streaming data in from a live feed.

Now, with all this valuable information, other applications can be built on top of it. Interfacing with something like the Pinoccio microcontroller system can allow for devices to be turned off during peak-power times, helping to reduce the billing price at the end of the month.

Energy-intelligence platforms like this assist in conserving electricity while keeping the rate-payer consistently informed of their power usage habits. A real win, win. However, we still need to figure out how to (legally) extract the data from other types of meters.

One example is to harvest the information wirelessly with a special USB dongle to gather the data emitting from the Utility meter. But this only works for that brand of meter. Another solution is to read infrared flashes with an AVR, a resistor, a capacitor, and a phototransistor, which is similar to what [Jon] created above.

So, what kind of meter do you have? And, do you think there is a better way to extract the kWh data? Let us know in the comments, and let’s see what we can come up with.


Filed under: home hacks

Sassor wants to let users know just how much electricity their gadgets are wasting (hands-on)

Everyone knows that their game consoles, appliances and HDTVs are energy vampires, and while Energy Star-certified products tell us which gadgets are more green-friendly than others, we still don't know just how much juice they're actually sucking down in a given day. Enter Sassor, a start-up from Japan that's created a system to monitor the electrical consumption of anything plugged into a wall outlet -- from PCs to refrigerators. It tracks power consumption using current sensors clamped onto power cords, which communicate wirelessly via ZigBee with an module (based on an Arduino design) that uploads the info to the cloud.

Through the web portal, users can track energy consumption on a per-device basis in real-time, letting them figure out which gadgets are most responsible for their sky-high utility bill -- and take appropriate steps to correct the problem. Currently, it's aimed solely at businesses, but once Sassor's on its feet, funding-wise, the plan is to also put them in people's homes. The company told us it'll ditch ZigBee in favor of a WiFi solution in such future iterations, and it'll make an SDK and the system APIs available to all so that people can program for the platform and improve it in ways currently not contemplated. Alas, there's neither a timetable nor a price for the consumer version just yet, but you can see some pictures of the hardware's innards below.

Sassor wants to let users know just how much electricity their gadgets are wasting (hands-on) originally appeared on Engadget on Mon, 18 Jun 2012 21:59:00 EST. Please see our terms for use of feeds.

Permalink | Email this | Comments