Posts with «arduino» label

Hackaday Prize Entry: The Green Machine

For Hackers, rapid prototyping is made easier using basic building blocks such as the Raspberry Pi, Arduino and the huge variety of add on shields for home brew projects. But we don’t see too many real world Industrial applications or machines built using these off-the-shelf electronics. [SlyScience] built The Green Machine – an industrial grade, automated spray painting device to help coat polycarbonate tubes consistently.

The Green Machine is essentially a linear drive that can move a spray gun across a spinning clear tube and coat it evenly with the desired color. These tubes are used as color filters – they slide over standard T5, T8 or T12 fluorescent lamps – and are used in advertising, special effects, films and similar applications. For almost 10 years prior to this machine, the task was done manually. The HPLV (high pressure, low volume) spray gun used for this process needed skilled hands to get consistent results. It was easy to ruin a tube and cleaning them was not possible. [SlyScience] figured things out on the go – teaching himself and figuring out all of the software and hardware pieces of the puzzle. The welded steel frame is about the only “custom” part in this build. Everything else is COTS. Check out the video of The Green Machine in action below, and if you have any tips to help improve the build, chime in with your comments.


The HackadayPrize2016 is Sponsored by:

Filed under: The Hackaday Prize

Multipurpose Robot For the Masses

As the cost of almost every technology comes falling down, from electronics to batteries to even tools like 3D printers, the cost to build things formerly out of reach of most of us becomes suddenly very affordable. At least, that’s what [John Choi] has found by building a completely DIY general purpose robot for around $2000.

OK, so $2000 isn’t exactly “cheap” but considering that something comparable (like Baxter) costs north of what a new car would cost means that [John] has dropped the price for a general-purpose robot by an order of magnitude. And this robot doesn’t skimp on features, either. It has a platform that allows it to navigate rooms, two manipulating limbs with plenty of servos, a laptop “head” that allows for easy interface, testing, and programming, and an Arduino Mega that allows it to interface with any sensors or other hardware with ease. It’s also modular so it can be repaired and transported easily, and it uses open source software and open hardware so it’s easy to build on.

This robot is an impressive piece of work that should help bring this technology to more than just high-end factories and research labs. They’ve already demonstrated the robot watering plants, playing the piano, picking things up, and many other tasks. We’d say that they’re well on their way to their goal of increasing the number of students and hobbyists who have access to this technology. If the $2k price tag is still too steep, though, there are other ways of getting into robotics without diving headfirst into a Baxter-like robot.


Filed under: robots hacks

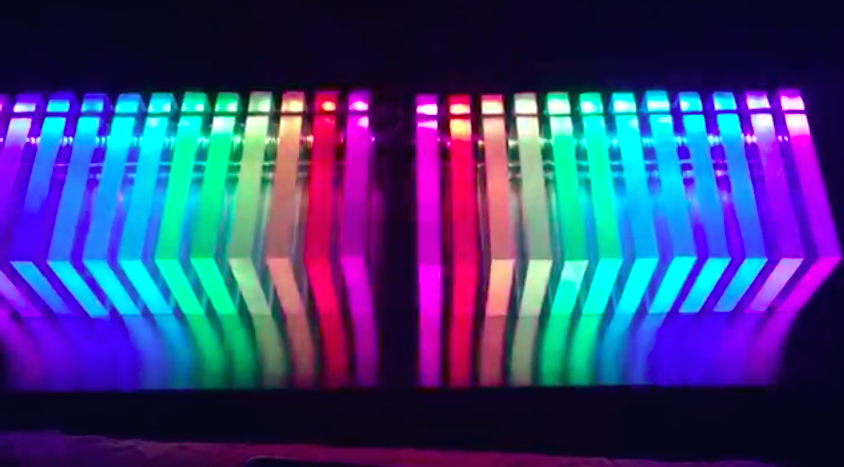
Watch 24 colorful acrylic blocks dance to music

Lights synchronized to music, what’s not to love? YouTuber “Robert Robert” has done just that using 24 acrylic blocks, an Arduino Uno, four 12-pixel WS2812B addressable LED strips, an Adafruit electret microphone amplifier, a 12000mAh external battery pack, and some code.

The blocks are divided into two sets of 12, held together by threaded rods and nuts, with LED strips hot glued to the back. A 60cm x 40cm stainless steel shelf rests underneath to reflect the light back.

In terms of code, the project uses Adafruit’s NeoPixel library:

The first part of the code is Adafruit’s own mic code which calibrates the sound level so that whether you’re using a big speaker or, as in the video, a tiny iPad speaker, the mic remains sensitive. The second part of the code maps the sound level onto 12 if statements so that when quiet it idles with the NeoPixel library rainbow but then as the sound level gets higher more effects are triggered. Within each if statement I have then included a random() function so that the display stays interesting. You can edit each individual strip pixel to create patterns in an infinite variety of ways and using the random () function you can keep on building so you never get bored. The code works best with music with a wide dynamic range (soft and loud parts).

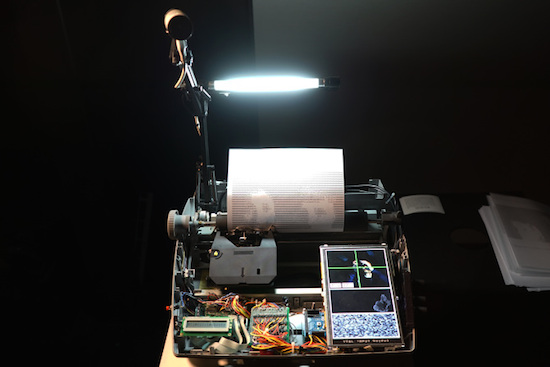
Hacked typewriter prints selfies as ASCII art

Last year, Moscow-based artist Dmitry Morozov — known by many as ::vtol:: — came up with a far less modern way of taking selfies. The Maker modified an old Brother SX-4000 typewriter to create portraits in the form of ASCII art.

The machine, called “i/o,” is controlled by an Arduino Mega and works by capturing an image using an iSight camera (with the help of a lamp for proper lighting), converting it into ASCII art using Pure Data and MAX/MSP, and then gradually printing it onto a piece of paper — one alphanumeric character at a time.

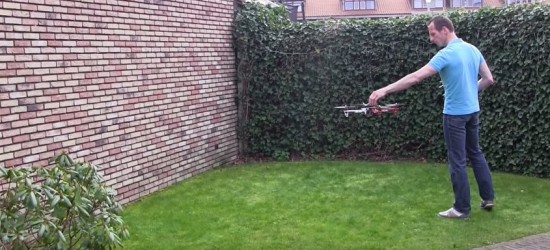
Teach your drone what is up and down with an Arduino

Gyroscopes and accelerometers are the primary sensors at the heart of an IMU, also known as an internal measurement unit — an electronic sensor device that measures the orientation, gravitational forces and velocity of a multicopter, and help you keep it in the air using Arduino.

Two videos made by Joop Brokking, a Maker with passion for RC model ‘copters, clearly explain how to program your own IMU so that it can be used for self-balancing your drone without Kalman filters,  libraries, or complex calculations.

Auto leveling a multicopter is pretty challenging. It means that when you release the pitch and roll controls on your transmitter the multicopter levels itself. To get this to work the flight controller of the multicopter needs to know exactly which way is down. Like a spirit level that is on top of the multicopter for the pitch and roll axis.

Very often people ask me how to make an auto level feature for their multicopter. The answer to a question like this is pretty involved and cannot be explained in one email. And that is why I made this video series.

You can find the bill of materials and code here.

Listen to an artist play the piano with a PC keyboard

German composer Oskar Schuster recently uploaded a YouTube video showing off a new project he is working on: an Arduino-controlled upright piano. Called Utopiano, it’s described as an electro-mechanical device that replaces the traditional mechanical piano action and enables him to control the 100-year-old instrument with a computer keyboard. Amazing!

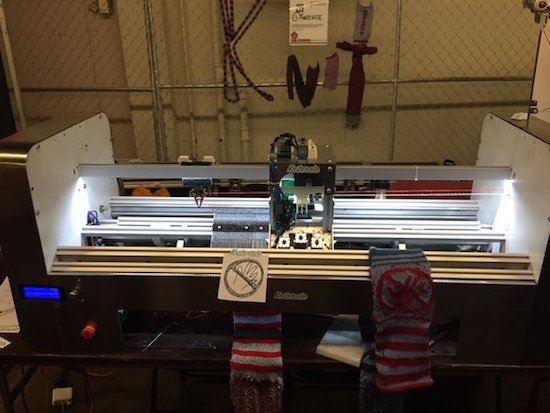
Kniterate is a 3D printer for clothes

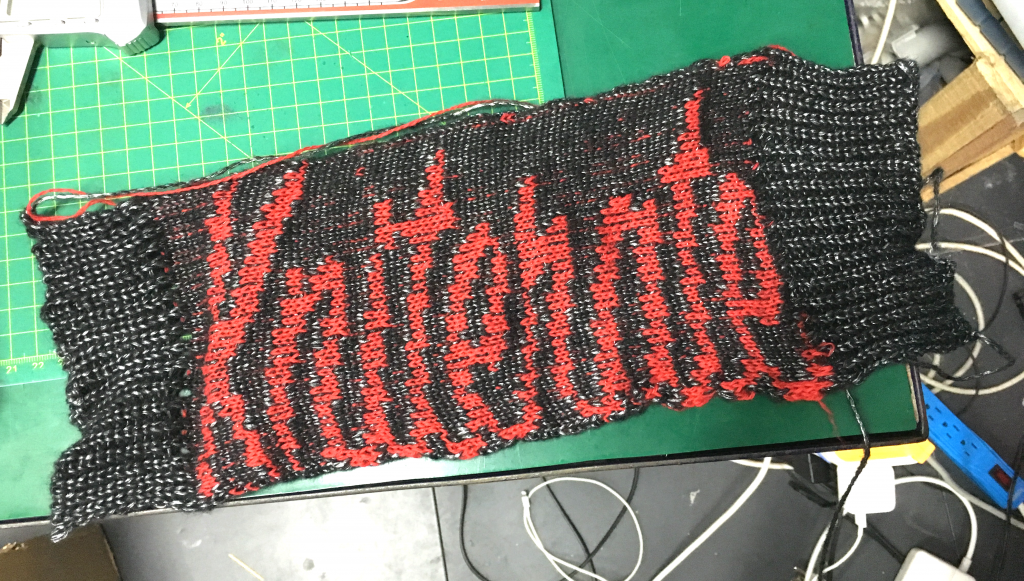
Why head to the store when you could simply create your outfits right at home with the touch of a button? That’s the idea behind London-based startup Kniterate, who has developed what they’re calling “the 3D printer for knitwear.”

The system features Photoshop-like software that enables Makers to easily design patterns using various templates, which are then imported over to the Arduino Mega-driven machine to knit socks, scarves, sweaters, ties, beanies, and other garments. According to the team, they are in the process of developing an online platform that’ll allow you to sketch and share your wardrobe with an entire community.

Kniterate, which was recently introduced at HAX’s demo day, is an evolution of founder Gerard Rubio’s Arduino-controlled OpenKnit project. His vision is to one day democratize textile manufacturing, and will take the next step in that journey when he launches the new age machine on Kickstarter in September. Until then, head over to its website here or watch Tested’s Maker Faire video below!


Quadrupede bluetooth Spider


After printing pieces to Prusa I3 is the new 4-legged spider with bluetooth comm :)


read more

Let's Make Robots 07 Jun 20:27
32 servo controler  6v  arduino  balance  battery  biped  bluetooth  fast  greek  grrobot  hands  head  hexapod  humanoid  led  legs  mg995  mini servo  move  one leg  program  relay  robot  robotics  servos  slow  ssc32  step  vb.net  walk  warior  

FarmBot is an open-source CNC farming machine

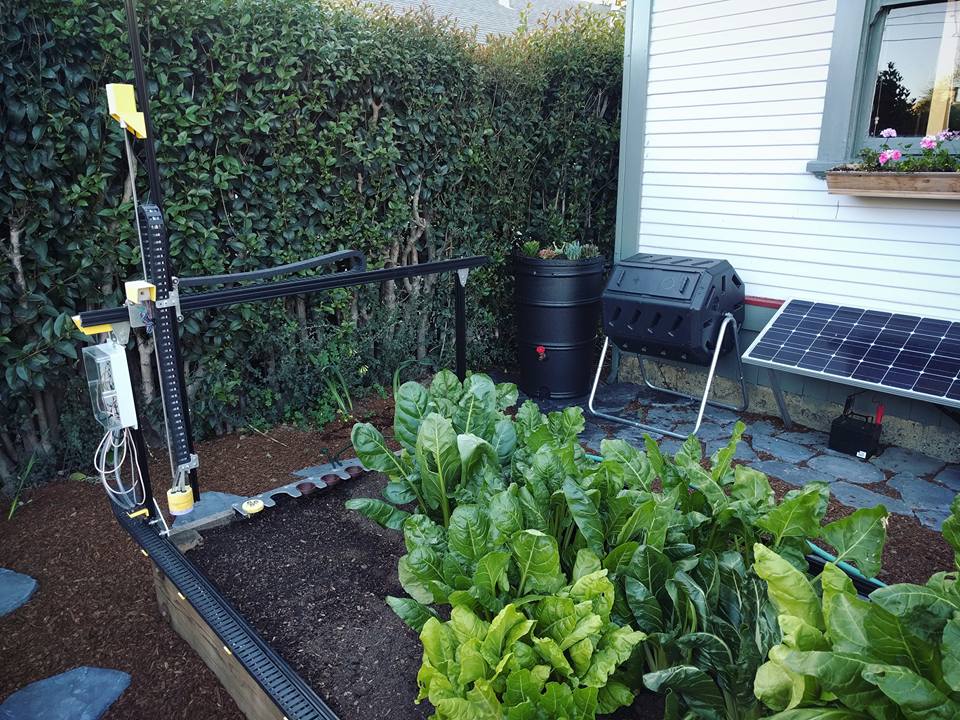
With hopes of reinventing the way food is grown, Rory Aronson has developed humanity’s first open-source CNC farming machine. The FarmBot Genesis — which will begin taking pre-orders in July — is capable of planting seeds and then watering them precisely.

Designed with the Maker community in mind, FarmBot is driven by an Arduino Mega 2560, a RAMPS 1.4 shield, NEMA 17 stepper motors, and a Raspberry Pi 3. What’s more, all of its plastic components can easily be 3D printed, while its flat connecting plates can be made with either a waterjet, plasma or laser cutter, a CNC mill, or even a hacksaw and drill press.

The three-axis machine employs linear guides in the X, Y, and Z directions, which allows for tooling such as seed injectors, watering nozzles, sensors, and weed removal equipment to be accurately positioned. Impressively, FarmBot can cultivate a variety of crops in the same area simulatenously. 

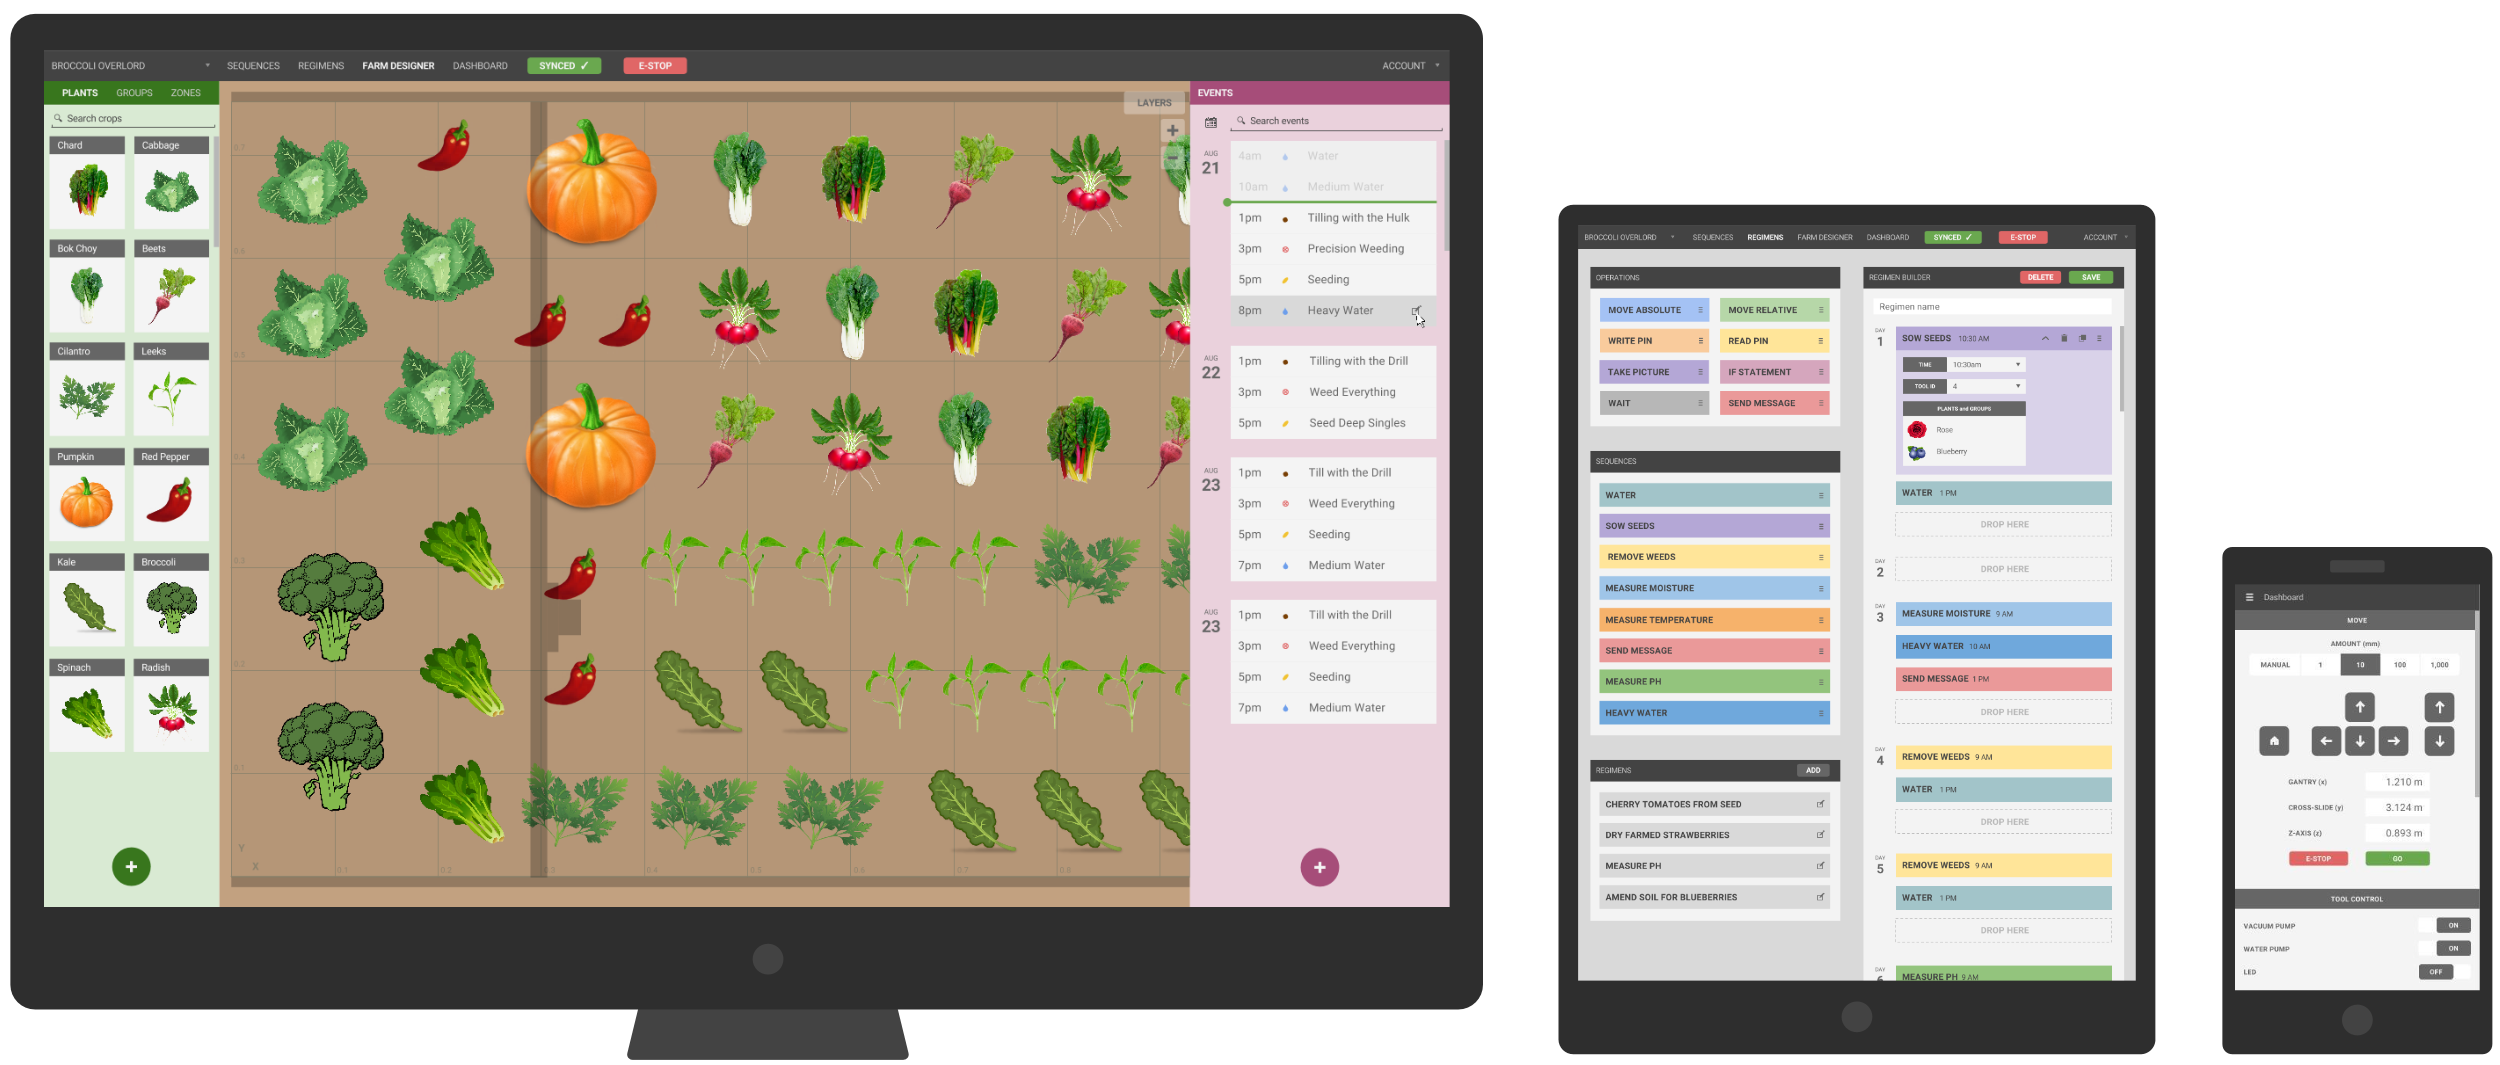
FarmBot is controlled via mobile device or laptop, while its web-based interface makes customizing your garden as simple as playing FarmVille. You can also build and schedule sequences by dragging and dropping basic operations, adjust the parameters to your liking, and save. Meanwhile, a decision support system adjusts water, fertilizer and pesticide regimens, seed spacing, timing, and other factors based on soil and weather conditions, sensor readings, location, and time of year. And of course, FarmBot can be manually operated in real-time as well.

Aronson’s vision is to make precision agriculture open and accessible to everyone. Each FarmBot Genesis can be modified and augmented to suit anyone’s unique growing style and needs. For instance, you can power your machine with renewable energy from a small off-the-grid solar panel, or install a barrel to store and use rainwater.

Add IoT capabilities to an IKEA night light with MKR1000

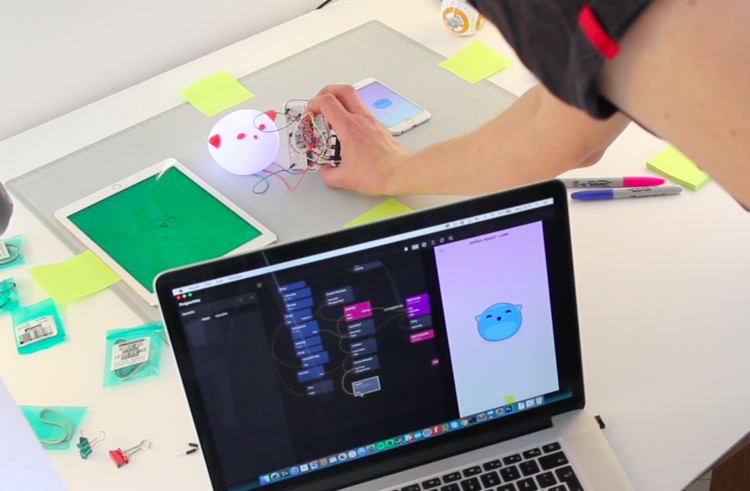
During a recent workshop, Swedish innovation studio Topp set out to create a platform for rapid prototyping with design and data. The team decided to take an existing product and retrofit it with IoT capabilities. For this, they selected an IKEA Spöka night light and hacked it with an Arduino MKR1000. The connected lamp is capable of reacting to its surrounding environment through sound, motion, and light, while an accompanying app is used to monitor and control intensity.

Traditionally data and physical interactions have been difficult to work with, often requiring the availability of early hardware or by constructing mockup data. However, to achieve quick iterations and a higher fidelity experiences for projects involving data, sensors, cloud, and other things typically unavailable to designers early on in projects, we’ve developed a tool called Noodl to help support a better way of working. We’re using Noodl as a foundational tool when we hack our night light.

A key function for this hack is to have the lamp and the phone connected to an IoT cloud broker. Bluetooth or other non-routable communications would not work with remote presence, so by using Wi-Fi and a public broker we could build a prototype that also works with multiple clients in a true IoT fashion.

The end result was a platform that makes use of cloud and data, which could be employed for a wide range of intelligent home devices ranging from a baby monitor to a morning alarm to a smart dimmer. You can read all about the project — along with instructions, code and components — on Topp’s page here.