Posts with «arduino» label

Lawn Da Vinci is an open-source, remote-controlled lawn mower

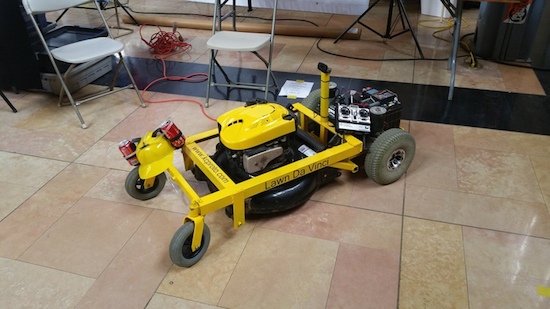
Inspired by the one seen in Honey, I Shrunk The Kids, Blake Hodgson has built a remote-controlled lawn mower of his own dubbed ”Lawn Da Vinci.”

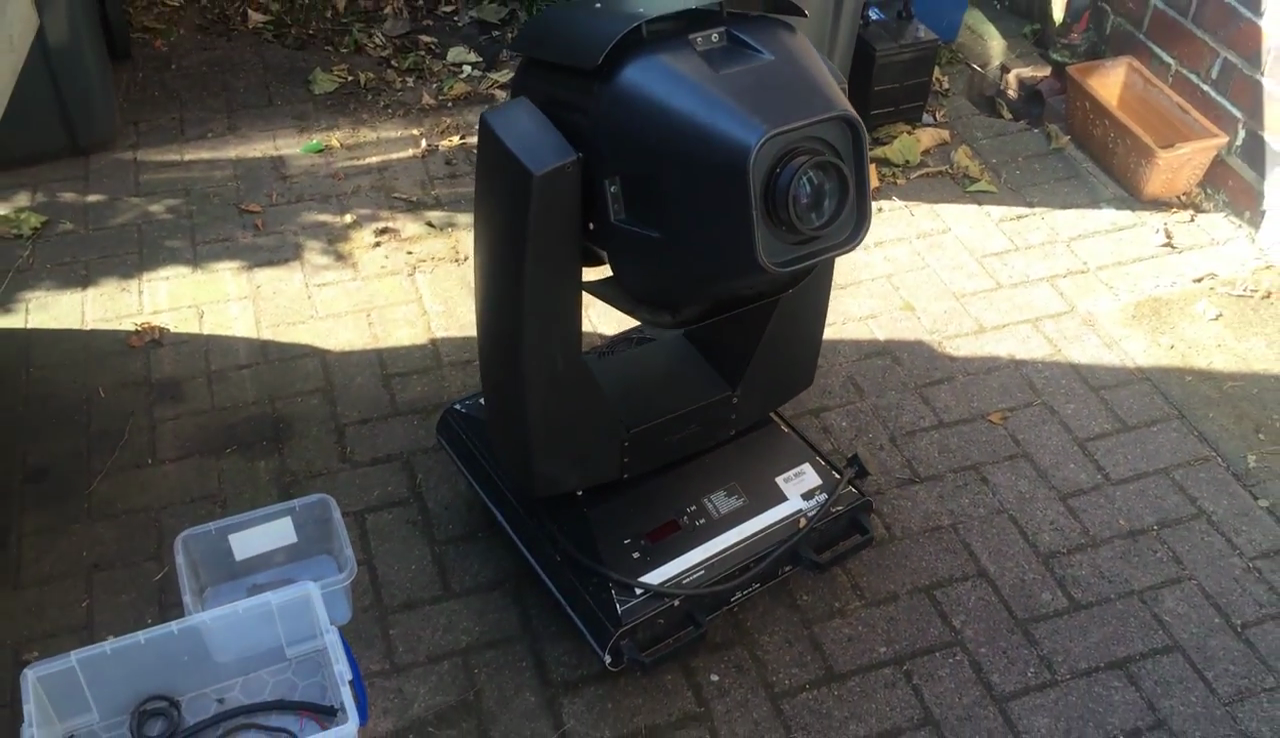
The robotic machine’s frame is made from angle iron and steel, while its wheels and motors were taken from a mobility scooter. Power is supplied by a pair of 12V car batteries wired in series, and it’s driven across the yard with an RC airplane remote.

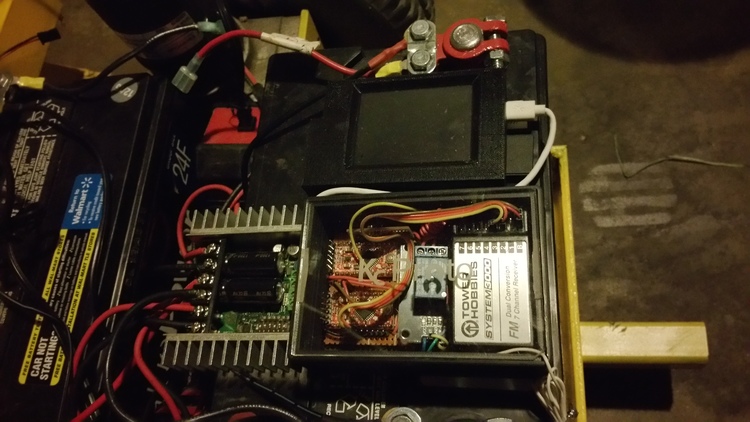
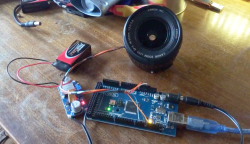
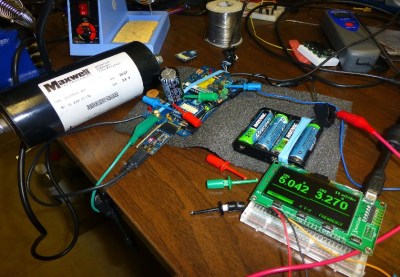
The Lawn Da Vinci has two Arduino Pro Minis and a Raspberry Pi for a brain–one Arduino is used for the motors and RC signal, the other for the kill switches. Meanwhile, the Raspberry Pi is tasked with streaming video from an attached webcam to his phone.

To improve reliability and reduce complexity, the motor driver now gets its signal directly from the RC receiver once it goes through the two relays controlled by the Arduino, which is always looking for a good signal. The Arduino and Raspberry Pi are powered off of a disassembled car cigarette lighter USB charger which takes the 12v of the batteries down to a clean 5v. I originally had it powered off of the Sabertooth but have better reliability this way. There are many ways to kill the motors.  You can turn the remote off, push the trainer button, left with the right joystick, or push a button separate key fob and all of these will kill it.

Rather not to push a mower around all summer long? Check out Hodgson’s entire project–complete with its code–on his blog here, or read more on Hackaday.

DIY Motion Control Camera Rig Produces Money-Shots On A Budget

Motion control photography allows for stunning imagery, although commercial robotic MoCo rigs are hardly affordable. But what is money? Scratch-built from what used to be mechatronic junk and a hacked Canon EF-S lens, [Howard’s] DIY motion control camera rig produces cinematic footage that just blows us away.

[Howard] started this project about a year ago by carrying out some targeted experiments. These would not only assess the suitability of components he gathered together from all directions, but also his own capacity in picking up enough knowledge on mechatronics to make the whole thing work. After making  himself accustomed to stepper motors, Teensies and Arduinos, he converted an old moving-head disco light into a pan and tilt mount for the camera. A linear axis was added, and with more degrees of freedom, more sophisticated means of control became necessary.

Using the Swift programming language, [Howard] wrote a host program automatically detects the numerous stepper and servo motor based axis and streams the position data to their individual Teensy LC based controllers. To the professional motion graphics artist , these shots aren’t just nice and steady footage: The real magic happens when he starts adding perfectly matched layers of CGI. Therefore, he also wrote some Python scripts that allow him to manually control his MoCo rig from a virtual rig in Blender, and also export camera trajectories directly from his 3D scenes.

On top of the 4-axis camera mount and a rotary stage, [Howard] also needed to find an electronic follow-focus mechanism to keep the now moving objects in focus. Since the Canon EF-S protocol had already been reverse engineered, he decided to tap into the SPI control bus between the camera and the lens to make use of its internal ring motor. Although the piezo motors in autofocus lenses aren’t actually built for absolute positioning, a series of tests revealed that a Canon EF-S 17-55mm IS USM lens can be refocused a few hundred times and still return to its starting position close enough. The caveat: [Howard] had to hack open the £600 lens and drill holes in it. In retrospect, he tells us, it’s a miracle that his wife didn’t leave him during the project.

After several iterations of mechanical improvements, the motion control rig is now finished, and the first clips have already been recorded and edited. They’re stunning. Only the 6-axis robot arm hiding in [Howard’s] basement tells us that he just warming up for the real game. Enjoy the video below, but don’t miss out on the full 3-part video documentary on how this project came to be.


Filed under: digital cameras hacks, video hacks

OMG, this DIY split flap display is awesome

Let’s face it, there’s something magical about split flap displays. Common throughout older airports and train stations, the electromechanical devices are used to show changeable alphanumeric text (e.g. arrival and departures), fixed graphics, or in Jonathan Odom’s case, Internet slang.

With three-letter abbreviations like BRB, LOL, OMG and SMH commonplace in today’s smartphone and online conversations, the Maker decided to bring text and animation back to its mechanical roots with his own split flap display. As you can see in the video below, an arcade button under each frame enables him to cycle through all 26 letters to spell out his thoughts in acronym form, while a fourth frame reveals an animation of the very first cat video (by Eadweard Muybridge).

Structurally, the DIY gadget consists of 3D-printed parts, laser-cut acrylic for the tongue, flaps, brackets, wheels and spars, and plywood for the base. Everything is assembled by hand using screws and nuts. In terms of electronics, an Arduino Uno and Adafruit Motor Shield control a set of servo motors.

The configuration I built has four modules, but you could build as many as you want and connect them. The Arduino motor shield has 16 channels, so if you want more than than that you’ll have to find another means of controlling the rotation.

Want one for your desk? You can find all the necessary files and code on its project page, and see the final product in action below!

Maker uses Arduino to get revenge on his noisy neighbors

For our throwback project of the week, we stumbled upon a YouTube video that dates all the way back to 2012. And while the viral clip itself (which has over 1.4M views) may be a few years old, the problem it solves is timeless.

Unfortunately, you don’t get to choose your neighbors; however, what can choose is how you put up with them. After growing tired of the folks next door failing to turn down their stereo, Maker “Jamil” came up with an ingenious way to put an end to the noisy behavior: fight the loud music with, well, even louder music.

As you can see in the video below, Jamil programmed an Arduino Uno with a microphone sensor to detect whenever the nearby resident’s tunes exceeded his preferred threshold. When this occurs, it triggers a CD player to play incredibly annoying music through his massive speakers. His track of choice? “Who Let the Dogs Out?” by The Baha Men.

Check Out This Amazing Ghostbusters Proton Pack

"Why worry? Each of us is wearing an unlicensed nuclear accelerator on his back." That could be you with this DIY Ghostbusters Proton Pack!

Read more on MAKE

The post Check Out This Amazing Ghostbusters Proton Pack appeared first on Make: DIY Projects and Ideas for Makers.

Maker builds his own Ghostbuster proton pack

Anyone who has ever watched Ghostbusters is surely familiar with the iconic proton pack–a handheld wand connected to a backpack-sized particle accelerator used for capturing ghosts. With a remake of the ‘80s flick about to hit theaters, what better time for a DIY prop equipped with full-featured user control and Hollywood-like effects?

That’s exactly what John Finocchiaro has done using a bunch of household items, including a five gallon bucket for the cyclotron, a garlic powder container for the N-Filter, a hairbrush for the PKE meter, spark plug wire, cardboard tubes, pill bottles, handles from power tool cases, a couple electrical boxes, and some other miscellaneous parts.

The proton pack is based on an Arduino Uno along with a Seeed Studio SD card shield containing .WAV files. The Arduino supplies all of the sound and light effects, except for the cyclotron lights which use a 555 timer and 4017 decade counter. The sound is amplified through an old computer speaker board, while two homemade boards control the lights.

The red lights on the cyclotron area are supposed to be asymmetrical. This project took two weekends to make, one for the pack and one for the gun. It is attached to a homemade  PVC “ALICE” frame. I tried to make it as light as possible, the whole unit weighs just 13 lbs. Its not fully “screen accurate” but more like a “Model 3″ version. The addition of a bunch of actual electronic components make it look more like it is a  functional unit instead of a prop.

The power meter on the gun and pack are synced to show an accumulating “charge” while a generator sound plays. When armed, the lights on the gun blink and the generator sound intensifies. When it’s fired, the barrel lights and the blast sound plays as the charge meter decreases to zero. It then shuts off and recharges.

It came out so well I also made a PKE meter (ghost detector) that also functions with lights and sound. The arms are powered by a small gear motor. The lights are a blinking LED and 10 green LEDs that sequence via a 555 timer/4017 decade counter. It’s crammed into a hairbrush.

I also have made a ghost trap and pedal that opens and closes via a servo mechanism. The interior of the ghost trap is made from an old laser disc lit with a row of LEDs, so it looks “deeper” inside than it should. It works with the pedal as it does in the movie. It’s not full height, I am trying to keep all this stuff compact. Anyway, after 30 years I’m sure there would be some miniaturization in the equipment by now!

And what would a full Ghostbusters getup be without some Ecto Goggles? Finocchiaro constructed his own pair from scratch using foamboard and paper with aluminum strips for strength. The outside is textured to resemble a military-type finish, while the lens tubes illuminate green to add a “glow,” and a red LED blinks on the side.

Whether a fan of the movie, a fan of cosplay, or simply a fan of making, you’ll want to check out the entire build here.

In Bed With an Arduino, Fighting Sleep Apnea

Sometimes the journey is as interesting as the destination, and that’s certainly the case with [Marc]’s pursuit of measuring his sleep apnea (PDF, talk slides. Video embedded below.). Sleep apnea involves periods of time when you don’t breathe or breathe shallowly for as long as a few minutes and affects 5-10% of middle-aged men (half that for women.) [Marc]’s efforts are still a work-in-progress but along the way he’s tried a multitude of things, all involving different technology and bugs to work out. It’s surprising how many ways there are to monitor breathing.

Debugging the Eeonyx conductive fabric approach

His attempts started out using a MobSenDat Kit, which includes an Arduino compatible board, and an accelerometer to see just what his sleeping positions were. That was followed by measuring blood O2 saturation using a cheap SPO2 sensor that didn’t work out, and one with Bluetooth that did work but gave results as a graph and not raw data.

Next came measuring breathing by detecting airflow from his nose using a Wind Sensor, but the tubes for getting the “wind” from his nose to the sensor were problematic, though the approach was workable. In parallel with the Wind Sensor he also tried the Zeo bedside sleep manager which involves wearing a headband that uses electrical signals from your brain to tell you what sleep state you’re in. He particularly liked this one as it gave access to the data and even offered some code.

And his last approach we know of was to monitor breathing by putting some form of band around his chest/belly to measure expansion and contraction. He tried a few bands and an Eeonyx conductive textile/yarn turned out to be the best. He did run into noise issues with the Xbee, as well as voltage regulator problems, and a diode that had to be bypassed.

But while [Marc]’s list of approaches to monitor sleep is long, he hasn’t exhausted all approaches. For example there’s monitoring a baby using lasers to detect whether or not the child is still breathing.

[Via Adafruit]


Filed under: Medical hacks
Hack a Day 14 Jul 00:00

Interactive sidewalks plays music to your shadows

Designed by Montreal studio Daily tous les jours, Mesa Musical Shadows is a public installation which turns several blocks of pavement in Arizona’s Mesa Arts Center into a super-sized dance pad that reacts to your moving shadow with the sounds of singing.

Shadows cast on different tiles trigger different voices, all while singing in harmony. Length of shadow is dependent upon the season, the time of day and the weather; meaning, a visitor may never quite cast the same shadow twice. The sounds themselves also change with the angle of the sun, which makes interacting with the installation a dynamic experience in the morning, midday, evening, and in the middle of the night. As the day turns into night, the tracks shift from upbeat, Pitch Perfect-like acapella to creepier, ominous tones.

Though all the audio originates with recordings of the human voice, a large variety of sounds and moods are created throughout the day. The sounds triggered in the morning are peaceful and ethereal: sustained choral tones that follow your long shadow, singing you into your day. Later, when the sun is hot overhead, and shadows are shorter; the sounds are chopped and frenetic, creating a rhythmic, energetic soundtrack. As the shadows become long again toward sunset, clusters of complementary, interlocking melodies are triggered. Finally, after dark, the sounds harken toward the natural landscape: Insect or bird-like vocal sounds evoking a nocturnal meadow are triggered by users navigating their way through the night.

The system itself consists of sensors that respond to changes in light, which prompt a range of melodic or percussive sounds emitted through speakers embedded in the colorful fabricated tiles. As Creative Applications details, Mesa Musical Shadows is controlled by a MaxMSP patch linking Arduino Mega boards via OSC.

The installation’s 47 sensors are run through six control nodes, comprised of an Arduino Mega, Ethernet shields, and custom connector shields – each of which is protected in a waterproof enclosure, placed underneath the tiling. Each sensor unit has a custom PCB with a light sensor on top and an LED on its bottom, for nighttime illumination and the more sensitive gear (computers, amplifiers, etc.) is all installed in the museum.

If this musical public display seems a bit familiar, that’s because you may recall Daily Tous Les Jours’ earlier project, 21 Swings, which used playground swings to form a giant collective instrument. Read more about the singing sidewalk here, and see it in action below!

Arduino door lock is activated by opening an incognito window

Mike, CEO of the Useless Duck Company, continues to make us laugh with his hilarious Arduino innovations. Despite all the comical projects, which range from a fedora that tips itself to an automated toilet paper-dispensing machine, he may be onto something with one of his more recent contraptions: a door that locks itself whenever you’re shopping for gifts for your wife or significant other.

If you don’t want Google Chrome to save a record of what you visit and download, you can always browse the web in incognito mode However, what happens if your loved one bursts into the room and catches you in the act of making a purchase?

To solve this common problem, Mike has hooked his PC up to an Arduino Uno that’s connected to a servo-controlled lock. A self-written program then checks all of the browsers running on his computer, and if it finds one in incognito mode, it sends a signal to the Arduino to bolt the door.

Solar Powered Hydroponics

[Dan Bowen] describes the construction of a backyard hydroponics set-up in an angry third person tirade. While his friends assume more nefarious, breaking, and bad purposes behind [Dan]’s interest in hydroponics; he’d just like some herbs to mix into the occasional pasta sauce.

Feel particularly inspired one day after work, he stopped by the local hardware store and hydroponics supply. He purchases some PVC piping, hoses, fittings, pumps, accessories, and most importantly, a deck box to hide all the ugly stuff from his wife.

The design is pretty neat. He has an open vertical spot that gets a lot of light on his fence. So he placed three lengths of PVC on a slant. This way the water flows quickly and aerates as it goes. The top of the pipes have holes cut in them to accept net baskets.

The deck box contains a practically industrial array of sensors and equipment. The standard procedure for small-scale hydroponics is just to throw the water out on your garden and replace the nutrient solution every week or so. The hacker’s solution is to make a rubbermaid tote bristle with more sensors than the ISS.

We hope his hydroponics set-up approaches Hanging Gardens of Babylon soon.


Filed under: cooking hacks, green hacks, home hacks