Posts with «arduino» label

Weekend Watch: B2Builds Dives into Electronics and Woodworking

Woodworking and electronics, automatons and camera sliders. Ben Brandt's YouTube channel offers lots of cool projects.

Read more on MAKE

The post Weekend Watch: B2Builds Dives into Electronics and Woodworking appeared first on Make: DIY Projects and Ideas for Makers.

Turn your printer into a MOCO slider with Arduino

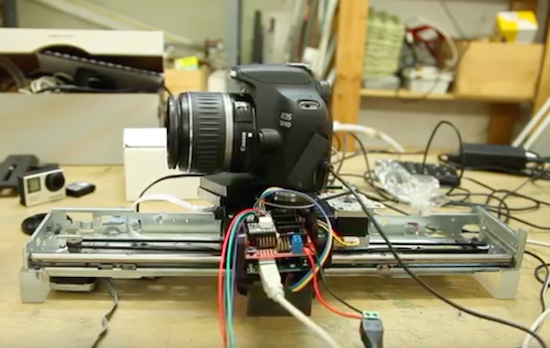
Product designer Eduard Puertas continues to impress us with his makeshift motion control projects. Recently, the animation enthusiast had come across a broken HP printer on the street; rather than let it be picked up by the garbage truck, he decided to repurpose it into a MOCO slider for stop motion and time-lapse photography.

Aside from the printer’s mechanical parts, Puertas used an Arduino Uno, some stepper drivers, and Dragonframe software to bring his idea to life. You can see the end result below!

Ride to work on an Arduino-based electric unicycle

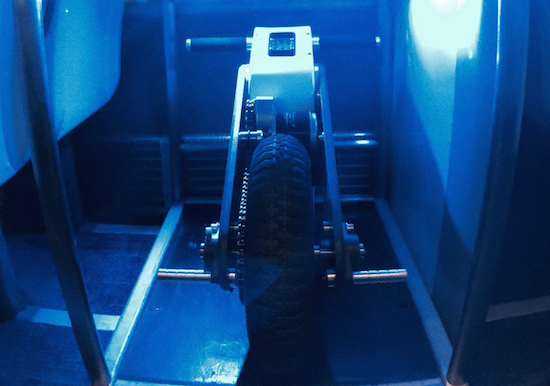
Some people drive their car to work. Some walk. Others ride their bike. Well, in Nick Thatcher’s case, he prefers to hop on his own electric unicycle. The serial creator of self-balancing vehicles has just completed his latest project, dubbed  “Plan-B.”

Unlike his other builds, this time Thatcher set out to make Plan-B a true “commuter” unicycle with the utmost portability–boasting a foldable design, a handle on its rear for easy carrying, and a LiFePo4 battery to keep it lightweight.

His newly-constructed personal transport is equipped with a 24V 350W geared motor and a SyRen 50A motor controller, along with an Arduino Uno and an IMU to help maintain the cycle’s stability. Beyond that, Plan-B uses a wheelbarrow wheel with a chain drive from the motor.

Watch Thatcher commute in style below!

Honey, I shrunk the NES… with Raspberry Pi and Arduino!

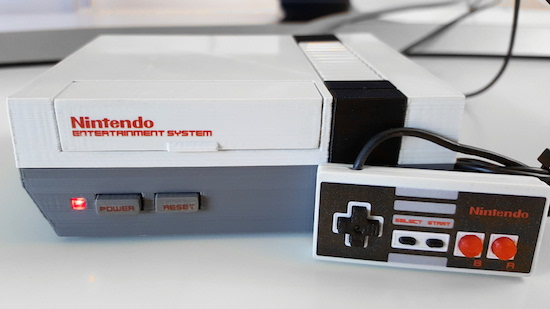
The NES was one of, if not, the first gaming consoles most of us ever played. That’s why we were all pretty excited to hear Nintendo’s recent plans of releasing the NES Classic Mini. As great as it sounds, though, turns out it’ll only support its 30 pre-loaded games–no Internet downloads, nor any cartridge slots. But leave it to a Maker to come up with a solution! Enter DaftMike, who has built his own shrunken-down, 3D-printed version of the retro system complete with some of the features we all would’ve loved to see with Nintendo’s re-creation.

The DIY system–which is 40% the size of the original–is powered by a Raspberry Pi and an Arduino. It runs on RetroPie emulation software and uses itsy-bitsy NFC tagged cartridges, ranging from Super Mario Bros. to Zelda. When a cartridge is inserted into the machine’s fully-functional slot, an NFC reader scans it, selects that specific game from the Pi’s internal memory, and boots it up onto the screen.

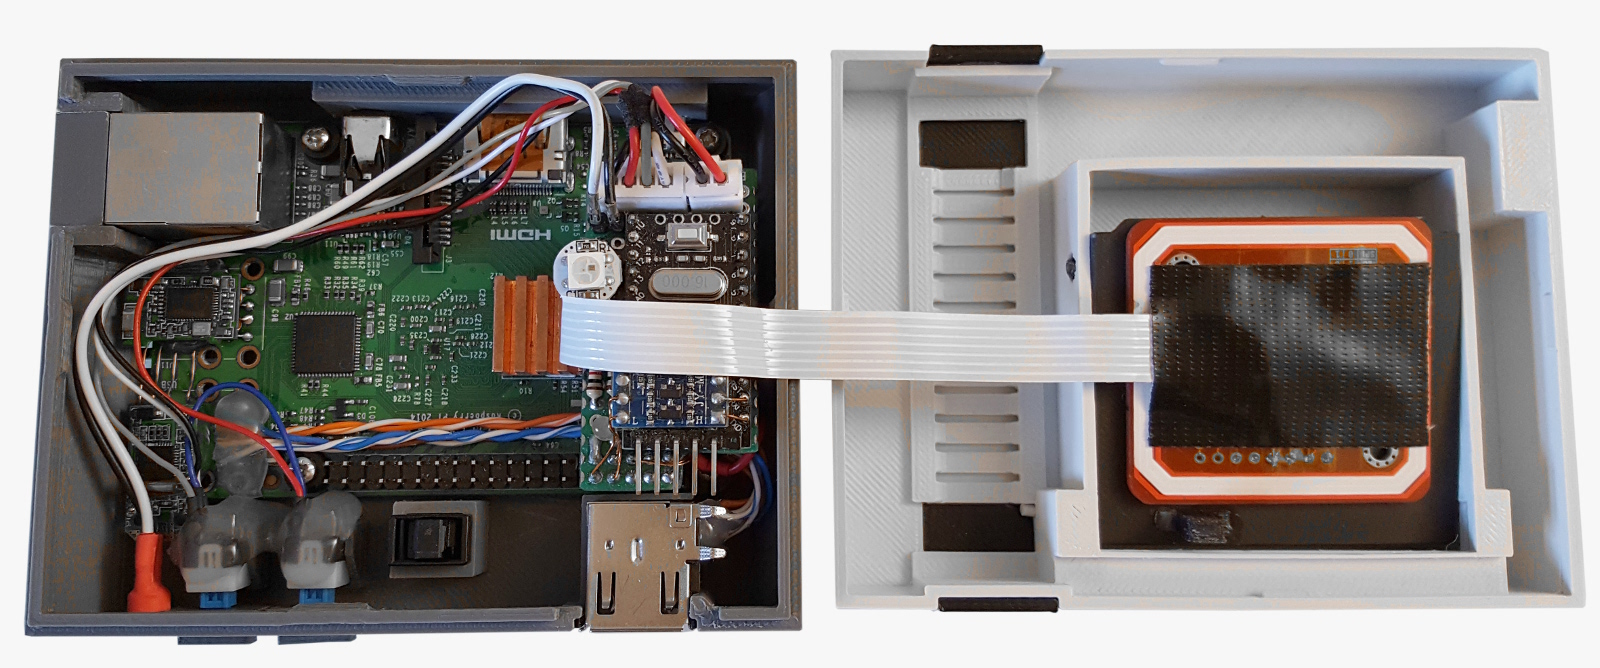
I designed the connections between the Arduino and Pi to use the top 10 GPIO pins so I could mount the Arduino directly to the Raspberry Pi using a 2×5 header. All the electronics would then sit in the case behind the USB ports.

The NFC reader mounts underneath the cartridge tray connected to the Arduino with a piece of flat cable. There’s enough length on it for the case halves to be splayed apart if I need to dismantle the unit and the Arduino ‘lump’ unplugs from the Pi so I can update the ‘firmware.’

DaftMike even rounded out his incredibly-realistic design with a mini, Arduino Pro Micro-based controller–although probably a bit too small for adult hands. (Cool nevertheless!)

In terms of software, an Arduino sketch is used to read the NFC tags and manage the power switching, while a Python script running on the Raspberry Pi is tasked with launching the games. The two communicate over serial.

Those wishing to spark some childhood gaming nostalgia should check out Daftmike’s entire blog post, which provides a full rundown of the build and its inner workings.


Monitor your solar energy with a dual-axis tracker

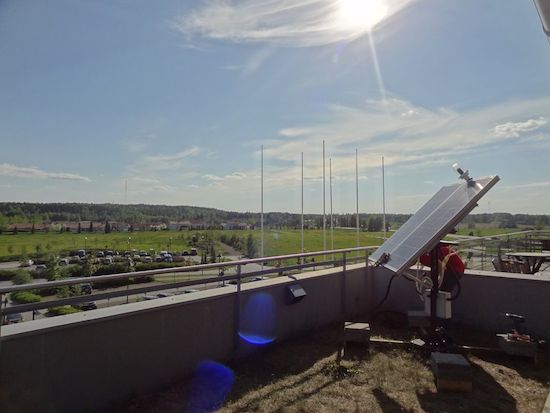
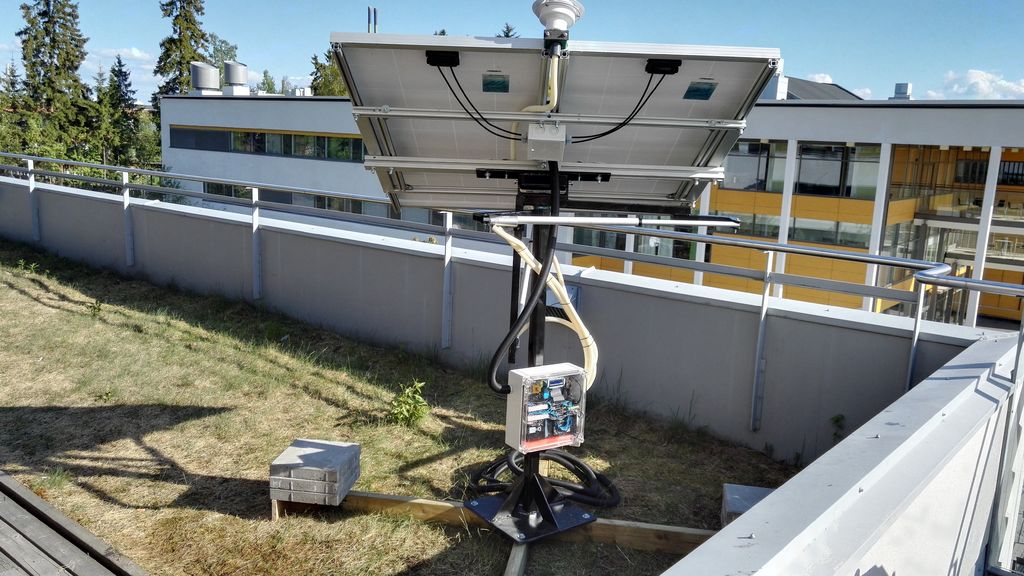
As part of a school project, Bruce Helsen built a dual-axis tracker for optimizing solar panel use during his time as exchange student in Finland. Although adding a tracking system to a larger installation isn’t really a cost-effective option, it can certainly come in handy for smaller units.

Helsen’s dual-axis tracker works by making sure that the two 12V 150W solar panels stay aligned with the sun for as long as possible, measuring the panels’ voltage and current then calculating the generated power and energy, and sending that data from the monitor to ThingSpeak. There’s also an LCD to display the readings.

The panel’s two axes are controlled by a pair of inexpensive linear actuators. It uses an Arduino Mega for a brain, and an ESP8266 for transmitting the data over to the cloud. Light direction is detected by a homemade light sensor housed inside an industrial lamp enclosure. A 3D-printed crossbeam separates the sensor into four quadrants, with a light-dependent resistor for each. By comparing the average LDR values, the panel is able to point in the best direction.

Looking to monitor your solar energy? Check out Helsen’s project page here.

Musician creates MIDI-triggered LED cubes with Arduino

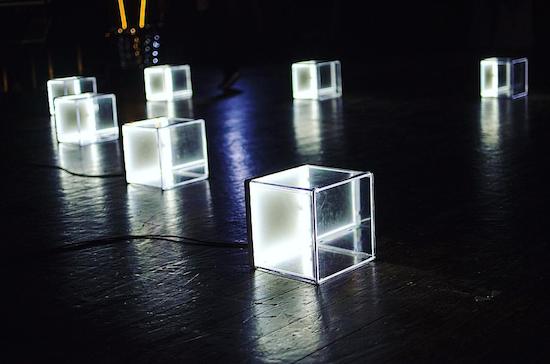
For the release of his latest EP, Dario Marturano brought together electronic music, technology, science, and dance to create an awe-inspiring music video called “Pyrite.” The artist (and STEAM advocate), who goes by the stage name Holograph, built a set of illuminated cubes using plexiglass boxes and LED strips that are MIDI-triggered via Arduino circuitry.

As Make: Magazine explains, the setup consists of an Arduino, some MOSFET for 12V (in the LED cubes), and opto-triac for 220V (for the big lightbulb props). Holograph wrote a MIDI sequence in Ableton Live that syncs with the tunes, assigning every note to a light-up box. The sequence is sent to Arduino, which activates the LEDs as the dancers move through their choreography.

It should be noted that this isn’t the first time the musician has employed MIDI-driven lights either. See the magic in action below!

Arduino Blog 28 Jul 17:19
arduino  featured  holograph  leds  midi  music  pyrite  

LEDs and MIDIs: Check Out the STEAM-Inspired Music of Holograph

"It's not only a musical project, but a union between different arts and sciences, where the sound meets design, electronics, and computer science"

Read more on MAKE

The post LEDs and MIDIs: Check Out the STEAM-Inspired Music of Holograph appeared first on Make: DIY Projects and Ideas for Makers.

Kick the habit with a cigarette smoke-detecting shirt

You’ve heard it before, smoking is bad for your health. However, despite the countless warnings, millions of people continue to use cigarettes–including 7th grade student Petter’s dad. Mindful of this, the young Maker came up with a new way to shame smokers into quitting.

The aptly named “Cigarette Smoke Detecting Shirt” consists of an Arduino LilyPad, a smoke sensor, and three LED sequins, all sewn into the t-shirt using conductive thread. When cigarette smoke is sensed, one of three different lights illuminate alongside a message to embarrass the wearer such as “stinky breath,” “yellow teeth,” or “lung cancer.”

In the future, Petter hopes to finish the prototype and start making more shirts to sell on Etsy. Whether or not this idea takes off, it’s pretty cool nonetheless. As Adafruit puts it, “This is such a fine example of a project that works on an issue and gets students excited about STEM.”

Download the new Arduino IDE 1.6.10!

Great news, Makers! We’re excited to announce the immediate availability of the Arduino IDE 1.6.10, AVR core 1.6.12 and SAM core 1.6.9.

The most notable feature of this release is the introduction of an up-to-date bundled toolchain for AVR containing the latest goodies from Atmel, GCC and AVRDUDE devs.

Thanks to LTO (Link Time Optimization), making your sketches smaller and faster is now only a push of the “Compile” button away.

The AVRDUDE update brings out-of-the-box support for a wide range of microcontrollers and debuggers, making it is as simple as possible to deploy. (For example, problems with Gatekeeper on Mac and dependencies on Linux are a thing of the past.)

Likewise, the builder has received the love it deserves and some of its shortcomings are gone forever. You’ll never have to worry again about encountering weird errors if you need to use C++ advanced libraries like .

All these improvements have been shared with Arduino Create, our cloud-based IDE. Check it out if you’ve never tried it, or test out these enhancements if you’re already an active user!

Of course, we also fixed some corner cases for user experience, so now we have a better error reporting when the upload fails and a [nicer] way to include libraries containing lots of header files.

What’s more, we have gone ahead and developed a new firmware and certificate updater for MKR1000 / WiFi101 Shield users–it’s bundled with the IDE and available as a plugin for older installations.

Our community effort continue to grow well with tons of bugfixing, proposals, and libraries added to the Library Manager. As you can imagine, this makes us extremely happy–thank you all for the contributions!

As usual, be sure to check the entire changelog for a complete list of changes and credits. Don’t forget to report any issue you may find, either on GitHub or on the Arduino Forum–your help is very much appreciated.

Go ahead and download IDE 1.6.10! Happy hacking!

Arduino Blog 27 Jul 09:35

Control with your smart devices by staring and gesturing

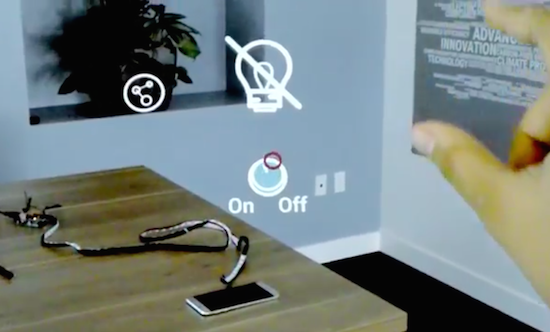
As part of a recent Microsoft HoloLens hackathon in San Francisco, Maker Ian Sterling developed a new app that interacts with you smart home via augmented reality. The proof of concept, dubbed “IoTxMR,” allows a user to simply glance at a gadget and control it through gestures.

As you can see in the video below, IoTxMR enables Sterling to connect various Android and Arduino-based devices with the HoloLens to create a customized interdependent network. It also features a mixed reality experience called “virtual zen mode,” complete with calming sounds and light orbs in his surrounding environment.

During a recent interview with Digital Trends, Sterling revealed:

The primary goal of the app is to provide a 3D spatial UI for cross-platform devices — Android Music Player app and Arduino-controlled fan and light — and to interact with them using gaze and gesture control.

The connectivity between Arduino and a mixed reality device is something which holds a huge amount of creative opportunity for developers to create some very exciting applications — be it [Internet of Things], robotics, or other sensor data visualization. Besides this, our app features some fun ways to connect devices. Our demo featured a connection between a music player and a light in order to set a certain mood in your home.

Although just a demo, IoTxMR does highlight the endless possibilities that AR platforms like HoloLens offer in the not-too-distant future.