QuadBot is a 3D-printable walking robot for everyone
If you think building a walking robot is impossible, perhaps this little guy will change your mind!
With platforms like the various flavors of Arduino, robotics has become accessible for many more people. Walking robots, however, can still be challenging. Especially when it comes to electronics and programming, one has some fairly complicated mechanisms to figure out. Perhaps none is more frustrating than four-legged walkers, as they seem very stable, but that all changes when one foot is removed from the ground.
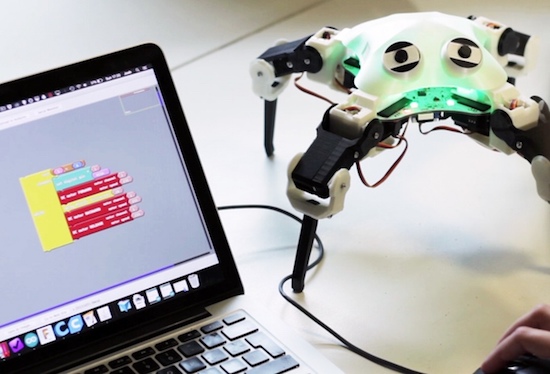
QuadBot aims to change this with an Arduino-compatible robot that, with clever cutouts for servo motors and plug-in headers on its main board, should be fairly easy to set up, yet capable of being expanded as needed.
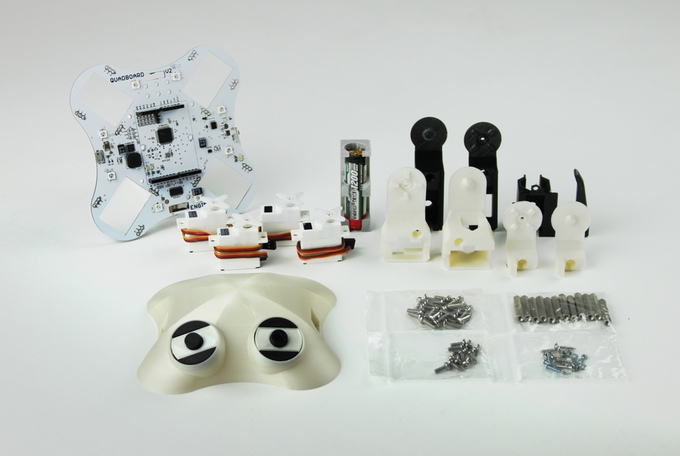
The 3D-printable, open-source bot is designed for Makers of any skill level. It works right out of the box and can be programmed using graphical blocks, ideal for beginners. Every aspect of QuadBot can be customized and modified, though, from the 3D design down to a single line of C++ code, opening it up to more advanced users as well.
QuadBot was made for you to do real deal robotics. This means that you learn coding techniques that are scalable to bigger and better projects, rather than an oversimplified and limited alternative (such as Lego Mindstorms). A robotics platform that sets up young and experienced Makers like this has not existed until right now.
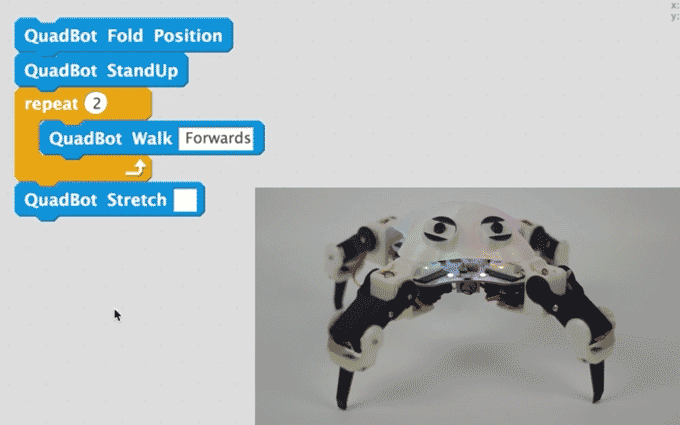
QuadBot doesn’t just walk either, it can dance, light up, and with sensors, can follow you, avoid obstacles, and even play songs. The project is the brainchild of Jack Scott-Reeve and Josh Elijah, who graduated with master’s degrees from the University of Manchester’s School of Electrical and Electronic Engineering.
Interested? Head over to Scott-Reeve, Elijah and the team’s Kickstarter page to learn more or back QuadBot for yourself!