Posts with «arduino hacks» label

Atmel and Arduino Announce Wi-Fi Shield 101 at World Maker Faire

Atmel and Arduino teamed up at World Maker Faire to introduce the Wi-Fi shield 101. [Gary] from Atmel gave us the lowdown on this new shield and its components. The shield is a rather spartan affair, carrying only devices of note: an Atmel WINC1500 WiFi module, and an ATECC108 crypto chip.

The WINC1500 is a nifty little WiFi module in its own right. WINC handles IEEE 802.11 b/g/n at up to 72 Mbps. 72Mbps may not sound like much by today’s standards, but it’s plenty fast for most embedded applications. WINC handles all the heavy lifting of the wireless connection. Connectivity is through SPI, UART or I2C, though on the Arduino shield it will be running in SPI mode.

The ATECC108 is a member of Atmel’s “CryptoAuthentication” family. It comes packaged in an 8-pin SOIC, and is compatible with serial I2C EEPROM specifications. Internally the similarities to serial EEPROMs end. The ‘108 has a 256-bit SHA engine in hardware, as well as a Federal Information Processing Standards (FIPS) level random number generator. Atmel sees this chip as being at the core of secure embedded systems. We think it’s pretty darn good, so long as we don’t hear about it at the next DEFCON.

The Wi-Fi shield 101 and associated libraries should be out in January 2015. We can’t wait to see all the new projects (and new ways to blink an LED) the shield will enable.


Filed under: Arduino Hacks, wireless hacks

A Proof of Concept Project for the ESP8266

It’s hardly been a month since we first heard of the impossibly cheap WiFi adapter for micros, the ESP8266. Since then orders have slowly been flowing out of ports in China and onto the workbenches of tinkerers around the world. Finally, we have a working project using this module. It might only be a display to show the current weather conditions, but it’s a start, and only a hint of what this module can do.

Since the ESP8266 found its way into the storefronts of the usual distributors, a lot of effort has gone into translating the datasheets both on hackaday.io and the nurdspace wiki. The module does respond to simple AT commands, and with the right bit of code it’s possible to pull a few bits of data off of the Internet.

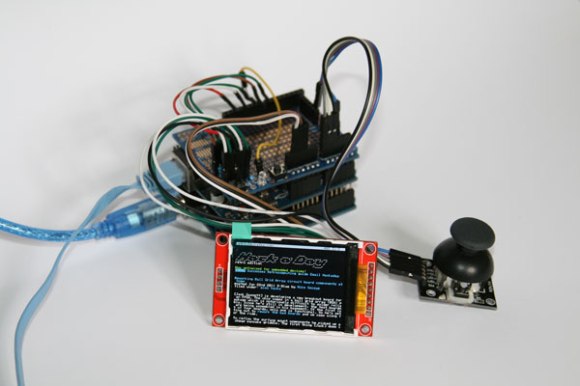
The code requests data from openweathermap.org and displays the current temperature, pressure, and humidity on a small TFT display. The entire thing is powered by just an Arduino, so for anyone wanting a cheap way to put an Arduino project on the Internet, there ‘ya go.


Filed under: Arduino Hacks, hardware
Hack a Day 18 Sep 03:00

LEDs Turn This Paper Map into a Tram Tracker

Public transit can be a wonderful thing. It can also be annoying if the trains are running behind schedule. These days, many public transit systems are connected to the Internet. This means you can check if your train will be on time at any moment using a computer or smart phone. [Christoph] wanted to take this concept one step further for the Devlol hackerspace is Linz, Austria, so he built himself an electronic tracking system (Google translate).

[Christoph] started with a printed paper map of the train system. This was placed inside what began as an ordinary picture frame. Then, [Christoph] strung together a series of BulletPixel2 LEDs in parallel. The BulletPixel2 LEDs are 8mm tri-color LEDs that also contain a small controller chip. This allows them to be controlled serially using just one wire. It’s similar to having an RGB LED strip, minus the actual strip. [Christoph] used 50 LEDs when all was said and done. The LEDs were mounted into the photo frame along the three main train lines; red, green, and blue. The color of the LED obviously corresponds to the color of the train line.

The train location data is pulled from the Internet using a Raspberry Pi. The information must be pulled constantly in order to keep the map accurate and up to date. The Raspberry Pi then communicates with an Arduino Uno, which is used to actually control the string of LEDs. The electronics can all be hidden behind the photo frame, out of site. The final product is a slick “radar” for the local train system.


Filed under: Arduino Hacks, Raspberry Pi

City Lights Telling Stories

If you’re walking around town and you see a light suddenly start to switch on and off seemingly at random, don’t discount it as a loose wire so quickly. [René] has been hard at work on a project to use city lights of all shapes and sizes for Morse messages, and a way for anyone to easily decode these messages if they happen upon one while out and about.

The lights can tell any story that is programmed into them. The code on the site is written for an Arduino-style microcontroller but it could be easily exported to any device that can switch power to turn a light on and off. Any light can work, there’s even video of a single headlight on a van blinking out some dots and dashes.

The other part of this project is a smartphone app that can decode the messages using the camera, although any Morse code interpreter can translate the messages, or if you’re a ham radio enthusiast you might recognize the messages without any tools whatsoever!

The great thing about this project is that it uses everyday objects to hide messages in plain sight, but where only some will be able to find them. This is indeed true hacker fashion! If you’re interested in making your own Morse code light, the code is available on the project site.


Filed under: Arduino Hacks
Hack a Day 13 Sep 00:00

Mood Lighting with LEDs and an Arduino

Regular candles can be awfully boring at times. They can only produce one color and the flicker is so… predictable. They can’t even be controlled by an infrared remote control, not to mention the obvious fire hazard. Now, however, [Jose] has come up with an LED candle that solves all of these problems. (Original link to the project in Spanish.)

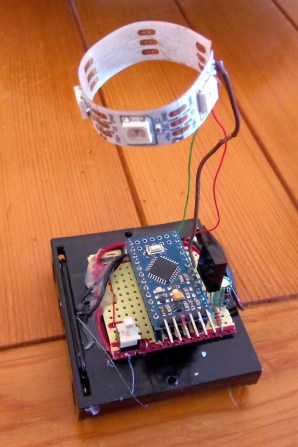
The heart of the project is an Arduino Pro Mini, which is especially suited for this project because of its size. [Jose] put the small form-factor microcontroller in the base of a homemade wax enclosure and wired it to a Neopixel WS2812b LED strip. The strip can produce any color, and has some programmed patterns including flicker, fade, rainbow, and fire.

The artificial candle is controlled with an infrared remote control, and all of the code for the project is available on the project site if you want to build your own. [Jose] has been featured here before for his innovative Arduino-driven RGB lighting projects, and this is another great project which builds on that theme!


Filed under: Arduino Hacks

End Table Kegerator Hides the Tap when You’re Not Looking

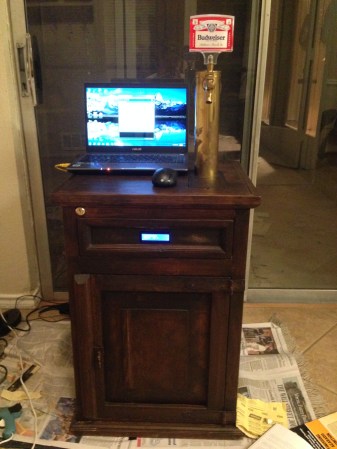
What’s better than an ordinary end table? How about an end table that can serve you beer? [Sam] had this exact idea and used his skills to make it a reality. The first step of the build was to acquire an end table that was big enough to hold all of the components for a functional kegerator. This proved to be a bit tricky, but [Sam] got lucky and scored a proper end table from a garage sale for only $5.00.

Next, [Sam] used bathroom sealant to seal up all of the cracks in the end table. This step is important to keep the inside cold. Good insulation will keep the beer colder, while using less electricity. Next, a hole was cut into the top of the table for the draft tower.

The draft tower is mounted to a couple of drawer slides. This allows the tower to raise up and down, keeping it out of sight when you don’t want it. The tower raises and lowers using a simple pulley system. A thin, high strength rope is attached to the tower. The other end is attached to a spool and a small motor. The motor can wind or unwind the spool in order to raise and lower the tower.

The table houses an Arduino, which controls the motor via a homemade H bridge. The Arduino is hooked up to a temperature sensor and a small LCD screen. This way, the users can see how cold their beer will be before they drink it.

To actually keep the beer cold, [Sam] ripped apart a mini fridge. He moved the compressor and condenser coils to the new table. He had to bend the coils to fit, taking care not to kink them. Finally he threw in the small keg, co2 tank and regulator. The final product is a livingroom gem that provides beer on demand.

Demo video (which is going the wrong way) can be found after the break.


Filed under: Arduino Hacks, Beer Hacks

Arduino Powered Digital Kaleidoscope

[Jose's] latest project brings an old visual effect toy up to date with digital electronics. Most of us are familiar with inexpensive kaleidoscope toys. Some of us have even built cheap versions of them with paper tubes, mirrors, and beads. [Jose] wanted to try to recreate the colorful pattern effects created by a kaleidoscope using an Arduino and an addressable LED strip.

The build is actually pretty simple. The base is a disc of PVC cut to just a few inches in diameter. [Jose] started with an addressable LED strip containing 60 LEDs. He then cut it into 12 sections, each containing five LEDs. The smaller strips were then mounted to the disc, similar to spokes on a bicycle wheel. The LED strip already has an adhesive backing, so that part was trivial.

The final step was to add some kind of diffuser screen. The LED strips on their own are not all that interesting. The diffuser allows the light to blend together, forming interesting patterns that are more reminiscent of the patterns you might see in a real kaleidoscope. Without the diffuser you would just see individual points of light, rather than blended color patterns.

The whole thing is controlled by a small Arduino. [Jose] has made the code available at the bottom of his blog post. Be sure to watch the video of the system in action below.


Filed under: Arduino Hacks
Hack a Day 06 Sep 12:00

Stewart Platform Ball Bearing Balancer

For their Mechanical Engineering senior design project at San Jose State University, [Tyler Kroymann] and [Robert Dee] designed and built a racing motion simulator. Which is slightly out of the budget of most hackers, so before they went full-scale, a more affordable Arduino powered Stewart platform proof of concept was built. Stewart platforms typically use six electric or hydraulic linear actuators to provide motion in six degrees of freedom (6 DOF), surge (X), sway (Y), heave (Z), pitch, roll, and yaw. With a simple software translation matrix, to account for the angular displacement of the servo arm, you can transform the needed linear motions into PWM signals for standard hobby servos.

The 6 DOF platform, with the addition of a resistive touch screen, also doubled as a side project for their mechatronic control systems class. However, in this configuration the platform was constrained to just pitch and roll. The Arduino reads the resistive touch screen and registers the ball bearing’s location. Then a PID compares this to the target location generating an error vector. The error vector is used to find an inverse kinematic solution which causes the actuators to move the ball towards the target location. This whole process is repeated 50 times a second. The target location can be a pre-programmed or controlled using the analog stick on a Wii nunchuck.

Watch the ball bearing seek the target location after the break.

Thanks to [Toby] for sending in this tip.

We at Hackaday look forward to the real life implementation of Marble Madness!

Need help Demystifying PID Control? Or perhaps you would like to build your own Stewart Platform?


Filed under: Arduino Hacks, robots hacks

Speedy Drinkmaker Keeps Party Guests Hydrated

After five weekends of work, [Alex] completed his automatic drink maker, the RumBot. What makes this automated bartender different from others is the fact that it is fast. VERY fast. It can serve drinks to five different locations in as little as 3 seconds per drink. By [Alex]‘s estimation, this could keep a party of 100 people going without anyone waiting on a drink.

The RumBot can make either of five pre-programmed drinks at varying levels of alcoholic intensity, ranging from 1 (“Virgin”) to 10. And for that extra push over the cliff, you can turn the knob to 11 (“Problem”).

Drink selection itself is handled by a simple digital I/O on an Arduino with a 1950s-styled user interface. The frame is built out of wood and uses 3D Printed plastic parts. It houses a very robust servo on a belt stage to move the drink nozzle, and special sensors placed at either of the five drink locations detect a cup ready to be filled. Any cup placed at any of the positions will automatically be filled based on the RumBot’s settings at any particular time.

Based on the quality of the build and the increased speed of this automatic drink maker, this should be a huge hit at any party. With all the knobs turned to 11 though, it might be a good idea to have a breathalyzer on hand! All of the code and schematics for the project are available at the project site as well.


Filed under: Arduino Hacks

Voice Controlled RGB LED Lamp

[Saurabh] wanted a quick project to demonstrate how easy it can be to build devices that are voice controlled. His latest Instructable does just that using an Arduino and Visual Basic .Net.

[Saurabh] decided to build a voice controlled lamp. He knew he wanted it to change colors as well as be energy-efficient. It also had to be easy to control. The obvious choice was to use an RGB LED. The LED on its own wouldn’t be very interesting. He needed something to diffuse the light, like a lampshade. [Saurabh] decided to start with an empty glass jar. He filled the jar with gel wax, which provides a nice surface to diffuse the light.

The RGB LED was mounted underneath the jar’s screw-on cover. [Saurabh] soldered a 220 ohm current limiting resistor to each of the three anodes of the LED. A hole was drilled in the cap so he’d have a place to run the wires. The LED was then hooked up to an Arduino Leonardo.

The Arduino sketch has several built-in functions to set all of the colors, and also fade. [Saurabh] then wrote a control interface using Visual Basic .Net. The interface allows you to directly manipulate the lamp, but it also has built-in voice recognition functionality. This allows [Saurabh] to use his voice to change the color of the lamp, turn it off, or initiate a fading routing. You can watch a video demonstration of the voice controls below.


Filed under: Arduino Hacks, led hacks