Posts with «stepper» label

Stepper-Controlled Chop Saw Automates a Tedious Job

We’re not going to question why [Absorber Of Light] needs to cut a bazillion little fragments of aluminum stock. We assume his reasoning is sound, so all we’re interested in is the automated chop saw he built to make the job less tedious, and potentially less finger-choppy.

There are probably many ways to go about this job, but  [Absorber] leaves few clues as to why he chose this particular setup. Whatever the reason, the build looks like fun, with a long, stepper-driven threaded rod pushing a follower down a track to a standard chop saw. The aluminum stock rides in the track and gets pushed out a set amount before being lopped off cleanly as the running saw is lowered by a linear actuator. The cycle then repeats until the stock is gone.

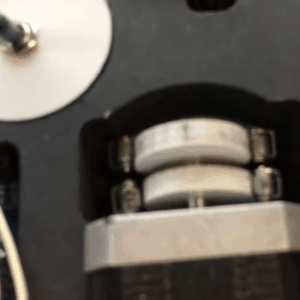
An Arduino controls the stock-advance stepper in the usual way, but the control method for the linear actuator is somewhat unconventional. A second stepper motor has two cams offset by 180° on the shaft. The cams actuate four microswitches which are set up in an H-bridge configuration. The stepper swivels back and forth to run the linear actuator first in one direction then the other, with a neutral position in between. It’s an interesting approach using mechanical rather than the typical optical isolation. Check it out in action in the video below.

We’ll admit to some curiosity as to the use of the coupons this rig produces, so maybe we’ll get lucky with some details from [Absorber Of Light] in the comment section. After all, we knew exactly what the brass tubes being cut by the similar “Auto Mega Cut-O-Matic”  were being used for.


Hack a Day 10 Aug 21:00

Automated Turntable For 3D Scanning

Those just starting out in 3D printing often believe that their next major purchase after the printer will be a 3D scanner. If you’re going to get something that can print a three dimensional model, why not get something that can create said models from real-world objects? But the reality is that only a small percentage ever follow through with buying the scanner; primarily because they are notoriously expensive, but also because the scanned models often require a lot of cleanup work to be usable anyway.

While this project by [Travis Antoniello] won’t make it any easier to utilize scanned 3D models, it definitely makes them cheaper to acquire. So at least that’s half the battle. Consisting primarily of a stepper motor, an Arduino, and a EasyDriver controller, this is a project you might be able to assemble from the parts bin. Assuming you’ve got a pretty decent camera in there, anyway…

The general idea is to place a platform on the stepper motor, and have the Arduino rotate it 10 degrees at a time in front of a camera on a tripod. The camera is triggered by an IR LED on one of the Arduino’s digital pins, so that it takes a picture each time the platform rotates. There are configurable values to give the object time to settle down after rotation, and a delay to give the camera time to take the picture and get ready for the next one.

Once all the pictures have been taken, they are loaded into special software to perform what’s known as photogrammetry. By compiling all of the images together, the software is able to generate a fairly accurate 3D image. It might not have the resolution to make a 1:1 copy of a broken part, but it can help shave some modeling time when working with complex objects.

We’ve previously covered the use of photogrammetry to design 3D printed accessories, as well as a slightly different take on an automated turntable a few years ago. The process is still not too common, but the barriers to giving it a try on your own are at least getting lower.

Custom Split-Flap Display Is a Unique Way to Show the Weather

There’s little doubt about the charms of a split-flap display. Watching a display build up a clear, legible message by flipping cards can be mesmerizing, whether on a retro clock radio from the 70s or as part of a big arrival and departure display at an airport or train station. But a weather station with a split-flap display? That’s something you don’t see often.

We usually see projects using split-flap units harvested from some kind of commercial display, but [gabbapeople] decided to go custom and build these displays from the ground up. The frame and mechanicals for each display are made from laser-cut acrylic, as are the flip-card halves. Each cell can display a full alphanumeric character set on 36 cards, with each display driven by its own stepper. An Arduino fetches current conditions from a weather API and translates the description of the weather into a four-character code. The codes shown in the video below seem a little cryptic, but the abbreviation list posted with the project makes things a bit clearer. Bonus points if you can figure out what “HMOO” is without looking at the list.

We like the look and feel of this, but we wonder if split-flap icons might be a neat way to display weather too. It seems like it would be easy enough to do with [gabbapeople]’s detailed instructions. Or you could always look at one of the many other custom split-flap displays we’ve featured for more inspiration.

Semi-automated Winder Spins Rotors for Motors

What’s your secret evil plan? Are you looking for world domination by building a machine that can truly replicate itself? Or are you just tired of winding motor rotors and other coils by hand? Either way, this automated coil winder is something you’re probably going to need.

We jest in part, but it’s true that closing the loop on self-replicating machines means being able to make things like motors. And for either brushed or brushless motors, that means turning spools of wire into coils of some sort. [Mr Innovative]’s winder uses a 3D-printed tube to spin magnet wire around a rotor core. A stepper motor turns the spinner arm a specified number of times, pausing at the end so the operator can move the wire to make room for the next loop. The rotor then spins to the next position on its own stepper motor, and the winding continues. That manual step needs attention to make this a fully automated system, and we think the tension of the wire needs to be addressed so the windings are a bit tighter. But it’s still a nice start, and it gives us some ideas for related coil-winding projects.

Of course, not every motor needs wound coils. After all, brushless PCB motors with etched coils are a thing.

Hack a Day 17 Aug 16:30

Light Painting Animations Directly From Blender

Light painting: there’s something that never gets old about waving lights around in a long exposure photo. Whilst most light paintings are single shots, some artists painstakingly create frame-by-frame animations. This is pretty hard to do when moving a light around by hand: it’s mostly guesswork, as it’s difficult to see the results of your efforts until after the photo has been taken. But what if you could make the patterns really precise? What if you could model them in 3D?

[Josh Sheldon] has done just that, by creating a process which allows animations formed in Blender to be traced out in 3D as light paintings. An animation is created in Blender then each frame is automatically exported and traced out by an RGB LED on a 3D gantry. This project is the culmination of a lot of software, electronic and mechanical work, all coming together under tight tolerances, and [Josh]’s skill really shines.

The first step was to export the animations out of Blender. Thanks to its open source nature, Python Blender add-ons were written to create light paths and convert them into an efficient sequence that could be executed by the hardware. To accommodate smooth sliding camera movements during the animation, a motion controller add-on was also written.

The gantry which carried the main LED was hand-made. We’d have been tempted to buy a 3D printer and hack it for this purpose, but [Josh] did a fantastic job on the mechanical build, gaining a solidly constructed gantry with a large range. The driver electronics were also slickly executed, with custom rack-mount units created to integrate with the DragonFrame controller used for the animation.

The video ends on a call to action: due to moving out, [Josh] was unable to continue the project but has done much of the necessary legwork. We’d love to see this project continued, and it has been documented for anyone who wishes to do so. If you want to check out more of [Josh]’s work, we’ve previously written about that time he made an automatic hole puncher for music box spools.

Thanks for the tip, [Nick].

Simple Camera Slider Adds a Dimension or Two to Your Shots

Camera sliders are a popular build, and properly executed they can make for impressive shots for both time-lapse sequences or real-time action. But they seem best suited for long shots, as dollying a camera in a straight line just moves subjects close to the camera through the frame.

This slider with both pan and tilt axes can make moving close-ups a lot easier. With his extremely detailed build log, [Dejan Nedalkovski] shows how he went about building his with only the simplest of materials and tools. The linear rail is simply a couple of pieces of copper pipe supported by an MDF frame. The camera trolley rides the rails on common skateboard bearings and is driven by a NEMA-17 stepper, as are the pan and tilt axes. [Dejan] also provided a barn-door style pivot to tilt the camera relative to the rails, allowing the camera to slide up and down an inclined plane for really interesting shots. The controller uses an Arduino and a joystick to drive the camera manually, or the rig can be programmed to move smoothly between preset points.

This is a step beyond a simple slider and feels a little more like full-blown motion control. We’ve got a feeling some pretty dramatic shots would be possible with such a rig, and the fact that it’s a simple build is just icing on the cake.

TeensyStep – Fast Stepper Library for Teensy

The Teensy platform is very popular with hackers — and rightly so. Teensys are available in 8-bit and 32-bit versions, the hardware has a bread-board friendly footprint, there are a ton of Teensy libraries available, and they can also run standard Arduino libraries. Want to blink a lot of LED’s? At very fast update rates? How about MIDI? Or USB-HID devices? The Teensy can handle just about anything you throw at it. Driving motors is easy using the standard Arduino libraries such as Stepper, AccelStepper or Arduino Stepper Library.

But if you want to move multiple motors at high micro-stepping speeds, either independently or synchronously and without step loss, these standard libraries become bottlenecks. [Lutz Niggl]’s new TeensyStep fast stepper control library offers a great improvement in performance when driving steppers at high speed. It works with all of the Teensy 3.x boards, and is able to handle accelerated synchronous and independent moves of multiple motors at the high pulse rates required for micro-stepping drivers.

The library can be used to turn motors at up to 300,000 steps/sec which works out to an incredible 5625 rpm at 1/16 th micro-stepping. In the demo video below, you can see him push two motors at 160,000 steps/sec — that’s 3000 rpm — without the two arms colliding. Motors can be moved either independently or synchronously. Synchronous movement uses Bresenham’s line algorithm to plan motor movements based on start and end positions. While doing a synchronous move, it can also run other motors independently. The TeensyStep library uses two class objects. The Stepper class does not require any system resources other than 56 bytes of memory. The StepControl class requires one IntervallTimer and two channels of a FTM  (FlexTimer Module) timer. Since all supported Teensys implement four PIT timers and a FTM0 module with eight timer channels, the usage is limited to four StepControl objects existing at the same time. Check out [Lutz]’s project page for some performance figures.

As a comparison, check out Better Stepping with 8-bit Micros — this approach uses DMA channels as high-speed counters, with each count sending a pulse to the motor.

Thanks to [Paul Stoffregen] for tipping us off about this new library.


Filed under: Microcontrollers

Landscape to Portrait at the Click of a Mouse

Modern 16:9 aspect ratio monitors may be great for watching a widescreen movie on Netflix, but for most PDFs, Word documents, and certain web pages, landscape just won’t do. But if you’re not writing the next great American novel and aren’t willing to commit to portrait mode, don’t — build an auto-rotating monitor to switch your aspect ratio on the fly.

Like many of us, [Bob] finds certain content less than suitable for the cinematic format that’s become the standard for monitors. His fix is simple in concept, but a little challenging to engineer. Using a lazy susan as a giant bearing, [Bob] built a swivel that can be powered by a NEMA 23 stepper and a 3D-printed sector of a ring gear. Due to the narrow clearance between the top and bottom of the lazy susan, [Bob] had to do considerable finagling to get through holes for the mounting hardware located, but in the end the whole thing worked great.

Our only quibble would be welding galvanized pipe for the stand, which always gives us the willies. But we will admit the tube notching turned out great with just a paper template. We doubt it would have been much better if he used an amped-up plasma-powered tubing notcher.


Filed under: misc hacks
Hack a Day 05 Apr 12:01

Linear Clock Slows the Fugit of the Tempus

We feature a lot of clocks here on Hackaday, and lately most of them seem to be Nixie clocks. Not that there’s anything wrong with that, but every once in a while it’s nice to see something different. And this electromechanical rack and pinion clock is certainly different.

[JON-A-TRON] calls his clock a “perpetual clock,” perhaps in a nod to perpetual calendars. But in our opinion, all clocks are perpetual, so we’ll stick with “linear clock.” Whatever you call it, it’s pretty neat. The hour and minute indicators are laser cut and engraved plywood, each riding on a rack and pinion. Two steppers advance each rack incrementally, so the resolution of the clock is five minutes. [JON-A-TRON] hints that this was a design decision, in part to slow the perceived pace of time, an idea we can get behind. But as a practical matter, it greatly simplified the gear train; it would have taken a horologist like [Chris] at ClickSpring to figure out how to gear this with only one prime mover.

In the end, we really like the look of this clock, and the selection of materials adds to the aesthetic. And if you’re going to do a Nixie clock build, do us a favor and at least make it levitate.


Filed under: clock hacks
Hack a Day 02 Apr 03:00

DIY Syringe Pump Saves Big Bucks for Hacker’s Lab

If you had a choice between going to your boss and asking for funds for a new piece of gear, would you rather ask for $3000 to buy off-the-shelf, or $200 for the parts to build the same thing yourself? Any self-respecting hacker knows the answer, and when presented with an opportunity to equip his lab with a new DIY syringe pump for $200, [Dr. D-Flo] rose to the challenge.

The first stop for [Dr. D-Flo] was, naturally, Hackaday.io, which is where he found [Naroom]’s syringe pump project. It was a good match for his budget and his specs, but he needed to modify some of the 3D printed parts a little to fit the larger syringes he intended to use. The base is aluminum extrusion, the drive train is a stepper motor spinning threaded rod and a captive nut in the plunger holders, and an Arduino and motor shield control everything. The drive train will obviously suffer from a fair amount of backlash, but this pump isn’t meant for precise dispensing so it shouldn’t matter. We’d worry a little more about the robustness of the printed parts over time and their compatibility with common lab solvents, but overall this was a great build that [Dr. D-Flo] intends to use in a 3D food printer. We look forward to seeing that one.

It’s getting so that that you can build almost anything for the lab these days, from peristaltic pumps to centrifuges. It has to be hard to concentrate on your science when there’s so much gear to make.


Filed under: chemistry hacks, tool hacks