Posts with «remote control» label

Arduino & Xbee Remote Control

[nickatredbox] has sent this interesting project with Arduino involving wireless comunication. The fun comes when you have to decide to buy something already done or DIY.

I wanted a remote control system of my own design for may various RC model projects planes and boats. I set about researching the options and and Xbee with / Arduino solution poped out as a viable option, having failed performance testing using both WiFi and TinyCLR. The other feature I get as the Xbee is a transceiver is real-time telemetery. I’m sure I could buy this functionality from HobbyKing but where is the fun in that.

More project on the [website]

Using an IR remote with your Arduino

If you’ve ever needed a short-range remote control for a project, [firestorm] is here to help you out. He put up a great tutorial on using an IR remote to do just about anything with everyone’s favorite microcontroller platform.

[firestorm] used the Arduino IRremote library to decode the button presses on his remote. After uploading the IR receive demo included in the library, the Arduino spit out hex codes of what the IR receiver was seeing. [firestorm] wrote these down, and was able to program his Arduino to respond to each individual button press.

After figuring out the IR codes for his remote, [firestorm] threw a shift register into his bread board and attached a seven-segment LED. Since [firestorm] knows the codes for the number buttons on his remote, it’s very easy to have the LED display flash a number when the corresponding button on the remote is pressed.

A single seven-segment display might not be extremely useful, but with [firestorm]‘s tutorial, it’s easy to give your Arduino some remote control capabilities with a simple IR receiver. Not bad for a few dollars in parts.


Filed under: arduino hacks, how-to

Fighting over the Frat’s TV remote

[Colin Bookman] lives in a Fraternity house and apparently the remote for the cable box has a way of walking off. He figured out a method to give everyone control of the TV channel in one form or another.

The cable box can be seen perched on that shelf, and [Colin's] addition is the wooden box sitting on the floor. Inside is an Arduino board, and the cable snaking out of the enclosure is an IR LED. This give the Arduino the ability to send remote control commands to the TV box. The two arcade buttons on the front will switch the channel up or down.

But this is hardly a remote control replacement since you have to get up to use it, so he went a few steps further. The Arduino board was paired with an Ethernet shield. It serves up a web page that has a virtual keypad. So anyone with a smart phone or laptop can log into the server and start changing the channels. We’re not sure if this provides relief from a missing remote, or promotes impromptu fist fights when brothers can’t agree on what to watch. It certainly opens up the possibility of long-distance trolling as you could be sitting in class and decide to change the channel to Lifetime every ten minutes or so.

If you don’t have an Ethernet shield handy we’ve seen a similar setup that uses Bluetooth instead the network.


Filed under: home entertainment hacks

Adding remote control to Klipsch surround system

The speaker system [Zurcher] bought was made by Klipsch. It is a surround sound unit but it’s intended to be used with a computer so there’s no wireless remote for it. Instead, a wired unit sits on the desk and lets you select between the speakers or headphones, and has a volume adjustment knob. The thing is he uses them for his home theater system and had to add his own remote control hardware to adjust them from across the room.

He started with some web searches that helped a lot. It seems others have mapped out the hardware in the past and he was able to use that information to find the volume chip inside the controller. A bit of signal sniffing let him work out the control commands coming in over the i2c bus. This was the information he needed to build his own controller. He grabbed his Arduino board, and IR receiver to take commands from just about any remote, and a four-digit 7-segment display to provide settings feedback. You can seen him showing off the final build in the clip after the break.


Filed under: home entertainment hacks

LayerOne badges stop bullets; drive away

We love badges. And we’ve really got to thank [Charliex] for taking the time to write a huge post about this year’s LayerOne badges, especially since they’ve got their backs up against the deadline for pulling everything together in time.

Here it is, the stock badge on the left, with an add-on shield on the right. Now the original intent was to make this badge the chassis of an RC car. [Charliex] chewed through his development time trying to source toy cars that could be gutted for parts that would mount easily on the badge. This looked promising at first, but turned out to be folly. Instead what we have here is an Arduino compatible board with an RF transmitter which can be cut off and used separately if you wish. Attendees will be able to use the badge to take control of the toy cars (cases of them have been shipped to the conference), with the option to use the USB functionality to facilitate automation.

So what about stopping bullets? There is a bug in the module [Charliex] used to export the board design from Eagle. They came back from the fab house as 0.125″ substrate. That’s pretty beefy!

The conference is this weekend… better get on that!


Filed under: cons
Hack a Day 24 May 19:01
arduino  badge  badges  cons  layerone  rc  remote control  rf  shield  

Rocket Brand Studios Transmitter

Primary image

What does it do?

A transmitter kit for just about any robot project


Cost to build

Embedded video

Finished project

Complete

Number

Time to build

Type

URL to more information

Weight

read more

Software and firmware for TiDiGino (GSM remote controller with Arduino)

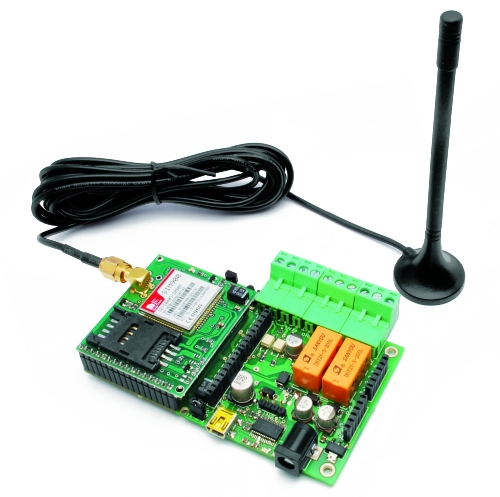
A lot of people who bought the TiDiGino ask me how to test it.
The Gsm Remote Control is provided with bootloader, so you have to insert the prefered sketch that you can find in code.google.
Daniele Denaro wrote a good sketch for TiDiGino, and I’m reporting his tutorial.
Ask me (and him) all do you need.
Author Daniele Denaro

Be careful, because you have to manipulate the environment of development (IDE) 1.0 to insert the new hardware.
In particular replace the file “boards.txt” (see below).
In this new version of the file has been added to the section on hardware TiDiGino.
You should also add the folder “tidigino” that “boards.txt” references (see below).
The changes will be visible to restart the IDE.

Changes from previous version 1.0:

- It was introduced double message mode for alarms. Meaning now is also detected the return to the base level (end alarm) with the possibility to be notified by a second message.

- It is advisable to perform a reset procedure to be safe pressing both the switch P1 and P2 on the first start after installation.

- Fixed some errors in the Java program.

NB. If you have an unmodified hardware TiDiGino, should arrange removal 100-ohm resistor R20 (near the USB connector). Because otherwise…
TiDiGino remains constantly in reset and will not start unless it is also connected to the USB.
(As distinct from the opening of the JP2 jumper that only affects the transparency serial link to the functioning of the operating TiDiGino)

The download includes:
- Installation of this file
- A Italian handbook pdf: TiDiGinoMan.pdf
- A quick Italian reference guide to the controls and the installation and startup: TiDiGinoShort.pdf

- A folder “FirmwareTiDiGino” containing the firmware for TiDiGino;
“TiDiGinoMainV12.ino”: main sketch;
5 modules in the folder “modules”:
“Commands.c”: Commands and their management
“Phone.c” Management Procedures GSM
“Pins.c” Definitions of corresponding pins of the Arduino and global variables
“StateVariables.c” Variables to store the state of the controller and procedures for EEPROM
“Utility.c”: Various procedures used by other modules

- An executable jar file “TiDiGinoW32.jar” and “TiDiGinoW64.jar”
(Containing the Java application interface for Windows32 or Windows64)
(Just extract the files in a directory and appropriate “to click” above)

- A “Library” folder containing (for convenience) Arduino libraries used.
To be installed in the directory “libraries” of the Arduino software (if not already present)

- File “boards.txt” that replaces the same name in the “hardware\arduino”. This file has been added TiDiGino the platform that you will find it listed along with the other (after restarted the IDE). This file is pointing to the directory “Tidigino” of “variants”

- The folder “tdigino” that contains the file “pins_arduino.h” which realizes the map particular hardware of TiDiGino. This folder should be added to other in the templates folder (the folder “hardware\arduino\variants” of the environment Arduino 1.0)

N.B.
To load the sketch of TiDiGino must first edit the path of inclusion forms.
In fact we used the absolute path to solve the problems with the Arduino compiler.
The inclusion of modules is obviously “TiDiGinoMain.ino”.
The easiest thing is to create a folder in the workspace Arduino “TiDiGinoMain”, copy the file “TiDiGinoMain” and the Forms folder, then edit the file, changing paths, and finally activate the upload.
Attention! At the first start after the upload, press P1 and P2 to reset and load the default values ​​to EEPROM.

N.B.
The application interface is in Java (and so you must have Java installed) but it is only for WINDOWS environment because of the library bill for the management of the serial port.
(If the jar was not associated with java you can run it from the console window command “java-jar TiDiGinoWxx.jar”, or creating a link using “javaw-jar TidiGinoWxx.jar”)
Keep in mind that every time you open the serial port you have a firmware restart unless you open jumper JP2 (near the USB connector) that prevents the software reset of Arduino.

N.B.
The software is “open source” and therefore disclaims any liability arising from its use.

Start your Car from Afar using Arduino

This DIYer had a 1st generation iPhone lying around, so he decided to put it to good use.  You can use any phone to accomplish this, even a $10 prepaid phone.  An SMS to the iPhone goes through an Arduino which tells yours car to start or stop from anywhere.  There’s some custom circuitry and programming which is all included in the instructions. When a text message is sent to the iPhone, the iPhone tells the Arduino to start the engine, and the iPhone sends a message back reporting that the start has commenced. Check out the full details to make your own.

Top Arduino Projects:

TiDiGino, the Arduino-based GSM remote control


Using an ATmega 2560 and therefore the heart of Arduino, we have developed a universal remote control with GSM. This allows  to control 2IN/2OUT, DTMF key, gate control and GSM thermostat activated remotely.

We have already presented several remote control with different functions.
But now we want to present the best remote control ever made with Arduino.
The remote control is easier, thanks to the availability of several libraries that allow you to do anything to the Arduino microprocessor; if there is not really a specific library, you can modify an existing one. Thus was born TiDiGino, based on the chip ATmega 2560 used in Arduino Mega. Our system has connectors S.I.L. to mount any shield, each of them is in the same location where you would be in the original development platform, which enables the use of commercial and in any case the standard shield.
We said that the functions of our remote control, ie 2IN/2OUT, gate opener, key DTMF GSM and thermostat can be achieved by using special firmware, well, we could write these ourselves, but we wanted to offer our readers who know the Arduino environment do them. This is the sense of TiDiGino Contest, which you could follow our blog and that has just ended, as promised, we publish the hardware of the remote control and a few routines.

The circuit

The TiDiGino is based on a ATmega 2560 chip, some pins are used to manage GSM functionality, corresponding to ports that are not used in the original Arduino MEGA. For this reason it is necessary to replace the file pins_arduino.c located under the folder C:\ProgramFiles\arduino-0022\hardware\arduino\cores\arduino that is created by downloading the Arduino IDE, with that we made available with the library, otherwise it is possible to manage all’ATmega 2560 lines of I/O provided by the platform Arduino MEGA.

This choice was intended to leave some I/O free for use by any shield. Therefore you can use the sketches already made to control a specific shield with the original Arduino board, even on TiDiGino.
In compliance with the open-source philosophy we have made available on our site libraries to operate the main blocks of the TiDiGino.
To test the circuit we made four sketches, each of which allows you to use a section of the system. The sketches are all contained in the file GSM_TDGINO.zip, downloadable from the development page of Google, which contains the library that allows you to manage the GSM of TDGINO.
This library comes from the one developed by HWKitchen, but has been adapted to our hardware, as, for example, use the second serial dell’ATMEGA2560 to manage the GSM module of Simcom SIM900. Decompressing the zip in the folder of the Arduino libraries (eg C:\ProgramFiles\arduino-0022\libraries) the library is immediately usable.
By copying the library, are also automatically installed the examples we have developed to manage the various sections, in order to test these examples must be connected to the USB port TDGINO and provide an external power supply circuit of about 12 VDC (1 A of current).
This creates a virtual COM will be used to program the remote control. Select the Board “Arduino Mega 2560″ and from File-> Examples-> GSM_TDGINO, choose the example that you want to upload to the remote control.


The hardware

The I/O used for the expansions are PB4÷PB7, PE3÷PE5, PG5, PH3÷PH6, then there are PE0 and PE1 that are, respectively, RXD and TXD of the first internal UART to the microcontroller.
Now we see the lines of I/O used to manage the devices necessary to implement the functions of remote control, starting from PE6 and PE7 configured as input (pull-up R38 and R39) used to read the status of the optically isolated inputs, each of which detects the presence of a dc voltage (from a minimum of 3 to a maximum of about 35 volts) and AC (from a minimum of 2.5 to a maximum of 30 Vrms) applied to IN1 (circuit U4) and IN2 (circuit U5).
The command of the relay output is obtained with PC0 and PC1, initialized as outputs, each relay is controlled by an NPN transistor.
The GSM in the circuit diagram is not the GSM module, but a circuit (TDGGSM_900 - Store) that mounts it.
There is also a EEPROM memory 24FC256-SN to store user data.
For the management of the temperature sensor, used for the feature “Thermostat GSM”, the ATmega use the pin PK1 initialized as two-way line, the remote temperature sensor used in the Dallas DS1820 is capable of measuring temperatures in the range -5 to 150 ° C with an accuracy of ± 0.5 ° C (-10 to 85 ° C).
The DTMF section use the U7 (a MT8870, SMD): capable to decode standards tone thanks to a complex pattern of active filters agreed by the clock signal generated from its oscillator.
The USB interface circuit uses the integrated U8: the classic FT232RL. The pins 3 (TX) and 2 (RX) correspond to the first UART, since they are essentially used to program TiDiGino thanks the bootloader.
P1 is the button to reset the circuit, which also DTR is forced, by the computer when we want to load the firmware in the micro, exploiting the bootloader.
Well, we conclude the analysis with the power, which is a DC voltage, even non-stabilized (applied to the points + and – PWR) in value between 7 and 32 V, this voltage is filtered downstream of the protection diode reverse polarity (D1) by the capacitors C1 and C2, the fuse F1 allows us to protect the circuit and the source of power in an integrated circuit in the controller below and that we need to derive the 4 volts required to make run the rest of the circuit.

BOM

R1: 0,1 ohm 1W (1206)
R2: 2,2 kohm (0805)
R3: 1 kohm (0805)
R4: 100 kohm (0805)
R5: 4,7 kohm (0805)
R6: 4,7 kohm (0805)
R7: 330 ohm (0805)
R8: 330 ohm (0805)
R9: 4,7 kohm (0805)
R10: 10 kohm (0805)
R11: 4,7 kohm (0805)
R12: 10 kohm (0805)
R13: 330 ohm (0805)
R14: 330 ohm (0805)
R15: 1,5 kohm (0805)
R16: 1,5 kohm (0805)
R17: 330 ohm (0805)
R18: 4,7 kohm (0805)
R19: 4,7 kohm (0805)
R20: 100 ohm (0805)
R21: 4,7 kohm (0805)
R22: 4,7 kohm (0805)
R23: 330 kohm (0805)
R24: 39 kohm (0805)
R25: 56 kohm (0805)
R26: 100 kohm (0805)
R27: 100 kohm (0805)
R28: 4,7 kohm (0805)
R29: 4,7 kohm (0805)
R30: 4,7 kohm (0805)
R31: 0 ohm (0805) *
R32: 0 ohm (0805) *
R33: 4,7 kohm (0805)
R34: 470 ohm (0805)
R35: 470 ohm (0805)
R36: 10 ohm (0805)
R37: 10 ohm (0805)
R38: 4,7 kohm (0805)
R39: 4,7 kohm (0805)

C1: 100 nF (0805)
C2: 220 µF 35 VL (F)
C3: 100 pF (0805)
C4: 100 nF (0805)
C5: 100 µF 16 VL (D)
C6: 100 nF (0805)
C7: 100 nF (0805)
C8: 470 µF 6,3 VL (D)
C9: 22 pF (0805)
C10: 22 pF (0805)
C11: 47 µF 16 VL (D)
C12: 47 µF 16 VL (D)
C13: 100 nF (0805)
C14: 470 µF 6,3 VL (D)
C15: 470 µF 6,3 VL (D)
C16: 470 µF 6,3 VL (D)
C17: 10 pF (0805)
C18: 100 nF (0805)
C19: 10 pF (0805)
C20: 100 nF (0805)
C21: 100 nF (0805)
C22: 4,7 µF 6,3 VL  (R)
C23: 100 nF (0805)
C24: 100 nF (0805)
C25: 100 nF (0805)

Q1: Quartz 16 MHz (C7S)
Q2: Quartz 3,579545 MHz (HC49/4H SMX)

U1: MC34063AD
U2: DS18B20+
U3: 24FC256-SN
U4: TLP181
U5: TLP181
U6: ATMEGA2560-16AU
U7: MT88L70AS
U8: FT232RL
U9: TC1262-3.3 (SOT-223)
GSM: TDGGSM_900

D1: GF1M-E3
D2: MBRS140TRPBF
D3: GF1M-E3
D4: GF1M-E3

T1: BC817
T2: BC817

LD1: LED 3 mm red
LD2: LED 3 mm red
LD3: LED 3 mm yellow
LD4: LED 3 mm yellow
LD5: LED 3 mm green
LD6: LED yellow(0805)
LD7: LED red (0805)

L1: coil 22 µH

RL1: relay 5V 2 vias
RL2: relay 5V 2 vias

P1: Microswitch
P2: Microswitch 90°

F1: Fuse 2 A (1206)

- screw 2 vias(2 pz.)
- screw 3 vias (2 pz.)
- Mini-USB
- Plug
- Jumper
- Strip male 2 poli
- Strip male 3 poli (2 pz.)
- Strip male 4 poli
- Strip female 3 poli
- Strip female 6 poli (2 pz.)
- Strip female 8 poli (2 pz.)
- Strip female 16 poli
- PCB

Functions

There are several sketches to handle the remote control, all came through TiDiGino contest.
These files can be downloaded from Google, where you will find the library and files created by various readers.
Basically all the sketches perform the same functions.
Summarize here the common features.

The remote can be operated by commands sent by SMS, but you can also control it via the serial port (connected to USB converter).
Each command is followed by a response (via SMS) directly to the sender, but the answer may be disabled. In addition there is an alarm function, as the automatic sending of SMS or voice calls, based on conditions on each of the two inputs.
The circuit can also be used as a gate control, calling the SIM in the TiDiGino: the system recognize the calling number and if this number is stored the relay will switch on. In the DTMF mode, the remote control can be controlled by a multi-frequency telephone tone.
In addition, the circuit can operate as a thermostat, running an air conditioning system.

In summary, there are the following features:

• Remote alarm
• Gate control
• GSM termostat
• Remote control with DTMF

Library and sketch

Download the latest sketch for this GSM remote control.

Design


Triggertrap automatic shutter release hits production, links your camera to most things

Want your camera to take a shot whenever the phone rings or someone loads your blog page? Triggertrap can arrange that for you. This Arduino-powered box has managed to cross the funding finish-line and will be bringing its multi-source automatic release to camera creatives early next year. The former Insert Coin project can communicate with cameras through either a wired connection or its own IR transmitter. It can initiate shutter release from a multitude of sensors, with the built-in light, laser and sound sensors backed up by an auxiliary port, meaning it can be hooked up to anything capable of generating an electronic signal. With prototype testing complete, the Triggertrap looks set to ship in early February next year, with a special build-your-own version appearing soon after that. The ready-made options will set you back $125, while the customizable 'shield' version is pegged at $75. Interested? Well, hold on after the break for a full video tour of the cherry red hardware.

Continue reading Triggertrap automatic shutter release hits production, links your camera to most things

Triggertrap automatic shutter release hits production, links your camera to most things originally appeared on Engadget on Tue, 06 Dec 2011 11:10:00 EST. Please see our terms for use of feeds.

Permalink | Email this | Comments