Posts with «cnc» label

Converting an STL file to Gcode to drive a CNC mill or lathe

As mentioned in my blog, "Multipurpose Mini Machine" DAGU wants to develop a low cost CNC machine kit. The models shown here will not be the final product, they are simply what I used for testing the quality of the components.

Part of the kit will be an Arduino compatible controller. Ok, I know, nothing new so far.

read more

Let's Make Robots 04 Nov 09:20
arduino  card  cnc  dagu  gcode  library  programming  sd  stl  

Building an Arduino Controlled Lathe

After picking up a vintage Delta Homecraft wood lathe from a garage sale, Chris decided to convert to CNC using an Arduino:

I found an old lathe at a garage sale and decided to turn it into a router lathe for cutting spirals, flutes and threads. Initially, I considered using a strictly mechanical mechanism to synchronize spindle rotation and cross-feed travel, but after playing with an Arduino and some stepper motors, I realized that could be a better solution, possibly even converted to a full CNC system sometime in the future. Now that I know it’s going to work, (I made the first cut today) I’m sharing some notes on the build.


I love the detail Chris put into documenting this conversion. He even explains how he prototyped the design using an Arduino, a MotorShield, and some old stepper motors to make sure everything would work on his full-sized version. Check out the entire build on Chris’s Blog. [Thanks Rob!]


Filed under: Arduino, CNC, Furniture

Telepresence Zen Garden

Harford Hackerspace’s Telepresence Zen Garden looks awesome! Such a great idea.

For this year’s RedBull Creation competition, we had to incorporate a ‘Bullduino’ into the project of our choice. What is a Bullduino? It’s essentially an Arduino Uno shaped like the RedBull logo. So, we came up with the idea of creating a Telepresence Zen Garden. Sounds simple right? Well, it was actually more difficult than it sounds.

We created a user interface in Flash which allows the user to draw lines on a canvas. That data is uploaded to a web server and stored into a MySQL database. There is a queuing system written in PHP on the web server. The queuing system keeps track of the order in which the drawings are submitted and it is responsible for keeping the buffer full on the Bullduino.

The Bullduino is connected to a rail of power mosfets to control turning on and off 8 banks of Red and Blue LEDs. It is also connected to 2 stepper motor drivers, 2 servos, and 4 limit switches. The limit switches are used to zero out the XY table and prevent damage to the machine should something go wrong.

[via MakerBot]


MAKE » Arduino 11 Jul 15:00

Arduino based Milling Machine

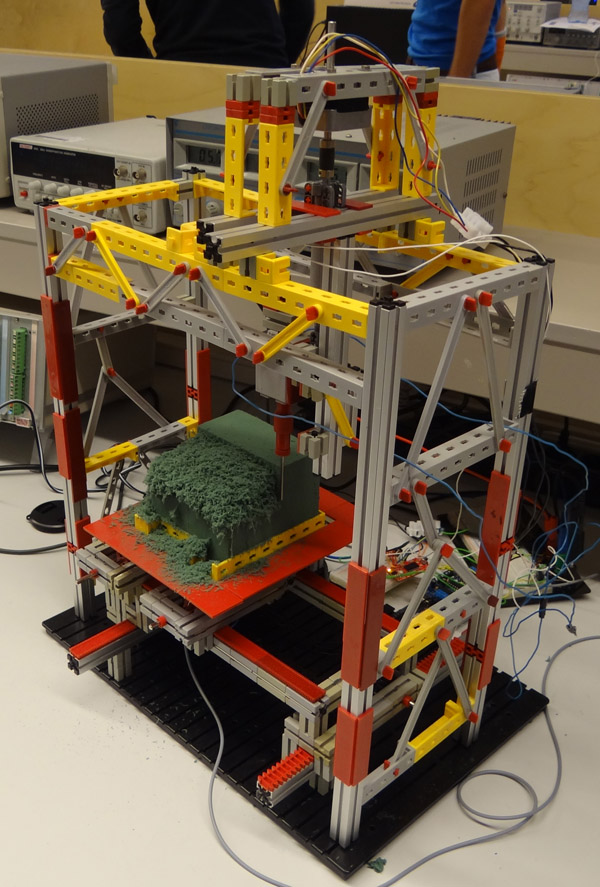
This is a working model of an Arduino based Milling Machine created using FischerTechnik. For those of you who are unaware of FischerTechnik, it is similar to the LEGOTM Building Blocks.

A group of four Mechanical Engineering students at the Delft University of Technology (Netherlands) created this project as part of their Mechatronics class in their Second year of Bachelor of Sciences (B.Sc.) Program.

Laurens Valk, one of the creators, explains the essence of Arduino in the project:

“The system uses the Adafruit motor shield to run two stepper motors, and the Sparkfun EasyDriver for the third stepper motor. The Arduino runs code that listens to Matlab commands over USB. We expanded that code a little to make it possible to add the third stepper motor and some other commands. Most of the actual code was programmed in Matlab, with the Arduino as the interface between computer and motors/sensors.”

We had a little chat with Laurens. Here is the excerpt:


When did you first hear about Arduino, and when did you first start using it?
I’ve seen a lot of Arduino projects over the years, but this was the first time we used it in a project. Personally, I usually build robots with MINDSTORMS NXT, but this felt like a good opportunity to combine mechanical work (the printer hardware) with real electronics (Arduino).
How did you end up making a Milling Machine/ 3D Printer for your project?

We chose to come up with our own design challenge and decided not to do the standard exercise. Initially we thought about making a (2D) plotter or scanner. Then quickly we started thinking about the same things, except in 3D. One of the projects that inspired us was the LEGO Milling Machine by Arthur Sacek. Both a scanner and printer would still be doable in 3D, but the time was limited, so we settled with the printer idea.

All construction had to be done in one workweek for logistical reasons. To make sure we were able to finish in time, we prepared much of the electronics and software outside the lab. We finished just in time, but unfortunately we could do only one complete print before we had to take it apart. Not surprisingly, it was very exciting to wait for the result of the one and only complete test run. We couldn’t see the result until we used the vacuum cleaner to remove the dust.

Here is a video showing the working of this machine. [And the Vacuum Cleaner Laurens is talking about]:

This gives an Insight into the many feats that an Arduino can accomplish.


DIWire Build Plans Available for Download

We’ve previously posted about DIWire, an Arduino based machine that bends metal wire into 2D or 3D shapes. Now the folks at Pensa have uploaded the bill of materials, code, and models of the custom parts for 3D printing so that you can get started building your own CNC wire bending machine… in case one of these is out of your price range.


MAKE » Arduino 21 Jun 17:30
arduino  cnc  wire  wire bending  

DIWire printer – Draw, click, bend!

So, you want a DIY printer, but you have no idea to print the intricate squiggly design on the board? Enter Pensa!

In the maker’s own words:

But there are times when we need to output lines in space rather than volumes. Most 3D printing technologies are not well suited for printing thin lines because the materials are weak, the machine uses a lot of 3D-print support material, and the process is slow. The closest thing to a machine that can output lines is a CNC wire bender, but these machines are used almost exclusively for mass production in factories. They are not used for rapid prototyping because the equipment is large, expensive and takes trained personnel to run. So, we decided to make the DIWire Bender.

Apart from a mere prototype, the machine can read any data. A few desired applications can be : artwork from a random number algorithm, or internet data like stock prices and weather stats. You can also create mass customized products, like eyeglass frames that fit, or be a street vendor printing jewelry from a person’s silhouette, on demand.

And it doesn’t have to be aluminum wire; in principal the machine could bend other materials, including colored electrical wires, some plastics, memory metals, even light pipes to create small light forms. And if you don’t like the output, it could be configured to pass the bent wire through the straightener to start again.

Have fun!

Via:[Pensanyc]

Arduino Blog 07 May 16:45
ar(t)duino  cnc  

Hacking An Industrial CNC Lathe, Part I: Intro

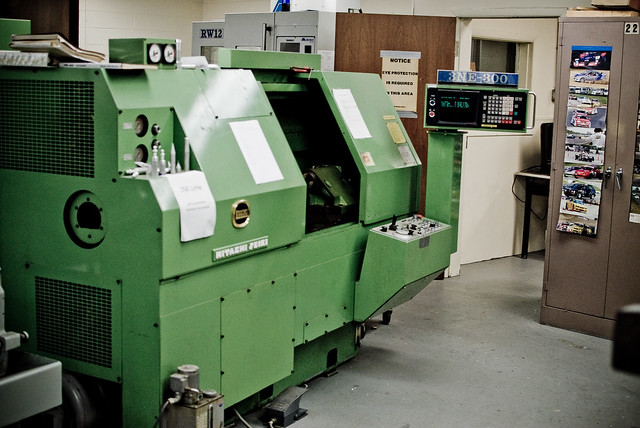
Hitachi-Seiki 3NE-300 Lathe, circa 1980

I’m currently taking some mechanical engineering classes at County College of Morris (CCM) in Randolph, NJ. Among the equipment in the machine shop is this mean, green Hitachi-Seiki CNC Lathe, a neat piece of industrial equipment from the late 70′s/early 80′s.

Currently, there are two ways to program the machine. You can program it manually, by entering in codes on the keypad:
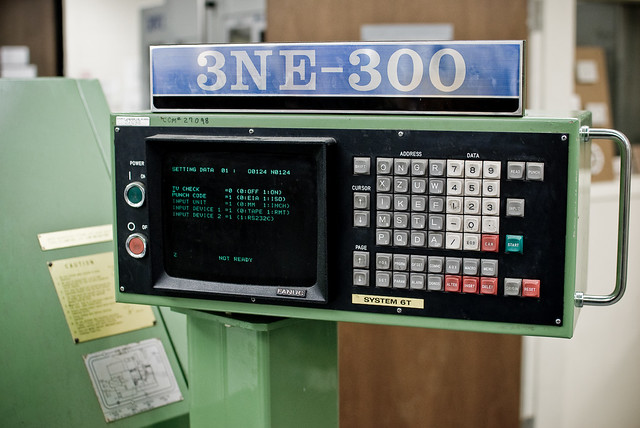
3NE-300 control panel

-OR- you can get your Jacquard on and write a program on punched tape:
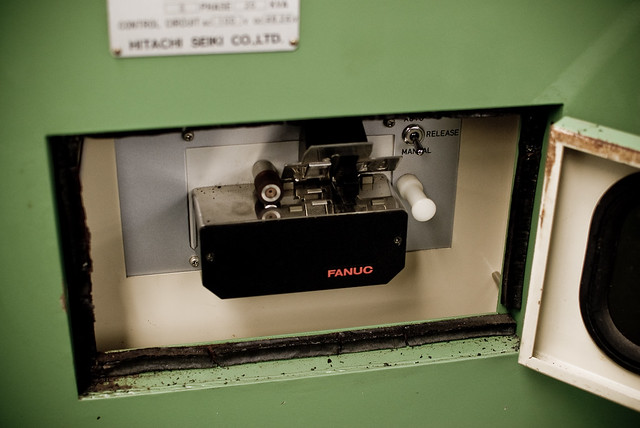
FANUC punched tape reader

Naturally, for ease of use, the punched tape reader is on the back of the machine. *sigh*

Fortunately, there is a third way to get program code into the controller. This is via an RS-232C port:
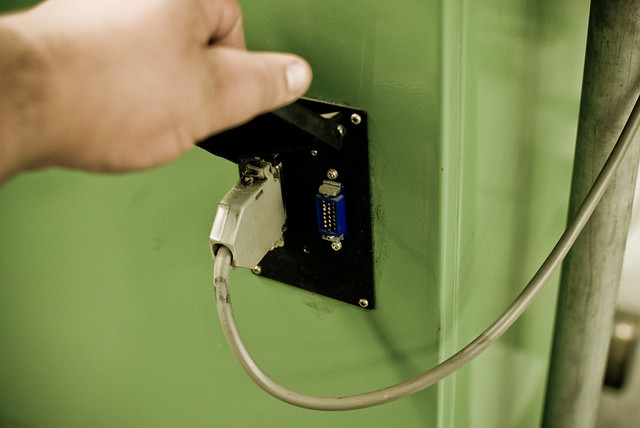
Serial port: a DB-25 RS-232-C port and an MR-20 "HONDA" connector

The obvious question is: why not just hook the serial port up to a computer? Well, due to the logistics of the shop, it’s not feasible to have a computer in the immediate vicinity of the machine. In order to hook it up to the nearest computer, the required cable would be at least 25 feet long. In practice, this translates to a 600-baud signaling rate, as there is a lot of EM interference in the shop, due to motors, fluorescent lights, etc. It’s much easier to simply have a small “black box” that can load the program from modern media like an SD card.

My plan is to build a circuit based around an Arduino, which will read an NC file (ASCII text) from an SD card and send it to the machine over the serial port. I plan to use the following hardware:

  • Arduino Mega – the brains of the operation. To be honest, I probably won’t need the extra pins of the Mega, but with the full SD library, the serial library and the extensive menu system I plan to write, I need the extra program memory.
  • LCD with Adafruit i2c/SPI backpack – for the display (file menu, load progress, etc.)
  • Adafruit Logger Shield – for reading from and writing to the SD card.
  • CuteDigi RS232 Shield – not entirely sure about this one yet. I may just get an Adafruit protoshield and wire up a DB-25 port to it.
  • Hammond 1550D enclosure – with milled openings for the SD card, LCD and buttons.

The controller for the lathe is a FANUC 6T-B. While rather primitive by today’s standards, in it’s day it was a top of the line industrial controller, and FANUC is still the standard. It’s pretty much indestructible too, which is a bonus, because it means I won’t end up scrambling the brains on a $20,000 piece of equipment.

More to come as I work on this project over winter break. I’m hoping to get the electronics soon and start work on the menu and input systems. By the time I get back to school in January, it’ll (hopefully) be ready to interface with the FANUC controller.

n/a
Let's Make Robots 01 Jan 00:00
arduino  cnc  code  dagu  file  robot  stl  

n/a
Let's Make Robots 01 Jan 00:00
5 axis  arduino  axis  cnc  dagu  lcd  machine  mill  prototype