Posts with «cnc» label

Laser Engraver Uses All of the DVD Drive

For the last ten to fifteen years, optical drives have been fading out of existence. There’s little reason to have them around anymore unless you are serious about archiving data or unconvinced that streaming platforms will always be around. While there are some niche uses for them still, we’re seeing more and more get repurposed for parts and other projects like this laser engraver which uses not only the laser from a DVD drive, but plenty of other parts as well.

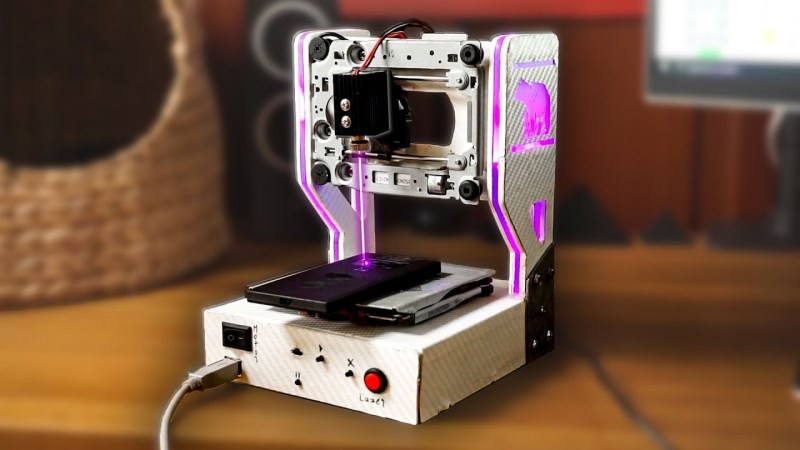
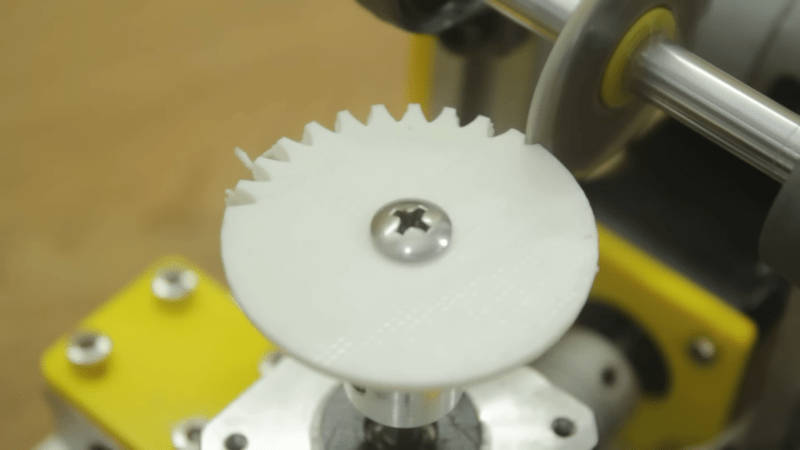
The build starts with a couple optical drives, both of which are dismantled. One of the shells is saved to use as a base for the engraver, and two support structures are made out of particle board and acrylic to hold the laser and the Y axis mechanism. Both axes are made from the carriages of the disassembled hard drives, with the X axis set into the base to move the work piece. One of the lasers from the scavenged DVD drives is fitted to the Y axis with a new heat sink, and with an Arduino set up to interpret gcode the device is on its way to engraving any material that will fit into its diminutive frame.

While the build repurposes almost all of the parts from the optical drives, it does stop short of using the drive motors in favor of A4988 stepper motors. It’s also not quite powerful enough to engrave wood, but other materials like leather are right in this machine’s sweet spot. If you have plenty of drives on hand with nothing else for them to do, there’s plenty more they can be used for. This scanning laser microscope is among the more interesting builds we’ve seen.

Retired Welding Robot Picks Up Side Hustle as CNC Router

Who says you can’t teach an old robot new tricks? Nobody, actually. That saying is about dogs. But it applies to robots too, at least judging by the way this late-90s industrial beast was put to use in a way it was never intended: as a giant CNC router.

The machine in question is an ABB IRB6400, a six-axis, floor-mounted industrial machine that had a long career welding at a Eurorail factory in Austria before [Brian Brocken] made its acquaintance. He procured the non-working machine — no word on what he paid for it — and moved the 2-ton paperweight into his shop, itself a non-trivial endeavor. After a good scrubbing, [Brian] tried to get the machine started up. An error prevented the robot controller from booting; luckily, there’s a large community of ABB users, and [Brian] learned that one of the modules in the controller needed replacement.

After fixing that — and swapping out the controller’s long-dead backup batteries, plus replacing the original 1.44 MB floppy drive with a USB drive — he was able to bring the machine back to life. Unfortunately, the limited amount of internal memory made it difficult to use for anything complicated, so [Brian] came up with an application to stream coordinates to the controller over a serial port, allowing for unlimited operation. With that in place, plus a simple spindle mounted to the robot’s wrist with a 3D printed adapter, [Brian] was able to carve foam blocks into complex shapes. The video below shows everything from delivery to first chips — well, dust at least.

This build seems to be a significant escalation from [Brian]’s previous large-format CNC machine. He must have something interesting in mind, so stay tuned for details.

Hack a Day 11 Apr 09:00

Walnut Case Sets This Custom Arduino-Powered RPN Calculator Apart from the Crowd

How many of us have an everyday tool that’s truly unique? Likely not many of us; take a look around your desk and turn out your pockets, but more often than not, what you’ll find is that everything you have is something that pretty much everyone else on the planet could have bought too. But not so if you’ve got this beautiful custom RPN calculator in a wooden case.

This one comes to us from [Shinsaku Hiura], who generally dazzles us with unique mechanical clocks and displays. This calculator solves a more practical problem — the dearth of RPN calculators on the market with the correct keyboard feel, specifically with the large keys and light touch he desired. Appropriately, the build started with a numeric keypad, which once liberated of its USB interface was reverse-engineered to figure out how the matrix was wired. Next up, a custom PCB to connect the keypad to an Arduino and a 20×4 LCD display was milled up, while a test case was designed and printed to check fitment. The final case was milled from a block of solid walnut and fitted with an acrylic window, for a sharp look with clean lines and pleasing colors.

As for the calculator itself, the demo below shows it going through its paces. The code is clever because it leverages the minimal number of keys available by hiding all the scientific and engineering functions behind a “secret silver key” that was once the equals key and obviously not needed in RPN. Hats off to [Shinsaku] for a handsome and unique addition to his desk.

Simple CNC Gear Production with Arduino

We’ve seen plenty of people 3D printing custom gears over the years, but [Mr Innovative] decided against an additive process for his bespoke component. He ended up using a simple CNC machine that makes use of several components that were either salvaged from a 3D printer or produced on one. Using a small saw blade, the machine cuts gear teeth into some plastic material and — presumably — could cut gears into anything the saw blade was able to slice into, especially if you added a little lubrication, cooling, and dust removal.

If you’ve built a 3D printer, you’ll see a lot of familiar parts. Stepper motors, aluminum extrusion, straight rods, bearing blocks, and rod holders are all used in the build. There’s also a lead screw and the associated components you usually see in a printer’s Z-axis. Naturally, an Arduino drives the whole affair.

The saw blade was custom-made from a washer, grinding an edge and using a 3D printed template to cut teeth in it. We might have been more inclined to use a cut-off wheel from a rotary tool, but this certainly did the trick. An LCD accepts the gear diameter and number of teeth. The stepper rotates the correct number of degrees and another stepper lowers the cutting head which is spinning with a common DC motor.

As impressive as this machine is, the fact remains that a 3D printer can produce more complex designs. For example, a herringbone pattern can help with alignment issues. It has been done many times. You can even use a resin printer, although you might prefer to stick with FDM.

Hack a Day 10 Oct 16:30

Old CNC Brain Swapped With An Arduino

[Sebastian] and [Stefan Shütz] had a ISEL EP1090 CNC machine at home, sitting unused, and they decided to bring it to life. With pretty good mechanical specs, this CNC looked promising – alas, it was severely constrained by its controller. The built-in CPU’s software was severely outdated, had subpar algorithms for motor driving programmed in, and communication with the CNC was limited because the proprietary ISEL communications protocol that isn’t spoken by other devices.The two brothers removed the CPU from its PLCC socket, and went on to wiring a grbl-fueled Arduino into the controller box.

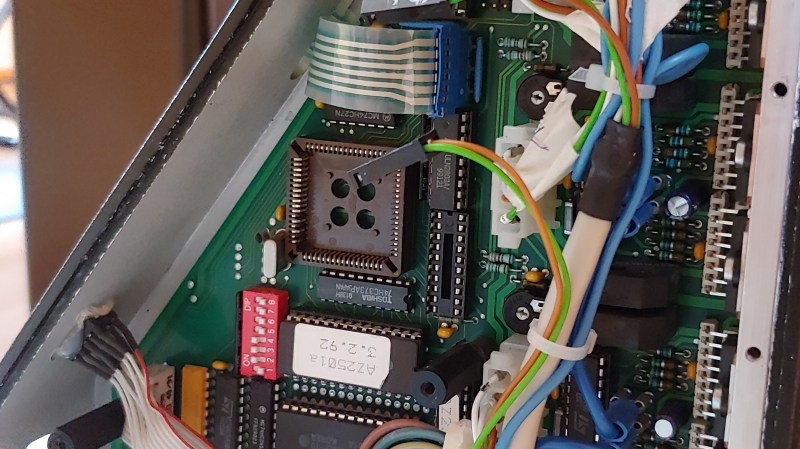
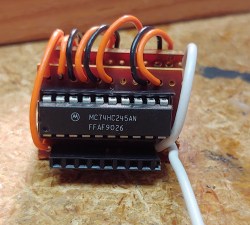
They reverse-engineered the motor driver connections – those go through a 74HC245 buffer between the original CPU and the drivers. Initially, they put an Arduino inside the control box of the CNC and it fit nicely, but it turned out the Arduino’s CPU would restart every time the spindle spun up – apparently, EMC would rear its head. So, they placed the Arduino out of the box, and used two CAT7 cables to wire up the motor and endstop signals to it.

For tapping into these signals, they took the 74HC245 out of its socket, and made an interposer from two small protoboards and some pin headers – letting them connect to the STEP and DIR lines without soldering wires into the original PCB. There’s extensive documentation, GRBL settings, and more pictures in their GitHub repo, too – in case you have a similar CNC and would like to learn about upgrading its controller board!

After this remake, the CNC starts up without hassles. Now, the brothers shall CNC on! Often, making an old CNC machine work is indeed that easy, and old controller retrofits have been a staple of ours. You can indeed use an Arduino, one of the various pre-made controller boards like Gerbil or TinyG, or even a Raspberry Pi – whatever helps you bridge the divide between you and a piece of desktop machinery you ought to start tinkering with.

This Sun Tracking CNC Machine Uses The Sun Instead of a Laser

We’ve all seen people goof around with a magnifying glass in the sun, but this project takes it to a new level. Cranktown City has uploaded this fantastically amusing project that is sure to impress. He built a cnc controlled engraving machine that uses the sun instead of a laser tube. As he explains in […]

The post This Sun Tracking CNC Machine Uses The Sun Instead of a Laser appeared first on Make: DIY Projects and Ideas for Makers.

Split Flap Display Tells Us The Word

LED and LCD displays are a technological marvel. They’ve brought the price of televisions and monitors down to unheard-of levels since the days of CRTs, but this upside arguably comes with an aesthetic cost. When everything is covered in bland computer screens, the world tends to look a lot more monotonous. Not so several decades ago when there were many sharply contrasting ways of displaying information. One example of this different time comes to us by way of this split-flap display that [Erich] has been recreating.

Split-flap displays work by printing letters or numbers on a series of flaps that are attached to a spindle with a stepper motor. Each step of the motor turns the display by one character. They can be noisy and do require a large amount of maintenance compared to modern displays, but have some advantages as well. [Erich]’s version is built out of new acrylic and MDF, and uses an Arduino as the control board. A 3D printer and CNC machine keep the tolerances tight enough for the display to work smoothly and also enable him to expand the display as needed since each character display is fairly modular.

Right now, [Erich]’s display has 20 characters on two different rows and definitely brings us back to the bygone era where displays of this style would have been prominent in airports and train stations. This display uses a lot of the basics from another split flap display that we featured a few years ago but has some improvements. And, if you’d prefer restorations of old displays rather than modern incarnations, we have you covered there as well.

Thanks to [Bob] for the tip!

Minimal Mill: The Minamil

Having a few machine tools at one’s disposal is a luxury that not many of us are afforded, and often an expensive one at that. It is something that a large percentage of us may dream about, though, and with some commonly available tools and inexpensive electronics a few people have put together some very inexpensive CNC machines. The latest is the Minamil, which uses a rotary tool and straps it to an economical frame in order to get a functional CNC mill setup working.

This project boasts impressively low costs at around $15 per axis. Each axis uses readily available parts such as bearings and threaded rods that are readily installed in the mill, and for a cutting head the build is based on a Dremel-like rotary tool that has a similarly low price tag. Let’s not ignore the essentially free counterweight that is used.

For control, an Arduino with a CNC shield powers the three-axis device which is likely the bulk of the cost of this project. [Paul McClay] also points out that a lot of the material he needed for this build can be salvaged from things like old printers, so the $45 price tag is a ceiling, not a floor.

The Minamil has been demonstrated milling a wide variety of materials with excellent precision. Both acrylic and aluminum are able to be worked with this machine, but [Paul] also demonstrates it in its capacity to mill PCBs. It does have some limitations but for the price it seems that this mill can’t be beat, even compared to his previous CNC build which repurposed old CD drives.

The HackadayPrize2021 is Sponsored by:

Teaching an Old Lathe New Tricks With a Programmable Power Feed

Ask anybody whose spent time standing in front of a mill or lathe and they’ll tell you that some operations can get tedious. When you need to turn down a stainless rod by 1/4″ in 0.030″ increments, you get a lot of time to reflect on why you didn’t just buy the right size stock as you crank the wheel back and forth. That’s where the lead screw comes in — most lathes have a gear-driven lead screw that can be used to actuate the z-axis ( the one which travels parallel to the axis of rotation). It’s no CNC, but this type of gearing makes life easier and it’s been around for a long time.

[Tony Goacher] took this idea a few steps further when he created the Leadscrew Buddy. He coupled a beautiful 1949 Myford lathe with an Arduino, a stepper motor, and a handful of buttons to add some really useful capabilities to the antique machine. By decoupling the lead screw from the lathe’s gearbox and actuating it via a stepper motor, he achieved a much more granular variable feed speed.

If that’s not enough, [Tony] used a rotary encoder to display the cutting tool’s position on a home-built Digital Readout (DRO). The pièce de résistance is a “goto” command. Once [Tony] sets a home position, he can command the z-axis to travel to a set point at a given speed. Not only does this make turning easier, but it makes the process more repeatable and yields a smoother finish on the part.

These features may not seem so alien to those used to working with modern CNC lathes, but to the vast majority of us garage machinists, [Tony]’s implementation is an exciting look at how we can step up our turning game. It also fits nicely within the spectrum of lathe projects we’ve seen here at Hackaday- from the ultra low-tech to the ludicrously-precise.

Carve shapes out of foam with this Arduino-controlled hot wire cutter

You may have a 3D printer or other “digital” tools like a laser engraver or CNC router, but what if you want to work with Styrofoam? As How To Mechatronics demonstrates in his latest project, many of the same techniques used there can be implemented to make your own Arduino-powered hot wire foam cutter.

This build is constructed with 20x20mm aluminum extrusion and 3D-printed parts, and uses an Uno board and CNC shield to drive three stepper motors. Two of these motors manipulate the wire in the horizontal and vertical directions, while the third controls a turntable that rotates the foam as needed.

As seen in the video below, it’s a brilliant design. Written instructions can be found in How To Mechatronics’ blog post, which walks you through the entire process from assembling the machine and connecting its components to preparing shapes and generate the G-code.