Posts with «arduino» label

Homemade Satellites are Just Around the Corner


As a child, I always looked up at the stars and wondered how I could make it into space. Hopefully, I will live to see that day, but for now, a homemade satellite will have to do. The Nanosatisfi team has made it their mission “to provide affordable space exploration for everyone!,” and with ArduSat, they move one step closer to reality. ArduSat is a Arduino-controlled miniature 10cm cubic satellite, weighing 1 kg, which is roughly equivalent to half a store bought loaf of bread. Its size might not be impressive, but it packs over 25 sensors including: Myspectral’s open source spectrometer, inertial measurement unit, magnetometer, along the standard set, and many others. This impressive little machine boasts a camera to take photographs, it could send messages back to earth, or it can run your space experiments. With the ability to upload code directly to the ArduSat while in space, the possibilities are virtually limitless.

Be sure to check out their YouTube Channel for more technical details. You can also support their efforts via their Kickstarter page .


DIWire Build Plans Available for Download

We’ve previously posted about DIWire, an Arduino based machine that bends metal wire into 2D or 3D shapes. Now the folks at Pensa have uploaded the bill of materials, code, and models of the custom parts for 3D printing so that you can get started building your own CNC wire bending machine… in case one of these is out of your price range.


MAKE » Arduino 21 Jun 17:30
arduino  cnc  wire  wire bending  

Buying parts for circuits course

I’m going to need some parts to play with for the circuits course.  While I probably could get the parts I need at work from the Baskin Engineering Lab Support (BELS) staff, it would probably involve a bit of hassle, as there isn’t even a course number for the course yet, and so they’d have a difficult time figuring out which department to charge for the 30¢ and 60¢ parts—the cost in staff time (and my time) would be ridiculous.  So I decided to buy my own parts with my own money from Digikey.  My experience with them in the past is that in-stock parts generally get delivered by US mail within 2 days of ordering (it helps that they are not far away).

One experience we don’t give the students (at least, not until the senior design project) is trying to figure out what parts to buy.  It can be an overwhelming task—DigiKey has in stock 10,917 chips that come up in response to a search for op amps. We can reduce that to 1,249 if we restrict ourselves to through-hole rather than surface-mount parts. Adding a request for rail-to-rail outputs reduces that number to 314.  Sorting by price and looking through those under $1 shows many from Microchip Technology, each with slightly different specs.  I don’t see any way that a student in a beginning circuits class could make sense of most of the specs.

Thermistors are almost as bad, as there are a lot of specs for them also, and the price range is huge.  You have to know that you want NTC (negative thermal coefficient) devices, which gets you down to 1,369 thermistor types.  Eliminating surface mount parts reduces the number to 479, ranging in price from 23.5¢ each to $20 each.

I’ve decided to play with three different thermistors:

  • Vishay BC Components NTCLE100E3103JB0 a very cheap (23.5¢ each in quantities of 10) 10kΩ thermistor with B-value 3977K).  There is high variation in the resistance (±5%), but low variation in the B-value (±0.75%).  These are glass-bead thermistors with short leads and will need some sort of waterproofing for the labs.
  • The epoxy-coated Vishay BC Components NTCLE413E2103F520L has 50mm leads and is epoxy coated, but with the warning “Not intended for fluid immersed applications or continuous contact with water.”  It is a 10kΩ thermistor with B-value 3435K, both ±1%, and costs 34.9¢ each in quantities of 10. It may be waterproof enough for the relatively short duration of the labs, and the 2″ leads may make it easier to use with disposable thermometer covers from the drugstore.
  • Murata Electronics North America NXFT15XH103FA2B100 a 10kΩ thermistor with B-value 3431K, with low resistance variation (±1%) and moderate B-value variation (±1%).  Note: the specs give different B-values depending which pair of temperatures used—I’ll have to look to see if they have specs for higher-order models of the resistance as a function of temperature. Although these thermistors cost more (66¢ each in quantities of 10), they have 100mm insulated, flexible leads, which should be long enough that we use these in a coffee-cup water bath, though they come with the warning not to use them in wet or humid locations, nor “Places with salt water, oils, chemical liquids or organic solvents”.  The long flexible leads may make this one the easiest to use with disposable thermometer covers.

It looks like I’d have to go to $2–$4 per part for thermistor probes with a brass, copper, or plastic sheath, and even then the manufacturers don’t say that they are waterproof.

I also decided to get myself some op-amp chips to play with, since we will certainly be assigning some op-amp labs. Because I don’t have a bench power supply, I want to use a single power supply, like a 5v wall wart (or the 5v supply for the Arduino).  I also want a DIP package, so that I can use the op amp on a breadboard.  I looked for cheap op amps on Digikey, and the best choice I found was a Microchip Technology MCP6002-I/P (33¢ each in quantities of 10) for a dual op amp with rail-to-rail output.  It is a bit slow (1MHz gain-bandwidth product, 0.6V/µsec slew rate), but has a low input bias current (1pA) and will run on a single power supply anywhere from 1.8V to 6V, so should be easy to use with batteries or the Arduino power supply.

I will have to be careful not to blow up the chips with my function generator, though, as I believe it has a 10V peak-to-peak output.  Maybe I won’t have to worry about it—I just tried to turn on my function generator to check the output voltage, and it won’t turn on.  The fuse looks ok, but I don’t even get a power-on light, much less any signal at the output.  I don’t know whether I want to try debugging it or not, given that I don’t even have a manual for it, much less a schematic.  It worked fine the last time I turned it on, so I’ve no idea what the problem is.  I suppose I should have expected it, buying cheap, old equipment on e-bay, but I didn’t expect the function generator to fail after I had checked that it was working.  It will be harder for me to develop a lab that uses a function generator, though, if I don’t have a functional one to test the lab with.  I wonder whether it is better to try to fix the one I have or get another one.

The students will have Agilent 33120A Function/Arbitrary Waveform Generators to work with, which are very nice instruments, but out of my price range ($1300 refurbished on e-bay, $2200 MSRP).  I could get a cheap Victor VC2002 for about $130, which is about as good a price as the used stuff on e-bay.


Filed under: Circuits course Tagged: Arduino, bioengineering, circuits, course design, function generator, op amp, teaching, temperature measurement, thermistor

A closer looks helps you build your own DiWire Bender

Whether or not you’re actually going to build this CNC wire bender, we think you’ll love getting a closer look at how it’s put together. The team over at PENSA got such a strong response from a look at the original machine that they decided to film a video (embedded after the break) showing how the thing was put together. They’ve also posted a repository with code, bom, etc.

In the image above [Marco] shows off the portion that actually does the bending. It’s designed to mount on the pipe through which the straightened wire is fed. The 3d printed mounting bracket really makes this a lot easier. The assembly provides a place to attach the solenoid which moves a bearing in and out of position. That bearing presses against the wire to do the bending, but must be moved from one side of the wire to the other depending on the direction of the next bend. This is a lot easier to understand after watching the demo video which is also embedded after the break.


Filed under: cnc hacks
Hack a Day 21 Jun 12:01

Tears of Rainbow.

Video clips on youtube, arduino is running simple demo application.

Tears of Rainbow                             BarGraph HD movie                                    " href="//www.youtube.com/watch?v=30ELYwyy4JQ&feature=youtu.be]" target="_blank">BarGraph movie.


It’s time to release new updates for my first (ever) project with Arduino, “Color Light Music”.  From artistic perspective, VU BarGraph style (IMHO) is the best one for spectral dynamic representation, and not much could be improved on this side. But this time, it cross my mind an another idea “Tears of Rainbow”. This blog about how successively (or awfully) the idea was brought to life. And of course, VU visual effects still there, updated with nice peak indicators, color adjustment flexibility (this time triple color LEDs), and PWM-ed brightness settings luxury.  So, this is design requirements, I was following:

  •   make it as big as possible, GIGANTIC size !;
  •   Lego style, or many blocks / modules, which could be re-arranged in different pattern;
  •   extend-able,  easy to add up more blocks later on;
  •   low price on hardware, no special display driver IC.
To simplify assembly work, I decided to buy RGB Led Strip. I had known, from my first project, that design would be composed with straight lines, and the longer lines means the more LED’s ( and consequently, soldering work). For comparison, one line on this display consist of 6 RGB leds, or 24 soldering connections. Using RGB strip, I reduce a workload 24 to 4, or 6 times. I envy to people,  who have a patience to build  8x8x8 RGB led cube (or even 10^3 !).   Addressable RGB strip would make life even easier,   but  I couldn’t find local re-seller,  and was not going to wait shipment / customs. It’s summer time!
 In order to easy reconfigure a style, for example, from  3 BarGraphs, needed in Color Music exposition, to just  1 GIGANTIC VU meter (*),  RGB led strip is chopped-up and attached to 3 rectangular shape plates. I find out, that for some reason strip isn’t “sticky” enough, and to keep its perfectly align on a plate, I used a tire-ups at both ends. Luckily, it was quite easy to punch a holes in the plates for tire-ups just using kitchen knife.
 It wouldn’t be so, if I use a glass as a back-plate
(I had such idea initially). Something to think, if you plan to work with a strip in your design. The same also true for wiring (32 wires per plate). Tin “cookie” plates just was made to be part of this project!  And I even did not mention the heat dissipation,  1/3 of 5 meters strip consume around 12 W of power,  it’s almost like my soldering iron!
 One more things before I forget, I installed 1 cm paper pads to insulate contacts from the metal plate in the middle and on one side. Heat shrink tube takes care of the other end.
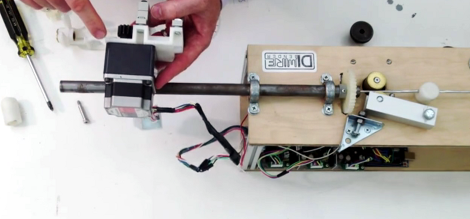
 LED’s use 12V as power source, and as I need a lot of  PWM channels to control their brightness , here comes 74HC595 buffered by ULN2803 at the outputs. Nothing special, 9 shift registers daisy chained to produce 72 PWM outputs. Two IC in a pair installed in reverse on a prototype board, to minimize a number of interconnections. As you can see from the  picture, there is only 1! yellow jumper brought from pin 15 of the shift register to pin 8 of the Darlington array. Why they don’t make a shift register in DIP-16 package? There wouldn’t be any jumpers at all!  Other alternative is using TPIC6B595.
        * For clarity, schematic diagram shows only two pairs of chip, and half length of the strip lines.

Now software part.

There are on-line libraries available, to drive 74HC595 by arduino. Only some of them not using hardware “build-in”  SPI interface , and really slow in communication with peripheral IC’s (don’t forget, that LED display only second part of the project, the first one, FFT, is very time consuming). The others libraries, nicely written and perfectly optimized for speed, have too much functionality, that I don’t need in my project, plus they are memory demanding. On the other hand, I need low resolution animation function – sliding down colorful tears, that I have to create on my own.  Now I ‘d like to represent a code, very fast SPI subroutines, completely written in C !  Function shift out 9 bytes ( for 9 shift registers in this project ) approximately in less than 36 usec, or 0.5 usec per one PWM channel. One bit-set in the unrolled loop is about 4.5 cycles.

static uint8_t brightn;

brightn++;
 if(( brightn % QUANTUMS ) == 0)
{
bitClear(PORTB,LATCH_PB);
SPDR = 0;

uint8_t * srP = &brightns[PIN_NBRS];
uint8_t cmp_level = brightn;

for (int8_t iSR = 0, curBt = 0; iSR < IC_COUNT ; iSR++, curBt = 0){

if ((* –srP) > cmp_level)
curBt |= 0b00000001;
if ((* –srP) > cmp_level)
curBt |= 0b00000010;
if ((* –srP) > cmp_level)
curBt |= 0b00000100;
if ((* –srP) > cmp_level)
curBt |= 0b00001000;
if ((* –srP) > cmp_level)
curBt |= 0b00010000;
if ((* –srP) > cmp_level)
curBt |= 0b00100000;
if ((* –srP) > cmp_level)
curBt |= 0b01000000;
if ((* –srP) > cmp_level)
curBt |= 0b10000000;

loop_until_bit_is_set(SPSR, SPIF);
SPDR = curBt; // Start the transmission
}
loop_until_bit_is_set(SPSR, SPIF);
bitSet(PORTB,LATCH_PB);
}

FFT part of the code completely “copy / pasted” form my “Radix-4″ blog. Here an advise, if you wish to explore the code, look there for “pure” form of function. What is new in this publication, is magnitude calculation subroutine, without slow SQRT.

Bar Graphs “set position” sub-function, or mapping height of lighted area of a plate to integral sum of the bins, brought into this project with mild modification from first project.

Continue moving from LED’s display to audio input, I should say couple words on a sampling. There are two functions in the project, that have to be triggered periodically with a timer, “display refresh” posted above and “take ADC sample”. It looks logically, instead of having two timers and have a lot of troubles with collision / racing between them, to scale both function to the same time frame, and execute them at once. “Display refresh” rate equals to minimum rate just to avoid flickering (60/70 Hz) multiplied by the numbers of brightness level. For example, setting brightness step number to 256 ( which provides excellent 256 x 256 x 256 = 16 M colors ) would require periodicity 60 x 256 = 15360 Hz.  See, where I’m driving at? Exactly, 15 kHz is nice frequency to sample audio input!. Well, it’s not 44.1 kHz as default settings Hi-Fi audio standard would recommend, but I ‘m not using all sound data in this project, as I only interested in lower 2 kHz part of the spectrum. And BTW, it’s almost 4x times higher than bear minimum prescribed by sampling theorem (Whittaker–Shannon–Kotelnikov).  I’ve made my choice at 15.625 kHz, to simplify math of binary compare to 64. ( 1/64 usec = 15.6 kHz) If there is no big difference, why not pick up “lucky” binary number, and help a Timer to do his job?

Initially, I thought that I would just re-use sampling sub-function  from “Pitch Shifting” project, slightly adjusting it from 8.0  to 15.6 kHz. I was surprised to discover, that TIMER2 and SPI don’t want to work together! Have I missed something in a data sheet? Could be, sometimes it’s so hard to comprehend, that I’d be still experimenting with “Blinking Led”, if not help from this (must to have) masterpiece:

AVR Microcontroller and Embedded Systems: Using Assembly and C (Pearson Custom Electronics Technology)

O’K, there is TIMER1 available. As project already have been heavily “over-loaded” on software side, I decided to take TimerOne library and not bother myself this time with a bunch of registers, interruptions, masks, etc, leaving this out of the scope, as not related to subject.

FFT size =128 provides extra fine resolution for Color Music performance. BTW, may be it not obvious, but bigger size of FFT has LOWER CPU workload per sample. And last, after everything was melted in one  (BIG) sketch nothing happened. No, my arduino can’t catch up at 15.6 kHz. Shifting 9 bytes via SPI, as I mention earlier, takes 36 microseconds. It’s leaving 64 – 36 = 28 microseconds per sample for everything else, or 28 x 128 = 3 584 per frame.  Radix-4 (size = 128) takes 4.2 milliseconds, as I posted here.  Alright, hell with it, who need 16 M colors  on 8 x 3 led display, by the way?  So, I bring quantity of brightness steps down to:             256 / 4 = 64, which is more than enough -> 262 144 color combinations!  QUANTUMS definition sets coefficient 4 in SPI sub-function.  The same time frame rate equals to  122 Hz, which is 2x times higher, than 60 Hz I started my calculation with.

Default color map, or bin’s assignment to a specific plate, is shown above. This time I implemented a command in CLI to make adjustment in this map on the fly, according to music style, equalizing all three bars more or less proportionally. Automatic Gain Control loop implemented in first project, doesn’t work so great with bigger display size ( first project uses 4  lines per color ). Plus, AGC bringing noise in the visual performance in  pauses between  two songs and in quite fragments of the music.  Starting bin position for each RGB plate could not be changed using CLI  ( you still can do this modifying the scetch), but quantity of bins accumulated per plate could be adjusted simply sending “dr” for red, “dg” – for green, and “db” - for blue, where  d is a digit 0..9.  Bands could over-lap, which is not desirable, in this case red is limited too 0..3, green 0..6, and blue 0..9.

More on the audio input hardware and sampling software subroutine, I post in separate blog, as this part follows w/o much modification thorough a few previous blogs, and doesn’t need to be re-stated here.

*Note: in software G.VU is not implemented yet.

Link to download a sketch:  Tears_of_Rainbow.


More musings on circuits course: temperature lab

I’ve decided to do a lot of my musing about the course design on my blog, so that others could contribute to the course design (or at least participate vicariously).  I think that having an open log of our thinking on the course design will be useful to grad students or new faculty who are having to do their own course designs, to show how us old farts do it (whether they wish to copy our methods or avoid using them).

The relevant posts so far are

Changing teaching plans
More on electronics course design
Yet another project idea
Another way to think about course design

I’ve got my son working on Arduino software to act as a data logger, so that students can have an easy-to-use tool that requires no programming, but which is easily modified if they want to do their own programming.  He has Arduino code for alpha testing already, and I think he’ll have a user interface ready for beta testing by the end of the week, but he’ll only have tested it on a Mac—we’ll need to get him access to a Windows machine to do testing there, because there are some operating system dependencies in talking to USB devices like the Arduino from a Python program. He’s been consulting with me on desired specs for the data logger, but doing all the coding himself. It is good practice for him both in interrupt handling and in user-interface design. He’s also having to think about portability for the first time, as the data logger has to run on Windows and Mac OS X (I think that Linux users should have no trouble with the version that works on Mac OS X, but we probably won’t be testing it). He’ll have to write user documentation and installation instructions also. Some of the packages he likes to use (like PyGUI) are enough of a pain to install that he’ll probably provide a stripped-down interface without a GUI for those who want to do minimal installation (Arduino software, Python, and PySerial are only essentials).

The first lab I’ve been thinking about is for temperature measurements. For the small temperature ranges normally needed in biosensor applications, the sensitivity, low thermal mass, and low cost of thermistors make them probably the best approach, and I think that they are what are used in the cheap digital oral thermometers sold in drug stores.  I wonder what techniques the manufacturers use to get medically acceptable calibration for those devices.

I’ve been thinking about the thermistor lab—it seems like we could do that in stages: first just reading resistance with a meter, then adding a series resistor to make a voltage output, then adding a parallel resistor to try to linearize the exponential curve a bit, finally adding larger series resistors and an amplifier to avoid self-heating currents through the thermistor and to allow nearly the full range of the ADC to be used.  This series of lab exercises could be spread out over the quarter, as students learn more about circuits.

For them to calibrate the thermistor, we could use hot and cold water baths, if the thermistor was in a waterproof package. From what I can see, that raises the price of a thermistor with leads from about 25¢ (for something like the NTCLE100E3333JB0 by Vishay BC Components) to $1.55 (for USP10982 from US Sensor) or $3 (for USP10973RA from US Sensor).  [Prices from DigiKey 10-unit price.]

I think that having the students do their own waterproofing is probably not a good idea.  Potting components gets to be a mess, and adding a large blob around the thermistor will slow its response time a lot.  I wonder whether using 5¢ disposable thermometer probe covers would work, or whether they tear too easily.  I probably need to look at some at the drug store, to see whether there is thicker one on the market that the cheap thermistors would fit into.

If waterproofing a cheap thermistor turns out to be too difficult, we need to think about whether to use the more expensive parts or work out some cheap, measurable temperature sources that are not wet.  We could make something like is used in PCR machines, with a couple of blocks of aluminum and a Peltier device, but I don’t think that the price is worth it—better to use the sort-of waterproof probes, a cup of water, and a thermometer.

I’ve noticed that for some applications, people are choosing voltage-output temperature sensors that rely on the thermal
coefficient of a transistor, rather than on a thermistor, like the MCP9700-E/TO from Microchip Technology (25 cents).  They have a fairly linear 10mv/degree C output, but their absolute accuracy is even worse than thermistors. These may be a better choice than thermistors in many applications, but would not provide the same teaching opportunities for a circuits class.

Using a thin-film platinum resistor temperature sensor (RTD) like the US Sensor PPG102C1RD would allow more accurate temperature measurement without calibration. With calibration, RTDs can be the most precise electronic temperature sensors, though I don’t know if the high precision is available in thin-film resistors, or only in the more expensive wire-wound ones. I suspect that repeatability from part to part is higher in the wire-wound RTDs, but that the thermal coefficients are the same, so that calibrating at one temperature should give about equal accuracy either way.

The naturally linear response of RTDs (100Ω at 0°C and 138.5Ω at 100°C in a very straight line) does not lend itself to as much circuit design as thermistors. On second thought, converting the 3850 ppm/°C resistance change into a voltage range readable by the Arduino ADC is not a bad circuit exercise, particularly if self-heating is to be avoided, though it is not as difficult as flattening the highly nonlinear response of a thermistor.  The biggest problem with RTDs is their price: at over $10 for a bare sensor they may be too expensive for class use.

Another possible temperature sensor is a thermocouple, which generates a voltage based on the temperature difference of two electrically connected junctions of dissimilar metals. One article in the engineering toolbox claims that thermocouples are cheap and RTDs expensive, and I think that is true if you are looking for high-temperature devices (like thermocouples for detecting pilot lights in furnaces), but not so true if you are looking for careful measurement in corrosive wet materials (like most biosensing applications). See Choosing and using a temperature sensor for more info comparing RTDs and thermocouples. Thermocouples have relatively low precision and sensitivity, and they measure only the difference in temperature between two points, and so are probably not very interesting for biosensing.

Action plan for testing out a temperature measurement lab:

  • Get some thermistors and some thermometer probe sheaths and see if I can make adequate temporary waterproofing for pennies per student.  I’ll probably have to solder on wires to lengthen the leads.
  • Try calibrating thermistors using a multimeter, cups of hot and cold water, and an accurate thermometer.
  • Try reading the thermistor using a voltage divider and the Arduino ADC.  Plot the temperature and Arduino reading over a wide temperature range (say, as a cup of boiling water cools).
  • Try linearizing the thermistor readings  using a parallel resistor and voltage divider.
  • Try designing an amplifier to read the thermistor with much lower current through it (and so less self-heating).


Filed under: Uncategorized Tagged: Arduino, bioengineering, circuits, course design, teaching, temperature measurement, thermistor

Tinydino: World’s Smallest Arduino Clone?


Jaanus Kalde has made the Tinydino, an Arduino clone that’s just 7.4 mm square. He used the ATmega88 chip and built the rest of the components around it. According to Jaanus, its features are:

-Auto reset
-UART
-SPI
-4 analog channels
-1 digital i/o
-one LED
-funny readme with BOM

It needs arduino bootloader for atmega88 like ottantotto bootloader, probably it needs some hacking too because the resonator is 8MHz not the Arduino regular 16MHz.

[via Electronics Lab]


MAKE » Arduino 20 Jun 20:00

Another way to think about course design

Continuing the series about designing an applied electronic circuits course for our bioengineering majors (with more project ideas and another project idea), I want to talk about another lab-oriented view of what we want the course to teach—what lab skills they should have by the end of the course. Eventually, I’ll get around to textbook-concept view of the course, but I’m trying to stay away from that for a while, since the course we are trying to replace was faulted for being far too theoretical.  I want to start with the practical goals first, and work out form there what are the most important theory topics and what order they should go in.

Again, this is all very preliminary brainstorming—I have to talk with my co-instructor about what lab skills are feasible to teach in the class, which ones he sees as essential, and which are beyond the scope of the class.  Here is a tentative list of technician-level skills that every engineer should have:

  • Reading voltage, current, and resistance with a multimeter.
  • Using an oscilloscope to view time-varying signals:
    • Matching scope probe to input of scope.
    • Adjusting time-base.
    • Adjusting voltage scale.
    • Using triggering.
    • Reading approximate frequency from display.
    • Measuring time (either pulse width or time between edges on different channels)
  • Using a bench power supply.
  • Using a signal generator to generate sine waves and square waves.  Hmm, only the salinity conductance meter uses an AC signal so far—I may have to think of some other project-like labs that need the signal generator.  Perhaps we should have them do some capacitance measurements with a bridge circuit before building a capacitance touch sensor.
  • Using a microprocessor with A/D conversion to record data from sensors.
  • Handling ICs without frying them through static electricity.
  • Using a breadboard to prototype circuits.
  • Soldering through-hole components to a PC board.  (I think that surface-mount components are beyond the scope of the class, and freeform soldering without a board is too “arty” for an engineering class.)

There are probably a lot more skills to add to this list, which I haven’t thought about yet, and details within these skills that I’ve not thought about.  Luckily, my co-instructor has been teaching beginning students how to use electronic lab equipment for over 15 years, so I’m sure he knows what needs to be covered.

The bigger problem here is motivating students to want to develop these skills quickly—the EE and computer engineering students see the skills as directly related to their chosen profession, but the bioengineers will need to know why anyone would care about resistance, voltage, or current.  Getting a simple biosensor in right from the beginning would probably help.  I wonder if we should start with a thermistor lab for resistance, voltage, and current measurement.  How soon can we cover voltage dividers, so that they can design a resistance-to-voltage converter for interfacing to the ADC on an Arduino? Can we do that in the first lab?


Filed under: Uncategorized Tagged: Arduino, bioengineering, circuits, course design, teaching

Parker1 WiFi / 4G Mobile Robot


read more

Let's Make Robots 19 Jun 12:22
3g  4g  advertising  arduino  mobile  parker1  robot  wifi  

Sassor wants to let users know just how much electricity their gadgets are wasting (hands-on)

Everyone knows that their game consoles, appliances and HDTVs are energy vampires, and while Energy Star-certified products tell us which gadgets are more green-friendly than others, we still don't know just how much juice they're actually sucking down in a given day. Enter Sassor, a start-up from Japan that's created a system to monitor the electrical consumption of anything plugged into a wall outlet -- from PCs to refrigerators. It tracks power consumption using current sensors clamped onto power cords, which communicate wirelessly via ZigBee with an module (based on an Arduino design) that uploads the info to the cloud.

Through the web portal, users can track energy consumption on a per-device basis in real-time, letting them figure out which gadgets are most responsible for their sky-high utility bill -- and take appropriate steps to correct the problem. Currently, it's aimed solely at businesses, but once Sassor's on its feet, funding-wise, the plan is to also put them in people's homes. The company told us it'll ditch ZigBee in favor of a WiFi solution in such future iterations, and it'll make an SDK and the system APIs available to all so that people can program for the platform and improve it in ways currently not contemplated. Alas, there's neither a timetable nor a price for the consumer version just yet, but you can see some pictures of the hardware's innards below.

Sassor wants to let users know just how much electricity their gadgets are wasting (hands-on) originally appeared on Engadget on Mon, 18 Jun 2012 21:59:00 EST. Please see our terms for use of feeds.

Permalink | Email this | Comments