Posts with «soldering» label

Business On The Outside, Electronics Workstation On The Inside

As an electrical engineering student, [Brandon Rice] had the full suite of electronics tools you’d expect. Cramming them all into a dorm room was doable — but cramped — a labour to square everything away from his desk’s top when he had to work on something else. To make it easier on himself, he built himself a portable electronics workstation inside the dimensions of a briefcase.

Built from scratch, the workstation includes a list of features that should have you salivating by the end. Instead of messing with a bunch of cables, on-board power is supplied by a dismantled 24V, 6A power brick, using a buck converter and ATmega to regulate and display the voltage, with power running directly to  12V and 5V lines of a breadboard in the middle of the workstation. A wealth of components are stored in two dozen 3d printed 1″ capsules setting them in loops pinned to the lid.

If all this was not already enough, there’s more!
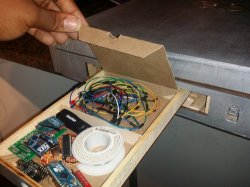
Since he’ll be soldering a lot, there’s obviously an included soldering station, but were you expecting a helping hand and a carbon-filtered fume extractor? How about a folding overhead light to boot? Spools of wire are off to the rear to be tugged on when needed, and a drawer tucked into the side keeps circuit boards and jumper wires organized. There’s also a power strip along the other side — [Rice] notes that it was handier than he realized — for any other devices you might need. There’s even a built-in Arduino.

Hungry for more? How about a second serving, or even desert?

Making Your Own Soldering Station

An industrious maker reverse engineers and builds his own high-end soldering station.

Read more on MAKE

The post Making Your Own Soldering Station appeared first on Make: DIY Projects and Ideas for Makers.

Hackaday Prize Entry: Reflowduino, the Open Source Reflow Oven Controller

Face it — you want a reflow oven. Even the steadiest hands and best eyes only yield “meh” results with a manual iron on SMD boards, and forget about being able to scale up to production. But what controller should you use when you build your oven, and what features should it support? Don’t worry — you can have all the features with this open source reflow oven controller.

Dubbed the Reflowduino for obvious reasons, [Timothy Woo]’s Hackaday Prize entry has everything you need in a reflow oven controller, and a few things you never knew you needed. Based on an ATMega32, the Reflowduino takes care of the usual tasks of a reflow controller, namely running the PID loop needed to accurately control the oven’s temperature and control the heating profile. We thought the inclusion of a Bluetooth module was a bit strange at first, but [Timothy] explains that it’s a whole lot easier to implement the controller’s UI in software than in hardware, and it saves a bunch of IO on the microcontroller. The support for a LiPo battery is somewhat baffling, as the cases where this would be useful seem limited since the toaster oven or hot plate would still need a mains supply. But the sounder that plays Star Wars tunes when a cycle is over? That’s just for fun.

Hats off to [Timothy] for a first-rate build and excellent documentation, which delves into PID theory as well as giving detailed instructions for every step of the build. Want to try lower-end reflow? Pull out a halogen work light, or perhaps fire up that propane torch.


Filed under: The Hackaday Prize, tool hacks

Petduino Is the DIY Tamagotchi You Can Hack

The Tamagotchi is a thing of the past. Bring your virtual pet into the 21st century with LEDs and an Arduino-compatible processor.

Read more on MAKE

The post Petduino Is the DIY Tamagotchi You Can Hack appeared first on Make: DIY Projects, How-Tos, Electronics, Crafts and Ideas for Makers.

Vibrating Distance Torch Illuminates the Dark without Light

If you’ve ever had to move around in a dark room before, you know how frustrating it can be. This is especially true if you are in an unfamiliar place. [Brian] has attempted to help solve this problem by building a vibrating distance sensor that is intuitive to use.

The main circuit is rather simple. An Arduino is hooked up to both an ultrasonic distance sensor and a vibrating motor. The distance sensor uses sound to determine the distance of an object by calculating how long it takes for an emitted sound to return to the sensor. The sensor uses sounds that are above the range of human hearing, so no one in the vicinity will hear it. The Arduino then vibrates a motor quickly if the object is very close, or slowly if it is far away. The whole circuit is powered by a 9V battery.

The real trick to this project is that the entire thing is housed inside of an old flashlight. [Brian] used OpenSCAD to design a custom plastic mount. This mount replaces the flashlight lens and allows the ultrasonic sensor to be secured to the front of the flashlight. The flashlight housing makes the device very intuitive to use. You simply point the flashlight in front of you and press the button. Instead of shining a bright light, the flashlight vibrates to let you know if the way ahead is clear. This way the user can more easily navigate around in the dark without the risk of being seen or waking up people in the area.

This reminds us of project Tacit, which used two of these ultrasonic sensors mounted on a fingerless glove.


Filed under: Arduino Hacks

Get Better at Mortal Kombat by Hacking Your PS3 Controller

Fighting games like Mortal Kombat provide you with a variety of different available moves. These include kicks, punches, grabs, etc. They also normally include various combination moves you can perform. These combo moves require you to press the proper buttons in the correct order and also require you to time the presses correctly. [Egzola] realized that he could just hack his controller to simulate the button presses for him. This bypasses the learning curve and allows him to perform more complicated combinations with just the press of a single button.

[Egzola] started by taking apart his Playstation 3 controller. There were two PCB’s inside connected by a ribbon cable. Luckily, each individual pad for this cable was labeled with the corresponding controller button. This made it extremely simple to hack the controller. [Egzola] soldered his own wires to each of these pads. Each wire is a different color. The wires then go to two different connectors to make them easier to hook up to a bread board.

Each wire is then broken out on the breadboard. The signal from each button is run through a 4n25 optoisolator. From there the signal makes its way back to various Arduino pins. The 4n25 chips keeps the controller circuit isolated from the Arduino’s electrical circuit. The Arduino also has two push buttons connected to it. These buttons are mounted to the PS3 controller.

Now when [Egzola] presses one of the buttons, the Arduino senses the button press and simulates pressing the various controller buttons in a pre-programmed order. The result is a devastating combination move that would normally require practice and repetition to remember. You might say that [Egzola] could have spent his time just learning the moves, but that wasn’t really the point was it? Check out the video below for a demonstration.


Filed under: Arduino Hacks

Freeform Arduino Bliss

Designer Kimio Kosaka soldered together an entire Arduino using the difficult freeform method.

Read the full article on MAKE

Sales Team Goes to Camp, Part II

These are the ongoing adventures of the MAKE Sales and Marketing team, as we build our maker skill sets… pretty much from scratch. To read about how MAKE Sales Camp came to be, go here.

My masterpiece.

Up until now at MAKE Sales Camp, it’s been all fun and games.  We did a little programming, a little building, had some laughs, and everyone went home feeling good.  But today at Camp, things stopped being fun– and started getting REAL.

Camp Director Nick Raymond, knowing what today’s task would demand of us, left us in the capable hands of the only intern man enough for the job: the Sultan of Solder, Brian Melani.  Our task?  Using only a soldering iron and a steady hand, populate a servo motor shield with capacitors, resistors, and integrated circuits.

This basic soldering task seemed like child’s play at first, but after the first dozen solder joints, tensions began to escalate.  Attention to detail was essential.  Perfection: the only option.  In the end, the pressure proved too much… for some.

Professional demeanor was compromised.  Dignity was left by the wayside.  Tears were shed.

(OK, no tears, but there were definitely some colorful expressions tossed around the lab.)

It’s all in the wrist…

Once we were finally able to regain our composure, we emerged from the cloud of solder fumes we had created and all came to the same conclusion: Putting this board together was harder than we thought!  Getting all those tiny parts lined up, making sure we knew which capacitors were polarized, and most of all, having a steady yet quick hand (no bridges!!)… sheesh!  I definitely earned a new respect for our Engineering interns today.

In the end, it took an iron will (and a rosin core)– but we all managed to get our servo shields put together (reasonably) correctly.  High Fives all around!

But our future is still uncertain: Will our shields hold up when we hook them up to our Arduinos?  Do we have what it takes for the more advanced maker skills that lay ahead?

Will yours truly crack the color code for differentiating resistor values and become totally awesome??

Only time will tell… see you at next week’s MAKE Sales Camp!


Tinydino: World’s Smallest Arduino Clone?


Jaanus Kalde has made the Tinydino, an Arduino clone that’s just 7.4 mm square. He used the ATmega88 chip and built the rest of the components around it. According to Jaanus, its features are:

-Auto reset
-UART
-SPI
-4 analog channels
-1 digital i/o
-one LED
-funny readme with BOM

It needs arduino bootloader for atmega88 like ottantotto bootloader, probably it needs some hacking too because the resonator is 8MHz not the Arduino regular 16MHz.

[via Electronics Lab]


MAKE » Arduino 20 Jun 20:00