Posts with «arduino» label

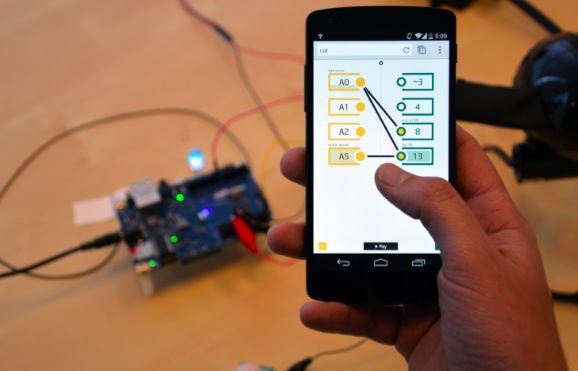
Real-time tinkering on Intel Galileo using a mobile device

If you are a beginner and want to start prototyping easily with  Intel Galileo, it could be fun to use ConnectAnyThing. It  makes it easy for novices to start tinkering in hardware before jumping into example code and the IDE but it’s also useful for experienced builders that want to try something out really quickly.

To get started, you will need:

  • Galileo (with updated firmware)
  • Wi-Fi card and antenna.  (Tested with Centrino n-135, n-6205, n-6235)
  • Micro SD card, 2gb up to 32gb capacity, with ConnectAnyThing loaded (instructions on github)

Download the latest release of ConnectAnyThing, follow the instructions and enjoy tinkering: on a webpage you’ll be able to  read inputs and control outputs in real-time from your mobile device!

New Project: Print your Dream Robot: CIRKO

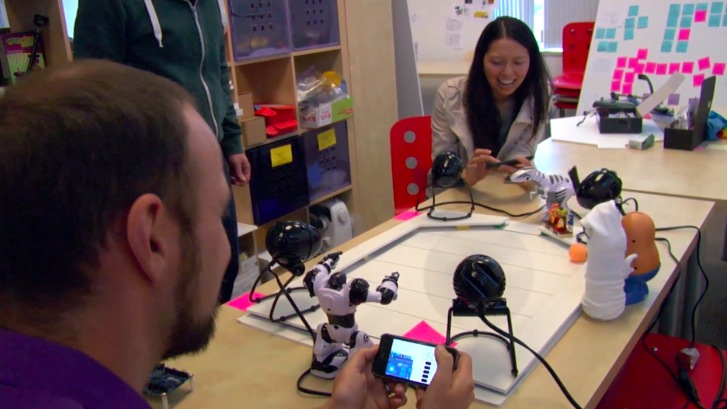
Come and make this mean, green, robotic machine ... make it laugh and make it sing!

Read more on MAKE

Using State Machines In Your Projects


[Tony] has developed a method of using a state machine to validate keypad inputs. His method checks the commands character by character as they are entered in by a 16 button keypad. State machines are often used to break down complex problems into sequential tasks, making code development easier. While [Tony's] example uses the keypad, Arduino Uno, and a character LCD, the theory can be applied to numerous projects, such as this Dahlander motor switch.

As you see, state machines can be very versatile. Stick around after the break as we take a look at [Tony's] state machine and provide a brief explanation of how it all works. 

The goal is to ensure a command is entered in to a system correctly – in this case it is being validated character by character with each key press. A state machine is used to achieve this goal. The command is:


XX@HH:MM#
Where:
XX = 1-99
HH = 0-24
MM = 00-59
# = Execute


Each value is considered a state. When the value is entered, it moves to the next state. So:


Be sure to check out [Tony's] project for more details and learn how he implements the above state machine in code.


Filed under: Arduino Hacks
Hack a Day 27 May 21:00

Build your own robotic bartender with Arduino and a 3D printer

You can certainly buy a ready-made drink mixing robot if you're flush with cash, but wouldn't you rather spend that money on the drinks themselves? Yu Jiang Tham thinks so -- he recently designed Bar Mixvah, a robotic bartender you can build yourself with $180 in parts. The key ingredient is an Arduino Nano microcontroller that takes your requests through a web-based interface. After that, it's mostly a matter of 3D printing the frame and wiring up the pumps that will make your beverage a reality.

Filed under: Household, Robots

Comments

Source: Yu Jiang Tham

Engadget 27 May 16:23

What’s the future of board games? Some students are making it connected

Fifteen students from Master degree of ECV Aquitaine  under the direction of Tazas Project - an artistic group run by Guillaume Beinat and Alexandre Suné –  created and shared with us a smart board game called “Web World War”.

The goal is simple: survive a computer virus that has infected your machine and, throughout the game, the player should build a strategy  to win this virtual war.

The game runs on Arduino and is composed by a screenprinted board connected to any mobile device plugged on a local WiFi connection. Take a look at the video:

Arduino Blog 27 May 15:36

Four guys met at Arduino Day and now they are finalists at NASA Challenge

Last March, during Arduino Day in Zaragoza, four guys met for the first time and  then decided to participate to the Nasa Challenge collaborating to the project made by Carlos Sicilia Til in the previews months:

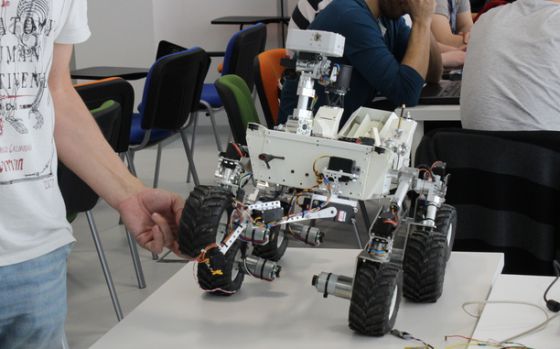
OpenCuriosity is an open source, exomars rover (1:5 scale) with Arduino as main controller, based on the NASA Curiosity Rover. It contains a set of Arduino boards and sensors. The general public will be allowed to use these Arduinos and sensors for their own creative purposes while they are in space. All the people will be allowed to integrate their project in the robot, and the data gathered will be available on the internet in order to share this information with the general public for educational, science or other purposes. We want to provide affordable space exploration for everyone!

The robot designed by the Aragonese team is now among the finalists of the NASA contest!

Read the details of the story on El Pais.

Arduino Blog 26 May 17:06
arduino  nasa  opensource  robot  rover  zaragoza  

A Wireless Computer Remote that Emulates a USB Keyboard

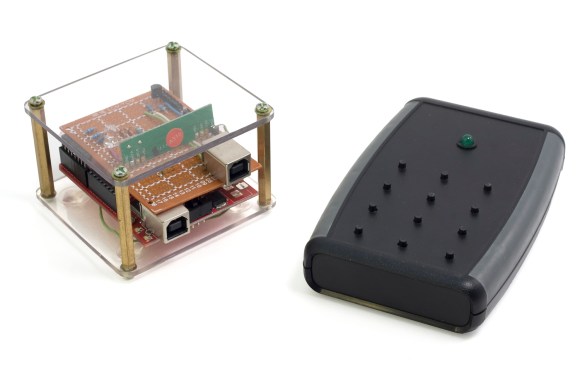
If you are anything like [Antoine], you would love to be able to control your PC with a simple hand-held remote control from anywhere in your house. [Antoine] wrote in to tell us about his wireless computer remote that emulates a USB keyboard, making it suitable for any device that uses a USB keyboard.

His blog post is very well written and contains a ton of design information and background on the project. He initially wanting to easily control his PC’s music from anywhere in his house without needing to be within line of site of his computer. The end result is a very handy remote that can be used to change music, video, and even launch applications on his computer. The system consists of a base station for his remote that connects to the computer and acts as a USB keyboard, and the remote itself. The base station uses V-USB on an Arduino to interface with the computer, and VirtualWire to handle the wireless protocol for the remote. For those of you who don’t know about VirtualWire (now superseded by RadioHead), it is a very cool Arduino library that lets you easily use raw wireless interfaces (also called vanilla wireless interfaces).

Without going into too much detail here (be sure to see the actual post for more information), the remote itself was redesigned after the initial proof of concept to maximize battery life. The final power consumption is very impressive, resulting in a battery life of more than two years! This remote system is very well put together and contains many aspects that can easily be reused for other projects.


Filed under: wireless hacks

Arduino Garage Door Opener is Security Minded

Do it yourself garage door openers must be all the rage nowadays. We just got word of another take on this popular idea. [Giles] was commissioned by his friend to find a way to control the friend’s garage door using a smart phone. The request was understandable, considering the costly garage door remote and the fact that the buttons on the expensive remote tended to fail after a while. The inspiration for this project came from some YouTube videos of other similar projects. Those projects all paired an Arduino with a Bluetooth headset in order to control the door from a mobile phone. [Giles] understood that while this would get the job done, it wouldn’t be very secure. Bluetooth headsets typically connect to mobile phones using a four digit PIN. Many of them have known default PINs and even if the default is changed, it wouldn’t take very long to guess a four digit PIN. [Giles] knew he had to find a more secure way.

While WiFi was an option, [Giles] decided that having the garage door hooked up to the internet would likely be a security risk, even if it did offer some potential interesting use cases.  He therefore opted to stick with Bluetooth, but decided to use the Seedstudio Bluetooth shield instead of a basic headset. The electronics are relatively simple. [Giles] simply plugged the Bluetooth shield into an Arduino Uno. [Giles] did have one problem with the Bluetooth shield though. The Bluetooth module did not accept many standard AT commands. He needed a way to force a disconnect of a mobile device if it failed authentication. After digging around, he discovered that the module had some extra exposed pads that he could likely use to accomplish that goal. The only problem was that they were expecting a 3.3V signal, and the Arduino works at 5V. The solution was simple. He setup a basic voltage divider using two resistors. This lowered the 5V signal from the Arduino to the required 3.3V. This provides the communication functionality to the mobile phone. He then realized that he could use a simple 12V automotive relay to control the garage door. To control the relay, he used the Freetronics relay control shield. The end result is a relatively simple stack of shields hooked up to a relay.

For the smart phone interface, [Giles] started out by trying to write a native Android application. Having little experience in Android development, he soon realized that it was going to take him longer than anticipated to get anything usable this way. He then decided to use SL4A. SL4A provides a scripting environment for Android and supports several different scripting languages. [Giles] was then able to write a Python script that can be executed on the smart phone. Many people would be tempted to write a really simple script that would just open the door and connect without any real thought about security. After all, this is a one-off obscure garage door opener. Security through obscurity! [Giles] is smarter than that.

He instead implemented a challenge handshake authentication mechanism between the Python script and the Arduino. This would ensure that users are authenticated before permitting commands to be executed, and also help prevent replay attacks. The process works like this. First the smart phone connects to the Arduino. The Arduino then generates a pseudo-random string and calculates the expected response, based on a pre-shared key. The phone then receives the string and sends back the appropriate response. If it doesn’t match, the Arduino disconnects the phone. If it does match, the phone then sends back a request for a different pseudo-random command challenge string. Once the phone receives this new string, it is able to use that string in conjunction with a second pre-shared key to generate a one-time use command. Assuming it was calculated correctly, the Arduino will then run the command to open or close the door. If it doesn’t match the phone gets disconnected. All of this is to help prevent replay attacks. Any attacker watching the airwaves would not be able to simply record the signals or commands and play them back. This is because every time the authentication and commands are transmitted, they must be different based on the pseudo-random seed.

While everything seems to work mostly fine, the Arduino tends to crash after about six door cycles. [Giles] believes this may be caused by the MD5 library he is using but has so far been unsuccessful in trying to fix this bug. He also thinks his Python script is messy and somewhat unstable. He’s decided to publish his programs to the internet in hopes that someone else may have the time and drive to figure out what’s going on.


Filed under: Arduino Hacks

Sentry Robot will Stalk your Driveway

A team of students from Marin County Day School built a mobile robot with a sentry gun that responds to its environment.

Read more on MAKE

MAKE » Arduino 24 May 16:20

This Sassy Art Installation is Like The Stanley Parable for the Telephone

Imagine this. A phone on a nearby desk starts ringing. No one is around to pick it up, so you decide that you will be a good Samaritan and answer the phone. You are greeted by a slightly creepy robotic female voice asking you to complete a simple survey. Having nothing else to do, you go ahead and run through the telephone survey. As you start answering the questions, things start to get a bit… weird. The robot voice doesn’t like your answers. She actually disagrees with you, and she does NOT like being interrupted. Now she’s getting sassy with you! What is going on here?

Most likely you are the latest victim of Insert Customer Feedback Here, [Charles'] art installation. You see, that is no ordinary telephone. [Charles] actually removed the guts of an old telephone and replaced them with an Arduino. The Arduino periodically rings the phone, waiting for someone to answer. Once the phone is off the hook, the Arduino uses a Wave shield to start playing back the scripted audio files. All of the text-to-speech files and the various hold music files are played back with the wave shield. The Arduino is also hooked up to the 1, 2, 3, and # keys of the telephone keypad in order to read back the user’s responses.

From here on out the program acts as a sort of “choose your own adventure” game. The program takes different paths and responds in different ways depending on how the user answers the questions. Generally speaking, it will get more “irritated” towards the user if it doesn’t “like” your answers, otherwise it will get less irritated. The hold music will even change to become more or less aggressive.

It’s easy to draw comparisons to Portal’s GLaDOS due to the robotic female voice and to the narrator from The Stanley Parable for the “choose your own adventure” feeling. In fact, if GLaDOS and The Stanley Parable had offspring, this would surely be it. This project brings that same type of silly sarcastic humor to a different medium and it does it well. Be sure to watch the video of the system in action below. It really starts to get interesting around the 1:15 mark.


Filed under: Arduino Hacks