Arduino Prototyping with your Android Phone
 1Sheeld connects with and exposes the device’s sensors, actuators, and selected app APIs for easy access by the Arduino.

 1Sheeld connects with and exposes the device’s sensors, actuators, and selected app APIs for easy access by the Arduino.

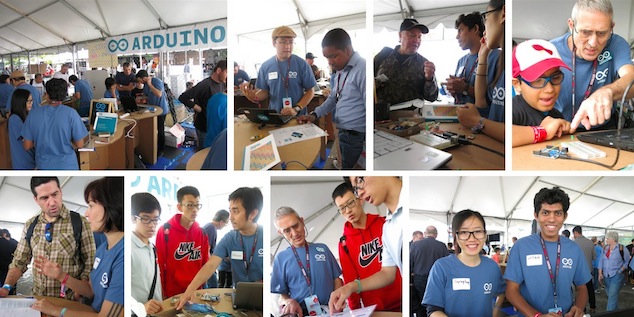
Today and tomorrow you visit us at the Arduino booth (#204) right next to Atmel booth (#205) and have a look at our cool demos. You’ll find all the new boards: Arduino TRE Development Edition and Arduino ZERO, Arduino Yún together with Temboo and the freshly baked Arduino at Heart littleBits Module!
Massimo Banzi keynote is scheduled at 4.00PM and Michael Shiloh’s Getting Started with Arduino talks are waiting for you 2 times a day.

We are looking forward to see you all and we give a big “thank you” to all our volunteers who are supporting us this weekend, talking with hundreds of people visiting our booth and showing their passion for Arduino!

Clocks have taken many forms of the years, starting with shadow clocks and sundials in Egypt around 3500 BC. Obviously, these could only tell the time while the sun was out. Water Clocks followed which could track time in the dark. Water Clocks are basically a bowl with a hole in the bottom. This bowl was set in a container filled with water. The water entered the bowl at a consistent rate and graduations on the inside of the bowl showed how much time had passed.
Mechanical clocks followed, as did quartz and the atomic clock. We have now entered a new era in time-telling, the Bamboo LED Clock. [Pascal] brings us this funky fresh chronometer all the way from Germany.
The front face is made from a bamboo pizza plate and gives the clock some modern minimalist pizzazz. A 1-meter long LED strip is attached to the circumference of the plate and contains 60 individually assignable RGB LED’s. An Arduino and Real Time Clock are responsible for the time keeping and coordination of the LED’s.
As you can see in the photo, 2 of the LED’s colors are used. The single red LED indicates the hour. The strip of blue LED’s show the minutes. If you’d like to build one of these [Pascal] has shared the Arduino code on his Instructables page.


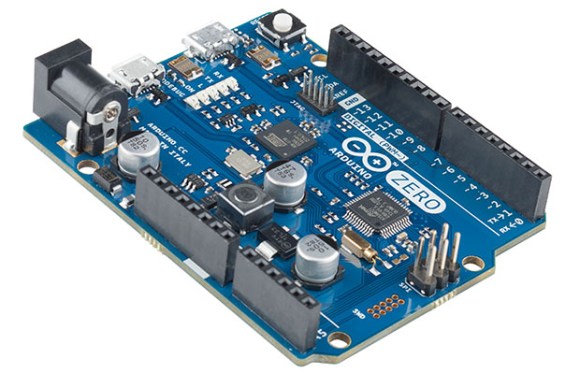
The Arduino Uno is the old standby of the Arduino world, with the Arduino Due picking up where the Mega left off. The Arduino Tre is a pretty cool piece of kit combining a Linux system with the Arduino pinout. Care to take a guess at what the next Arduino board will be called? The Arduino Zero, obviously.
The Arduino Zero uses an Atmel ARM Cortex-M0+ for 256kB of Flash and 32k of RAM. The board supports Atmel’s Embedded Debugger, finally giving the smaller Arduino boards debugging support.
The chip powering the Zero features six communications modules, configurable as a UART, I2C, or SPI. USB device and host are also implemented on the chip, but there’s no word in the official word if USB host will be available. There are two USB connectors on the board, though.
The Arduino folk will be demoing the Zero at the Bay Area Maker Faire this weekend. Hackaday will have boots on the ground there, so we’ll try to get a more detailed report including pricing and availability then.


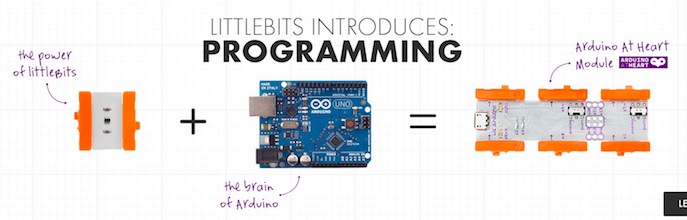
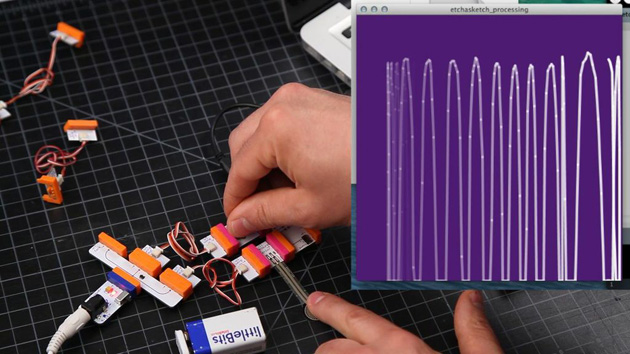
We are excited to announce that littleBits joined the Arduino At Heart Program to easily incorporate programming into littleBits circuits!
littleBits Arduino Module is everything you know and love about Arduino without the breadboarding, soldering or wiring. littleBits takes care of the electronics, while you focus on the code.
The new littleBits Arduino Module allows to:
• Create code using the Arduino programming environment
• Communicate with software (Processing, MaxMSP, Flash etc…)
• Play with 3 inputs and 3 outputs using littleBits bitSnap™ magnetic connector as well as additional I/O for advanced hardware interaction
• Getting started with 10 sketches, including Analog Pong, Tone Libraries and more!
• Access to Arduino AND littleBits community support
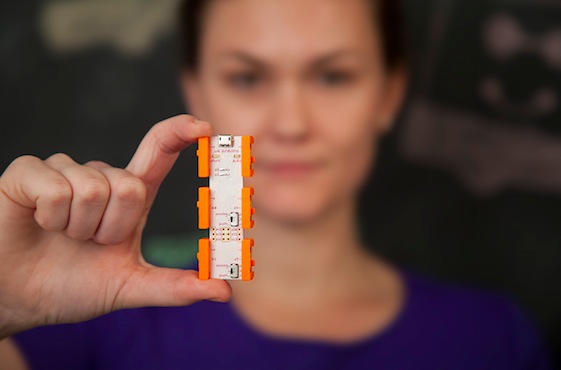
Inventing on this platform requires the user to be able to debug through electronics issues as well as software bugs.
For example, instead of having to solder together a complete circuit of power, ground, resistors and LEDs, a user can simply snap a power and an LED module to the Arduino module and dive straight into programming. This will make hardware innovation even more friendly for beginners, and further lower the entry to physical computation.

Take a look at the video and discover what you could do with it!

When a Lexmark inkjet printer stopped working, [Mojobobo] was able to claim it as his own. He quickly realized that the machine was flooded with ink and not worth repairing, but that didn’t mean he couldn’t still find a use for it. When he learned that the printer’s firmware was not only upgradable but also unprotected, he knew he should be able to get the printer to do his own bidding.
[Mojobobo] started his journey with the motherboard. The unit still powered up, but it was asking to insert a “duplex module” before it would boot any further. [Mojobobo] first tried to find a way to trick the duplex module sensor, but was unsuccessful. His next step was to search for some kind of serial communications port. He didn’t have an oscilloscope, so instead he used a speaker with a wire probe. In theory, if the wire was pressed against an active serial port, he would be able to hear varying tones through the speaker. Sure enough, he found some interesting tones after probing around some ports next to a “JTAG” label. He looked up some information about the nearby chip and found that it included an SPI bus.
After some internet research, [Mojobobo] learned enough about SPI to have a rough idea of how to use it. Having limited tools available to him, he decided to use his Arduino to try to communicate with the motherboard. After wiring up a simple circuit, (and then re-wiring it) he was able to dump the first 4096 bytes of the motherboard’s boot loader to the Arduino via the SPI interface.
[Mojobobo's] next steps will be to find a faster way to dump the boot loader. At 9600 baud, he grew tired of waiting after three hours. Once he has the full boot loader he intends to search for a way to bypass the duplex sensor and get the board to finish booting. Then he may just use the printer for its scanning functions, or he might find other interesting uses for it.


Getting your feet wet with programmable hardware can be tricky; even if you're comfortable with coding, you may not want to break out the soldering iron just to build a usable device. LittleBits is aware of just how intimidating these make-it-yourself gadgets can be, so it has just launched its first software-programmable module, the Arduino at Heart. As the name implies, it's an Arduino core (the same as the Leonardo) designed to fit into LittleBits' simple, building block approach to circuit boards. If you want to attach a light, motor or sensor to the Arduino board, you just snap it on -- you can spend more of your time coding rather than dealing with wiring and other hardware hassles. %Gallery-slideshow193425%
Filed under: Household, Peripherals
Source: LittleBits
 Hinted at yesterday by Massimo Banzi during his keynote speech at MakerCon yesterday, Arduino has just officially announced their latest board—the Arduino Zero.


