Posts with «arduino» label

Collector is “a kind of reality re-mixer”

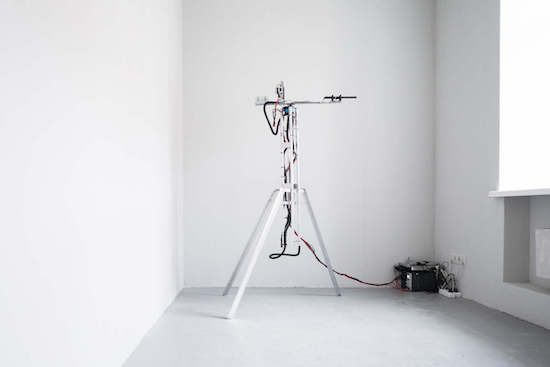
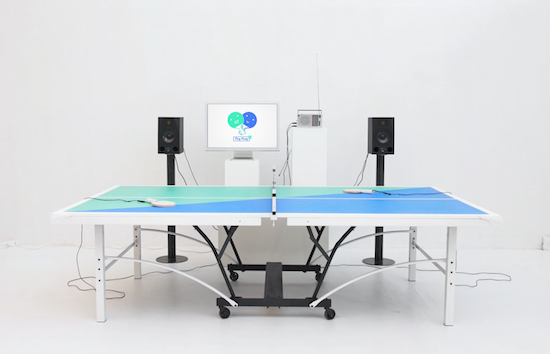
For his latest project, Dmitry Morozov (aka ::vtol::) has created a robotic machine that uses a microphone to record sounds from its surrounding environment, selecting only the loudest ones. Then, the aptly named “Collector” pieces these noises together in the order they were recorded to form an algorithmic  composition.

First, the Collector records the sounds until it has gathered 100 samples. From there, it plays the result as a loop through a pair of speakers for one minute, so they can be heard by those nearby. While this mode, the recording stops. After that, it erases everything and begins a new search.

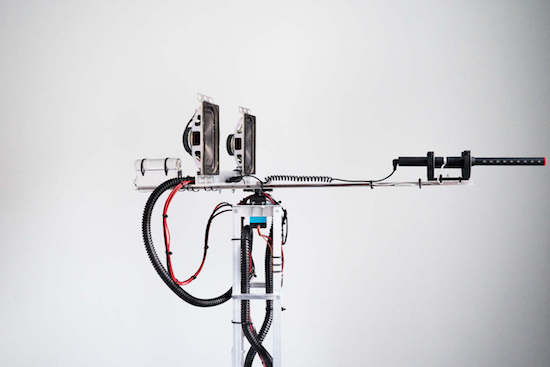
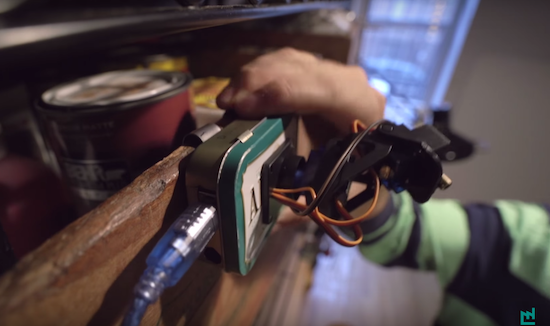
The Collector is also equipped with an Arduino Uno for a brain, a servo motor for rotating the mic, and a flashlight to show detected sounds or indicate the sounds during playback mode.

It is a kind of reality re-mixer–by simply removing the silence and pauses between loud sounds and words, it creates the sense of very rhythmical and organized aural experience, which sounds very musical to me.

Intrigued? You can read more and see other photos of the project on its page here.

Arduino Blog 13 Oct 16:55

Ping Pong FM is a fun, musical take on table tennis

If you thought table tennis was hard enough, wait until you see what Mark Wheeler and a team of designers have come up with. Ping Pong FM puts a Guitar Hero-like spin on the classic sport.

However, unlike the actual game, Ping Pong FM is more collaborative than competitive. That’s because players must hit the ball back and forth to keep the music going. Select your paddle, choose your song, and serve. Rally too slowly, or miss the ball, and the music will wind down. Rally at the correct tempo and the party is on. As you can imagine, faster tunes like “Intergalactic” by the Beastie Boys or “Milkshake” by Kelis are more challenging.

Although it may resemble an ordinary table tennis setup, Ping Pong FM is much more high-tech. Contact microphones are placed inside each of the paddles to track gameplay, while the microphone audio is processed by an Arduino hidden in a retro radio case that listens for peaks above a threshold. When a hit is registered, the Arduino sends a Player ID via USB to a computer running the game app, which displays the song coming out of two speakers and adjusts its speed accordingly.

You can see Ping Pong FM in action below and read more about the project here.

Check the traffic autonomously on a modified clock

Using an Arduino and 1Sheeld, Integreight embedded engineer Eslam Ali set his office clock up to preview the traffic going home.

If you work in a traffic-prone area, there’s always a debate at to whether you should go home at the normal time or wait a few minutes to leave and avoid the traffic. To help make that decision, Ali likes to check the traffic before heading out. This might be fairly simply using a computer or smartphone, but doing so autonomously would be even better.

In a clever feat of automation, he embedded 12 RGB LEDs in a simple IKEA clock. These were then controlled by an Arduino Uno, using a 1Sheeld device to access the Internet through his smartphone. If traffic is bad, it displays as red, then blinks green when it’s time to go! A clever application in itself, something like this could be expanded for numerous uses, perhaps even involving animated lights.

Whenever it’s time to get off the office, I always check the traffic status to choose the best time to go home. But I couldn’t find a way to do that autonomously. So then…I was up to make a system that shows me the current traffic status with the help of a simple tool that is used probably in all the offices, a wall clock

In addition to the video below, you can see how to make one on 1Sheeld’s site or check out the discussion about this build on Reddit.

Arduino Blog 11 Oct 23:12

This Arduino G meter shows how fast your car really is!

Using an Arduino with an accelerometer, this handy display lets you know how “extreme” your driving really is!

Modern cars tell us all kinds of information about how our vehicles are working and how you are driving. One thing that is generally missing is a display that tells you how many “G’s” (or how much you are pushed back into your seat) your car is pulling. With this clever setup, you can know how much force your tires are putting to the ground (neglecting body-roll factors) in both straight-line acceleration, braking, and even side-to-side turning.

As an automotive enthusiast and a mechanical engineer, I had a poor physical understanding of G’s. Sure, I’m experiencing 1g as I’m standing upright, but how many G’s did I experience as I came to a quick stop in LA traffic? To gain a better physical understanding of G’s, I built this device.

You can see more details of this simple yet very useful build on eadiec’s Imgur page.

Arduino Blog 11 Oct 19:55
arduino  featured  g meter  nano  

High Schooler Makes Devices for Visually Impaired Using Arduino and Servos

Sreyash's simple concepts could be very helpful to those with vision impairments.

Read more on MAKE

The post High Schooler Makes Devices for Visually Impaired Using Arduino and Servos appeared first on Make: DIY Projects and Ideas for Makers.

Making a Gesture

When [krich] switched keyboards he lost his volume control. So he decided to hack one together out of an Arduino, an old floppy disc case, and a Hover Labs Hover board (not the Back to the Future kind). You can see the result in the videos below.

You’ll notice in the video that the device reads a “spin” motion to resemble a round volume control. The program sends simulated keyboard presses to the PC to control the audio. In the write-up, [krich] mentions it may be the first gesture-based volume control. However,we’ve done it before and so have others.

The Hoverboard does all the hard work, of course. It passes data to the Arduino via I2C. The PC side is handled by some Windows on screen display software, 3RVX.

Still, this one seems to work well with the Hover board. Hard to argue against anything that upcycles a floppy disc container.


Filed under: Android Hacks

Arcade Cabinet Build Takes Quarters, Dispenses Fun

Building an arcade cabinet seems to be a rite of passage for many hackers and woodworkers. Not that there is anything wrong with that: as this series of posts from [Alessandro] at boxedcnc shows, there is an art to doing it well.

His final build is impressive, with quality buttons, a genuine-looking banner, and even a coin slot so he can charge people to play. His build log covers both the carpentry and electronic aspects of the build, from cutting the panels to his own code for running the coin acceptor that takes your quarter (or, as he is in Italy, Euro coins) and triggers the game to play.

To extract money from his family, he used the Sparkfun COM-1719 coin acceptor, which can be programmed to send different pulses for different coins, connected to an Arduino which is also connected to the joystick and buttons. The Arduino emulates a USB keyboard and is connected to an old PC running MAME with the Attract Mode front end. It’s a quality build, down to the Bubble Bobble banner, and the coin slot means that it might even make some money back eventually.


Filed under: Arduino Hacks, classic hacks

Galaga revived as a 4/5 scale MAME machine

This arcade machine helps creator Alex Weber relive arcade memories, but is slightly easier to move than a full-sized “cab!”

Galaga is one of Weber’s–and many others’–top five arcade games. Easy to learn, but difficult to master, it was just asking to accept your money and time! Now though, using a Raspberry Pi and MAME software, you can have this and other old-school games at your disposal. Weber built a cabinet for this purpose around an old CRT television slightly smaller than original size.

In order to keep from having to fool with the TV every time it switched on, he made an automated remote control with an Arduino and IR LED that sends signals to turn it on and switches the TV to AV mode.

I have a soft spot for 8-bit arcades… I saw these for the first time. At least it felt like that. All machines where running. All coin doors were open! Somebody saw me standing in front of them with huge eyes and showed me how to trigger the switch to get credits for free. BAM! I was hooked.

You can see the full build on Weber’s tinkerlog site as well as Hackaday’s writeup here.

A 3D-printed reimagined Game Boy prototype

With a shape reminiscent of a Game Gear, revised controls and hardware, Anthony Campusano’s rig looks extremely fun!

As reported on 3DPrint.com, Campusano’s Game Boy-inspired prototype was quite the crowd-pleaser at World Maker Faire in New York. Although wider than it is tall (like most portables to follow), and with many more buttons, this handheld console still screams “original Game Boy.” Perhaps this is because of its color scheme, or even the angle of the buttons.

Hardware consists of several platforms, including an Arduino to handle tasks such as status lights and battery level. The idea was inspired by Florian Renner’s similar concept, though he replaces the ideal of separate game cartridges with an SD card for storage.

I’m a trained architect, though I have industrial designer envy. In terms of electronics, I’m self-taught. When it comes to machine specs, the handheld is based on an Intel Core M. Controls are Teensy-based, and the status lights and battery level, etc. are run from an Arduino. Estimated battery life is about 3hrs +/- depending on the game.

You can see more photos of Campusano’s project on his Facebook page, and read all about it on 3DPrint.com.

Keep your cat entertained with an automated laser tower

As any cat owner can tell you, our feline friends love chasing the uncatchable dot of a laser pointer. Unfortunately, though, there is only so much time in the day that you can spend playing with them and catering to their natural instincts… so why not automate the process?

This is exactly what La Fabrique DIY decided to do using an Arduino Uno, two servos, a pan/tilt camera mount, and an Altoids tin to house the electronics. With some programming, the tower moves the laser “pseudo-randomly” to mimic the behavior of an insect.

So if you, like La Fabrique DIY, have a cat in a small apartment with not much room to hunt, head over to the project’s Imgur page to start building a distraction device for yourself!