Posts with «arduino» label

Interfacing accelerometer with arduino uno

Interfacing accelerometer with arduino uno


Introduction:

In this post, we are going to interface accelerometer with arduino. Accelerometer is a sensor used for detecting motion or change in coordinates. We have three coordinates i.e X, Y and Z axis. It's a five-pin device out of which are for power supply Vcc and Ground. The output of the sensor is in analog.
This sensor required three analog pins. We can provide Vcc and ground directly from the analog pins.
So, we are using five analog pins. Three for axis and two for providing power to the module.

Components required:

  1. Arduino Uno
  2. ADXL335 (accelerometer)
  3. USB type B cable for interfacing with computer.
Connections:

Make connections as follows:

ADXL335                                    Arduino
Vcc                                               A0
X                                                  A1
Y                                                  A2
Z                                                  A3
Gnd                                              A4

The program is quite simple. We are using adc for reading the values of X, Y and Z axes. 
Also, the adc value  is in raw format means its value ranges from 0 to 1023.
No need to manipulate the raw adc value.


Once, we get the raw values of adc, we will fed it to serialprint function to check its output through serial monitor.

Application of accelerometer:

Used in smartphones for motion detection and orientation sensor. It found enormous application in
motion sensing game consoles. In case of robotics, we can use it for hand gesture based robot or to synthesize the hand gesture into voice.

Source code:

// these constants describe the pins. They won't change:
const int groundpin = A4;             // analog input pin 4 -- ground
const int powerpin = A0;              // analog input pin 5 -- voltage
const int xpin = A1;                  // x-axis of the accelerometer
const int ypin = A2;                  // y-axis
const int zpin = A3;                  // z-axis (only on 3-axis models)


void setup() {

  Serial.begin(9600);

  pinMode(groundpin, OUTPUT);
  pinMode(powerpin, OUTPUT);
  digitalWrite(groundpin, LOW);
  digitalWrite(powerpin, HIGH);
}

void loop() {
  Serial.print(analogRead(xpin));
  Serial.print("\t");
  Serial.print(analogRead(ypin));
  Serial.print("\t");
  Serial.print(analogRead(zpin));
  Serial.println();
  delay(100);
}


Output from serial monitor of arduino

Thanks for viewing this post.

A touchless MIDI controller for your electric guitar

If guitar effects pedals aren’t really your thing, perhaps Evan Kale’s touchless MIDI controller will fit the bill.

Using an Arduino, along with a Colpitts oscillator and some other electronics, Kale has come up with a rather unique interface for his guitar. Instead of using a foot pedal, he put a strip of aluminum foil inside of a fingerless glove, then attached a homemade metal detector coil and circuit to the back.

This allows him to strum the guitar, then change the sound by moving his hand away and toward the strings as a MIDI input. Very clever, and as always, Kale outlines everything in his own zany video style!

You can find the code for this project here and check out the schematic on Imgur. On the other hand, if this looks slightly familiar, he uses the same type of circuit for this MIDI controller as the metal detector previously covered on our blog.

A touchless MIDI controller for your electric guitar

If guitar effects pedals aren’t really your thing, perhaps Evan Kale’s touchless MIDI controller will fit the bill.

Using an Arduino, along with a Colpitts oscillator and some other electronics, Kale has come up with a rather unique interface for his guitar. Instead of using a foot pedal, he put a strip of aluminum foil inside of a fingerless glove, then attached a homemade metal detector coil and circuit to the back.

This allows him to strum the guitar, then change the sound by moving his hand away and toward the strings as a MIDI input. Very clever, and as always, Kale outlines everything in his own zany video style!

You can find the code for this project here and check out the schematic on Imgur. On the other hand, if this looks slightly familiar, he uses the same type of circuit for this MIDI controller as the metal detector previously covered on our blog.

Square Off is a chess board with a high-tech twist

If you love chess, but aren’t thrilled about playing it on an app, the InfiVention team has just the board for you.

The origin of the game chess is a fascinating and somewhat unknown tale, stretching continents and many hundreds of years. In the last 25 or so years, however, it has gone from a game played on a beautiful board with finely crafted pieces, to something played on a computer or smartphone. Perhaps this is a good thing, since finding competition is as easy as signing into the correct game.

On the other hand, this type of play looses a lot of charm, and you can’t exactly pass the app on your beat up smartphone to your kids one day. Attempting to fill in the gap is the amazing automated board called “Square Off.” With an Arduino Mega 2560 at its core, it automatically moves the pieces, and detects where you move, allowing you to play in the real world with someone remotely–even if he or she is merely using a tablet!

Square Off is all set to redefine the world of board games, starting with chess. Bringing to you the world’s smartest, most connected and the most evolved chess board. It enables you to play your favorite game against a fellow chess enthusiast from anywhere in the world. The automated board is designed to reflect the move of your opponent with precision. Not just that, you can challenge the artificial intelligence of the board, too.

Intrigued? You can learn more about Square Off on its nearly-funded (as of this writing) Kickstarter page, as well as on the Arduino Project Hub!

Square Off is a chess board with a high-tech twist

If you love chess, but aren’t thrilled about playing it on an app, the InfiVention team has just the board for you.

The origin of the game chess is a fascinating and somewhat unknown tale, stretching continents and many hundreds of years. In the last 25 or so years, however, it has gone from a game played on a beautiful board with finely crafted pieces, to something played on a computer or smartphone. Perhaps this is a good thing, since finding competition is as easy as signing into the correct game.

On the other hand, this type of play looses a lot of charm, and you can’t exactly pass the app on your beat up smartphone to your kids one day. Attempting to fill in the gap is the amazing automated board called “Square Off.” With an Arduino Mega 2560 at its core, it automatically moves the pieces, and detects where you move, allowing you to play in the real world with someone remotely–even if he or she is merely using a tablet!

Square Off is all set to redefine the world of board games, starting with chess. Bringing to you the world’s smartest, most connected and the most evolved chess board. It enables you to play your favorite game against a fellow chess enthusiast from anywhere in the world. The automated board is designed to reflect the move of your opponent with precision. Not just that, you can challenge the artificial intelligence of the board, too.

Intrigued? You can learn more about Square Off on its nearly-funded (as of this writing) Kickstarter page, as well as on the Arduino Project Hub!

It’s a Clock! It’s a Puzzle! It’s The GoonieBox!

[Dr.Duino] recently completed the latest piece of what he calls “Interactive Furniture” – the GoonieBox. It took over 800 hours of design and assembly work and the result is fascinating. Part clock and part puzzle box, it’s loaded with symbols, moving parts, lights, riddles, sounds, switches, and locked compartments. It practically begs visitors to take a closer look.

The concept of Interactive Furniture led [Dr.Duino] to want to create a unique piece of decor that visitors could interact with. That alone wasn’t enough — he wanted something that wouldn’t require any explanation of how it worked; something that intrinsically invited attention, inspection, and exploration. This quest led to creating The GoonieBox, named for its twin inspirations of the 1985 film The Goonies as well as puzzles from the game “The Room“.

Embedded below are two short videos: the first demonstrates the functions of the box, and the second covers the build process. There’s laser-cut wood, plenty of 3D printed parts, and a whole lot of careful planning and testing.

Puzzle boxes let people show off their creativity over a wide range of different executions, like these simpler laser-cut puzzle boxes and on the other end of the spectrum is this timed, multi-stage puzzle rigged to blow. Not only is this build one of the more complex ones we’ve seen, but I don’t think we’ve ever seen a puzzle box so carefully designed to also serve as a functional piece of decor. Great work!


Filed under: clock hacks, misc hacks

Smartwatch prototype turns your wrist into a joystick

Although smartwatches were designed to be an easy-to-use alternative for your smartphone, interacting with their touchscreens still requires your opposite hand to be free. So what do you do when you’re carrying a bag of groceries or holding onto a bus handle?

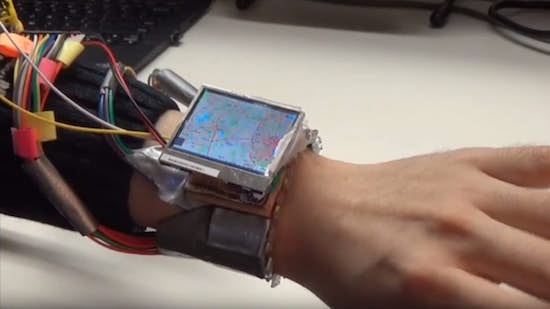
This is the problem a Dartmouth-led team set out to solve with WristWhirl, a smartwatch prototype that uses the wrist wearing the device as a joystick to perform common touchscreen gestures with one-handed continuous input, while freeing up the other hand for other tasks.

WristWhirl was built using a two-inch TFT display and a plastic watch strap equipped with a dozen infrared proximity sensors and a piezo vibration sensor, which is connected to an Arduino Due board. Commands are then made by moving the hand as if it were operating a joystick, while a finger pinch turns the sensors on/off to indicate the start or end of a gesture.

For starters, the team implemented four sample applications with off-the-shelf games and Google Maps to illustrate potential use cases.

Four usage scenarios for WristWhirl were tested: 1) a gesture shortcuts app was created, which allowed users to access shortcuts by drawing gestures; 2) a music player app was created, which allowed users to scroll through songs through wrist-swipes and play a selected song by double tapping the thumb and index fingers; 3) a map app was implemented for which 2D maps could be panned and zoomed depending on where the watch was held in relation to one’s body; and 4) game input, which often requires continuous input was tested, for which Tetris was played using a combination of wrist swipes, wrist extension and wrist flexion.

You can read more about the project on its page here, as well as see a demonstration of it below!


Smart ping pong paddles remix music to the speed of play

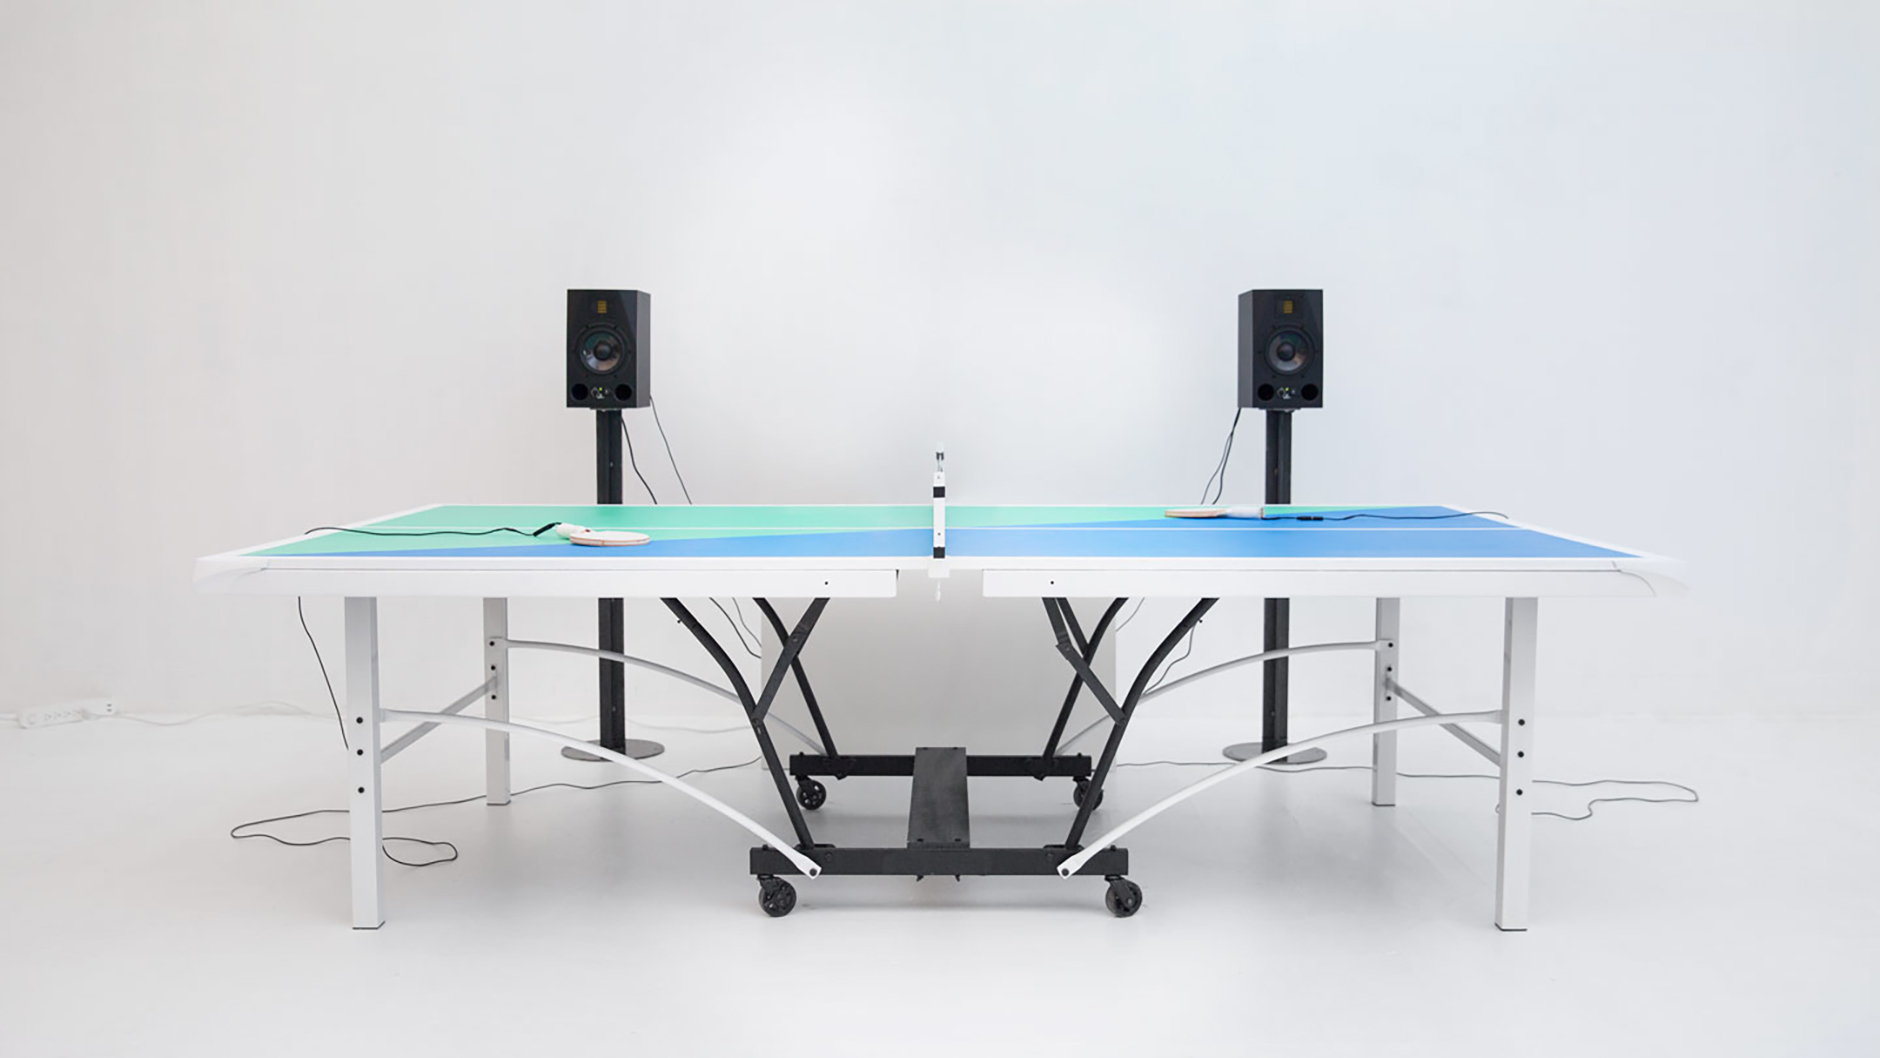
I love playing table tennis, but my backhand topspin is average at best. I'll play for an hour and grow tired of chasing wayward balls, knowing that I'll never have a smash quite like Peco from Ping Pong. Never mind -- now I can cut loose with a game of "Ping Pong FM" instead. The modified bats, which have contact microphones inside, log when you've hit the ball and remix music accordingly. Exchange slices too slowly and the song will drop to a lower tempo; likewise, driving the ball with some vicious top spin will cause it to speed up. You can try to match the beat or purposefully remix the music in weird and wonderful ways -- it's entirely up to you.

Engadget 17 Oct 15:21

Smart ping pong paddles remix music to the speed of play

I love playing table tennis, but my backhand topspin is average at best. I'll play for an hour and grow tired of chasing wayward balls, knowing that I'll never have a smash quite like Peco from Ping Pong. Never mind -- now I can cut loose with a game of "Ping Pong FM" instead. The modified bats, which have contact microphones inside, log when you've hit the ball and remix music accordingly. Exchange slices too slowly and the song will drop to a lower tempo; likewise, driving the ball with some vicious top spin will cause it to speed up. You can try to match the beat or purposefully remix the music in weird and wonderful ways -- it's entirely up to you.

Via: designboom, The Verge

Source: Ping Pong FM

Engadget 17 Oct 15:21

Homemade E-Drums Hit All The Right Notes

In our eyes, there isn’t a much higher calling for Arduinos than using them to make musical instruments. [victorh88] has elevated them to rock star status with his homemade electronic drum kit.

The kit uses an Arduino Mega because of the number of inputs [victorh88] included. It’s not quite Neil Peart-level, but it does have a kick drum, a pair of rack toms, a floor tom, a snare, a crash, a ride, and a hi-hat. With the exception of the hi-hat, all the pieces in the kit use a piezo element to detect the hit and play the appropriate sample based on [Evan Kale]’s code, which was built to turn a Rock Band controller into a MIDI drum kit. The hi-hat uses an LDR embedded in a flip-flop to properly mimic the range of an actual acoustic hi-hat. This is a good idea that we have seen before.

[victorh88] made all the drums and pads out of MDF with four layers of pet screen sandwiched in between. In theory, this kit should be able to take anything he can throw at it, including YYZ. The crash and ride cymbals are MDF with a layer of EVA foam on top. This serves two purposes: it absorbs the shock from the sticks and mutes the sound of wood against wood. After that, it was just a matter of attaching everything to a standard e-drum frame using the existing interfaces. Watch [victorh88] beat a tattoo after the break.

If you hate Arduinos but are still reading for some reason, here’s a kit made with a Pi.


Filed under: Arduino Hacks, musical hacks