Posts with «arduino» label

An Arduino-controlled automated whiskey distillery

If you simply want to have a drink now and then, building your own automated distillery probably isn’t the easiest way to obtain alcohol. As shown in this Instructables post, however, it can be done. On the other hand, if you create your own “NanoStillery,” you’ll have to contend with possible legal and safety issues while running the process… and of course, the risks of actually using the product.

Though the writeup appears quite good, with three control panels, custom mechanical components and a nicely-welded frame, it’s likely not a good project to attempt without a bit of engineering experience!
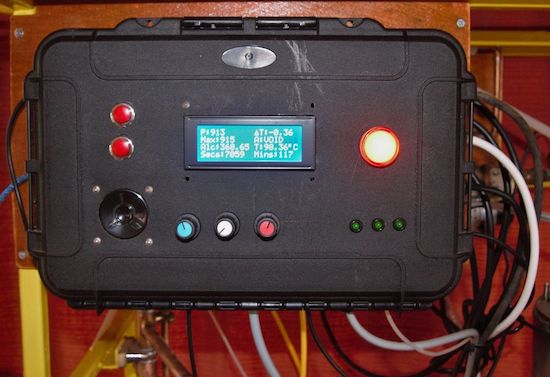
There are three panel boxes in the NanoStillery™, the main panel is driven by an Arduino Mega and the secondary one houses an Adafruit Feather GPRS board for transmitting data to the interweb. The third box has a large 12V power supply and a bank of relays in it.

The main control panel receives information from the various sensors in the system—temperatures, pressure and alcohol vapor levels and controls various valves, pump and the boiler heater via the relays. It then communicates with the Adafruit Feather via the I2C bus which then sends the data to a database where it is accessed from this webpage.

The GPRS module could very well have been bolted into the main control panel, but, for one, I had run out of room and secondly, I wanted the module to be removable so that it could be used for other projects in the future. Getting the two ‘machines’ to communicate with each other effectively was quite challenging. It was OK if the numbers were just simple small integers, but as soon as more complex ‘floats’ were involved, some serious number crunching code had to be developed.

Want to learn more? You can find all the necessary information on NanoStillery, including its code, over on Instructables.

The Rex800 looks like a dinosaur Terminator

The Rex800 looks like a dinosaur Terminator, a terrifying proposition, and perhaps a great merchandising opportunity!

YouTuber “RobitFactory” is in the process of creating a 1/10 replica of the “Sue” dinosaur skeleton, now featured at the Field Museum of Natural History in Chicago. What he has at the moment is a rough frame made out of tubing, as well as a metallic gray head with glowing red eyes.

The video takes us through the build process, along with some of RobitFactory’s future plans which include voice-activation. It’s an ambitious project, and in preparation for upgrades, he’s switched out the Arduino Uno used originally for a Mega board, and installed a Molex connector on the head so it can be easily disconnected. It will be exciting to see where this build goes!

Intrigued? Be sure to check out the RobitFactory’s YouTube page.

Arduino Blog 05 Dec 21:05

Repurpose a Classroom Clicker for Great Justice

If you’ve been in a university class of a certain size, with a professor who wants to get live feedback from the students, you’ve probably been forced to buy a Turning Point “clicker”. Aside from the ridiculousness of making students pay for their professor’s instructional aides (do the make you pay extra for the chalk too?!?!) these clickers are a gauntlet thrown down to any right-minded hacker because they supposedly contain secrets.

[Nick] had one of these gadgets, and hopped right up on the shoulders of giants to turn it into a remote control that interfaces with his computer and drives a synthesizer, so he can work through the chord changes by clicking. His two references, to [Travis Goodspeed]’s nRF promiscuity hack and to [Taylor Killian]’s Arduino library for the clickers are a testament to why we need both reverse engineers doing the hard work and people who’ll wrap up the hard work in an easy-to-use library.

That’s it, really. [Nick] hooked up an Arduino to an nRF24, sent the decoded output from the clicker to his computer, and wrote a Python routine that would play whatever music he wanted over MIDI to a baseline synthesizer. The whole shooting match is available on GitHub. If you have one of these clickers collecting dust somewhere, pull it out and do something with it.


Filed under: wireless hacks

Otto Bot is Bob’s Grandson

The Otto DIY robot has just taken first place in the coveted role as “best robot to 3D print for your (inner) child”. It’s cute, it dances, it doesn’t cost too much, it’s completely open source, and it’s not impossible to write code for. It’s probably the most refined Bob design that we’ve seen yet. Watch it move in the video below.

We fell in love with the Bob robot when we first saw it, and we apparently weren’t alone. There have been a ton of Bob-clones that have refined the basic design. And until Otto, the Spanish Zowi was the coolest that we’d ever seen.

Why is Otto so cool? They’ve tweaked the design so that, with the exception of some fiddly servo screws, everything just snaps together. The printed parts fit easily on a single RepRap bed, so you can practically churn them out. And the rest consists of very cheap commodity parts that you can easily source online. If four hobby servos cost $20, you could get the whole bot done for around $40.

Since this is a Bob clone, the firmware is approximately compatible with the Zowi. Indeed, there have already been people who’ve run Zowi firmware on the Otto (YouTube), adding Bluetooth to make use of Zowi’s cell-phone remote control. Besides the cute-factor, one of the strongest reasons to build yourself a Bob-style robot is the growing code ecosystem, both around Otto and Zowi. So don’t just sit there, get printing and contribute!


Filed under: robots hacks
Hack a Day 04 Dec 16:30
arduino  bob  otto  robot  robots hacks  zowi  

Code Like an Egyptian

[Marcelo Maximiano’s] son had a school project. He and a team of students built “The Pyramid’s Secret“–an electronic board game using the Arduino Nano. [Marcelo] helped with the electronics, but the result is impressive and a great example of packaging an Arduino project. You can see a video of the game, below.

In addition to the processor, the game uses a WT5001M02 MP3 player (along with an audio amplifier) to produce music and voices. There’s also a rotary encoder, an LCD, a EEPROM (to hold the quiz questions and answers), and an LED driver. There’s also a bunch of LEDs, switches, and a wire maze that requires the player to navigate without bumping into the wire (think 2D Operation).

In addition to the code and hardware diagrams, there is a PDF file on GitHub describing more about the game. It is in Portuguese, though, so most of us will probably need a little translation help. However, a Brazillian site did have an English post about the game, which might be a good place to start.

You might not want to replicate the game, but it is a great example of how much an Arduino can do with some simple externals devices and some attention to packaging.

Sadly, most of our projects look more like this game (no offense to that hacker). Projects like this are way more likely to spark young people’s interest than a blinking LED or a capacitor meter. If you are more in the mood for arcade play, you can also check out Arduinocade.


Filed under: Arduino Hacks
Hack a Day 04 Dec 06:00
arduino  arduino hacks  egypt  game  mp3  pyramid  

Arduino based DC Voltmeter (0-50 volts)

In this post, we are going to make digital voltmeter using arduino uno. It's a DC voltmeter and it's range is 0 to 50 volt. As we know, arduino is an open source hardware prototyping platform used worldwide by the hobbyists, educators and students across the globe.
This is a handy voltmeter.

Stuff required:

  1. Arduino uno
  2. 16*2 lcd
  3. 10k pot
  4. voltage source

Objective of the project: To make a digital voltmeter, which can measure voltage from 0 to 50 volt DC and thereafter it can display on 16*2 LCD.

Connections:

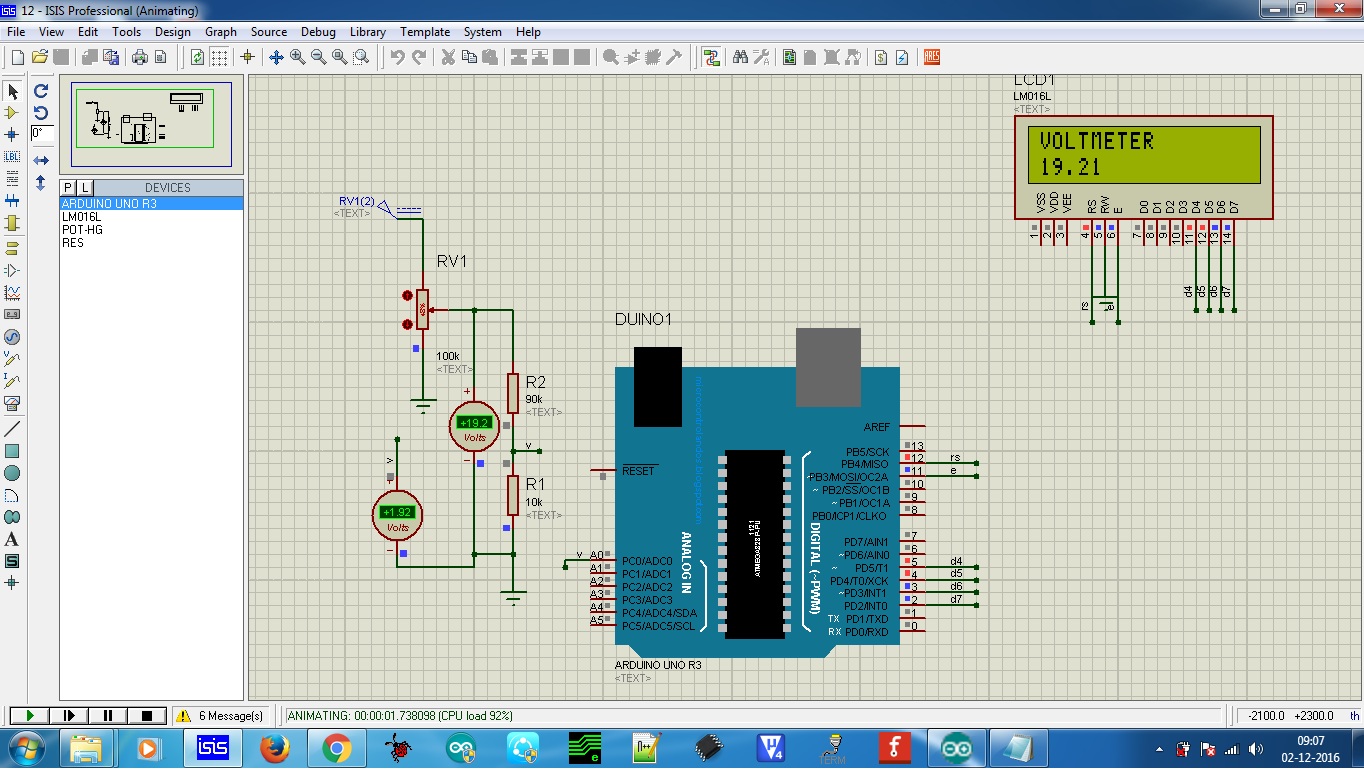
Make the connections as given in the figure below:

Arduino based voltmeter
Once the connection is made, upload the source code.

/* Source code */

const int volt=A0;

float val=0.0;

#include <LiquidCrystal.h>

LiquidCrystal lcd(12, 11, 5, 4, 3, 2);

void setup() {
  lcd.begin(16, 2);
  lcd.print("VOLTMETER");
}

void loop() {
  val=analogRead(volt);
  val=val*4.887;     // convert digital count into millivolt
  val=val/1000;      // convert millivolt into volts
  val=val*10.0;
  lcd.setCursor(0, 1);
  lcd.print(val);
}

/* End of source code */

Check out the video:


Hope you guys have enjoyed the post.

Thanks for reading the post.

Wrist thrusters let you fly through the water effortlessly

These small arm-mounted propeller units can carry a skin diver through the water with minimal effort.

YouTuber “PeterSripol” had only a week to prepare for his trip to Hawaii. Rather than purchase a set of fins or a snorkel, he instead hooked up two T100 thrusters that he had lying around to wrist straps. In his setup, these thrusters are controlled by a button interfaced with an Arduino that allows the user to select one of three power levels.

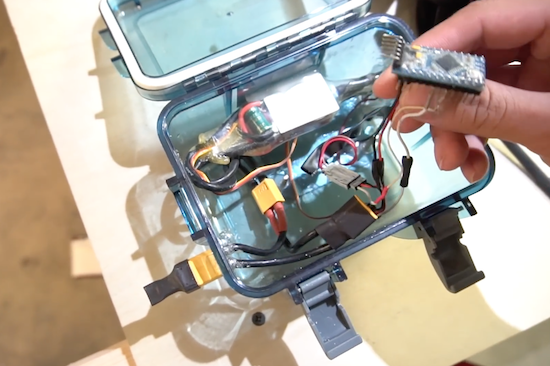
The required battery, as well as other control components are housed inside a waterproof box, and quite a bit of effort was put into making good (and hopefully waterproof) connections!

Unfortunately, the fun was cut short by a cut wire, but it looked awesome nevertheless! You can see the project in action below!

Arduino Controlled Micro Distillery

Booze, they say, is one of the major factors that shaped human history. And creating new and faster ways of making booze has always been a big engineering problem, so this project by [Goat Industries] is rather interesting. It’s a completely automated micro-distillery called the NanoStillery.

The whole thing can run unattended, but uploads data on the brewing process for remote monitoring and notification. Given that distilling involves explosive things like alcohol vapor, that’s a big plus. It is all home-made, including the boiler assembled from steel plate and an air-cooled condenser. It’s controlled by an Arduino Mega twinned with a couple of Adafruit boards that interface with the various sensors and pumps that control the flow of booze around the system. There is also an Adafruit FONA board that includes a cellular modem that uploads data to a database to monitor the progress and let you know when it is done.

The Instructable even includes the Arduino code that runs the process. It’s an impressive build from an engineering point of view, and the final touch has to be the creepy Cylon voice that the controller uses to narrate the process. There’s a video tour after the break.

If you are curious about the role of booze and other drinks in the development of technology, I recommend you read A History of the World in Six Glasses by Tom Standage, an excellent book that traces the history of civilization through the history of beer, wine, spirits, coffee, tea and cola.


Filed under: cooking hacks
Hack a Day 02 Dec 06:00

Payphone Boombox Straight Out of the 1990’s.

Due largely to the overwhelming dominance of mobile phones, payphones are a sometimes overlooked relic from the 90’s and earlier eras. While seldom seen out in the wild these days, they can however still be acquired for a moderate fee — how many of you knew that? Setting out to prove the lasting usefulness of the payphone, Instructables user [Fuzzy-Wobble] has dialed the retro spirit way past eleven to his ’90 from the ’90s’ payphone boombox.

Conspicuously mounted in the corner of his office, a rangefinder sets the phone to ringing when somebody walks by — a fantastic trap for luring the curious into a nostalgia trip. Anyone who picks up will be prompted to punch in a code from the attached mini-phone book and those who do will be treated to one of ninety hits from — well —  the 1990’s. All of the songs have been specifically downgraded to 128kbps for that authentic 90’s sound — complete with audio artifacts. There’s even a little easter egg wherein hitting the coin-return lever triggers the payphone to shout “Get a job!”

[Fuzzy-Wobble] notes that a payphone bracket is indispensable as most all payphones are made of cast iron, and nobody likes holes ripped out of their walls due to improper mounting. They’ve also provided their code as well as links to other tutorials for aspects of the build — such as the Adafruit music maker — throughout. Now you’ll have to excuse us as we groove while lost in a reverie.

Kick it back an extra decade and you get an 80’s boombox bluetooth speaker.

[Thanks for the submission, Alex S!!]


Filed under: phone hacks
Hack a Day 02 Dec 03:00

Adding an “extra sense” with rangefinders

Using ultrasonic sensors attached to a person’s arm, researchers have found a way to let you “feel” distant objects.

The concept of this project is surprisingly simple, but as shown in the test video below, seems to work quite well. Using an Arduino Uno to coordinate everything, when rangefinders see a nearby object, like a wall, the system triggers the corresponding vibrators. This allows someone to sense what is nearby without seeing or touching it.

An obvious use case for something like this would be to help visually-impaired people navigate. Perhaps it could also serve in an application where you need to pay attention to something you can’t quite see, sort of like how an animal’s whiskers warn them of danger before contact is made.

The idea is to have a set of rangefinders in armbands that point outwards around your body. Each armband also has vibrators in that vibrate against your skin at an increasing frequency as the range from each sensor gets smaller. The left armband covers your left-side surroundings, and the right your right-side.

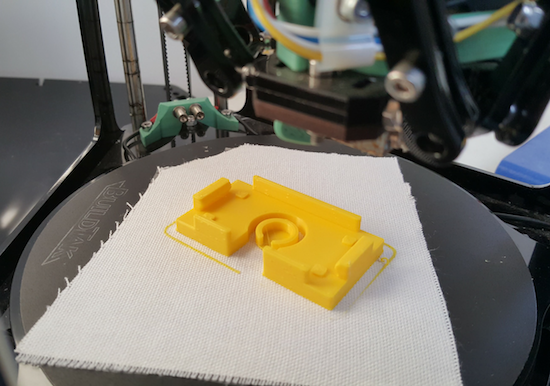
You can see more details on this sensor assembly on RepRap Ltd’s page, including how its case was printed directly on fabric!