Posts with «arduino» label

Shed Pounds and Inches while Binge Watching Netflix

Feel like breaking out of your streaming-induced vegetative state but can’t seem to break the binge-watching cycle? Maybe you’re a candidate for this exercise bike that controls how much Netflix you watch.

The concept behind [Roboro]’s anti-couch potato build is simple — just keep pedaling and you get to keep watching. The details are pretty simple too and start with an Arduino monitoring the signal coming from a jack thoughtfully provided by the manufacturer of his exercise bike. The frequency of the square wave is translated into a speed which a Python script on a PC reads over USB. Once a Netflix stream is started, dropping below the user-defined speed pauses the movie. The video below shows it doing its thing.

Improvements readily spring to mind, like adding a speed buffer so that pedaling faster lets you bank some streaming time and earn a rest. Maybe it could somehow integrate with these Netflix-enabled socks, or even with the Netflix and Chill button. But those sort of defeat the purpose a bit.


Filed under: home entertainment hacks, misc hacks

Making Your Own Custom Shortcut Keyboard

Create a custom 3D printed shortcut keyboard for design and other complex programs you work in.

Read more on MAKE

The post Making Your Own Custom Shortcut Keyboard appeared first on Make: DIY Projects and Ideas for Makers.

Making Your Own Custom Shortcut Keyboard

Create a custom 3D printed shortcut keyboard for design and other complex programs you work in.

Read more on MAKE

The post Making Your Own Custom Shortcut Keyboard appeared first on Make: DIY Projects and Ideas for Makers.

Building an Arduino-controlled single-pixel scanner

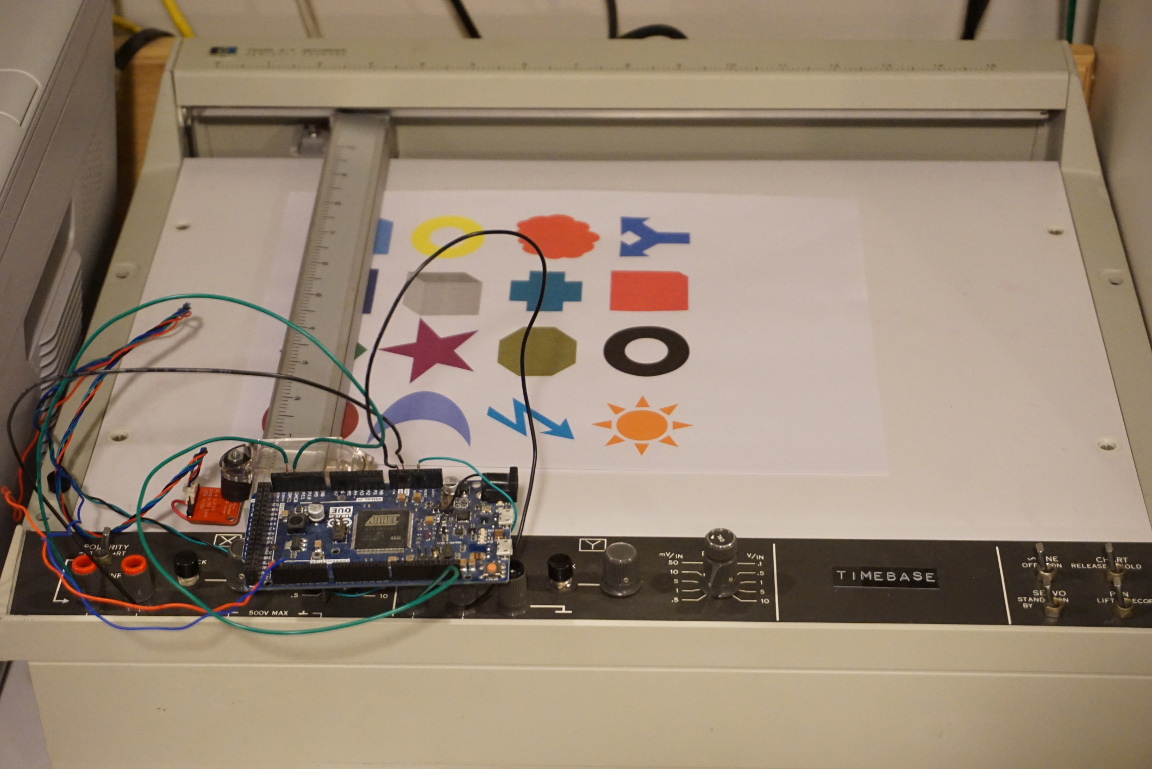
If you’ve seen color sensors such as the TCS34725,  you may have considered them for projects that can pick out one colored object over another. On the other hand, if you were to take one of these sensors, mount them to an Arduino-driven plotter, and then take readings in an X/Y plane, you’d have all the elements needed for a simple single-pixel scanner.

In the video seen below, Kerry D. Wong does just this using his hacked HP 7044A plotter to scan a picture, recording RGB color values in a 128 x 128 grid. As the device scans, the Arduino Due used for control passes these values to a computer, which assembles them together into a low-resolution image.

You can find more details on the project, including its code, in Wong’s blog post here.

JPEG Decoding, Arduino Style

When you think of image processing, you probably don’t think of the Arduino. [Jan Gromes] did, though. Using a camera and an Arduino Mega, [Jan] was able to decode input from an Arduino-connected camera into raw image data. We aren’t sure about [Jan’s] use case, but we can think of lots of reasons you might want to know what is hiding inside a compressed JPEG from the camera.

The Mega is key, because–as you might expect–you need plenty of memory to deal with photos. There is also an SD card for auxiliary storage. The camera code is straightforward and saves the image to the SD card. The interesting part is the decoding.

The use case mentioned in the post is sending image data across a potentially lossy communication channel. Because JPEG is compressed in a lossy way, losing some part of a JPEG will likely render it useless. But sending raw image data means that lost or wrong data will just cause visual artifacts (think snow on an old TV screen) and your brain is pretty good at interpreting lossy images like that.

Just to test that theory, we took one of [Joe Kim’s] illustrations, saved it as a JPEG and corrupted just a few bytes in a single spot in it. You can see the before (left) and after (right) picture below. You can make it out, but the effect of just a few bytes in one spot is far-reaching, as you can see.

The code uses a library that returns 16-bit RGB images. The library was meant for displaying images on a screen, but then again it doesn’t really know what you are doing with the results. It isn’t hard to imagine using the data to detect a specific color, find edges in the image, detect motion, and other simple tasks.

Sending the uncompressed image data might be good for error resilience, but it isn’t good for impatient people. At 115,200 baud, [Jan] says it takes about a minute to move a raw picture from the Arduino to a PC.

We’ve seen the Arduino handle a single pixel at a time. Even in color. The Arduino might not be your first choice for an image processing platform, but clearly, you can do some things with it.


Filed under: Arduino Hacks
Hack a Day 12 Jul 16:00

Hack Your Car into the Future with an LED Heads-Up Display

This LED heads-up display is a simple modification for your car, but it makes your car look very futuristic.

Read more on MAKE

The post Hack Your Car into the Future with an LED Heads-Up Display appeared first on Make: DIY Projects and Ideas for Makers.

Hack Your Car into the Future with an LED Heads-Up Display

This LED heads-up display is a simple modification for your car, but it makes your car look very futuristic.

Read more on MAKE

The post Hack Your Car into the Future with an LED Heads-Up Display appeared first on Make: DIY Projects and Ideas for Makers.

Tinkercad does Arduino

If you’ve done 3D printing, you’ve probably at least heard of Tinkercad. This popular CAD package runs in your browser and was rescued from oblivion by Autodesk a few years ago. [Chuck] recently did a video about a new Tinkercad feature: building and simulating virtual Arduino circuits. You can watch it below.

There are a variety of components you can add to your design. You’ll find an integrated code editor and a debugger. You can even get to the serial monitor, all in your browser with no actual Arduino hardware. You can also build simple circuits that don’t use an Arduino, although the component selection is somewhat limited.

This could be great for teaching Arduino in classrooms or when you want to do some development in a hotel room. The layout is very visual, so if you are accustomed to reading schematics, you may not appreciate the style. In addition, the selection of components is somewhat limited (including only supporting the Arduino UNO, as far as we could tell). So for educational purposes, it is great. For breadboarding your next great Arduino-powered robot, maybe not so much.

If you remember Circuits123 (or circuits.io), this is the same underlying technology. They’ve just integrated it with Tinkercad. However, there doesn’t seem to be any real integration between the two other than they are on the same web page now. Perhaps in the future, they’ll let you drop components on the circuit that also show up in the 3D design (or, at least, with sockets or holders for those components).

However, having a simulated Arduino with a debugger could come in handy even if you don’t care about the circuit simulations. If you really want to do circuit simulation, it is hard to go wrong with LTSpice. If you really want it to be in your browser, there’s always Falstad.


Filed under: Arduino Hacks

A Live ECU Simulator for OBD2 Projects

If you are working with OBD2 hardware or software, it’s easy enough to access test data, simply plug into a motor vehicle with an OBD2 socket. If, however, you wish to test OBD2 software under all possible fault conditions likely to be experienced by an engine, you are faced with a problem in that it becomes difficult to simulate all faults on a running engine without breaking it. This led [Fixkick] to create an OBD2 simulator using a secondhand Ford ECU supplied with fake sensor data from an Arduino to persuade it that a real engine was connected.

The write-up is quite a dense block of text to wade through, but if you are new to the world of ECU hacking it offers up some interesting nuggets of information. In it there is described how the crankshaft and camshaft sensors were simulated, as well as the mass airflow sensor, throttle position, and speedometer sensors. Some ECU inputs require a zero-crossing signal, something achieved with the use of small isolating transformers. The result is a boxed up unit containing ECU and Arduino, with potentiometers on its front panel to vary the respective sensor inputs.

We’ve brought you quite a few OBD2 projects over the years, for example, there was this LED tachometer, and a way into GM’s OnStar.

Thanks [darkspr1te] for the tip.


Filed under: Arduino Hacks, car hacks
Hack a Day 10 Jul 16:30

Portal fan recreates a sentry turret using an Arduino

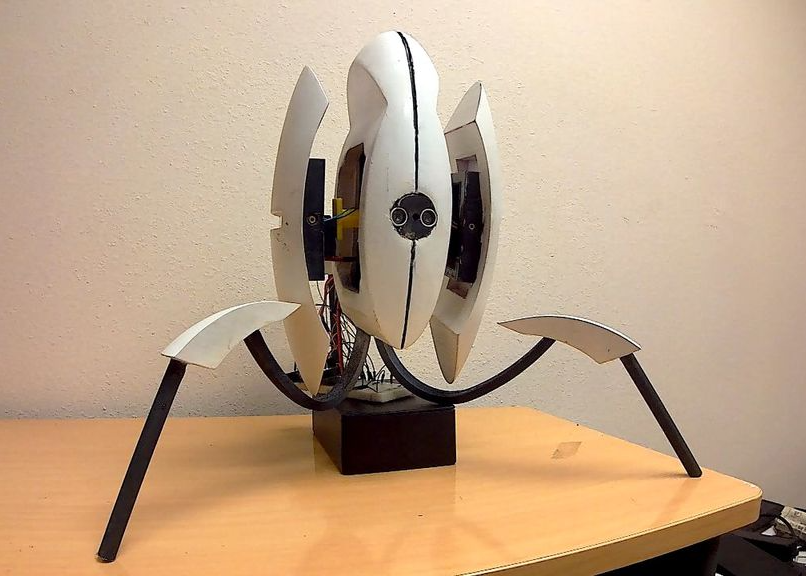
Steven Gioiosa recently signed up for a “Makecourse” class at the University of South Florida, where he was required to build something that featured both an Arduino and a 3D-printed part. As a fan of Portal, and especially the sentry turrets in the game, it was an easy decision to construct one of these devices for himself.

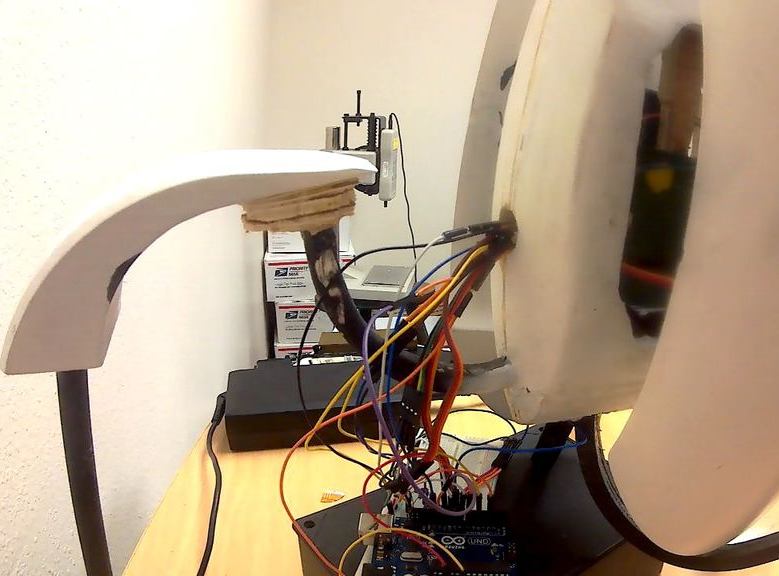
Gioiosa’s turret recreation is based on an Arduino Uno connected to an HC-SR04 ultrasonic sensor, and features motion-activated lasers that move back and forth, along with audio feedback, depending on how far away the human target is. The project also involves a bunch of servos: one to open the arms out, another to pitch them up and down, and two more to move each arm left and right.

You can see Gioiosa’s sentry turret in action below, and find more details on his Instructables write-up here.