Posts with «arduino» label

Designing an Arduino-powered split-flap display
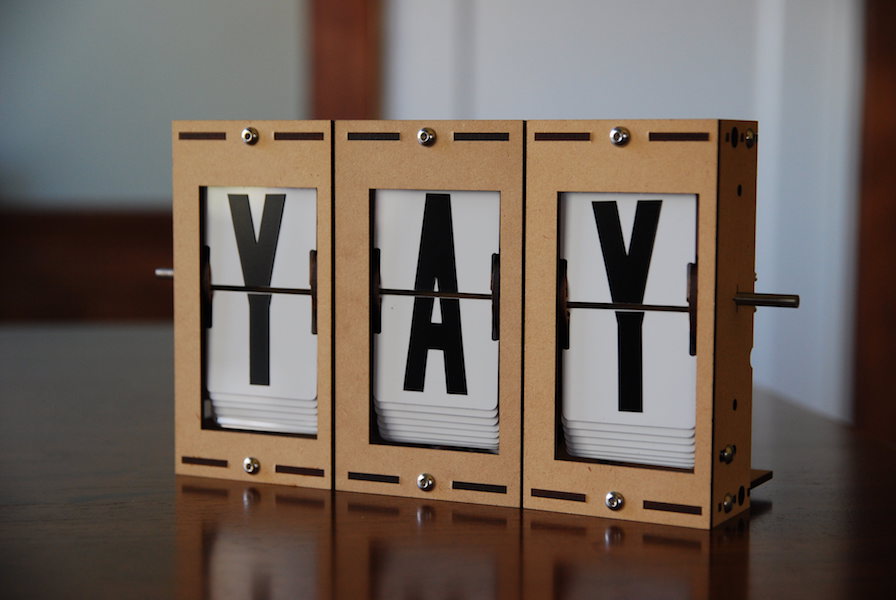
If you’d like a split-flap display with numbers and letters, options tend to be quite expensive. This though was no problem for hacker “scottbez1” who reports that after “only” two-plus years of work, he has produced a split-flap assembly that plugs into an Arduino Uno as a sort of external shield.

The device employs inexpensive stepper motors to click through letters, numbers, and even some punctuation, using cutout PVC ID display stock to show the characters. Cleverly, the PCB he designed for it can function as a motor driver or be split in two to function as a sensor board.

I’ve always loved these electro-mechanical displays, but you can’t buy them for a reasonable price, so I figured I’d try making them myself (plus it’s more fun that way!). Ultimately I wanted to design a split-flap display that can be built at home in small/single quantities and can be customized and put together by an intermediate hobbyist for not too much money.

The design I settled on uses PVC ID badge cards for the flaps, store-bought vinyl stickers for the letters, and is driven by a cheap 28BYJ-48 stepper motor. The enclosure and moving parts are all made from laser-cut MDF, which can be easily ordered online. To control them, I designed a driver board that can be hand-soldered and plugs into an Arduino like a shield.

The entire build story can be found here and more details including Arduino code are available on GitHub. If you’d just like to see and hear it flapping away, check out the video below!

Vintage Sewing Machine to Computerized Embroidery Machine

It is February of 2018. Do you remember what you were doing in December of 2012? If you’re [juppiter], you were starting your CNC Embroidery Machine which would not be completed for more than half of a decade. Results speak for themselves, but this may be the last time we see a first-generation Raspberry Pi without calling it retro.

The heart of the build is a vintage Borletti sewing machine, and if you like machinery porn, you’re going to enjoy the video after the break. The brains of the machine are an Arduino UNO filled with GRBL goodness and the Pi which is running CherryPy. For muscles, there are three Postep25 stepper drivers and corresponding NEMA 17 stepper motors.

The first two axes are for an X-Y table responsible for moving the fabric through the machine. The third axis is the flywheel. The rigidity of the fabric frame comes from its brass construction which may have been soldered at the kitchen table and supervised by a big orange cat. A rigid frame is the first ingredient in reliable results, but belt tension can’t be understated. His belt tensioning trick may not be new to you, but it was new to some of us. Italian translation may be necessary.

The skills brought together for this build were vast. There was structural soldering, part machining, a microcontroller, and motion control. The first time we heard from [juppiter] was December 2012, and it was the result of a Portable CNC Mill which likely had some influence on this creation. Between then, he also shared his quarter-gobbling arcade cabinet with us.

10 Arduino-Based Robo-Critters

Hot on the heels of yesterday’s delightful discovery of Vorpal, a lovable scamp of a hexapod, I decided to poke around to see what other Arduino-based robot projects there are out there these days. I found this YouTube video rounding up ten robo-critters. These include a robo-dog, a robotic cat, […]

Read more on MAKE

The post 10 Arduino-Based Robo-Critters appeared first on Make: DIY Projects and Ideas for Makers.

Lunar landing conspiracy put to rest(?) with LIDAR

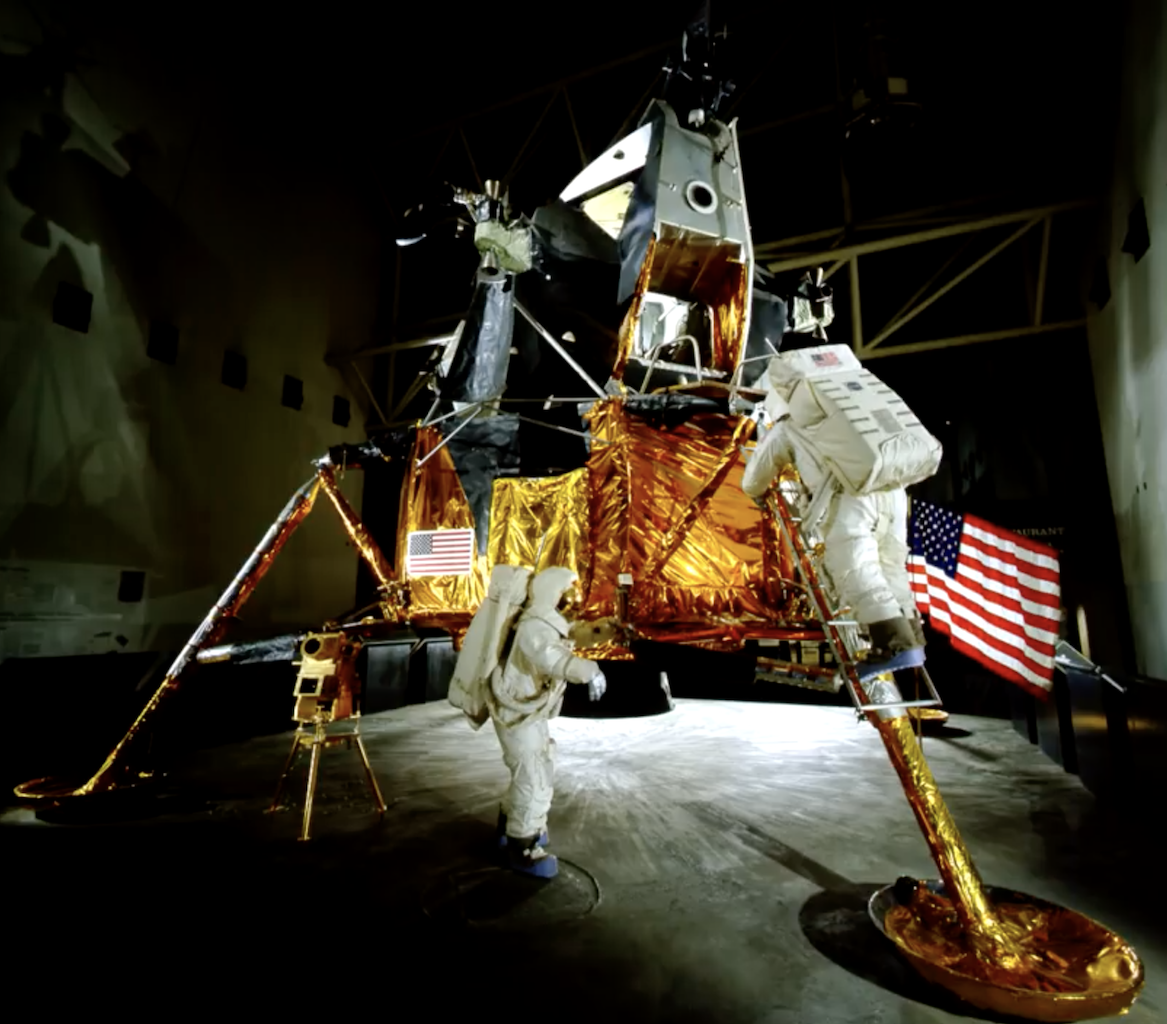
On July 20th, 1969 man first set foot on the moon with the Apollo 11 mission, or so they say. If it was faked, or so the theory goes, one would think that there were a few details that don’t quite add up. One such theory is that the hatch on the lunar module isn’t actually large enough to allow a fully-suited up astronaut to enter and exit the module.

Rather than make assumptions, astrophotographer and hacker “AstronomyLive” took matters into his own hands and used a homemade LIDAR unit to measure the hatch of Lunar Module #9 at the Kennedy Space Center, as well as an Apollo spacesuit.

The Arduino-powered device aims the laser, and transmits this information to a tablet that also provides a convenient user interface. This data was then arranged as a point cloud, proving that… You can take a guess, or watch the video below to see his conclusion!

I used the Garmin LIDAR-Lite V3 along with a couple of metal geared servo motors to build a simple pan/tilt scanner, which pairs via Bluetooth to an Android app I built using MIT App Inventor 2 to control and receive data from the Arduino. It’s simple but effective. Although every tutorial I read suggested I couldn’t safely pull the voltage off the board for the motors, but I found that the vin pin gave me no problems, as long as I used a 5V 1.5A linear voltage regulator between the pin and the motors. I supplied 9V using AA batteries to the power jack on the Arduino. In the future I may upgrade the scanner by adding a small camera to grab RGB data for each point as it samples, and ideally I would change the whole thing to use a stepper motor for continuous spinning and scanning to generate a denser cloud.

Debunking Moon Landing Denial with an Arduino and Science

It’s sad that nearly half a century after the achievements of the Apollo program we’re still arguing with a certain subset of people who insist it never happened. Poring through the historical record looking for evidence that proves the missions couldn’t possibly have occurred has become a sad little cottage industry, and debunking the deniers is a distasteful but necessary ongoing effort.

One particularly desperate denier theory holds that fully spacesuited astronauts could never have exited the tiny hatch of the Lunar Excursion Module (LEM). [AstronomyLive] fought back at this tendentious claim in a clever way — with a DIY LIDAR scanner to measure Apollo artifacts in museums. The hardware is straightforward, with a Garmin LIDAR-Lite V3 scanner mounted on a couple of servos to make a quick pan-tilt head. The rig has a decidedly compliant look to it, with the sensor flopping around a bit as the servos move. But for the purpose, it seems perfectly fine.

[AstronomyLive] took the scanner to two separate museum exhibits, one to scan a LEM hatch and one to scan the suit Gene Cernan, the last man to stand on the Moon so far, wore while training for Apollo 17. With the LEM flying from the rafters, the scanner was somewhat stretching its abilities, so the point clouds he captured were a little on the low-res side. But in the end, a virtual Cernan was able to transition through the virtual LEM hatch, as expected.

Sadly, such evidence will only ever be convincing to those who need no convincing; the willfully ignorant will always find ways to justify their position. So let’s just celebrate the achievements of Apollo.

An Affordable Phone Controlled Rover

A while back Jason made a phone controlled rover using the MotorAir. He wanted to revisit the basic idea but using cheaper, more widely available parts. Also since this is Arduino based, it is a great springboard for more than just a rover that drives around. You could add sensors, servos, etc. to really drive this project in any direction you want.

https://youtu.be/Qx0tvpr2DNw

read more

Let's Make Robots 19 Feb 22:38

This 3D Printed Arduino-Based Hexapod Robot Can Bust a Move!

Check out the sick moves on this open-source, 3D-printable hexapod robot.

Read more on MAKE

The post This 3D Printed Arduino-Based Hexapod Robot Can Bust a Move! appeared first on Make: DIY Projects and Ideas for Makers.

Levitate water drops with RGB LEDs and Arduino

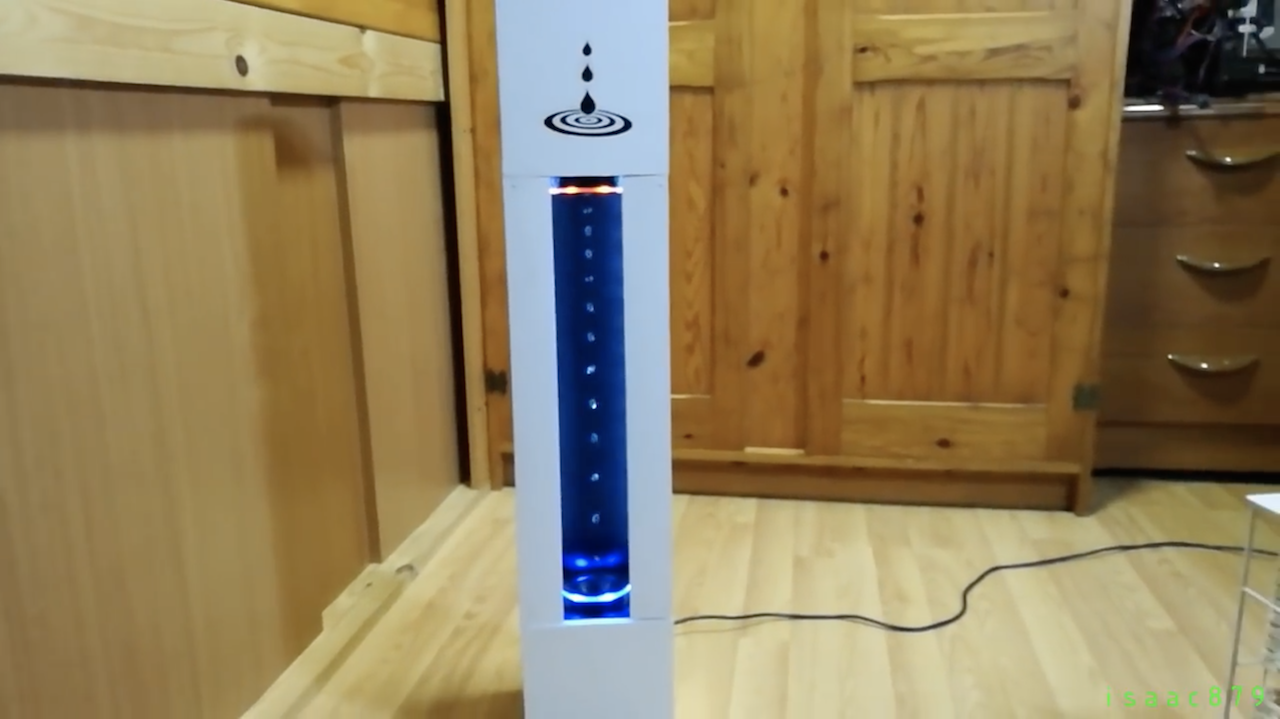
Water normally falls from the sky to the ground, the time fountain from hacker isaac879 appears to work much differently. As shown in the video below, water droplets somehow levitate from a circular orange apparatus to a blue one on top.

The trick here is that the water isn’t actually falling up, but appears that way by carefully controlling the flashing of RGB lights using an Arduino Uno. If the lights flash at the same rate as the water drops, they appear to stand still, while if the light is flashed more slowly, they appear to rise.

This is the prototype RGB LED Time Fountain I designed and built. It uses RGB LED strip lights to strobe a stream of water drops to make them appear as if they are levitating. By strobing the different colors out of phase with each other some incredible effects can be created.

An Arduino Uno controls the timing of the RGB strobe and the PWM of the pump. Bluetooth communication was achieved using an HC-05 Bluetooth module and the “Arduino bluetooth controller” app by “Giumig Apps.”

Be sure to check out the video to see it in action, especially the bit around 3:40 where drops appear to rise out of a cup while it’s getting filled with water.

Handheld GPS Tracks All The Things

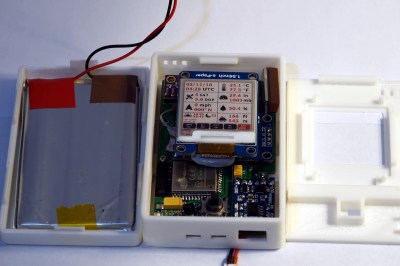
With a GPS on every smartphone, one would be forgiven for forgetting that handheld GPS units still exist. Seeking to keep accurate data on a few upcoming trips, [_Traveler] took on a custom-build that resulted in this GPS data logger.

Keeping tabs on [_Traveler] is a Ublox M8N GPS which is on full-time, logging data every 30 seconds, for up  to 2.5 days. All data is saved to an SD card, with an ESP32 to act as a brain and make downloading the info more accessible via WiFi . While tracking the obvious — like position, speed, and time — this data logger also displays temperature, elevation, dawn and dusk, on an ePaper screen which is a great choice for conserving battery.
The prototyping process is neat on this one. The first complete build used point-to-point soldering on a protoboard to link several breakout modules together. After that, a PCB design embraces the same modules, with a footprint for the ESP’s castellated edges and header footprints for USB charing board, SD card board, ePaper, etc. All of this finds a hope in a 3D printed enclosure. After a fair chunk of time coding in the Arduino IDE the logger is ready for [_Traveler]’s next excursion!

As far as power consumption in the field, [_Traveler] says the GPS takes a few moments to get a proper location — with the ESP chewing through battery life all the while — and plans to tinker with it in shorter order.

Not all GPS trackers are created equal: sometimes all you need is a stripped-down tracker for your jog, or to know exactly where every pothole is along your route.

[Via /r/electronics]

Hack a Day 19 Feb 19:31
arduino  esp32  gps  gps hacks  handheld  travel  

Play Striker Air Hockey on a capacitive touch surface

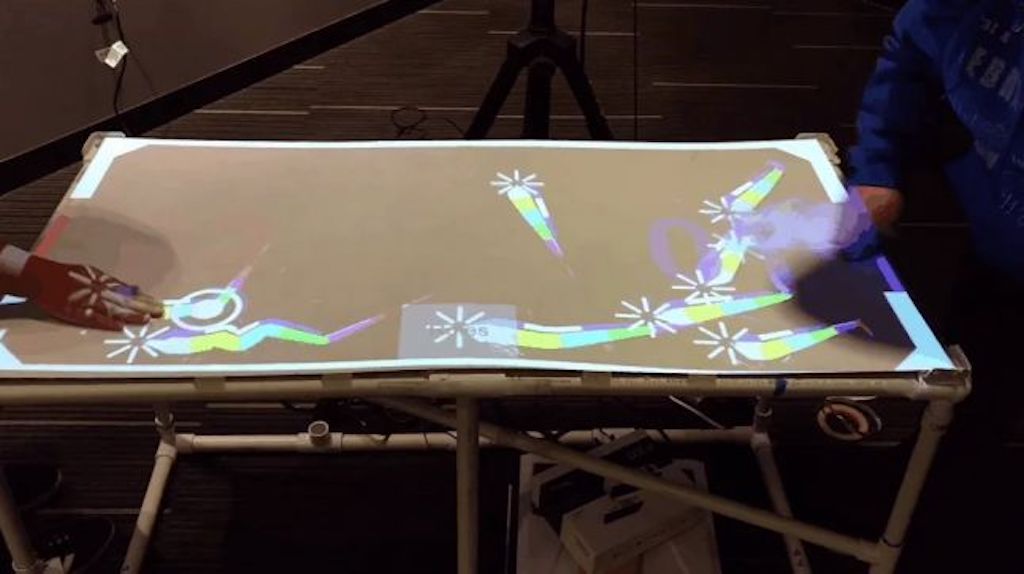
After discovering capacitive touch interactions with a Makey Makey device and an Arduino Leonardo, Jason Eldred realized it could also be used to control the Unity game engine. After a night of hacking, he had a basic interface that could change the scale of a virtual circle. From there, he teamed up with Alex L. Bennett to produce an art installation called Bee that invited users to interact with it by physically touching a panel to change graphics on the panel itself and a screen in front of them.

While not meant as a game per se, after more experimentation including work by Gabe Miller and Dustin Williams, this interactive display method was finally turned into a virtual air hockey table via a giant crisscrossing grid of copper tape and wires.

In the game, two players push a virtual puck projected onto a horizontal surface for colorful AR interactions at a very low cost. You can see it in action below, and read more about the project on DigiPen’s website and in Gamasutra’s recent article.