Posts with «arduino» label

Make your own 3D-printed robotic vacuum with Arduino

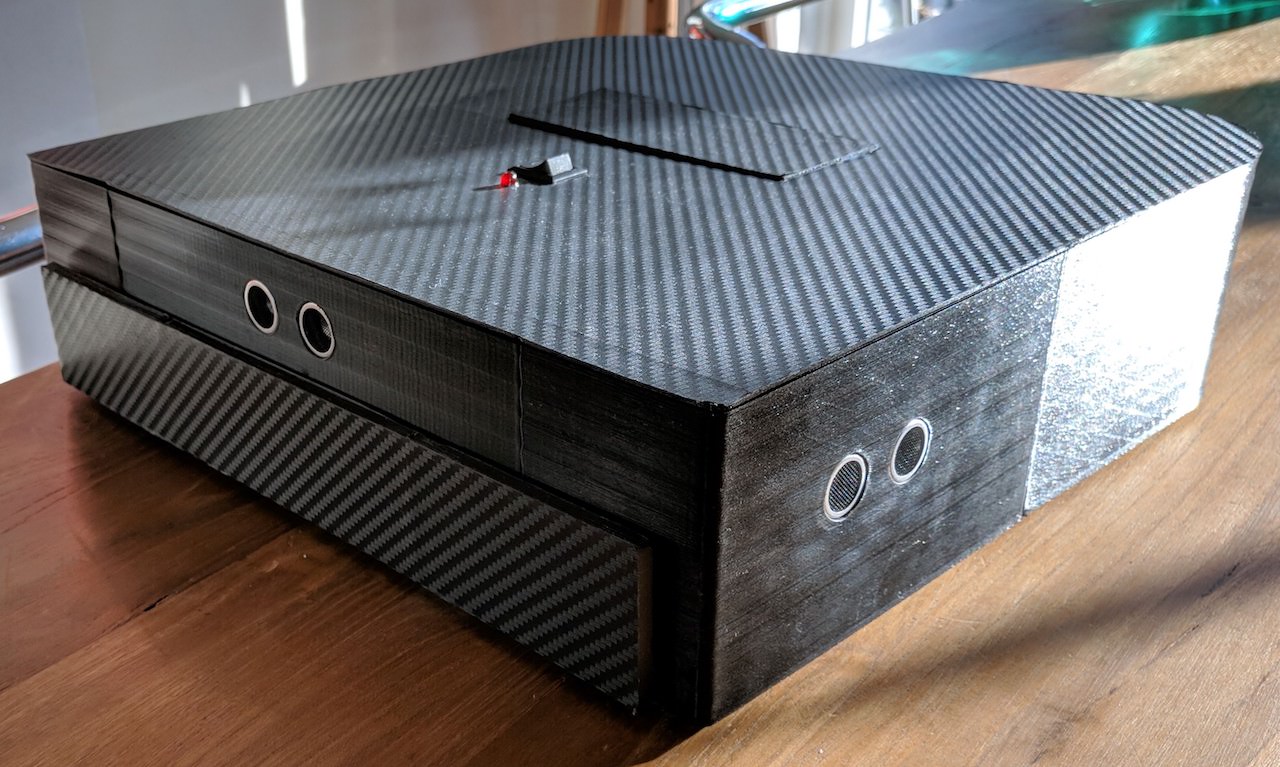
Tired of cleaning your house? A robotic vacuum may be the logical solution, but if you’re “theking3737” something off-the-shelf just isn’t quite cool enough. Created as part of a school project, he was responsible for the hardware design, while a fellow classmate took care of the programming.

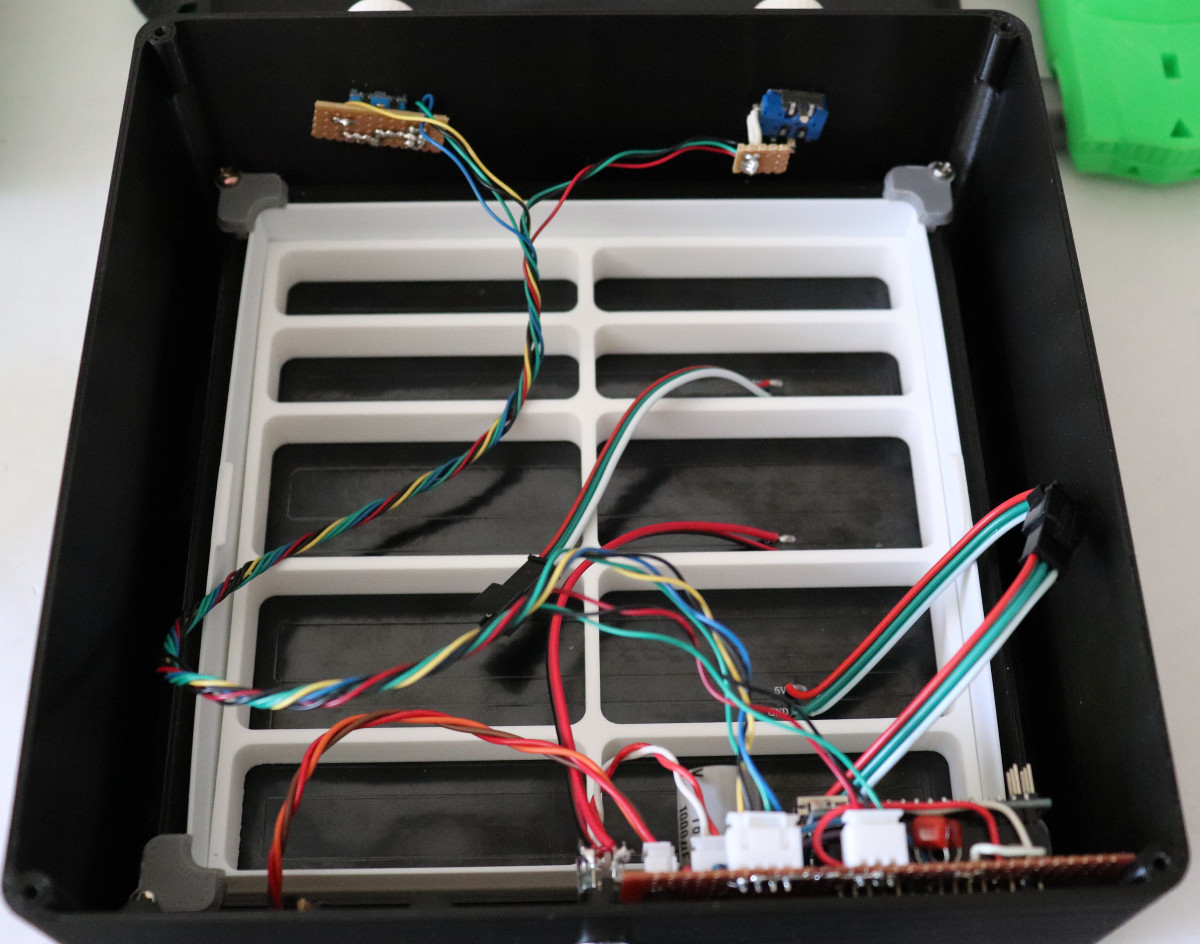
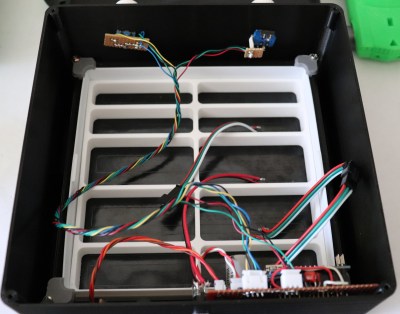
The DIY device uses an array of what appear to be ultrasonic sensors for navigation, and an Arduino Mega as the brains. It also features an HC-05 Bluetooth module that enables it to be controlled via an Android phone or smartwatch. All the electronics are housed inside a 3D-printed closure.

Impressively, the team had “never done anything like this before,” and the results look great—encouragement for anyone hesitant to start on a project because of inexperience!

Arduino BabyTV is Big Fun at Low Resolution

What kind of TV do you have? An older 720p model, or the now standard 1080p? Perhaps you’ve made the leap to the next generation, and are rocking a 4K display in the living room. All those are are fine and dandy if you just want to watch the local sportball contest, but where’s the challenge in that? With all the technology and modular components we have access to anymore, nowadays all the real hackers are making their own TVs.
Of course, when [Nikolai] built his very own LED TV, he did have to make a few concessions. For one thing, there’s no tuner on this model. Oh, and there’s the small issue of only having a 16×16 resolution. It might not be your idea of the perfect display, but it’s just perfect for his newborn son.

That’s right, [Nikolai] got his entry for the “Hacker Parent of the Year” award in early, and built an LED display for his son that he’s calling “BabyTV”.

Rather than the shows, trash, advertisements that they play on the kid channels, this TV only shows animated characters from retro games. We’ll concede that this project might be an elaborate Clockwork Orange style attempt at hypnotizing his son to instill an appreciation for classic gaming. But we’ll allow it.

To make his BabyTV go, [Nikolai] used a 16×16 WS2812B LED panel and an Arduino Nano. Two rotary encoders are used to allow adjusting brightness and change the character currently being shown on the screen. As a particularly clever hack, the Arduino has an IR sensor attached and is constantly watching for any signals. If an IR signal is detected, the BabyTV switches to the next image. So if Junior has a standard IR remote in his hands, any button he presses will cause the display to change to the next “channel”.

Historically speaking we haven’t seen much stuff for children here at Hackaday, but 2018 seems to be changing that. Recent projects like the incredible scratch built mini excavator and gorgeous AT-ST high chair would seem to indicate we’re currently witnessing a generation of hackers become parents. Don’t panic folks, but we might be getting old.

Moltoduino: Arduinos All the Way Down

It is getting difficult to find a desktop or laptop computer with only a single CPU. Even a typical ARM-based computer now probably has multiple cores. Of course, there’s nothing to stop you from using multiple microcontrollers — like the Arduino — together. To make the process neater, [Dimitris Platis] put together Moltoduino, essentially an Arduino on a shield made to plug into another Arduino. And, yes, they will stack. You can see a video about the open source boards, below.

The key is how the board brings the pins out to connections that are easy to jumper between boards. There are several obvious use cases, but one that [Dimitris] is particularly interested in is hardware-in-the-loop testing. The idea is that you can use a simulated I/O device in one computer to exchange fake data with the software under test.

For example, you might be working on a sous vide cooker that reads a temperature and controls a heater. A second computer could stand in for the temperature sensor and heater. You could log outputs and also control the inputs. This is really nice when you want to set up repeatable test cases.

Of course, you don’t have to stack the boards to make that work. In fact, you don’t have to use another Arduino. A PC or some other controller could be the surrogate test device. But having it all in a stack is handy. There are several examples of doing testing using simulated hardware on the project’s GitHub page. The test subjects are a robot car and an ultrasonic device.

One neat feature is that each board has a switch to enable the master Arduino to ISP program it. So while you might not need to stack boards to use any of the proposed techniques, it does make for a nice and compact package.

Usually, when we see a cluster it uses Raspberry Pis. Or, sometimes, PCs.

Debugging with Serial Print at 5333333 Baud

Debugging with printf is something [StorePeter] has always found super handy, and as a result he’s always been interested in tweaking the process for improvements. This kind of debugging usually has microcontrollers sending messages over a serial port, but in embedded development there isn’t always a hardware UART, or it might already be in use. His preferred method of avoiding those problems is to use a USB to Serial adapter and bit-bang the serial on the microcontroller side. It was during this process that it occurred to [StorePeter] that there was a lot of streamlining he could be doing, and thanks to serial terminal programs that support arbitrary baud rates, he’s reliably sending debug messages over serial at 5.3 Mbit/sec, or 5333333 Baud. His code is available for download from his site, and works perfectly in the Arduino IDE.

The whole thing consists of some simple, easily ported code to implement a bare minimum bit-banged serial communication. This is output only, no feedback, and timing consists of just sending bits as quickly as the CPU can handle, leaving it up to the USB Serial adapter and rest of the world to handle whatever that speed turns out to be. On a 16 MHz AVR, transmitting one bit can be done in three instructions, which comes out to about 5333333 baud or roughly 5.3 Mbit/sec. Set a terminal program to 5333333 baud, and you can get a “Hello world” in about 20 microseconds compared to 1 millisecond at 115200 baud.

He’s got additional tips on using serial print debugging as a process, and he’s done a followup where he stress-tests the reliability of a 5.3 MBit/sec serial stream from an ATMega2560 at 16 MHz in his 3D printer, and found no missed packets. That certainly covers using printf as a debugger, so how about a method of using the debugger as printf?

This 3D-Printed Robotic Vacuum Sucks

After you’ve taken a moment to ponder the turn of phrase used in the title, take a look at this scratch-built robotic vacuum created by [theking3737]. The entire body of the vacuum was 3D printed, and all of the internal electronics are off-the-shelf modular components. We can’t say how well it stacks up against the commercial equivalents from iRobot and the like, but it doesn’t look like it would be too hard to build one yourself to find out.

The body of this rather concerned-looking robot was printed on a DMS DP5 printer, which is a neat trick as it only has a build platform of 200 mm x 200 mm. Once all the pieces were printed, a 3D pen was used to “weld” the sections together. The final result looks a bit rough, but should give a bond that’s just as strong as the printed parts themselves.

The robot has four sets of ultrasonic range finders to detect walls and obstacles, though probably not in the positions you would expect. The right side of the robot has two sets of sensors, while the left side only gets one. We aren’t sure the reasoning behind the asymmetrical layout, but presumably the machine prefers making right turns.

Control is provided by an Arduino Mega and the ever-reliable HC-05 Bluetooth module. A companion Android application was written which allows configuring the robot without having to plug into the Arduino every time you want to tweak a setting.

We can’t say we’ve seen that many DIY robotic vacuums here at Hackaday, but we’ve certainly featured our fair share of hacks for the commercially available models.

Tachometer Uses Light, Arduinos

To measure how fast something spins, most of us will reach for a tachometer without thinking much about how it works. Tachometers are often found in cars to measure engine RPM, but handheld units can be used for measuring the speed of rotation for other things as well. While some have mechanical shafts that must make physical contact with whatever you’re trying to measure, [electronoobs] has created a contactless tachometer that uses infrared light to take RPM measurements instead.

The tool uses an infrared emitter/detector pair along with an op amp to sense revolution speed. The signal from the IR detector is passed through an op amp in order to improve the quality of the signal and then that is fed into an Arduino. The device also features an OLED screen and a fine-tuning potentiometer all within its own self-contained, 3D-printed case and is powered by a 9 V battery, and can measure up to 10,000 RPM.

The only downside to this design is that a piece of white tape needs to be applied to the subject in order to get the IR detector to work properly, but this is an acceptable tradeoff for not having to make physical contact with a high-speed rotating shaft. All of the schematics and G code are available on the project site too if you want to build your own, and if you’re curious as to what other tools Arduinos have been used in be sure to check out the Arduino-based precision jig.

Arduino Watchdog Has Bite And Doesn’t Need Treats

My dog Jasper isn’t much of a watchdog: he’s too interested in sleeping and chasing my cats to keep an eye on things. Fortunately, [Vadim] has come up with a more reliable alternative with this simple Arduino watchdog. It’s designed to work with crypto coin mining rigs, but it could be easily adapted for other high-uptime uses, such as file servers or doomsday weapons.

The way it works is simple: a small program on the watched computer sends a command over the serial port: a polite “hello”. The Arduino watchdog picks this up and responds with an equally polite “HELLO”. That starts the watchdog running. A simple Java program on the watched computer then sends a ping every five seconds over the serial port to let the watchdog know it is still running okay.

If the watchdog doesn’t receive this ping, it uses reed relay wired into the reset pins of the computer to trigger a reset. It then waits for the watched computer to say hello, starting the process again.

[Vadim] includes a demo video where the system resets an unreliable crypto mining rig. It does have limitations, of course: if the mining program crashes without taking down the entire computer, the watchdog won’t be triggered, and it won’t work if the problem requires a full hard power reset rather than a soft reset. dIt’s a neat little build that could be easily modified to handle all these issues, though, and you don’t need to keep feeding it treats to keep its attention, unlike Jasper.

Hack a Day 23 Feb 19:30

Let an Arduino notify you when the coffee is ready

Hacker “wesgood,” apparently not satisfied with randomly checking the office coffee pot to see if a fresh brew was available, decided to make his own notification system.

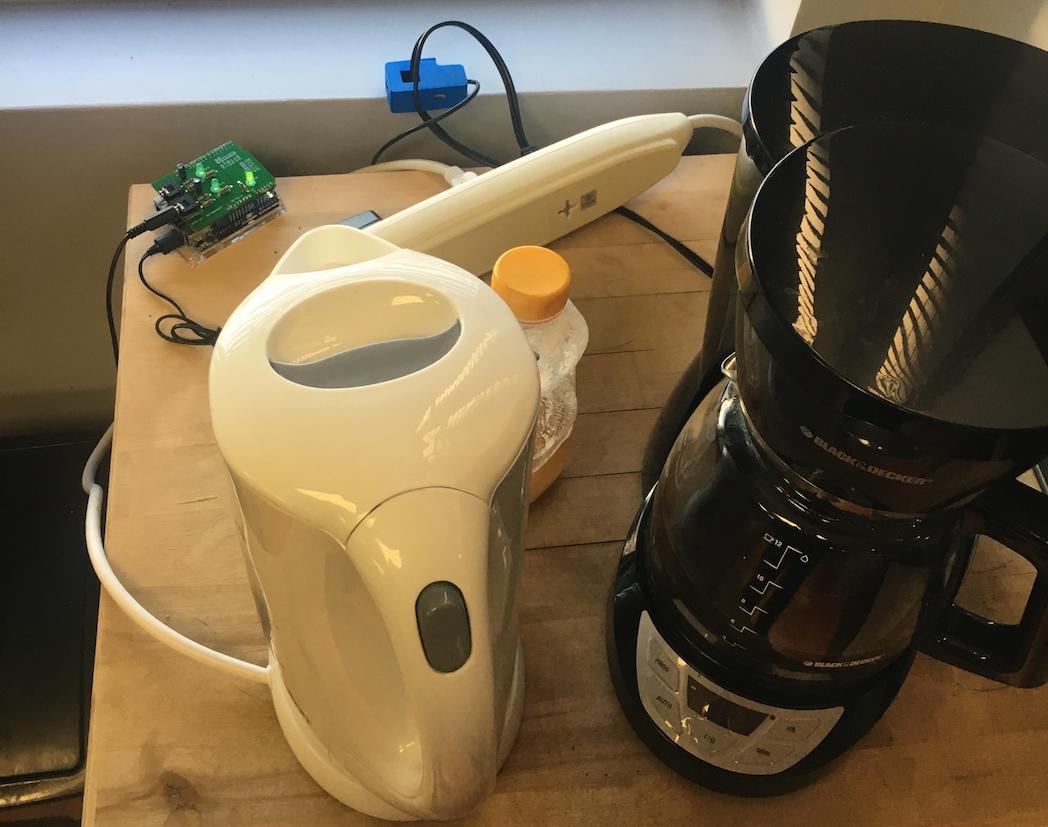
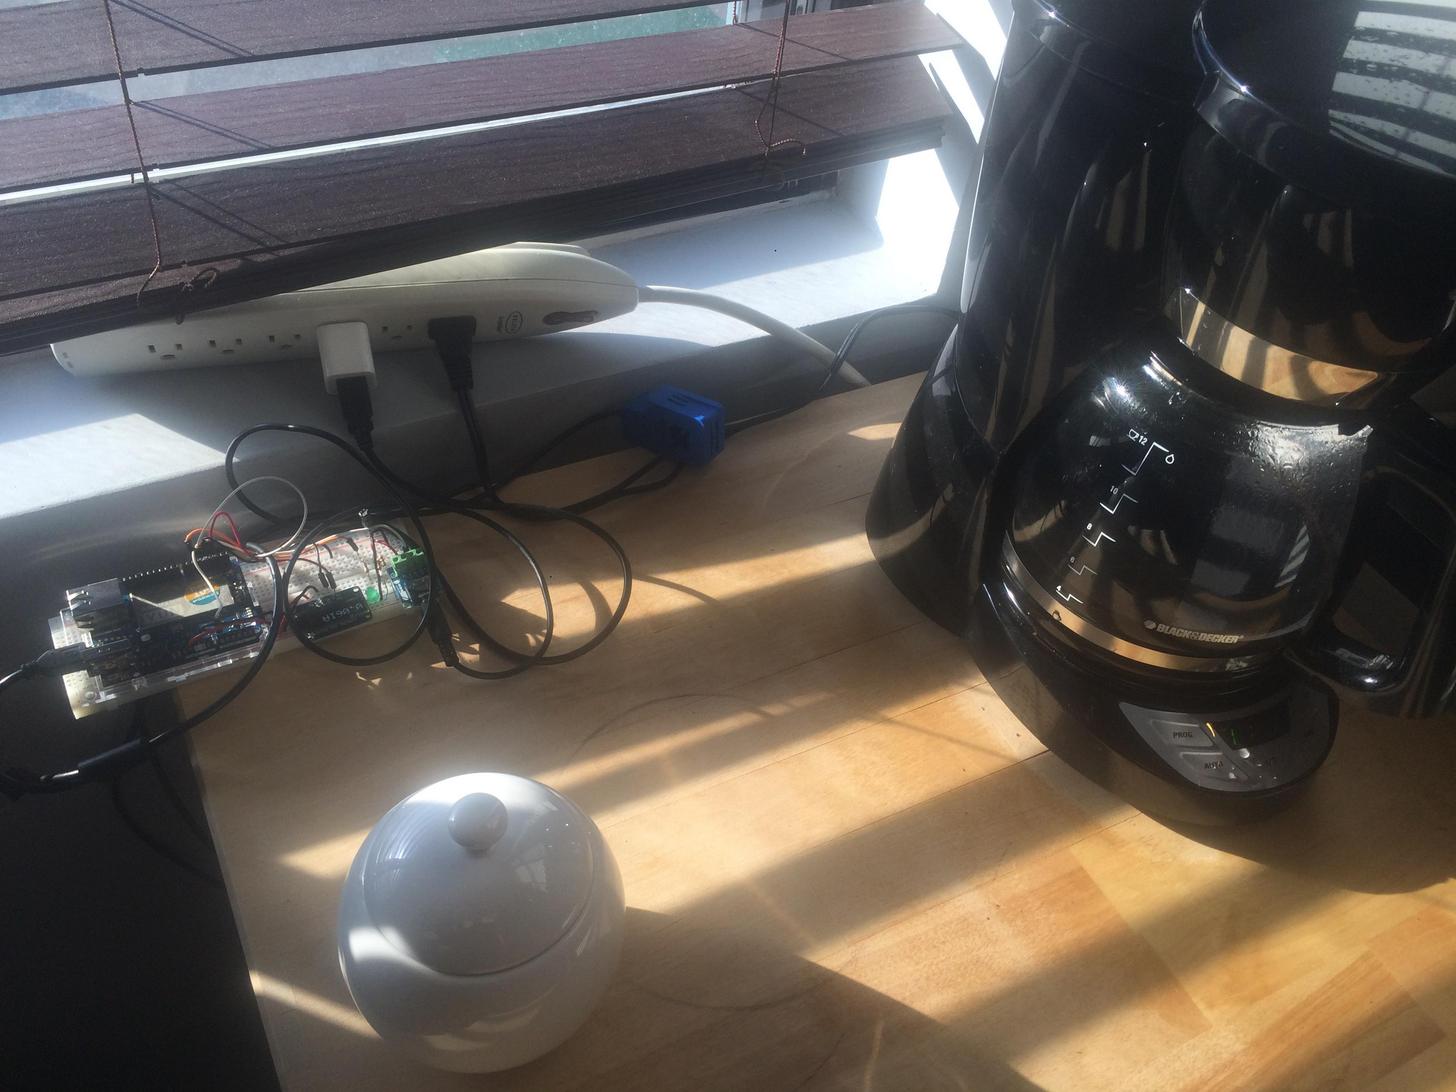
His device uses a current sensor to monitor power usage of the coffee pot, and after some observation, he was able to pick out its brewing pattern—7A at 10 minutes, then quick cycling to keep the pot warm.

The system features an Arduino Yún for brew tracking and sends an alert via his office communication tool to let everyone know that a fresh pot is ready. As with many projects, the first iteration started life on a breadboard, but now exists on a manufactured PCB as a shield. It even has a second channel that is slated for use with the office kettle.

Once the Arduino side of the Yún detects the brew cycle is complete, it triggers a shell script under Linux that sends a notification to our office communication tool Hipchat. It also records the data about date and cycle stage so that Hipchat can query the database (on a webserver) and request things like what stage the brew cycle is on and when it brewed last.

You can find additional build details on Imgur.

Learning Microcontrollers and Robotics in the DroneBot Workshop

Discover an excellent YouTube channel for learning hobby electronics, microcontrollers, robotics, and drones.

Read more on MAKE

The post Learning Microcontrollers and Robotics in the DroneBot Workshop appeared first on Make: DIY Projects and Ideas for Makers.

Strange vocal interactions with ‘you, me and all these machines’

Moscow-based artist ::vtol:: is back again with an interesting interactive exhibit entitled “you, me and all these machines.” His latest work, a collaboration with Lovozero, allows two participants to produce otherworldly vocals together.

One participant wears the device, which points a directional microphone under the control of the other participant at her mouth using a servo motor. An array of LEDs signal the vocalist in a manner agreed upon before the performance.

The head-mounted system is controlled by an Arduino Uno, and is meant to display the subtle interaction between two participating artists, as they must work together to produce the desired output.

“You, me and all these machines” is a performance for voice and electronic devices. The vocalist puts on his or her head a specially designed wearable interface tool to interact with the voice and display a visual score. Technically, the device consists of several elements: a narrowly directional microphone driven by a motor; an LED strip that shows the vocalist score; remote control with a joystick used by the second participant to control the interface.

Shifting the microphone against the mouth makes it possible to achieve interesting sound effects, and makes it easier to manipulate the vocalist’s voice. The LED line consisting of 10 diodes is a very primitive, but effective and convenient way of interacting with the vocalist, and the way of interpreting the values is predetermined before each performance. During the performance, a sound canvas is formed, thereby changing the dynamics, consisting of a set of looped fragments created within voice and interface processing elements, without using other methods to generate sounds.

Check out “you, me and all these machines” in the video below!