Access doors with a color card locking system!
When you swipe a card through a reader, you expect it to read a magnetic stripe on one end. In other circumstances cards might contain an RFID chip, but what if the card only had a pattern of colors on it?
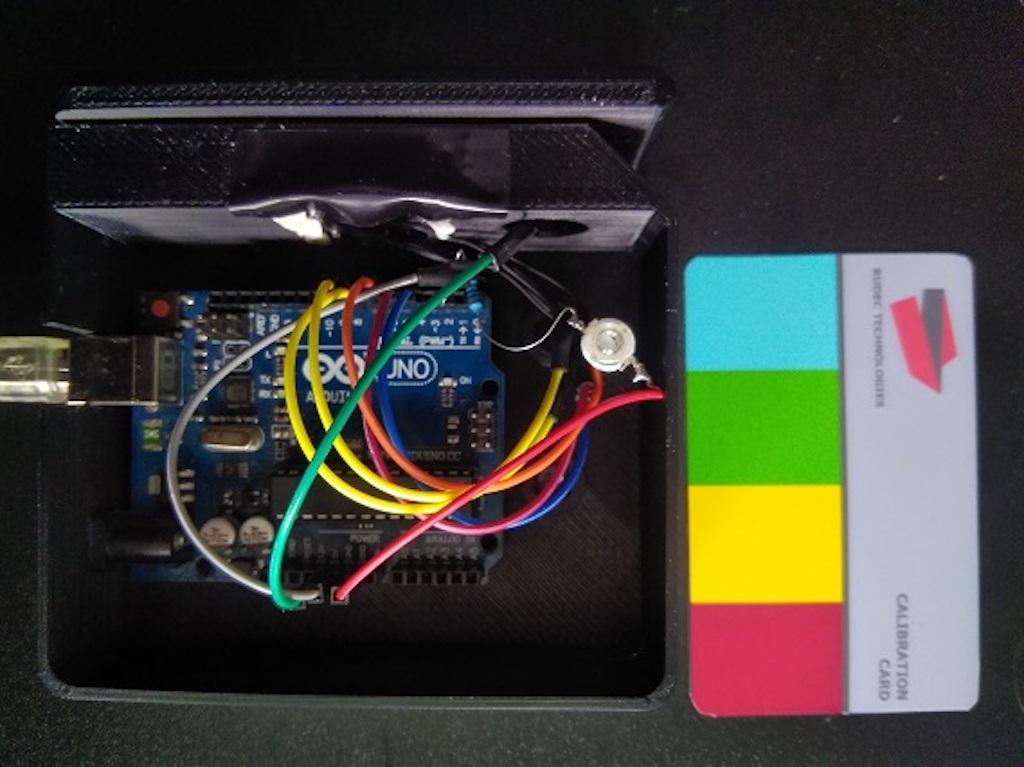
That’s the idea behind the Color Lock system by Rudec Technologies. The cards have a pattern of four colors printed on one side, which are read by an array of LEDs and a TCS230 color sensor when pulled through a slot. An Arduino Uno then takes this information and lights up an LED if the correct sequence is recognized.
This is a door locking system that uses a card with a preset color sequence printed on it to unlock the door. The system is still in the prototyping stage, i’m waiting for the actual lock part to arrive in mail to continue developing this. The idea behind this system is to avoid using RFID authentication, as it can be ‘stolen’ without contact, and this system offers a simple physical object that you use to authenticate yourself – think of it as an updated physical key. The system can offer much more than the conventional keys: if you lose your key, you simply print a new one, you can use a number of different keys for the same lock (or just one if you choose), the system logs all entries with timestamps (useful for tracking access), you can use your regular printer to print new keys, you can unlock it via Wi-Fi when paired with your phone or another device, the system can be used to authenticate in various situations (doors, cabinets, computers, entry points etc.
It’s an interesting concept that could be taken in a variety of directions depending on security needs. A clip of the prototype can be seen below!