We recently sponsored one of the labs at Lulea University in Sweden, the INSPIRE (INstrumentation for Space and Planetary Investigation, Resources and Exploration) Lab. It is not just any lab, it is the lab from Prof. Mari Paz Zorzano and Prof. Javier Martín, both known for their work in the possibility of discovering water on Mars’ surface, this extent was published in this Nature magazine article in 2015, among other places.
What I learned rather quickly, thanks to my interactions with both professors over the last couple of years, is that Arduino has been a basic component in the countless projects made in their lab–the Mega and Due are their students’ favorites due to the amount of available pins as well as robustness of the earlier; but also because of the floating comma, analog to digital converter, and general relevance for instrumentation of the latter.
This article is going to be the first of a series where we will highlight the way the Lulea lab is using Arduino for instruments, real life experiences, zero gravity tests, low orbit missions, and general teaching. We hope they will inspire many to follow in their steps and look at the stars with a renewed interest in science and technology.
Meet the players
Mari Paz and Javier were known to me before I actually got to meet up with them in person. As a researcher, I had heard of the article in Nature, who hadn’t? Plus, since both of them come from Spain (as I do), you can imagine that the national press was covering their finding pretty well when it was published. Funny enough, they knew about Arduino because they, as many researchers, needed to figure out methods to better finance their experiments, and Arduino is a tool known for being affordable, as well as technically competent to command many of their tests. I should confess that, by the time we all got in touch, I was already trying to figure out how to talk to them.
In November 2016, Mari Paz and Javier had just opened their lab in Kiruna, their discovery had given them new positions at a new university (Lulea University, owner of the Kiruna campus, closer to the launching station), a new team, and access to a lot more resources. And so they got back to work. I was invited to give a speech as part of their seminar series and later host a short workshop mainly for master and PhD students. The Kiruna campus in November is completely surrounded by snow. You can make it there skiing several months in the year, something I got told people do sometimes. However, the city of Kiruna is going to go through a bunch of transformations (the city center will be moved 30km due to the mine that is literally under it), and the professors decided to move their lab to Lulea’s main campus for the time being. Follow the descriptions of some of the projects developed there.
Project 1: PVT-Gamers
One of the biggest challenges for spacecrafts is how to weigh the remaining propellant (fuel) in the absence of gravity. With contemporary space vehicles in mind, which can be reused, this has become one of the most economically critical limitations to be taken into account. PVT-Gamers is the acronym for ‘Improved Pressure-Volume-Temperature Gauging Method for Electric-Propulsion Systems’ experiment designed at the INSPIRE Lab. It is exploring the use of pressurized propellants, like Xenon, and monitoring how it is used and how much is left to keep the spacecraft moving.
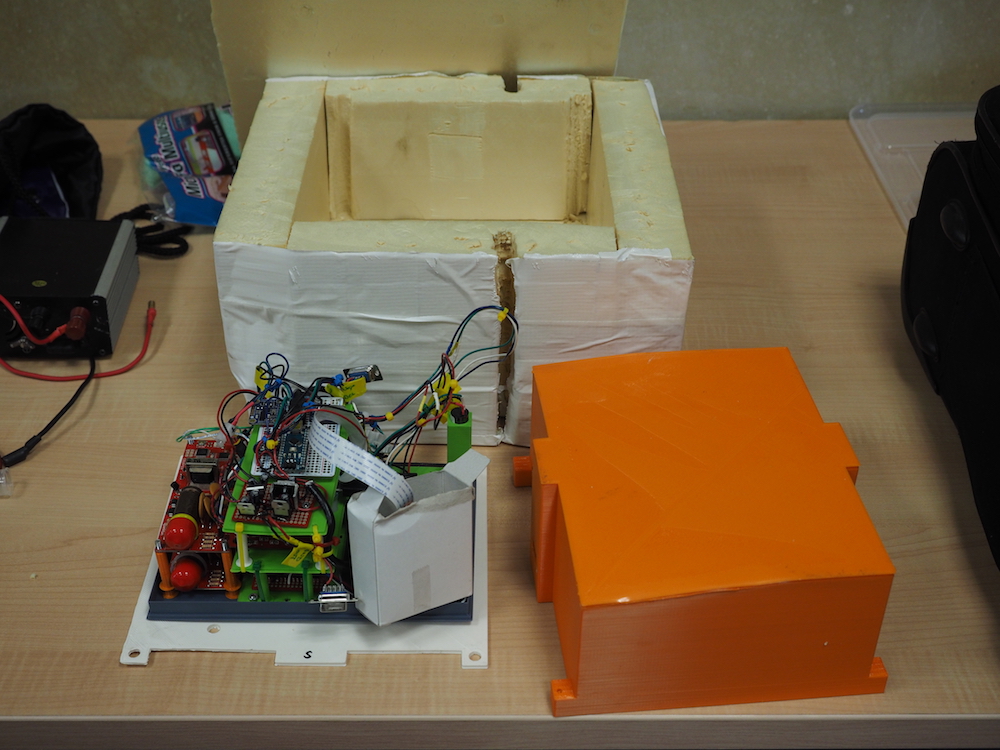
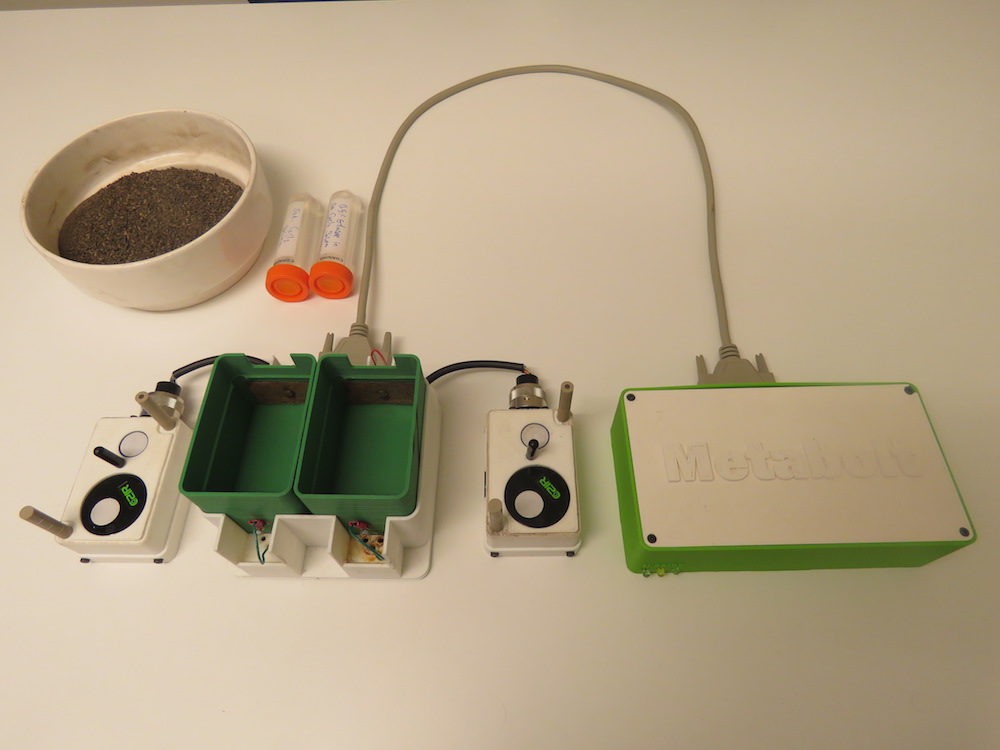
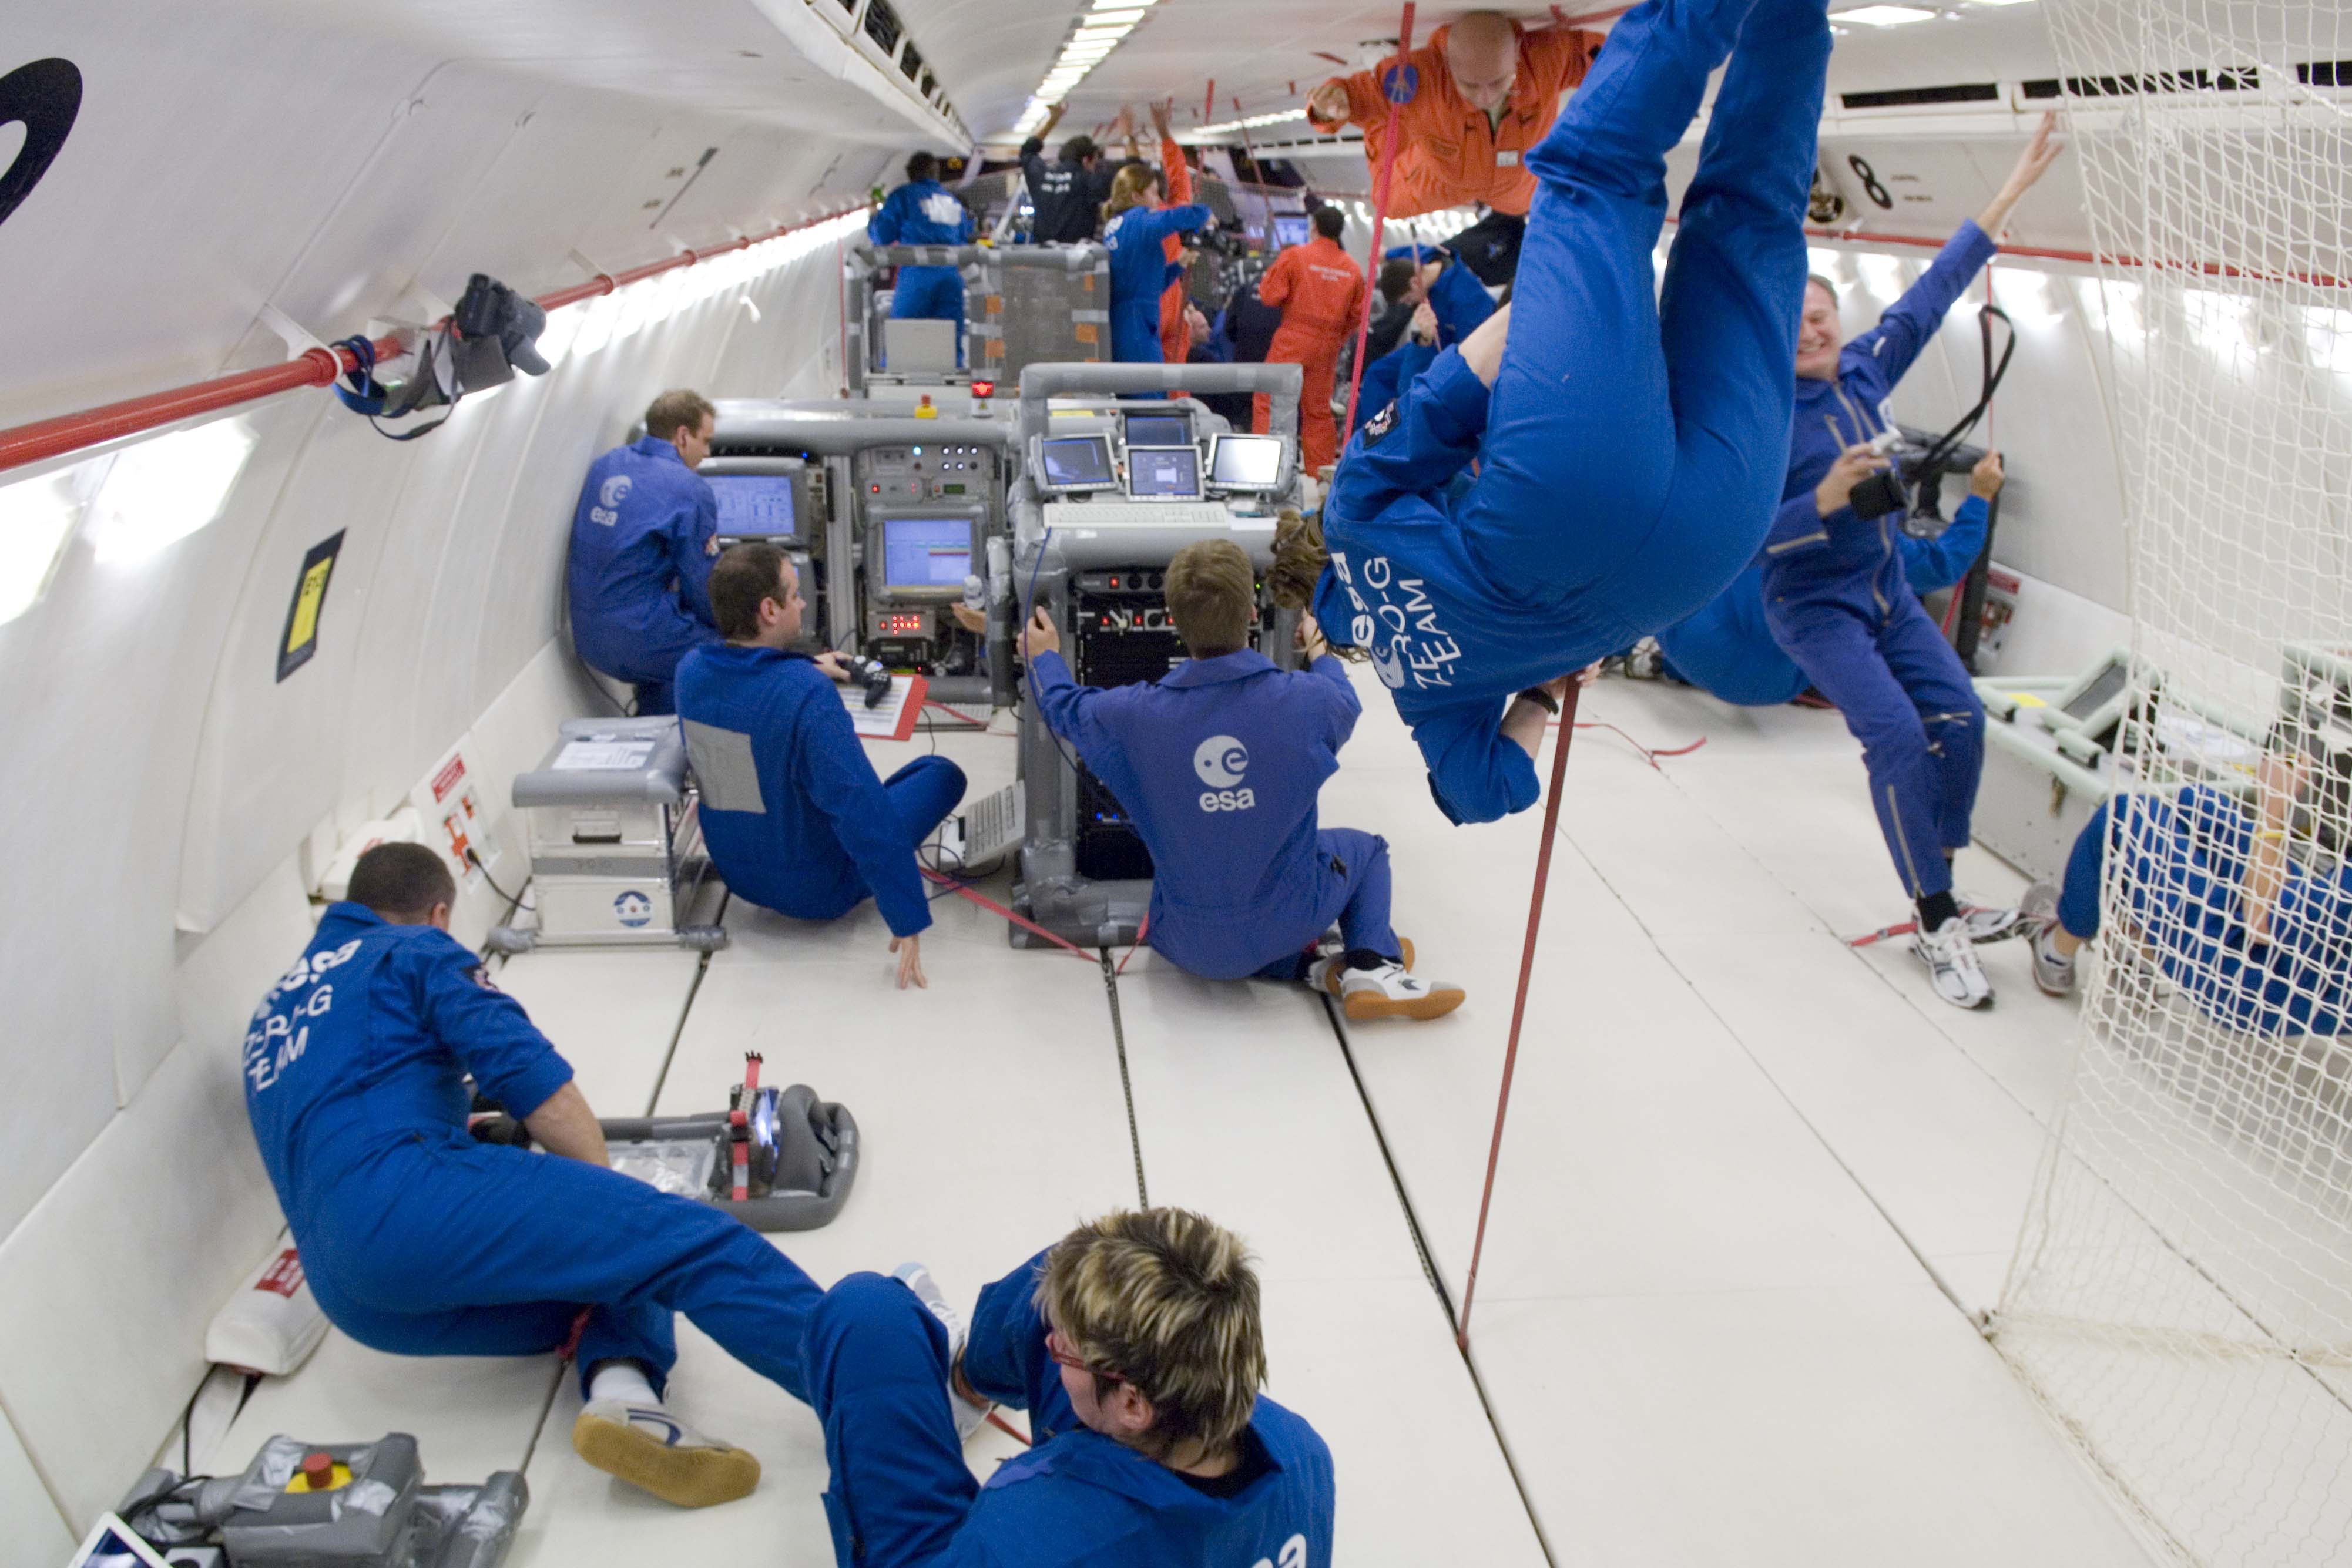
PVT-Gamers has been chosen by the European Space Agency (ESA) to fly on-board the Airbus A310 ZERO-G airplane. For those of you not familiar with it, it is a flying vehicle that reaches a state similar to zero gravity, and therefore is used for simulating space conditions. The PVT-Gamers has been selected within the ESA program “Fly Your Thesis! 2018,” which will give the research team behind it the ability to test their assumptions in a real world scenario. A new method will be applied to small pressurized Xenon gas containers under hyper/micro-gravity cycles at a stationary cooling. Arduino boards, specifically 6 Arduino Mega 2560, are instrumental in recovering all the data, such as temperature, pressure, deformation, or acceleration. Subsequently, it will be possible to reproduce on-orbit, thrust phase, external accelerations, and fuel transfer conditions over a propellant tank at its End Of Life (EOL) stage, where there is almost no propellant left.
The potential applications from this scientific experiment may provide the upcoming spacecraft generation with a fuel measuring and control method that could constitute a turning point for long-term space missions. This can be applied to CubeSats or telecommunication satellites, and also to large future projects using electric propulsion such as the lunar space station “Deep Space Gateway” or the Mercury mission BepiColombo.
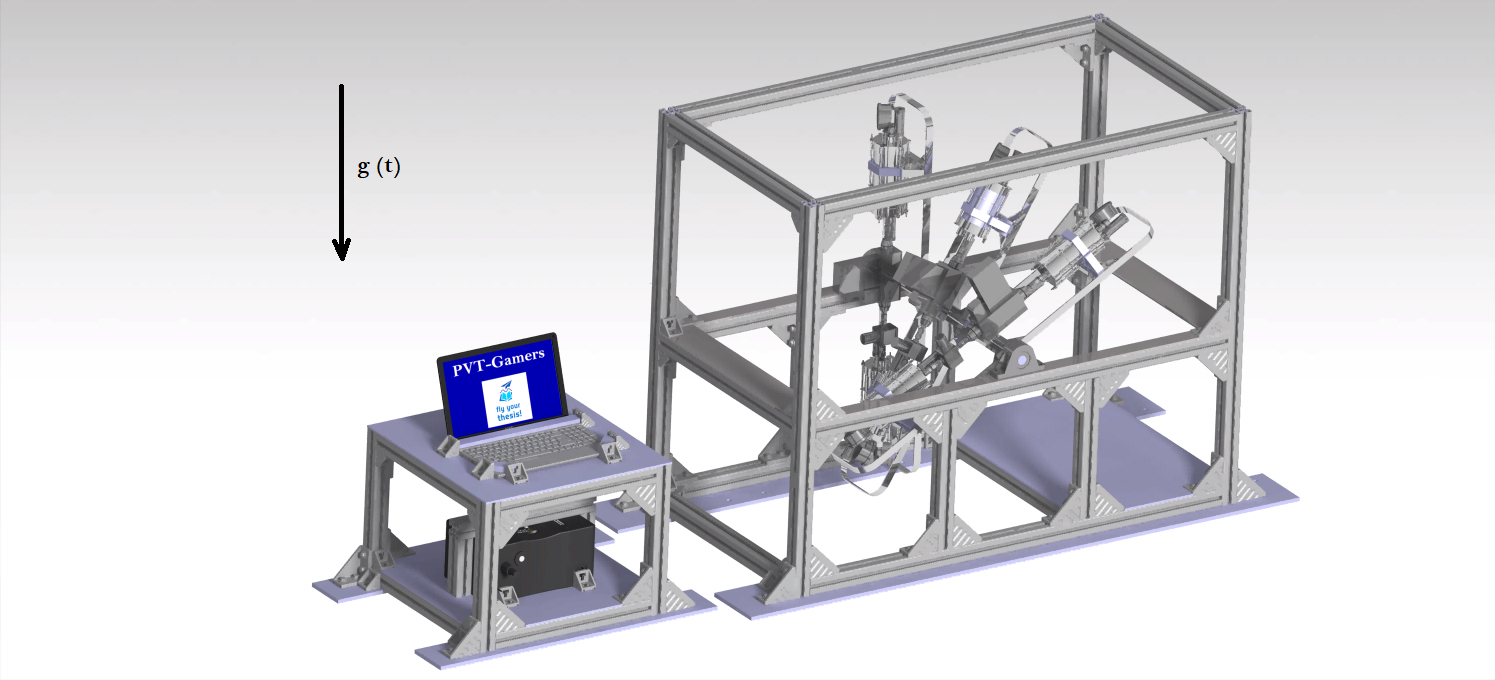
Current design of the PVT-Gamers experiment rack configuration to be attached to the A310 ZERO-G cabin. Photo credit: PVT-Gamers
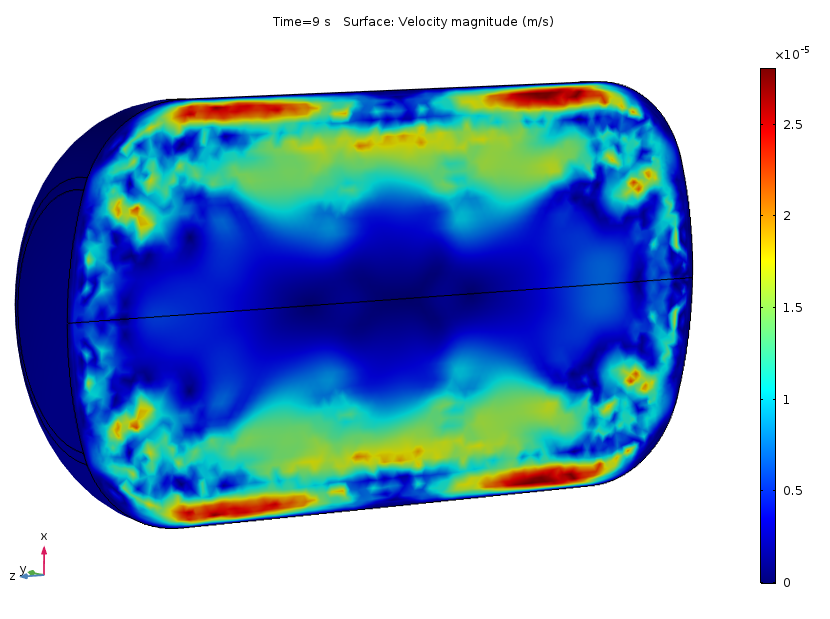
Simulation of the velocity distribution in magnitude within a spacecraft propellant tank as consequence of external heating. Photo credit: PVT-Gamers
A310 ZERO-G cabin during a micro-gravity stage. Photo credit: ESA
Closing with a reflection: Why is this so important?
You might wonder… Why should Arduino be so interested in the creation of machines aimed at the exploration of space? The answer is three-fold. First, space is the ultimate frontier, the conditions are very tough, shipping electronics out of the atmosphere is expensive and forces engineers to become very creative, reusability is key (a part has to be used for more than one thing, even the hardware components). For Arduino, proving that our boards and choice of materials, while still cheap, are good enough to be part of the space career, is of course of vital importance. If it works in space, it works on Earth, also for the industry.
Second, the limitations are such, that many of the designs become very useful in everyday situations. If we made a greenhouse for Mars, it would work for the Arctic, or for poor villagers on the mountains anywhere in the world as well. Isn’t an excuse good enough to make a machine that will help improve people’s lives?
Third, in education we need icons to follow, and we need experiences to replicate. The ones from Mari Paz, Javier, and their team will for sure awaken the scientific vocation in many of our younger ones. Helping science is helping education!