Posts with «glove» label

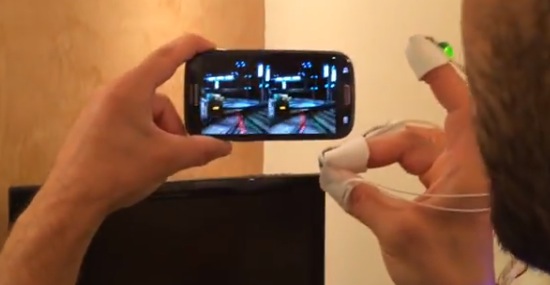
Haptic Glove Controls Robot Hand Wirelessly

[Miller] wanted to practice a bit with some wireless modules and wound up creating a robotic hand he could teleoperate with the help of a haptic glove. It lookes highly reproducible, as you can see the video, below the break.

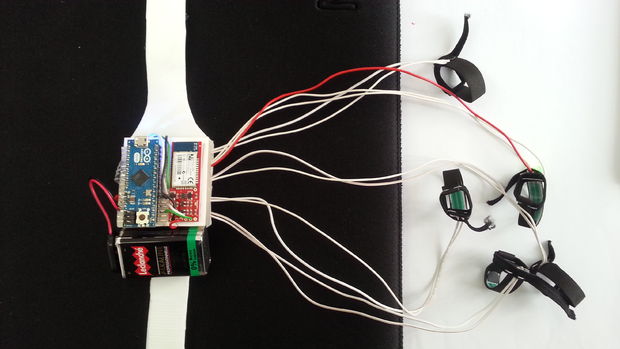
The glove uses an Arduino’s analog to digital converter to read some flex sensors. Commercial flex sensors are pretty expensive, so he experimented with some homemade sensors. The ones with tin foil and graphite didn’t work well, but using some bent can metal worked better despite not having good resolution.

The wireless communications set up was pretty easy thanks to the NRF24L01 modules. The hard part was sewing the flex sensors into the glove. We thought some of the circuitry looked precarious on the glove, too.

For the robot hand, he used balsa wood and hinges for each joint. Flexible thread provided the return power like a spring. The hand was surprisingly artistic in a primitive sort of way.

While this is a cool demo, the hand isn’t likely to be practical for much as it is. Nerve impulses are better but harder. The glove reminded us a little of one we’d seen before.

You Don’t Need to be Tony Stark to Afford This Hand Controller

Proving that duct tape really can do anything, [StudentBuilds] uses it to make a workable controller out of a glove. To be fair, there are a few more bits too, including paper coated with pencil graphite and tin foil, which forms a variable resistor you can read with an Arduino analog input. You can see the entire thing in the video below.

The source code is simple at this point — eventually, he plans to control a robotic hand with the controller, but that’s later. However, there’s no promised link to the code in the description, so you’ll have to freeze frame and type. However, it is pretty simple — just read the analog pin values to determine the specific values for each finger.

There was a slight issue with the build. At first, all the sensors read the maximum (1023). That necessitated changing the fixed resistor to a much higher value. Also, be sure to read the notes on the screen as the original schematic has a small error corrected with a note. One end of the voltage divider needs to go to 5 V. The schematic shows both ends going to ground.

Is this going to be wildly accurate? No. It isn’t even going to be repeatable if you build multiples and the calibration will probably even change with age. Still, it is cool that you can take a few pieces of scrap material and do something with it. Also, the homemade sensor approach might spur your imagination to make other pencil-based sensors.

If you want something a bit more mechanical, try Lego. If you can’t think of anything you want to control with such a glove, maybe try your hand at music.

Stop Motion with the Time Glove

What do you get when you put an ultra-bright LED in the palm of a glove, and strobe it controlled by an accelerometer? A Time Control Glove! In creator [MadGyver]’s own words, it’s “just a stroboscope with frequency adjustment” but the effect is where all the fun is.

The Time Control Glove uses the stroboscopic effect, which many of us have seen used in timeless water drop fountains where the strobe rate makes drops appear to change speed, freeze in place, and even change direction. [MadGyver] made the entire assembly portable by putting it into a glove. An on-board accelerometer toggles the strobe in response to a shake, and the frequency is changed by twisting the glove left or right. The immediate visual feedback to the physical motions is great. The whole effect is really striking on the video, which is embedded below.

Schematics and bill of materials are available on GitHub. Brilliant work! And while we’re discussing the stroboscopic effect, find out how it can be used to tune guitar strings.

[via Arduino Blog]


Filed under: Arduino Hacks, how-to, led hacks

Gravity Touch bluetooth Glove powered by Arduino Micro

Arduino user Jubeso submitted to our blog an instructable explaining the 10 steps to build an input device for gaming.

The  Gravity Touch bluetooth glove  is specifically designed to interact with augmented reality glasses like the Google Glass, Meta, Moverio BT or with the VR headsets like Oculus Rift, Samsung Gear VR, vrAse, Durovis Dive:

Those new products are amazing and they need new types of input devices. This instructable will describe how to build your own “Gravity Touch bluetooth glove” and I will also give you some tips to build your own Durovis Dive VR headset so that you will be able to enjoy full mobile VR. Because this glove will be of most use for VR game, I have created a Unity3D plugin for Android that handle the communication between your app and the glove. It means that you will be able to use your Gravity Touch glove to interact with your Unity3D VR game.

The Arduino code and the Java class I wrote to handle the communication between the glove and the Android device will also be available so that you will be able to adapt them for your need.


The bill of materials, among other things, contains an Arduino Micro , FreeIMU – an Open Hardware Framework for Orientation and Motion Sensing and 3m of flexible soft electric wire.