Bringing a Baofeng into the Cyberpunk 2077 Universe
You’ve got to love the aesthetics of dystopian cyberpunk video games, where all the technology looks like it’s cobbled together from cast-off bits of the old world’s remains. Kudos go to those who attempt to recreate these virtual props and bring them into the real world, but our highest praise goes to those who not only make a game-realistic version of a prop, but make it actually work.
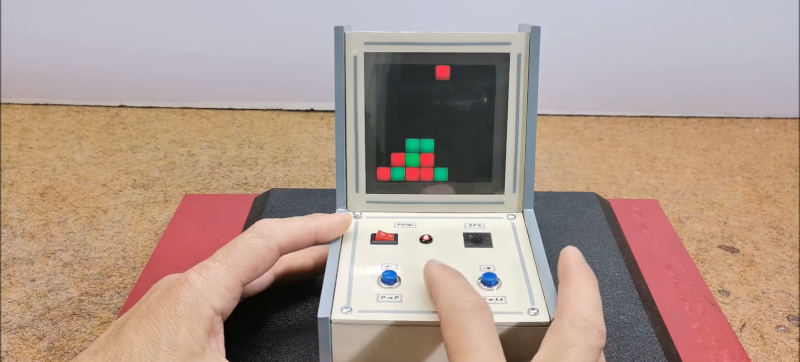
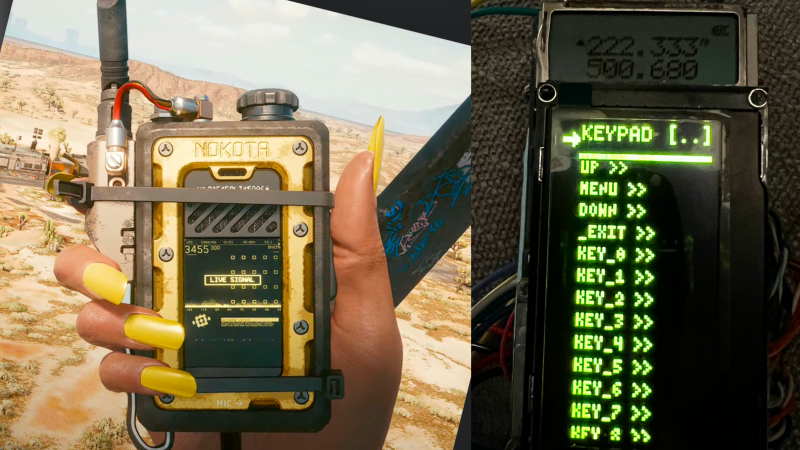
Take the Nokota Manufacturing radio from Cyberpunk 2077, for instance. [Taylor] took one look at that and knew it would be the perfect vessel for a Baofeng UV-5R, the dual-band transceiver that amateur radio operators love to hate. The idea is to strip the PCB out of a Baofeng — no worries, the things cost like $25 — and install it in a game-accurate 3D printed case. But this is far from just a case mod, since [Taylor]’s goal is to replace the radio’s original controls with something closer to what’s in the game.
To that end, [Taylor] is spinning up an interface to the stock radio’s keypad using some 7400-series bilateral analog switches. Hooked to the keypad contacts and controlled by a Mini MEGA 2560 microcontroller, the interface is able to send macros that imitate the keypresses necessary to change frequencies and control the radio’s settings, plus display the results on the yellow OLED screen that seems a dead-ringer for the in-game display. The video below shows some early testing of the interface.
While very much still a work in progress, we’ve been following [Taylor]’s project for a week or so and he’s really gaining some ground. We’ve encouraged him to enter this one in the Cyberdeck Challenge we’ve got going on now; it might not have much “deck” going for it, but it sure does have a lot of “cyber.”

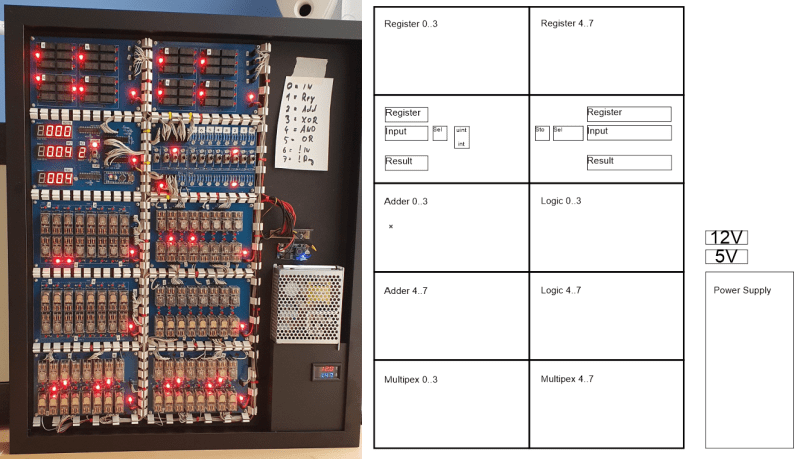
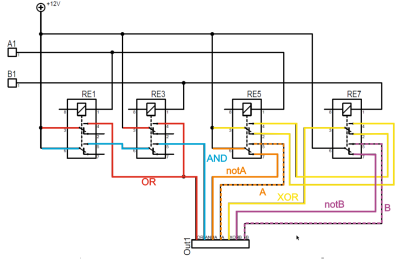 operating on 4-bits. To handle a byte-length word, boards are simply cascaded, making a total of eight. The register, adder, logic function, and multiplex boards are the heart of the build with an additional two custom boards for visualization (using an Arduino for convenience) and IO forming the interface. After all, a basic CPU is just an ALU and some control around it, the magic is really in the ALU.
 but that’s the job of a separate board. The adder function is the most basic, simply a pair of half-adders and an OR-gate to handle the chaining of the carry inputs and generate the carry chain output.