The well-dressed hacker [Sean Hodgins] has put together a neat little project: a battery powered remote shutter. He built it for use with Beme, the latest Snapchat clone that all of the cool kids are now using.
This service is designed to get away from the selfie culture by starting to record when you hold your phone against your chest, so you are looking at the thing being recorded, not your phone. [Sean] wanted a bit more control than that, so he built a remote control that starts the recording by moving the servo arm over the proximity sensor.
He built this neat little device from an Arduino Pro Mini, a battery, a small servo, a couple of power control boards and a cheap RF link from SeedStudio, all glued onto an iPhone case. It’s a bit rough around the edges (the servo makes some noise that is picked up on the recording, for one thing), but it is a great example of how to lash together a quick prototype to test a project out.
[Stef Cohen] decided to combine three different artistic mediums for her latest project. Those are painting, electronics, and software. The end goal was to recreate the aurora borealis, also known as the northern lights, in a painting.
The first step was to make the painting. [Stef] began with a shadow box. A shadow box is sort of like a picture frame that is extra deep. A snowy scene was painted directly onto the front side of the glass plate of the shadow box using acrylic paint. [Stef] painted the white, snowy ground along with some pine trees. The sky was left unpainted, in order to allow light to shine through from inside of the shadow box. A sheet of vellum paper was fixed to the inside of the glass pane. This serves to diffuse the light from the LEDs that would eventually be placed inside the box.
Next it was time to install the electronics. [Stef] used an off-the-shelf RGB LED matrix from Adafruit. The matrix is configured with 16 rows of 32 LEDs each. This was controlled with an Arduino Uno. The LED matrix was mounted inside the shadow box, behind the vellum paper. The Arduino code was easily written using Adafruit’s RGB Matrix Panel library.
To get the aurora effect just right, [Stef] used a clever trick. She took real world photographs of the aurora and pixelated them using Photoshop. She could then sample the color of each pixel to ensure that each LED was the appropriate color. Various functions from the Adafruit library were used to digitally paint the aurora into the LED matrix. Some subtle animations were also included to give it an extra kick.
What do you get when you cross a photographer with an Arduino hacker? If the cross in question is [nukevoid], you wind up with a clever camera rail that can smoothly move with both shift and rotation capability. The impressive build uses an Arduino Pro Mini board and two stepper motors. One stepper moves the device on rails using some Delrin pulleys as wheels that roll on an extruded aluminum track. The other stepper rotates the camera platform.
The rotating platform is very cool. It’s a plastic disk with a GT2 motion belt affixed to the edge. The stepper motor has a matching pulley and can rotate the platform easily. The GT2 belt only goes around half of the disk, and presumably the software knows when to stop on either edge based on step counts. There’s even a support to steady the camera’s lens when in operation.
Some AA batteries provide power (so probably not going to run all day long without a battery change). Judging by the video, the whole set up is cat-resistant (although nothing is totally cat-proof). Photographers are an innovative bunch, and we’ve seen Android-powered rails before as well as spinning turntables.
When he bought the table, he found that the electronics had been fried: many of the discrete components on the board had been burnt out. So, rather than replace the individual parts, he gutted the table and replaced the logic board with an Arduino Mega that drives the flippers, display and chimes that make pinball the delightful experience it is. Fortunately, this home pinball table is well documented, so he was able to figure out how to rewire the remaining parts fairly easily, and how to recreate the scoring system in software.
His total cost for the refurb was about $300 and the junker was just $50 to start with. Now for $350 you can probably find a working pinball table. But that’s not really the point here: he did it for the experience of working with electromechanical components like flippers and tilt switches. We would expect nothing less from the dude who previously built an Android oscilloscope from spare parts.
How long can you keep an Arduino circuit running on three AA batteries? With careful design, [educ8s] built a temperature sensor that lasts well over a year on a single charge of three 2250 mAH rechargeable cells (or, at least, should last that long).
Like most long-life designs, this temperature sensor spends most of its time sleeping. The design uses a DS18B20 temperature sensor and a Nokia 5110 LCD display. It also uses a photoresistor to shut off the LCD display in the dark for further power savings.
During sleep, the device only draws 260 microamps with the display on and 70 microamps with the display off. Every two minutes, the processor wakes up and reads the temperature, drawing about 12 milliamps for a very short time.
Along with the code, [educ8s] has a spreadsheet that computes the battery life based on the different measured parameters and the battery vendor’s claimed self discharge rate.
It is almost impossible these days to find a PC with old ISA card slots. Full size PCI card slots are in danger of going the same way. Many PCs today feature PCI Express connectors. PCI Express offers a lot of advantages including a small size, lower pin count, and a point-to-point serial bus topology that allows multiple simultaneous transfers between different pairs of end points. You’ll find PC Express connectors in things other than PCs too, including a lot of larger embedded systems.
If you ever wanted to prototype something on PCI Express, you’d usually turn to an FPGA. However, [moonpunchorg] posted a workable design for an Arduino on a mini PCI Express board. The design files use KiCAD so it should be fairly easy to replicate or change. Naturally, there are pins on the edges to access I/O ports and power. You do need to use ISP to program the Arduino bootloader on the chip.
The board appears to a host computer as a SparkFun as a Pro Micro 3.3V board, and from there you could easily add function to a computer with a PCI Express slot using nothing more than the Arduino IDE. The board is known to work with the VIA VAB-600 Springboard and VIA VAB-820 boards, although it is likely to work with other PCI Express hosts, too.
Robotic hacker [Andrea Trufini] apparently likes choices. Not only does his robotic arm have six degrees of freedom, but it has a variety of ways he can control it. The arm’s software can accept commands through a programming language, via potentiometers, an infrared remote, or–the really interesting part–through spoken commands.
The videos don’t show too much of the build detail, but the arm is mainly constructed of laser cut plywood and uses an Arduino. Hopefully, we’ll see more particulars about the build soon but for now have a look at a similar project.
The software (myrobotlab) is on github and looks very impressive. The Java-based framework has a service-oriented architecture, with modules that support common processors (like the Arduino, Raspberry Pi, and Beagle Board) along with I/O devices (like motors, sound devices, and that Leap Motion controller you just had to buy). As you might expect from the demonstration found below, there are speech to text and text to speech services, too. Like a lot of open source projects, some of these services are more ready for prime time than others but that just means you can contribute your hacks back to the project.
You could build some pretty powerful robots with a framework like this. How powerful? One of the services knows how to play chess.
With all of the cool features on the Raspberry Pi, it is somewhat notable that it lacks a power button. In a simple setup, the only way to cut power to the tiny computer is to physically remove the power cord. [Dalton63841] found that this was below his wife’s tolerance level for electronics, and built a simple remote control for his Raspberry Pi.
[Dalton63841] started this project by trying to use the UART TX pin, but this turned out to be a dead-end. He decided instead to use an Arduino to monitor the 3.3V power rail on the Pi. When the Pi is shut down in software, the Arduino can sense that the Pi isn’t on any more and disconnect the power. The remote control is used to turn the Pi on. The Arduino reads the IR code from a remote and simply powers up the Pi. This is a very simple and elegant solution that requires absolutely no software to be installed on the Raspberry Pi.
We know that this isn’t the most technically complex project we’ve ever featured, but it is a good beginner project for anyone just getting started with a Pi, Arduino, or using IR. Plus, this could be the perfect thing to pair up with a battery-backup Raspberry Pi shutdown device that allows it to power itself down in a controlled way when a power outage is sensed.
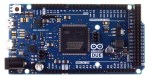
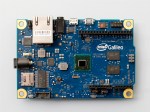
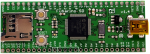
Speak with those who consider themselves hardcore engineers and you might hear “Arduinos are for noobs” or some other similar nonsense. These naysayers see the platform as a simplified, overpriced, and over-hyped tool that lets you blink a few LEDs or maybe even read a sensor or two. They might say that Arduino is great for high school projects and EE wannabes tinkering in their garage, but REAL engineering is done with ARM, x86 or PICs. Guess what? There are Arduino compatible boards built around all three of those architectures. Below you can see but three examples in the DUE, Galileo, and Fubarino SD boards.
This attitude towards Arduino exists mainly out of ignorance. So let’s break down a few myths and preconceived biases that might still be lurking amongst some EEs and then talk about Arduino’s ability to move past the makers.
Arduino is NOT the Uno
When some hear “Arduino”, they think of that little blue board that you can plug a 9v battery into and start making stuff. While this is technically true, there’s a lot more to it than that.
An Arduino Uno is justanAVR development board.AVRs are similar to PICs. When someones says “I used a PIC as the main processor”, does that mean they stuck the entire PIC development board into their project? Of course not. It’s the same with Arduino (in most cases), and design is done the same way as with any other microcontroller –
Use the development board to make, create and debug.
When ready, move the processor to your dedicated board.
What makes an Arduino an “Arduino” and not justan AVR but the bootloader. Thus:
An Atmega328P is an AVR processor.
An Atmega328P with the Arduino bootloader is an Arduino.
The bootloader allows you to program the AVR with the Arduino IDE. If you remove the bootloader from the AVR, you now have an AVR development board that can be programmed with AVR Studio using your preferred language.
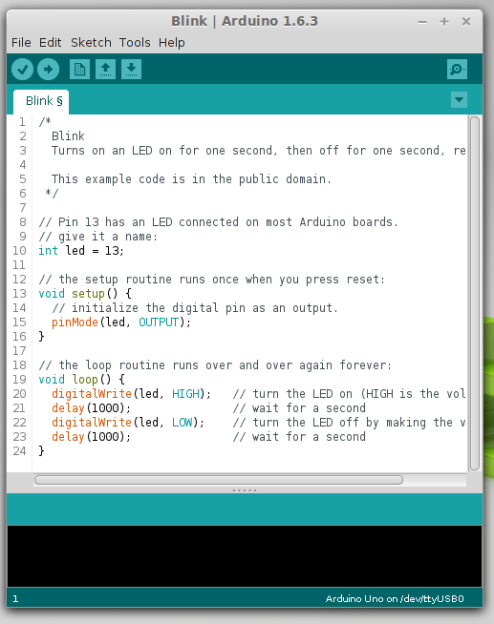
There Is No Special Arduino Language
Arduino “blink” sketch should run on any Arduino compatible board.
Yes, I know they call them sketches, which is silly. But the fact is it’s just c++. The same c++ you’d use to program your PIC. The bootloader allows the IDE to call functions, making it easy to code and giving Arduino its reputation of being easy to work with. But don’t let the “easy” fool you. They’re real c/c++ functions that get passed to a real c/c++ compiler. In fact, any c/c++ construct will work in the Arduino IDE. With that said – if there is any negative attribute to Arduino, it is the IDE. It’s simple and there is no debugger.
The strength comes in the standardization of the platform. You can adapt the Arduino standard to a board you have made and that adaptation should allow the myriad of libraries for Arduino to work with your new piece of hardware. This is a powerful benefit of the ecosystem. At the same time, this easy of getting things up and running has resulted in a lot of the negative associations discussed previously.
So there you have it. Arduino is no different from any other microcontroller, and is fully capable of being used in consumer products along side PICs, ARMs etc. To say otherwise is foolish.
What is the Virtue of Arduino in Consumer Products?
This is Ask Hackaday so you know there’s a question in the works. What is the virtue of Arduino in consumer products? Most electronics these days have a Device Firmware Upgrade (DFU) mode that allows the end user to upgrade the code, so Arduino doesn’t have a leg up there. One might argue that using Arduino means the code is Open Source and therefore ripe for community improvements but closed-source binaries can still be distributed for the platform. Yet there are many products out there that have managed to unlock the “community multiplier” that comes from releasing the code and inviting improvements.
What do you think the benefits of building consumer goods around Arduino are, what will the future look like, and how will we get there? Leave your thoughts below!
After the release of Mortal Kombat X, [Zachery’s] gaming group wanted to branch out into the fighter genre. They quickly learned that in order to maximize their experience, they would need a better controller than a standard gamepad. A keyboard wasn’t going to cut it either. They wanted a fight stick. These are large controllers that look very much like arcade fighting controls and include a joystick and large buttons. [Zachery’s] group decided to build their own fight stick for use with a PC.
[Zachery] based his build around the TeensyLC, which is a 32 bit development board with an ARM processor. It’s also compatible with Arduino. The original version of his project setup the controller as a HID, essentially emulating a keyboard. This worked for a while until they ran into compatibility issues with some games. [Zachery] learned that his controller was compatible with DirectInput, which has been deprecated. The new thing is Xinput, and it was going to require more work.
Using Xinput meant that [Zachery] could no longer use the generic Microsoft HID driver. Rather than write his own drivers, he decided to emulate the XBOX 360 controller. When the fight stick is plugged into the computer, it shows up as an XBOX 360 controller and Windows easily installs the pre-built driver. To perform the emulation, [Zachery] first had to set the VID and PID of the device to be identical to the XBOX controller. This is what allows the Microsoft driver to recognize the device.
Next, the device descriptor and configuration descriptor had to be added to the Teensy’s firmware. The device descriptor includes information such as USB version, device class, protocol, etc. The configuration descriptor includes additional information about the device configuration. [Zachery] used Microsoft Message Analyzer to pull the configuration descriptor from a real XBOX 360 controller, then used the same data in his own custom controller.
[Zachery] programmed the TeensyLC using the Arduino IDE. He ran into some trouble here because the IDE did not include the correct device type for an Xinput device. [Zachery] had to edit the boards.txt file and add three lines of code in order to add a new hardware device to the IDE’s menu. Several other files also had to be modified to make sure the compiler knew what an Xinput device type was. With all of that out of the way, [Zachery] was finally able to write the code for his controller.


 When he bought the table, he found that the electronics had been fried: many of the discrete components on the board had been burnt out. So, rather than replace the individual parts, he gutted the table and replaced the logic board with an Arduino Mega that drives the flippers, display and chimes that make pinball the delightful experience it is. Fortunately,