Posts with «arduino hacks» label

World’s Smallest Version of World’s Fastest Bumper Car

A few years ago, YouTubing madman [Colin Furze] took an old bumper car and made a 600-horsepower beast of a go-kart that managed to clock 100MPH with a headwind. This isn’t that. It’s a miniaturized, remote-control homage to [Colin]’s go-kart that is equally awesome.

[Forsyth Creations] started by CAD-modeling the chassis right on top of a still from the video. The entire body is 3D-printed in four large pieces, which took several days because each piece took around 24 hours. Inside the car there’s an Arduino brain driving a motor in the back and a servo in the front. This bad boy runs on a couple of rechargeable battery packs and can be controlled with either a Wii balance board or a PS2 controller. This thing really moves, although it doesn’t quite reach 100MPH. Watch it zoom around in the video after the break.

Got a Segway lying around that just doesn’t do it for you anymore? You could always turn it into a go-kart. Never had a Segway to begin with? Just roll your own.

Procedural Barcode Synth is as Simple as Black and White

We are no stranger to peculiar and wonderful musical instruments here at Hackaday. [James Bruton] has long been fascinated with barcode scanners as an input source for music and now has a procedural barcode-powered synth to add to his growing collection of handmade instruments. We’ve previously covered his barcode guitar, which converts a string of numbers from the PS/2 output to pitches. This meant having a large number of barcodes printed as each pitch required a separate barcode. As you can imagine, this makes for a rather unwieldy and large instrument.

Rather than looking at the textual output of the reader, [James] cracked it open and put it to the oscilloscope. Once inside, he found a good source that outputs a square wave corresponding to the black and white lines that the barcode sees. Since the barcodes [James] is using don’t have the proper start and stop codes, the barcode reader continuously scans.  Normally it would stop the laser to send the text over the USB or PS/2 connection. A simple 5v to 3.3v level shifter feeds that square wave into a Teensy board, which outputs the audio.

A video showcasing a similar technique inspired [James] with this project. The creators of that video have a huge wall of different patterns of black and white lines. [James’s] next stroke of brilliance was to have a small HDMI display to generate the barcodes on the fly. A Raspberry Pi 4 reads in various buttons via GPIO and displays the resulting barcode on the screen. A quick 3d printed shell rounds out the build nicely, keeping things small and compact. All the code and CAD files are up on GitHub.

Thanks [James Bruton] for the awesome project!

Starshine is a MIDI Controller for the Musically Shy

What keeps people from playing music? For one thing, it’s hard. But why is it hard? In theory, it’s because theory is confusing. In practice, it’s largely because of accidentals, or notes that sound sour compared to the others because they aren’t from the same key or a complementary key.

What if there were no accidentals? Instruments like this exist, like the harmonica and the autoharp. But none of them look as fun to play as [Bardable]’s Starshine, the instrument intended to be playable by everyone. The note buttons on the outside are laid out and programmed such that [Bardable] will never play off-key.

We love the game controller form factor, which was also a functional choice. On the side that faces the player, there’s a PSP joystick and two potentiometers for adding expression with your thumbs. The twelve buttons on this side serve several functions like choosing the key and the scale type depending on the rocker switch position. A second rocker lets [Bardable] go up or down an octave on the fly. There’s also an OLED to show everything from the note being played to the positions of the potentiometers. If you want to know more, [Bardable] made a subreddit for this and other future instruments, and has a full tour video after the break.

If this beginner-friendly MIDI controller isn’t big enough for you, check out Harmonicade’s field of arcade buttons.

Classical Poultry Conditioning is a Bird-Brained Scheme

A while back, [Kutluhan Aktar] was trying to hack their chickens, quails, and ducks for higher egg production and faster hatching times by using a bit of classical conditioning. That is, feeding them at the same time every day while simultaneously exposing them to sound and light. Once [Kutluhan] slipped enough times, they hatched a plan to build an automatic feeder.

This fun rooster-shaped bird feeder runs on an Arduino Nano and gets its time, date, and temperature info from a DS3231 RTC. All [Kutluhan] has to do is set the daily feeding time. When it comes, a pair of servos and a pan-tilt kit work together to invert a Pringles can filled with food pellets. A piezo buzzer and a green LED provide the sound and light to help with conditioning. Scratch your way past the break to see it in action.

If [Kutluhan] gets tired of watching the birds eat at the same time every day, perhaps a trash-for-treats training program could be next on the list.

Via r/duino

Teaching an Old Lathe New Tricks With a Programmable Power Feed

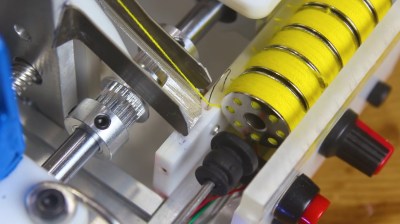
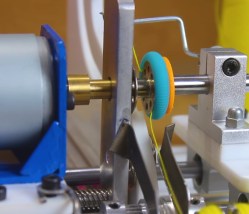
Ask anybody whose spent time standing in front of a mill or lathe and they’ll tell you that some operations can get tedious. When you need to turn down a stainless rod by 1/4″ in 0.030″ increments, you get a lot of time to reflect on why you didn’t just buy the right size stock as you crank the wheel back and forth. That’s where the lead screw comes in — most lathes have a gear-driven lead screw that can be used to actuate the z-axis ( the one which travels parallel to the axis of rotation). It’s no CNC, but this type of gearing makes life easier and it’s been around for a long time.

[Tony Goacher] took this idea a few steps further when he created the Leadscrew Buddy. He coupled a beautiful 1949 Myford lathe with an Arduino, a stepper motor, and a handful of buttons to add some really useful capabilities to the antique machine. By decoupling the lead screw from the lathe’s gearbox and actuating it via a stepper motor, he achieved a much more granular variable feed speed.

If that’s not enough, [Tony] used a rotary encoder to display the cutting tool’s position on a home-built Digital Readout (DRO). The pièce de résistance is a “goto” command. Once [Tony] sets a home position, he can command the z-axis to travel to a set point at a given speed. Not only does this make turning easier, but it makes the process more repeatable and yields a smoother finish on the part.

These features may not seem so alien to those used to working with modern CNC lathes, but to the vast majority of us garage machinists, [Tony]’s implementation is an exciting look at how we can step up our turning game. It also fits nicely within the spectrum of lathe projects we’ve seen here at Hackaday- from the ultra low-tech to the ludicrously-precise.

A Digital Magic 8-Ball? Signs Point to Yes

[FacelessTech] was recently charmed by one of our prized possessions as a kid — the Magic 8-Ball — and decided to have a go at making a digital version. Though there is no icosahedron or mysterious fluid inside, the end result is still without a doubt quite cool, especially for a project made on a whim with parts on hand.

It’s not just an 8-ball, it also functions as a 6-sided die and a direct decider of yes/no questions. Underneath that Nokia 5110 screen there’s an Arduino Pro Mini and a 3-axis gyro. Almost everything is done through the gyro, including setting the screen contrast when the eight ball is first powered on. As much we as love that aspect, we really like that [FacelessTech] included a GX-12 connector for easy FTDI programming. It’s a tidy, completely open-source build, and there’s even a PCB. What’s not to like? Be sure to check out the video after the break to see it in action.

Believe it or not, this isn’t the smallest Magic 8-Ball build we’ve seen. Have you met the business card version?

[via adafruit]

Parking Assistant Helps Back Up the Car Without Going Too Far

Sure, [Ty Palowski] could have just hung a tennis ball from the ceiling, but that would mean getting on a ladder, testing the studfinder on himself before locating a ceiling joist, and so on. Bo-ring. Now that he finally has a garage, he’s not going to fill it with junk, no! He’s going to park a big ol’ Jeep in it. Backwards.

The previous owner was kind enough to leave a workbench in the rear of the garage, which [Ty] has already made his own. To make sure that he never hits the workbench while backing into the garage, [Ty] made an adorable stoplight to help gauge the distance to it. Green mean’s he’s good, yellow means he should be braking, and red of course means stop in the name of power tools.

Inside the light is an Arduino Nano, which reads from the ultrasonic sensor mounted underneath the enclosure and lights up the appropriate LED depending on the car’s distance. All [Ty] has to do is set the distance that makes the red light come on, which he can do with the rotary encoder on the side and confirm on the OLED. The distance for yellow and green are automatically set from red — the yellow range begins 24″ past red, and green is another 48″ past yellow. Floor it past the break to watch the build video.

The humble North American traffic signal is widely recognized, so it’s a good approach for all kinds of applications. Teach your children well: start them young with a visual indicator of when it’s okay to get out of bed in the morning.

DIY Ergonomic Game Pad Lends a Hand

Does it seem like everyone you game against can do everything faster than you? Chances are good that they have some kind of dedicated game pad or macro pad with a bunch of custom shortcuts. If you can’t beat ’em, join ’em, but why buy one when you can build your own? [lordofthedum] did the smart thing when they built their own version of the Azeron game pad, which is an outrageously expensive but ergonomic and cool-looking macro pad that reminds us of the DataHand ergonomic keyboard.

Each finger hovers over a C-shaped group of three switches — one actuates by moving the finger forward, another by moving backward, and the third by pushing down like a regular button. The thumb gets a 4-way joystick. All of these inputs are wired up to an Arduino Pro Micro, which has sort of become the standard for DIY macro pads and keyboards. We think this looks fantastic, and really raises the bar for DIY macro pads.

Need a few more keys, but still want a thumb joystick? Check out the smooth and sweet Sherbet game pad.

Finally, a Differently Useless Machine

Traditionally, the useless machine is a simple one that invites passersby to switch it on. When they do, the machine somehow, some way, turns itself off; usually with a finger or finger-like object that comes out from the box in what feels like an annoyed fashion. Honestly, that’s probably part of what drives people to turn them on over and over again.

But [Bart Blankendaal] has managed to turn the useless machine on its head. When this machine is switched to the on position, unseen forces inside the box will spin the toggle switch around 180° to the off position.

What’s really happening is that an Arduino is getting a signal from the toggle switch, and is then rotating it on a ball bearing with a stepper motor driven through an H-bridge.

It shouldn’t be too hard to make one of these yourself, given that [Bart] has provided the schematic and STLs. If we weren’t living in such touchy times, we might suggest building one of these into your Halloween candy distribution scheme somehow. Sell the switch as one that turns on a candy dispenser, and then actually dispense it after three or five tries.

Many see useless machines as tangible examples of existential quandary. Here is one that takes that sentiment a bit further by snuffing out a candle.

Controlling a Broken Super Nintendo With MIDI

A Super Nintendo that has trouble showing sprites doesn’t make for a very good game system. As it turns out, Super Mario World is a lot less fun when the titular hero is invisible. So it’s no surprise that [jwotto] ended up tossing this partially functional SNES into the parts bin a few years back.

But he recently came up with a project that may actually benefit from its unusual graphical issues; turning the glitched console into a circuit bent video synthesizer. The system was already displaying corrupted visuals, so [jwotto] figured he’d just help things along by poking around inside and identifying pins that created interesting visual effects when shorted out.

Installing the new electronics into the SNES.

Once he mapped out the pins, he wired them all up to a transistor switching board that he’d come up with for a previous project. That would let an Arduino short out the pins on command while still keeping the microcontroller relatively isolated from the SNES. Then it was just a matter of writing some code that would fire off the transistors based on MIDI input.

The end result is a SNES that creates visual glitches along with the music, which [jwotto] can hook up to a projector when he does live shows. A particularly neat feature is that each game responds in its own way, so he can swap out the cartridge to show completely different visuals without having to change any of the MIDI sequencing.

A project like this serves as a nice introduction to both circuit bending and MIDI hacking for anyone looking to get their digital feet wet, and should pair nicely with the MIDI Game Boy Advance.

[Thanks to Irregular Shed for the tip.]