Posts with «arduino hacks» label

World’s Cutest Pomodoro Timer Is Also a Clock

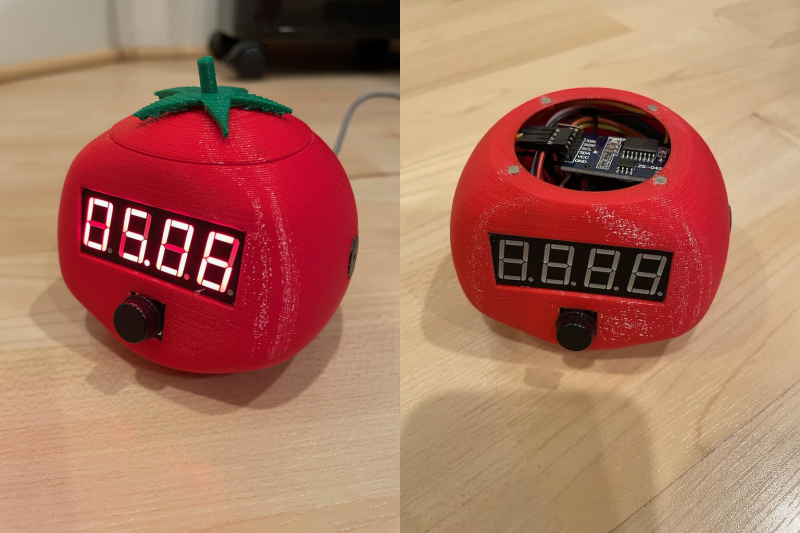
Student and hacker [prusteen] recently fell in love with the Pomodoro method of time management. That’s where you concentrate on your task for 25 minutes, then take a five-minute break, and repeat this four times with a longer break at the end. Initially, [prusteen] was keeping track on their phone, but hated having to change the timer value between Pomodoros and break times. In order to keep the flow mode engaged, [prusteen] came up with this darling little study buddy that does it all with the push of a button.

By default, this tomato shows the current time, which we think is a handy and often-overlooked feature of Pomodoro timer builds. Press that momentary switch on the front, and it starts counting upward to 25 minutes. Then it beeps in stereo through a pair of buzzers when the time is up, and automatically starts a five-minute break timer. Press it again and the display goes back to clock mode, although judging by the code, doing this will cancel the timer.

Inside the juicy enclosure is an Arduino Nano, an RTC, and a 7-segment display. We love the attention to detail here, from the little green leaves on top to the anatomically-correct dimple on the underside. And we always like to see lids that snap on with magnets. So satisfying. Check out the brief demo after the break, which unfortunately does not include any lid-snapping action.

Do you need more interaction with your Pomodoro timer? Build yourself a pomo-dachi instead.

Laser Pointer and Arduino Make a Minimalistic Shooting Game

Video games are great and all, but sometimes you just want the thrill of manipulating actual objects in addition to watching action on a screen. This must have been the reason why Nintendo’s Duck Hunt became so popular despite the simplicity of its gameplay. Prolific hacker [mircemk] similarly made a computer-plus-physical game called “Laser Shooter“, which somehow reminds us of the good old NES game.

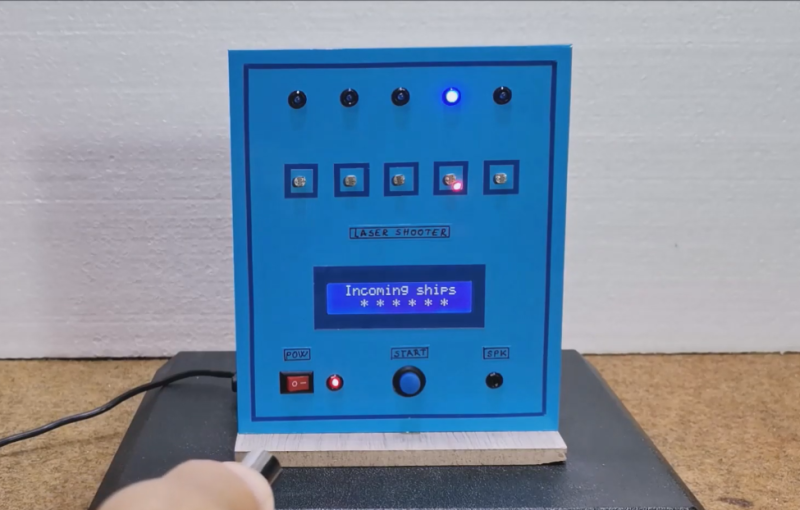
The game is based on an Arduino Nano, to which five LEDs as well as five photoresistors (LDRs) are connected. When the game is started, the LEDs light up at random and the player has a limited time to “shoot” the corresponding LDR with a laser pointer. This time limit is decreased as the game progresses, and the game is over once the player fails to hit the target on time. The “Game Over” message is accompanied by a sad tune, but luckily no giggling dog.

Complete schematics and code are available for anyone willing to try their hand at replicating or improving this game. And no, you can’t simply sweep your laser across the five LDRs all the time, because you lose if you shoot at the wrong target. For more laser pointer-based games, try this Laser Command clone or this laser tag badge system.

Tiny TV Tells the Temperature Tale

Once upon a time, we would run home from the bus stop to watch Gargoyles and Brady Bunch reruns on the family TV, a late-1970s console Magnavox number that sat on the floor and was about 50% more cabinet than CRT. The old TV, a streamlined white Zenith at least ten years older, had been relegated to the man cave in the basement. It looked so mod compared to the “new” TV, but that’s not the aesthetic my folks were after. They wanted their electronics to double as furniture.

This little TV is a happy medium between the two styles, and for us, it’s all about those feet. But instead of cartoons, it switches between showing the current weather and the top news headlines. Inside that classy oak cabinet is an LCD, an ESP32, and an SD card module. The TV uses OpenWeatherMap and pulls the corresponding weather image from the SD card based on time of day — light images for day, and dark images for night.

We love that it shows the SMPTE color bars, aka the standard American TV test pattern as it switches between weather and news. After showing the top headlines, it automatically switches back to the weather channel. Be sure to check out the short demo video after the break.

Do you like your tiny televisions in strange places? Here’s one you can use to trim your tree this year.

Using Arduinos To Drive Undocumented Displays

For those of us old enough to remember the VCR (and the difficulty of programming one), the ubiquitous vacuum fluorescent display, or VFD, is burned into our memories, mostly because of their brightness and contrast when compared to the superficially-similar LCD. These displays are incredibly common even apart from VCRs, though, and it’s easy to find them for next to no cost, but figuring out how to drive one if you just pulled it out of a 30-year-old VCR is going to take some effort. In this build, [mircemk] shows us how he drives unknown VFD displays using an Arduino in order to build his own weather forecasting station.

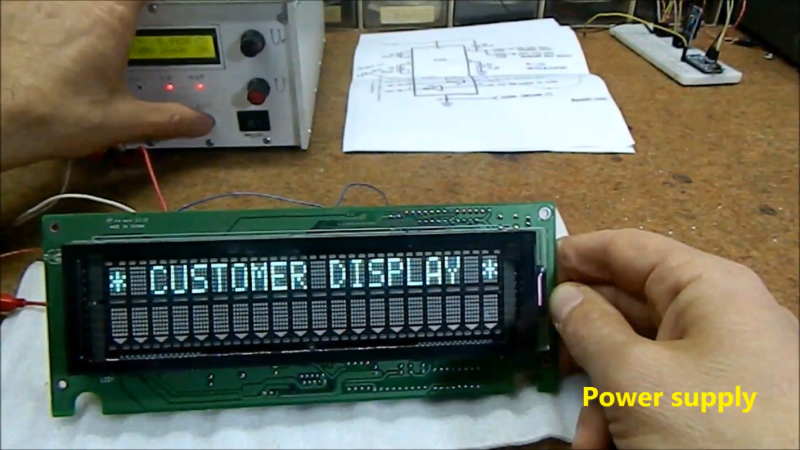
For this demonstration [mircemk] decided to turn a VFD into a weather forecasting station. First of all, though, he had to get the VFD up and running. For this unit, which came from a point-of-sale (POS) terminal, simply connecting power to the device turned on a demo mode for the display which let him know some information about it. From there, and with the knowledge that most POS terminals use RS232 to communicate, he was able to zero in on the Rx and Tx pins on the on-board microcontroller and interface them with an Arduino. From there it’s a short step to being able to output whatever he wanted to this display.

For this project, [mircemk] wanted the display to output information about weather, but rather than simply pull data from some weather API he is actually using a sensor suite connected to the Arduino to measure things like barometric pressure in order to make a 12-hour forecast. The design is inspired by old Zambretti weather forecasters which used analog wheels to input local weather data. It’s an interesting build not only for the VFD implementation but also for attempting to forecast the weather directly with just a tiny sensor set instead of downloading a forecast to display. To do any better with your own forecasts, you’d likely need your own weather station.

Giant Working NERF Gun Runs on Tiny Arduino

Well, here it is: a shoe-in for the new world’s largest NERF gun. (Video, embedded below.) The Guinness people haven’t shown up yet to award [Michael Pick], but at 12.5 feet, this baby is over twice as long as the current record holder, which belongs to former NASA mechanical engineer Mark Rober and his now-puny six-foot six-shooter.

We have to wonder if it is technically bigger than the six-shooter, because they seem to be roughly the same scale, except that [Michael] chose a much bigger model to start from. The main body is made from wood, and there are a ton of 3D-printed details that make it look fantastically accurate. The whole thing weighs over 200 pounds and takes at least two people to move it around. We especially love the DIY darts that [Michael] came up with, which are made from a PVC tube inside a section of pool noodle, topped off with a 3D printed piece for that distinctive orange cap.

Propelling those darts at around 50 MPH is a 3,000 PSI air tank connected to an Arduino Pro Mini that controls the trigger and the air valves. While [Michael] hasn’t run the thing quite that high, it does plenty of damage in the neighborhood of 40-80 PSI. As you’ll see in the video after the break, this is quite the ranged weapon. Watch it blow a hole clean through a sheet of drywall and much more.

Want to build something with a bit more stealth? Make it death from above with a NERF quadcopter.

Elderly Remote Keeps Things Simple

If you are lucky, you’ve never experienced the heartbreak of watching a loved one lose their ability to do simple tasks. However, as hackers, we have the ability to customize solutions to make everyday tasks more accessible. That’s what [omerrv] did by creating a very specific function remote control. The idea is to provide an easy-to-use interface for the most common remote functions.

This is one of those projects where the technology puzzle is now pretty easy to solve: IR remotes are well-understood and there are plenty of libraries for recording and playing back signals. The real work is to understand the user’s challenges and come up with a workable compromise between something useful and something too complex for the user to deal with.

Fortunately, with all the prototyping tools readily available now, it is easy to experiment with different setups to see what would work best. Larger keys? Color coding? A different arrangement of buttons? All of those things are easy to experiment with and, of course, what works for one person might not work for another. Even given time, it is possible that different configurations will work better or worse for the same person.

It isn’t likely that you’d duplicate [omerrv’s] remote directly. It may not work for your purpose. But it is a good inspiration on how we can use our ability to create customized hardware to improve the quality of life for those who need help.

We’ve seen similar projects — each one is a bit different. We wonder if old-fashioned remotes with their natural limitations would be a bit easier for people to handle?

Meet the Marvelous Macro Music Maker

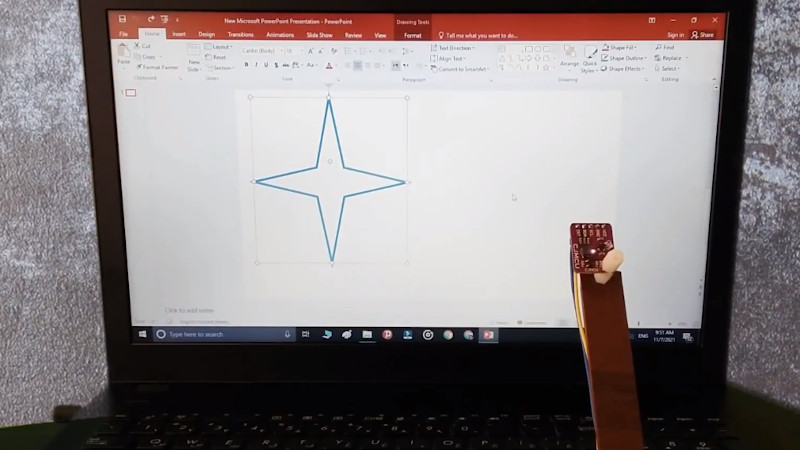
Do you kind of want a macropad, but aren’t sure that you would use it? Hackaday alum [Jeremy Cook] is now making and selling the JC Pro Macro on Tindie, which is exactly what it sounds like — a Pro Micro-based macro keypad with an OLED screen and a rotary encoder. In the video below, [Jeremy] shows how he made it into a music maker by adding a speaker and a small solenoid that does percussion, all while retaining the original macro pad functionality.

[Jeremy]’s original idea for a drum was to have a servo seesawing a chopstick back and forth on the table as one might nervously twiddle a pencil. That didn’t work out so well, so he switched to the solenoid and printed a thing to hold it upright, and we absolutely love it. The drum is controlled with the rotary encoder: push to turn the beat on or off and crank it to change the BPM.

To make it easier to connect up the solenoid and speaker, [Jeremy] had a little I²C helper board fabricated. There’s one SVG connection and another with power and ground swapped in the event it is needed. If you’re interested in the JC Pro Macro, you can pick it up in various forms over on Tindie. Of course, you might want to wait for version 2, which is coming to Kickstarter in October.

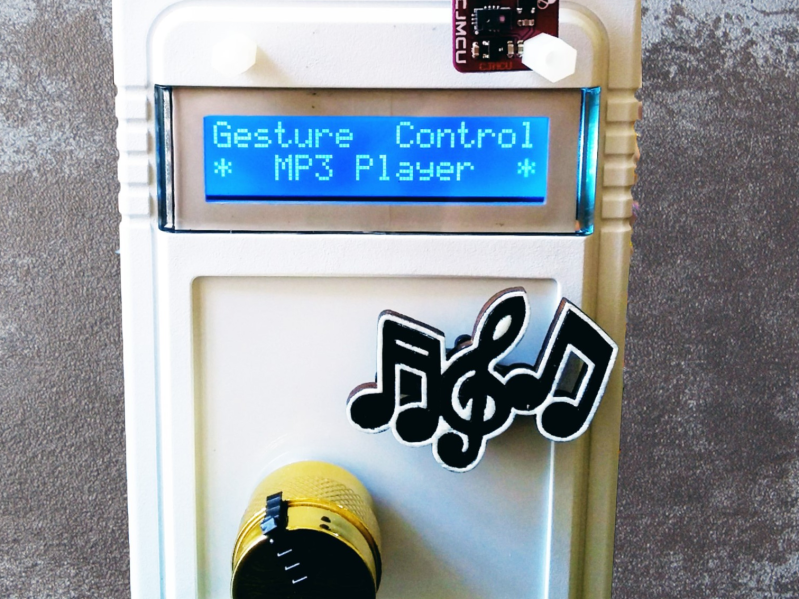
There are many ways to make a macro keyboard. Here’s one that also takes gesture input.

Mini Wireless Thermal Printers Get Arduino Library (and MacOS App)

[Larry Bank]’s Arduino library to print text and graphics on BLE (Bluetooth Low Energy) thermal printers has some excellent features, and makes sending wireless print jobs to a number of common models about as easy as can be. These printers are small, inexpensive, and wireless. That’s a great mix that makes them attractive for projects that would benefit from printing out a hardcopy.

It’s not limited to simple default text, either. Fancier output can be done using Adafruit_GFX library-style fonts and options, which sends the formatted text as graphics. You can read all about what the library can do in this succinct list of concise functions.

But [Larry] hasn’t stopped there. While experimenting with microcontrollers and BLE thermal printers, he also wanted to explore talking to these printers from his Mac using BLE directly. Print2BLE is a MacOS application that allows dragging image files into the application’s window, and if the preview looks good, the print button makes it come out of the printer as a 1-bpp dithered image.

Small thermal printers make for neat projects, like this retrofitted Polaroid camera, and now that these little printers are both wireless and economical, things can only get easier with the help of a library like this. Of course, if that’s all starting to look a little too easy, one can always put the thermal back in thermal printing by using plasma, instead.

RoboTray is a Secret Tea Butler

How far would you go for your cup of tea? [samsungite]’s missus doesn’t like clutter on her countertops, so away the one-cup kettle would go back into the cupboard for next time while the tea steeped. As long as there’s room for it in there, why not install it there permanently? That’s the idea behind RoboTray, which would only be cooler if it could be plumbed somehow.

RoboTray went through a few iterations, most importantly the switch from 6mm MDF to 4 mm aluminum plate. A transformer acts as a current sensor, and when the kettle is powered on, the tray first advances forward 7 cm using a 12 VDC motor and an Arduino. Then it pivots 90° on a lazy Susan driven by another 12 VDC motor. The kettle is smart enough to turn itself off when finished, and the Arduino senses this and reverses all the steps after a ten-second warning period. Check it out in action after the break.

If [samsungite] has any more Arduinos lying around, he might appreciate this tea inventory tracker.

Harp Uses Frikin’ Lasers

We aren’t sure if you really need lasers to build [HoPE’s] laser harp. It is little more than some photocells and has an Arduino generate tones based on the signals. Still, you need to excite the photocells somehow, and lasers are cheap enough these days.

Mechanically, the device is a pretty large wooden structure. There are six lasers aligned to six light sensors. Each sensor is read by an analog input pin on an Arduino armed with a music-generation shield. We’ve seen plenty of these in the past, but the simplicity of this one is engaging.

We’ve used the copper tape writing trick ourselves and it is quite effective. The tape is often used for stained glass work and sticks to many surfaces. You can solder to it and solder overlaps where you need connections. The results are often as good as a simple single-sided PCB.

The code attached to the post is fairly straightforward and the MIDI shield does the bulk of the work. It should also make it easy to create some really impressive musical effects with a bit of extra coding.

If you want an artsy self-contained version, check out this previous Hackaday Prize entry. We’ve seen several of these at different levels of complexity.