Posts with «uno» label

The little Arduino robot arm that could!

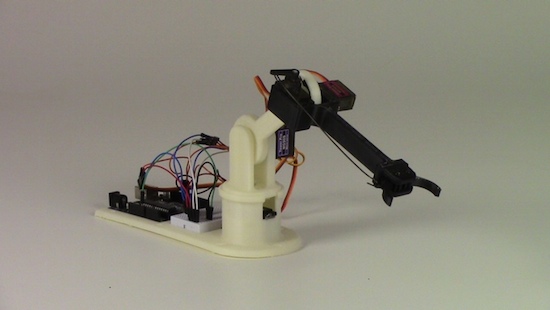
As its name would suggest, the LittleArm is a mini 3D-printed robot that began as a weekend project. Its creator Gabe Bentz wanted a small arm that was easy to work with, and one that wouldn’t require him to dig deep into his wallet. So, as any Maker would do, he decided to design his own low-cost device.

After showing the LittleArm off, it wasn’t before long that he was approached by some STEM teachers in the area who wondered if the kit was something they could use in their classrooms. Ideally, every student should have one to tinker with, but unfortunately today’s systems tend to be too expensive and quickly loose parts and pieces. This is a problem that LittleArm is looking to solve.

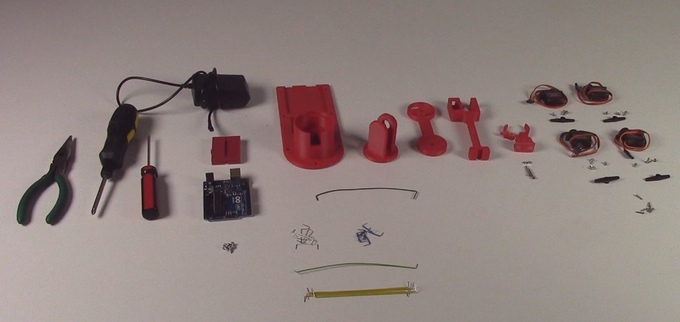
The arm is powered by an Arduino Uno and four identical metal-geared micro servos, while all other mechanical components are 3D-printed. There’s also a modular gripper that’s actuated by a servo along with rigid end-effectors for various tasks. What’s more, a basic GUI enables you to control the arm, its gripper, the speed, as well as use its record function to train the robot to perform a specific task and then watch it play out the sequence.

The entirely open-source gadget comes as a DIY kit that can be purchased or built from scratch. Want one of your own? Check out Bent’z Kickstarter page here, and see the LittleArm in action below (including some of its dance moves).

Star Track is an Arduino-powered star pointer and tracker

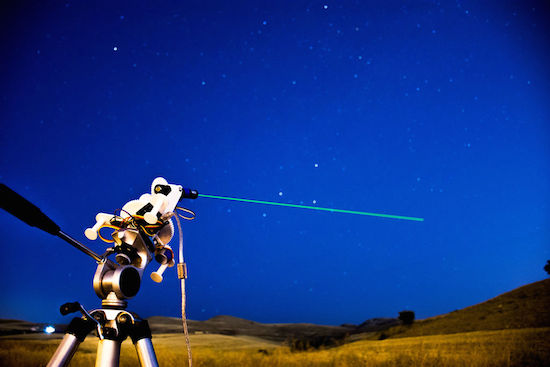
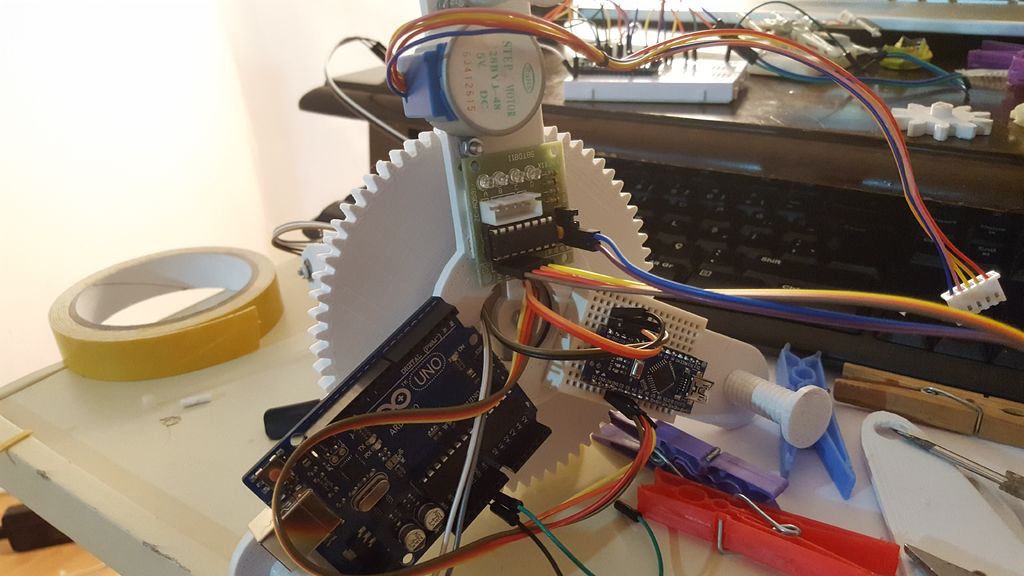
Maker and astronomy enthusiast Görkem Bozkurt has built a GoTo telescope mount-inspired system that points and tracks any object in the sky using its celestial coordinates. The aptly named Star Track sports a 3D-printed structure along with a pair of Arduinos (an Uno and Nano), a gyroscope, an RTC module, two low-cost 5V stepper motors, and a laser pointer.

Many computerized telescopes have a type of telescope mount and related software which can automatically point a telescope to astronomical objects that the user selects. Called GoTo mounts. Like a standard equatorial mount, equatorial GoTo mounts can track the night sky by driving the right-ascension axis. Since laser pointers are a perfect way to point stars, I thought a laser pointer with a GoTo mount would be a perfect tool for locating stars and to track them.

First I had to design a two-axis mount.

1. 360-degree rotating axis for RA
2. A up-down axis for DEC

After aligning the RA axis with the North Celestial Pole, an Arduino connected with an RTC should be able to calculate and track RA with sidereal time. And you can adjust the two axes to the user input from a computer via serial.

But first I had to find a way to precisely point the mount to given degrees. The main idea was to use step motors and give them a specific step to take. But after a few tests that was not totally accurate.

Instead, I used a gyroscope placed on the laser pointer to track the degrees on the two axes, this way I was able to send a command to the step motor to start and stop the movement if necessary.

Intrigued? Bozkurt provides a basic overview of positional astronomy on his project page, along with all of Star Track’s 3D files, code and assembly instructions.

Turn your printer into a MOCO slider with Arduino

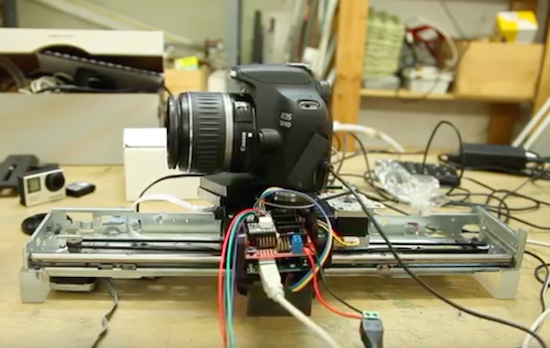
Product designer Eduard Puertas continues to impress us with his makeshift motion control projects. Recently, the animation enthusiast had come across a broken HP printer on the street; rather than let it be picked up by the garbage truck, he decided to repurpose it into a MOCO slider for stop motion and time-lapse photography.

Aside from the printer’s mechanical parts, Puertas used an Arduino Uno, some stepper drivers, and Dragonframe software to bring his idea to life. You can see the end result below!

Ride to work on an Arduino-based electric unicycle

Some people drive their car to work. Some walk. Others ride their bike. Well, in Nick Thatcher’s case, he prefers to hop on his own electric unicycle. The serial creator of self-balancing vehicles has just completed his latest project, dubbed  “Plan-B.”

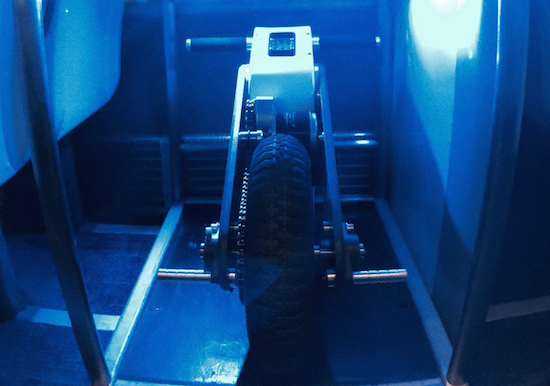
Unlike his other builds, this time Thatcher set out to make Plan-B a true “commuter” unicycle with the utmost portability–boasting a foldable design, a handle on its rear for easy carrying, and a LiFePo4 battery to keep it lightweight.

His newly-constructed personal transport is equipped with a 24V 350W geared motor and a SyRen 50A motor controller, along with an Arduino Uno and an IMU to help maintain the cycle’s stability. Beyond that, Plan-B uses a wheelbarrow wheel with a chain drive from the motor.

Watch Thatcher commute in style below!

Spinphony turns cycling into music

Spinphony is a bike installation that was built in collaboration with 72andSunny‘s Google team and their Made with Code initiative, with hopes of inspiring teenage girls to take an interest in coding.

As its name would suggest, the project combines spinning (indoor cycling) and music with each bike representing a different instrument stem of a song.

For instance, bike one controls drums, bike two might control bass and so on. The way we made it all come together was to have the volume of each stem depend on the speed at which the bike was being pedaled (i.e. the slower the RPM the quieter the stem of the song and vice versa). This is where Arduino came into play.

The prototype is based on an Arduino Uno and uses two magnets, a reed switch, RPM values, and MIDI to produce some spincredible sounds. You can see it in action below!


Prototyping a smart bulb with JavaScript, Arduino + PubNub

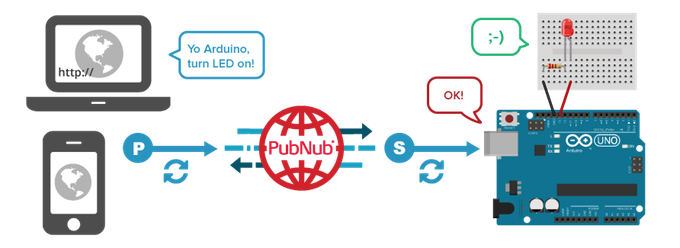
In this video, our friends at PubNub are going to create a smart home network that builds upon their previous Johnny Five tutorial. They again hack an Arduino Uno using JavaScript, but this time to create the simplest smart bulb. Because by “smart bulb,” we really just mean an LED.

The tutorial was developed by Tomomi Imura from PubNub and also uses Johnny-Five. No, not the robot from the movie Short Circuit. It is an open-source JavaScript robotics framework that lets you program an Arduino with Node.js. The bulb itself is remotely controlled via a web portal.

To establish the realtime communication between the Arduino and a web browser, the PubNub Data Stream Network (DSN) is used. PubNub provides global infrastructure and allows you to build and scale real-time apps and IoT devices quite easily.

The remote controller (web app) is written in JavaScript. This is a simple user interface that includes only one button. While a completed code sample is available on CodePen, this tutorial employs a simplified version so that it’s easier to follow along.


Build your own coin-operated Wi-Fi hotspot ticketing system

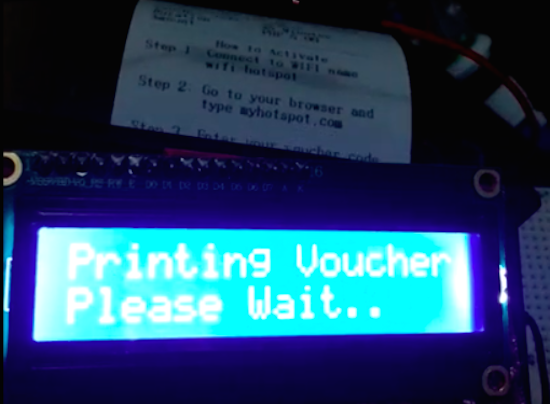
Reddit user “jeff122885” has come up with a fairly simple yet clever coin-operated ticketing system for his Wi-Fi network. The setup consists of a Ch-926 multi-coin acceptor, a MikroTik Groove, and an Arduino Uno with a microSD card module. The unique password for the hotspot is stored in the SD card and read by the Arduino.

Once the coins are deposited, the voucher code, Wi-Fi name, duration, cost, and instructions on how to connect are printed onto a receipt. You can see it all in action below!

OMG, this DIY split flap display is awesome

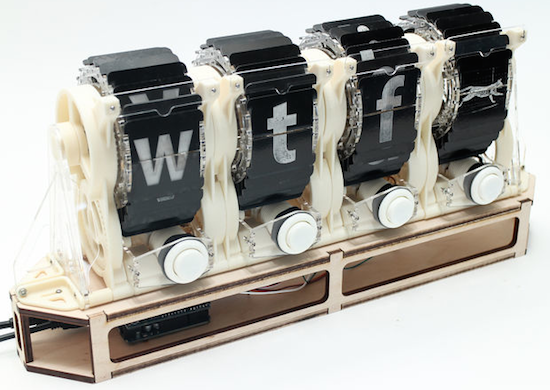
Let’s face it, there’s something magical about split flap displays. Common throughout older airports and train stations, the electromechanical devices are used to show changeable alphanumeric text (e.g. arrival and departures), fixed graphics, or in Jonathan Odom’s case, Internet slang.

With three-letter abbreviations like BRB, LOL, OMG and SMH commonplace in today’s smartphone and online conversations, the Maker decided to bring text and animation back to its mechanical roots with his own split flap display. As you can see in the video below, an arcade button under each frame enables him to cycle through all 26 letters to spell out his thoughts in acronym form, while a fourth frame reveals an animation of the very first cat video (by Eadweard Muybridge).

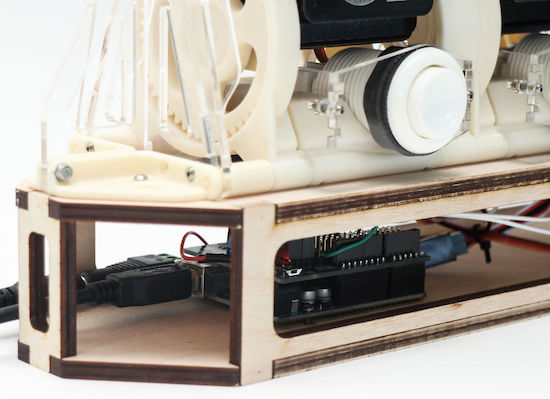
Structurally, the DIY gadget consists of 3D-printed parts, laser-cut acrylic for the tongue, flaps, brackets, wheels and spars, and plywood for the base. Everything is assembled by hand using screws and nuts. In terms of electronics, an Arduino Uno and Adafruit Motor Shield control a set of servo motors.

The configuration I built has four modules, but you could build as many as you want and connect them. The Arduino motor shield has 16 channels, so if you want more than than that you’ll have to find another means of controlling the rotation.

Want one for your desk? You can find all the necessary files and code on its project page, and see the final product in action below!

Maker uses Arduino to get revenge on his noisy neighbors

For our throwback project of the week, we stumbled upon a YouTube video that dates all the way back to 2012. And while the viral clip itself (which has over 1.4M views) may be a few years old, the problem it solves is timeless.

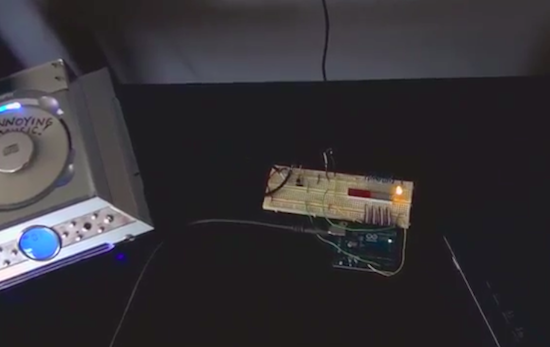
Unfortunately, you don’t get to choose your neighbors; however, what can choose is how you put up with them. After growing tired of the folks next door failing to turn down their stereo, Maker “Jamil” came up with an ingenious way to put an end to the noisy behavior: fight the loud music with, well, even louder music.

As you can see in the video below, Jamil programmed an Arduino Uno with a microphone sensor to detect whenever the nearby resident’s tunes exceeded his preferred threshold. When this occurs, it triggers a CD player to play incredibly annoying music through his massive speakers. His track of choice? “Who Let the Dogs Out?” by The Baha Men.

Maker builds his own Ghostbuster proton pack

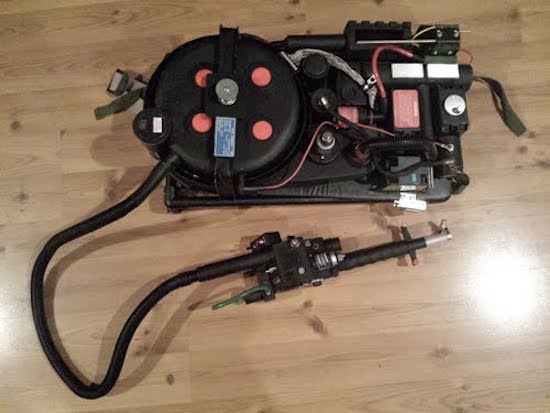
Anyone who has ever watched Ghostbusters is surely familiar with the iconic proton pack–a handheld wand connected to a backpack-sized particle accelerator used for capturing ghosts. With a remake of the ‘80s flick about to hit theaters, what better time for a DIY prop equipped with full-featured user control and Hollywood-like effects?

That’s exactly what John Finocchiaro has done using a bunch of household items, including a five gallon bucket for the cyclotron, a garlic powder container for the N-Filter, a hairbrush for the PKE meter, spark plug wire, cardboard tubes, pill bottles, handles from power tool cases, a couple electrical boxes, and some other miscellaneous parts.

The proton pack is based on an Arduino Uno along with a Seeed Studio SD card shield containing .WAV files. The Arduino supplies all of the sound and light effects, except for the cyclotron lights which use a 555 timer and 4017 decade counter. The sound is amplified through an old computer speaker board, while two homemade boards control the lights.

The red lights on the cyclotron area are supposed to be asymmetrical. This project took two weekends to make, one for the pack and one for the gun. It is attached to a homemade  PVC “ALICE” frame. I tried to make it as light as possible, the whole unit weighs just 13 lbs. Its not fully “screen accurate” but more like a “Model 3″ version. The addition of a bunch of actual electronic components make it look more like it is a  functional unit instead of a prop.
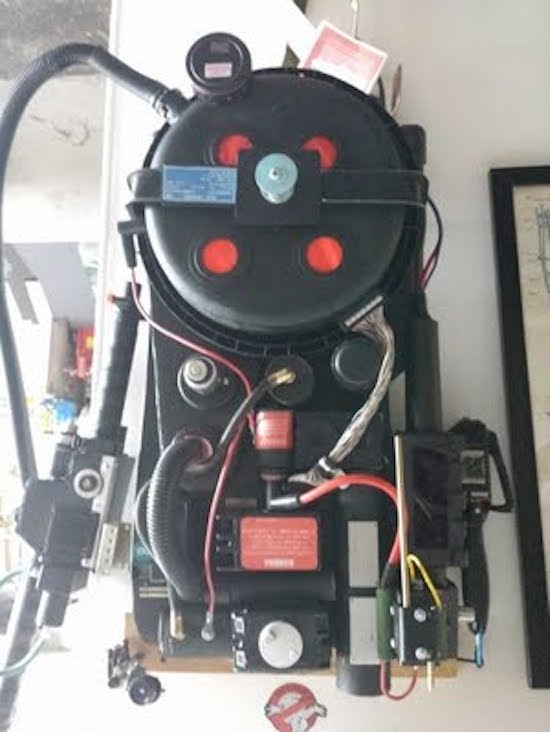
The power meter on the gun and pack are synced to show an accumulating “charge” while a generator sound plays. When armed, the lights on the gun blink and the generator sound intensifies. When it’s fired, the barrel lights and the blast sound plays as the charge meter decreases to zero. It then shuts off and recharges.

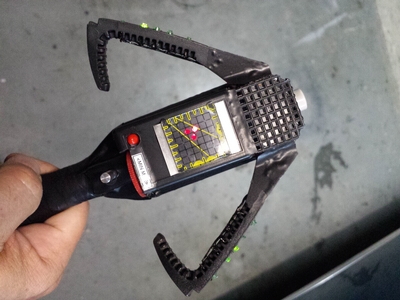
It came out so well I also made a PKE meter (ghost detector) that also functions with lights and sound. The arms are powered by a small gear motor. The lights are a blinking LED and 10 green LEDs that sequence via a 555 timer/4017 decade counter. It’s crammed into a hairbrush.

I also have made a ghost trap and pedal that opens and closes via a servo mechanism. The interior of the ghost trap is made from an old laser disc lit with a row of LEDs, so it looks “deeper” inside than it should. It works with the pedal as it does in the movie. It’s not full height, I am trying to keep all this stuff compact. Anyway, after 30 years I’m sure there would be some miniaturization in the equipment by now!
And what would a full Ghostbusters getup be without some Ecto Goggles? Finocchiaro constructed his own pair from scratch using foamboard and paper with aluminum strips for strength. The outside is textured to resemble a military-type finish, while the lens tubes illuminate green to add a “glow,” and a red LED blinks on the side.

Whether a fan of the movie, a fan of cosplay, or simply a fan of making, you’ll want to check out the entire build here.