Posts with «uno» label

Arduino door lock is activated by opening an incognito window

Mike, CEO of the Useless Duck Company, continues to make us laugh with his hilarious Arduino innovations. Despite all the comical projects, which range from a fedora that tips itself to an automated toilet paper-dispensing machine, he may be onto something with one of his more recent contraptions: a door that locks itself whenever you’re shopping for gifts for your wife or significant other.

If you don’t want Google Chrome to save a record of what you visit and download, you can always browse the web in incognito mode However, what happens if your loved one bursts into the room and catches you in the act of making a purchase?

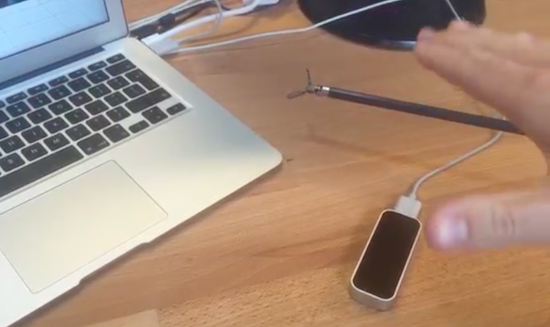
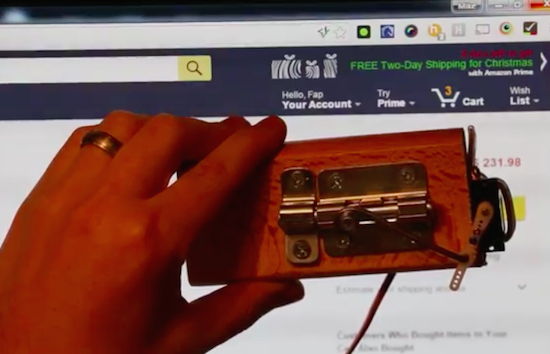
To solve this common problem, Mike has hooked his PC up to an Arduino Uno that’s connected to a servo-controlled lock. A self-written program then checks all of the browsers running on his computer, and if it finds one in incognito mode, it sends a signal to the Arduino to bolt the door.

Play some Super Arduino Bros. tunes with percussion

Have you ever wished your Arduino project could play tunes, or even just note-based sound effects? Connor Nishijima has, and that’s why over the last three years he has been hard at work developing Miduino–a free web service that enables Makers to automatically convert their MIDI music into ready-made sketches.

Unlike any built-in Arduino noisemaking functions such as tone(), Miduino’s output is polyphonic–meaning you can play up to six notes at once. Most recently, he has added two major updates to the service: percussion tracking and switch to software-based timing.

Now the only thing setting your Arduino apart from an NES is a proper triangle wave! While it’s not fully featured yet for the whole MIDI percussion spectrum, your basic snares, kicks and hi-hats will be joining the music!

Originally I collaborated with Len Shustek to tie his Playtune library into the service, but his library requires a hardware timer for each active note–which has its ups and downs.

With a hardware timer you’ll get extremely crisp sound every time, but an Arduino Uno can only play up to three notes at once and the original code didn’t know what to do with MIDI percussion channels.

Instead, Nishijima is polling for new notes and their expirations at about 22,050Hz using Timer 1 and generating different types of percussion with some RNG tricks. Admittedly it hasn’t been perfected yet, as some songs need the polling frequency turned down to avoid crashes. (Cut the Arduino some slack, it’s not supposed to be good at this!)

To demonstrate his latest upgrades, Nishijima plays Super Mario Bros. theme song with LEDs blinking to the iconic tunes. Although some would argue that this could be faked quite easily, the Maker has gone ahead and shared the code along with a couple other examples for any doubters–these include Van Halen’s “Eruption” and Mozart’s “Rondo Alla Turca.”


Check the time on a beautiful wooden word clock

When it comes to telling time, Makers like to go beyond simply reading moving hands or looking at a digital display. In Imgur user Grahamvinyl’s case, that’s a slick word clock comprised of a walnut veneer, clear epoxy, LEDs, letters, and Arduino.

Grahamvinyl cut the clock from the back of an acoustic guitar and sides, and then strung together individually addressable RGB strips. A matrix of letters in Art Deco font spell out the time horizontally. Pieces of spraypainted 1/4-inch MDF act as dividers (so the color doesn’t bleed from one letter to the next), and a sheet of wax paper diffuses the light.

I haven’t seen another word clock designed the same way: clear epoxy holds the interior of the letters in place, so I didn’t need to use a stencil font.

The display changes every five minutes, and counts two minutes before and after the actual time (e.g. 10:13 and 10:17). Meanwhile, numbers that take longer to spell out such as “fifteen” are shown as “quarter past.”

The Arduino Uno-controlled clock also has a button on its side that allows it to show the numerical time—from far away, you’ll notice the illuminated letters actually create the shapes of numbers. The hours show up dimmer, the minutes brighter. Another push reveals the numerical date in the same fashion. You can even program it to flash a special message on your birthday.

Grahamvinyl notes that there are three buttons in total, each wired to an input on the Arduino. Right now, however, only the top one is functional. The idea is to eventually have the bottom two cycle through colors or set the time. Beyond that, the Maker hooked up a USB connection to the clock so that it would be easily programmable.

Interested in building your own word clock? Check out more images on Imgur, and find the code on GitHub.

Listen to a computer hardware orchestra rock out to Nirvana

What do you get when you combine 64 floppy drives, eight hard disks, and two scanners? An incredible computer hardware orchestra that can rock out like Kurt Cobain. Created by Pawel Zadrozniak, the Floppotron is not only capable of covering ‘90s hits like Nirvana’s “Smells Like Teen Spirt,” but can play other tunes ranging from Darth Vader’s Imperial March to the theme song of the TV series “Hawaii Five-O.”

As for how the old-school tech synthesizes such tunes, Zadrozniak explains:

Every device with an electric motor is able to generate a sound. Scanners and floppy drives use stepper motors to move the head with sensors which scans the image or performs read/write operations on a magnetic disk. The sound generated by a motor depends on driving speed. The higher the frequency, the greater the pitch. Hard disks use a magnet and a coil to tilt the head. When voltage is supplied for long enough, the head speeds up and hits the bound making the “drum hit” sound. The disk head coil can also be used as a speaker to play tones or even music, but… that would be too easy and too obvious.

Every column of eight floppy drives is connected to one 8-channel controller built on ATmega16 microcontroller. One controller acts as one voice with envelope simulation – the higher the volume, the more drives are playing. This allows to make ADSR-like shape and simulate a musical instrument, like a piano (exponential decay) or string instrument (sine, “vibrato”). The boards which were made a few years ago, were designed as a standalone “players” with optional USB-to-UART bridge and was not intended to be chained. My goal was to re-use old stuff and get the job done as fast as possible, so I used the on-board ISP (which in fact is a SPI interface) connector to link 8 drivers in a SPI chain. Long SPI chain with unidirectional communication is not an example good and reliable design, but it did not require any hardware modification and took a minute to build a controller network, so let’s call it… good enough for this kind of project.

Scanner and disk head controllers share the same base with floppy controllers, but have a different “instrument interface.” For driving the coils, I used two push-pull outputs (H-bridge) built with discrete SMD MOSFETs. Scanner head controllers were built using of-the-shelf boards – an Arduino Uno (firmware also builds for ATmega328) and L298 breakout to save time needed to draw and etch the boards. PC interface (another Arduino board) receives the data over UART (USB-UART), buffers the messages and keeps the timings while passing packets to “musical instruments” over SPI interface, so a Windows hiccup will not affect the playback. It can also be driven by anything else like Raspberry Pi, Android smartphone (with USB-UART or UART-over-Bluetooth adapter) or another microcontroller.

You can read all about the Floppotron here, or check out its latest jam session below!

Grab things with an Arduino robotic gripper

Sam Baumgarten and his friend have developed a pretty rad robotic gripper with the help of Arduino and 3D printing. The gripper itself consists of three large hobby servos joined to the fingers with a linkage. The underactuated fingers have a force sensor under each contact point, while the control glove is equipped with tiny vibrating motors at the fingertips. This, of course, provides haptic feedback to ensure that the user doesn’t crush anything–the greater the pressure, the stronger the motors vibrate.

The gripper is mounted to a handle with abrasive tape–the same kind found on staircases and skateboards. The tape is also used on each finger for optimal gripping. A box at the base of the pole houses all of the electronics, which include an Arduino Pro Mini for controlling the addressable LEDs on top, another Arduino for handling the communication and fingers, and a battery for power.

Aside from the vibration motors, the glove features flexible resistors on the back of the fingers, an LED strip for visualization, a breakout board for measuring the resistance from the flex sensors, a battery, an Arduino Uno for processing, and an XBee module for transmitting the signals to the Arduino in the gripper.

If you think this sounds awesome, wait until you see it in action. Baumgartnen has shared a demo of the project, along with a detailed breakdown of his build. Kudos to Hackaday for finding this incredible piece of work!

A giant, Arduino-powered scrolling LED sign costs $15/foot

If you’ve ever wanted your own Times Square-like zipper, albeit a little smaller, you’re in luck. That’s because Josh Levine has created a giant scrolling LED display costing around $15 per foot, which consists of an Arduino Uno, a power supply, and seven programmable NeoPixel strips. The Maker also used a few pieces of plywood with a couple of aluminum angles glued to the top and bottom to enhance its sturdiness and appearance.

Equipped with 2,688 RGB pixels, the 12-foot-long sign is capable of showing text at 80 frames per second. Aside from basic scrolling messages, other features include a countdown timer with lookup-based gamma correction, column-by-column color control, custom fonts, sprite graphics with animation, and more.

The build is so simple, that you should be able to figure it out from looking at the pictures. Stick the strips to something, add some power, connect the Arduino data out pins to the strips’ data in pins.

The secret sauce is in the software. You can read about the parallel processing technique used here.

Bigger is better, right? Levine chose this size for his ticker only because it was the longest thing that could make it down his staircase–plus 400-pixels-long gives a refresh rate of 80 frames per second, which is just fast enough for nice animations. That being said, the Maker does note that he’d love to one day build a 100-foot-long sign “if you could find him a long enough surface to mount it on.” Until then, you can see it in action below and read all about the project on its page.

Venduino is a DIY Arduino vending machine

Ryan Bates has built a miniaturized vending machine from scratch using an Arduino Uno, four continuous rotation servos, and a Nokia 5110 LCD. The device, dubbed “Venduino,” includes four input buttons to make a selection, an LED indicator, and a 12V light strips to illuminate the inside of the cabinet. Whether it’s candies, toiletries, game cartridges, or miscellaneous items you’re looking to dispense, the possibilities are endless. Simply insert a coin, choose a product, and repeat.

Sound like something you’d like in your dorm room or cubicle? Bates has shared his code and schematics, and provided a detailed breakdown of his build below.

Maker builds his own Ghostbuster proton pack

Anyone who has ever watched Ghostbusters is surely familiar with the iconic proton pack–the combination of a handheld wand and backpack-sized particle accelerator that’s the weapon of choice for weakening ghosts and aiding in capturing them. And with a remake of the ‘80s flick coming out in a few days, what better time for a DIY prop equipped with full-featured user control and Hollywood-like effects?

That’s exactly what John Fin has done using a bunch of household items, including a five gallon bucket for the cyclotron, a garlic powder container for the N-Filter, a hairbrush for the PKE meter, as well as spark plug wire, cardboard tubes, pill bottles, handles from power tool cases, and a couple electrical boxes and miscellaneous parts.

The proton pack is based on an Arduino Uno along with a Seeed Studio SD card shield containing .WAV files. The Arduino supplies all of the sound and light effects, except for the cyclotron lights which use a 555 timer and 4017 decade counter. The sound is amplified through an old computer speaker board, while two homemade boards control the lights.

The red lights on the cyclotron area are supposed to be asymmetrical. This project took two weekends to make, one for the pack and one for the gun. It is attached to a homemade  PVC “ALICE” frame. I tried to make it as light as possible, the whole unit weighs just 13 lbs. Its not fully “screen accurate” but more like a “Model 3″ version. The addition of a bunch of actual electronic components make it look more like it is a  functional unit instead of a prop.

The power meter on the gun and pack are synced to show an accumulating “charge” while a generator sound plays. When armed, the lights on the gun blink and the generator sound intensifies. When it’s fired, the barrel lights and the blast sound plays as the charge meter decreases to zero. It then shuts off and recharges.

It came out so well I also made a PKE meter (ghost detector) that also functions with lights and sound. The arms are powered by a small gear motor. The lights are a blinking LED and 10 green LEDs that sequence via a 555 timer/4017 decade counter. It’s crammed into a hairbrush.

I also have made a ghost trap and pedal that opens and closes via a servo mechanism. The interior of the ghost trap is made from an old laser disc lit with a row of LEDs, so it looks “deeper” inside than it should. It works with the pedal as it does in the movie. It’s not full height, I am trying to keep all this stuff compact. Anyway, after 30 years I’m sure there would be some miniaturization in the equipment by now!

And what would a full Ghostbusters getup be without some goggles. Fin constructed his own pair from scratch using foamboard and paper with aluminum strips for strength. The outside is textured to resemble a military-type finish, while the lens tubes illuminate green to add a “glow,” and a red LED blinks on the side.

Whether a fan of the movie, a fan of cosplay, or simply a fan of making, you’ll want to check out the entire build here.

Arduino simulator puts you in the driver’s seat of a toy car

As part of their final project at EDN – Navàs, robotics students Rafart Jordi and Marc Thomas recently built an impressive Arduino simulator that captures video from a camera-equipped RC vehicle and displays it on a TV screen, making it feel as though you’re in the driver’s seat of a shrunken-down car.

The simulator is driven by an Arduino Uno along with an IBT-2 H-Bridge to control the 24V motors, and wirelessly communicates with the modified toy car via an XBee module.

You have to see it in action below!

Maker adds gesture control to a surgical robotic

The Da Vinci system is one of the most popular surgical robots around, which allows surgeons to perform operations through only a few small incisions. The device works by translating a doctor’s hand movements into smaller, precise movements of tiny instruments inside the patient’s body. As ubiquitous as they may be in hospitals, chances are it’s never been operated quite like this before.

That’s because Julien Schuermans has managed to connect the robotic surgical tool’s hardware up to a LeapMotion controller, making its small forceps gesture-controlled. You can see how it all works in the video below.

As The Verge explains, four Arduino Uno-controlled servos are fitted to the pulleys and cables that handle the rotation, angle and gripping mechanism. Gesture input is captured by the Leap Motion’s infrared cameras, which is then converted into instructions for these servos, enabling the user to command the endoscopic device with just a wave of the hand.