CH376S USB Read/Write module
Have you ever wondered if there was a way to store and retrieve data from a USB stick with an Arduino UNO? Most people choose SD cards to store their project data, but you may be surprised there IS a way!
IC Station have a nice little module which allows you store and retrieve your Arduino (or other MCU) project data to a USB stick.
I am not too sure why USB storage is not widely used in Arduino projects? These modules are not expensive, they have been around for quite a while, and are relatively simple to use. You do not need any libraries to get them to work, however, I must say that documentation for this module is not that easy to find. This site and this document proved to be very useful in my endevour to get this module working, and I hope my tutorial below will help you get started and bridge some of the information gaps.
The "CH376S USB read/write module" has a CH376S chip onboard which does most of the hard work for you. All you have to do is send the module some commands from the Arduino and the CH376S chip will do the rest. You can communicate with the module in three different ways:
- Parallel communication
- SPI communication
- and Serial (UART) communication.
This project will show you the connections and code for the Serial (UART) communication method only.
Parts Required:
- Arduino UNO or compatible board
- CH376S USB Read Write Module
- Female to Male jumper wires
- Breadboard (optional)
- USB stick
- LED + 330 ohm resistor (optional)
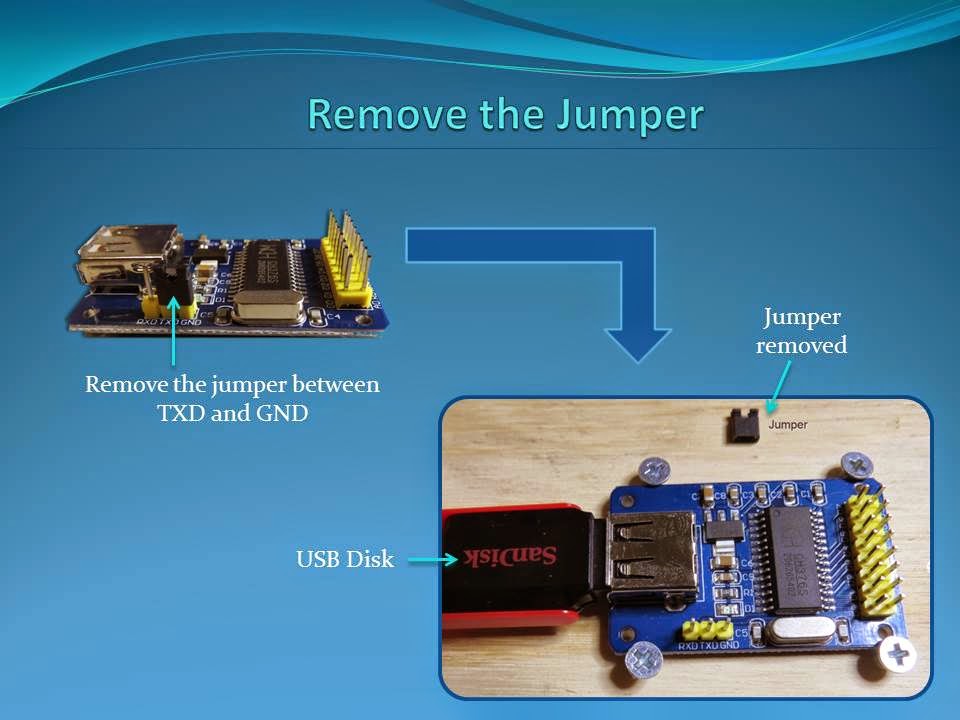
Remove the Jumper
When the CH376S USB module arrives in it's package, it will have a jumper between the TXD pin and GND. You will need to remove this jumper to make the necessary connections between the Arduino UNO and the CH376S USB module.
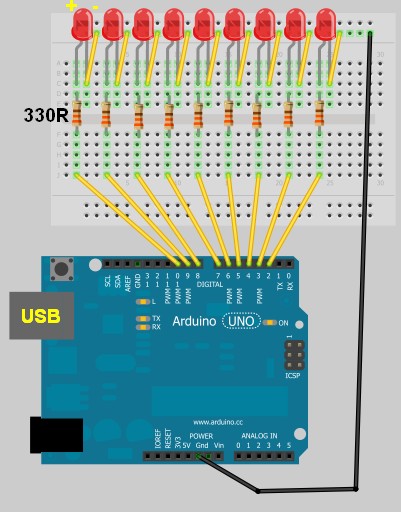
Fritzing Sketch
Please note, that the Arduino Sketch makes use of the Arduino UNO's onboard LED on digital pin 13. The Fritzing sketch below shows an LED + 300 ohm resistor on a breadboard. This is optional. The LED is not a necessary component of CH376S module communication. Also be aware that the CH376S USB module has an onboard LED just above the TXD and GND pins near the USB port. This LED will only turn on providing the CH376S module is in USB mode AND a USB device has been inserted into the USB port. Both conditions must be met before the module's onboard LED will illuminate. You will not see the LED turn on just by powering the board.
The wire diagram below is the correct setup for Serial communication between an Arduino UNO and the CH376S module. If you wish to use SPI or Parallel communication, you will need to refer to the datasheet.

Arduino Sketch
1 |
|