Posts with «programming» label

Minibloq examples

Minibloq seems to be a great way to program for those unable to injest the code writing. But for Godssake where are the tutorials in English ? Please guys if anyone can post few medium level examples on youtube or give a link...I searched but mostly in non-English.

Using A TeensyLC To Emulate The XBOX 360 Controller

After the release of Mortal Kombat X, [Zachery’s] gaming group wanted to branch out into the fighter genre. They quickly learned that in order to maximize their experience, they would need a better controller than a standard gamepad. A keyboard wasn’t going to cut it either. They wanted a fight stick. These are large controllers that look very much like arcade fighting controls and include a joystick and large buttons. [Zachery’s] group decided to build their own fight stick for use with a PC.

[Zachery] based his build around the TeensyLC, which is a 32 bit development board with an ARM processor. It’s also compatible with Arduino. The original version of his project setup the controller as a HID, essentially emulating a keyboard. This worked for a while until they ran into compatibility issues with some games. [Zachery] learned that his controller was compatible with DirectInput, which has been deprecated. The new thing is Xinput, and it was going to require more work.

Using Xinput meant that [Zachery] could no longer use the generic Microsoft HID driver. Rather than write his own drivers, he decided to emulate the XBOX 360 controller. When the fight stick is plugged into the computer, it shows up as an XBOX 360 controller and Windows easily installs the pre-built driver. To perform the emulation, [Zachery] first had to set the VID and PID of the device to be identical to the XBOX controller. This is what allows the Microsoft driver to recognize the device.

Next, the device descriptor and configuration descriptor had to be added to the Teensy’s firmware. The device descriptor includes information such as USB version, device class, protocol, etc. The configuration descriptor includes additional information about the device configuration. [Zachery] used Microsoft Message Analyzer to pull the configuration descriptor from a real XBOX 360 controller, then used the same data in his own custom controller.

[Zachery] programmed the TeensyLC using the Arduino IDE. He ran into some trouble here because the IDE did not include the correct device type for an Xinput device. [Zachery] had to edit the boards.txt file and add three lines of code in order to add a new hardware device to the IDE’s menu. Several other files also had to be modified to make sure the compiler knew what an Xinput device type was.  With all of that out of the way, [Zachery] was finally able to write the code for his controller.


Filed under: Arduino Hacks, ARM
Hack a Day 15 Jul 03:00

Arduinos (and other AVRs) Write To Own Flash

In this post on the Arduino.cc forums and this blog post, [Majek] announced that he had fooled the AVR microcontroller inside and Arduino into writing user data into its own flash memory during runtime. Wow!

[Majek] has pulled off a very neat hack here. Normally, an AVR microcontroller can’t write to its own flash memory except when it’s in bootloader mode, and you’re stuck using EEPROM when you want to save non-volatile data. But EEPROM is scarce, relative to flash.

Now, under normal circumstances, writing into the flash program memory can get you into trouble. Indeed, the AVR has protections to prevent code that’s not hosted in the bootloader memory block from writing to flash. But of course, the bootloader has to be able to program the chip, so there’s got to be a way in.

The trick is that [Majek] has carefully modified the Arduino’s Optiboot bootloader so that it exposes a flash-write (SPM) command at a known location, so that he can then use this function from outside the bootloader. The AVR doesn’t prevent the SPM from proceeding, because it’s being called from within the bootloader memory, and all is well.

The modified version of the Optiboot bootloader is available on [Majek]’s Github.  If you want to see how he did it, here are the diffs. A particularly nice touch is that this is all wrapped up in easy-to-write code with a working demo. So next time you’ve filled up the EEPROM, you can reach for this hack and log your data into flash program memory.

Thanks [Koepel] for the tip!


Filed under: Arduino Hacks

MIT's light-up robot garden teaches you how to code

If you're teaching kids how to code, what do you do to show that software makes an impact in the real world? MIT has a clever idea: a robot garden. The project lets you control a grid of Arduino-linked "plants" through programming that makes them blossom and light up in pretty (and occasionally mesmerizing) ways. It'll even teach the virtues of distributed computing -- you can tell these leafy robots to bloom or change color in algorithm-driven sequences. The garden is just a demo for now, but it'll eventually turn into an easy-to-replicate curriculum for students who'd otherwise have to settle for seeing their results on-screen.

[Image credit: Jason Dorfman, CSAIL]

Filed under: Science, Software

Comments

Source: MIT News

LittleBits' Arduino module puts the focus on programming, not wiring

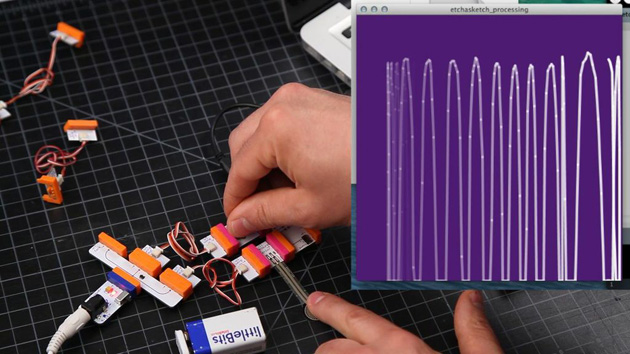
Getting your feet wet with programmable hardware can be tricky; even if you're comfortable with coding, you may not want to break out the soldering iron just to build a usable device. LittleBits is aware of just how intimidating these make-it-yourself gadgets can be, so it has just launched its first software-programmable module, the Arduino at Heart. As the name implies, it's an Arduino core (the same as the Leonardo) designed to fit into LittleBits' simple, building block approach to circuit boards. If you want to attach a light, motor or sensor to the Arduino board, you just snap it on -- you can spend more of your time coding rather than dealing with wiring and other hardware hassles. %Gallery-slideshow193425%

Filed under: Household, Peripherals

Comments

Source: LittleBits

How to make your own Primo prototype using digital fabrication and Arduino boards

Primo‘s team sent us exciting news from their HQ about their contribution to the open source community. After the successful Kickstarter campaign to launch the wooden play-set that uses shapes, colours and spacial awareness to teach programming logic through a tactile, warm and magical learning experience, they took a step further. They released all the documentation and the instructions to produce a Primo prototype,  different from the product that they make and sell.

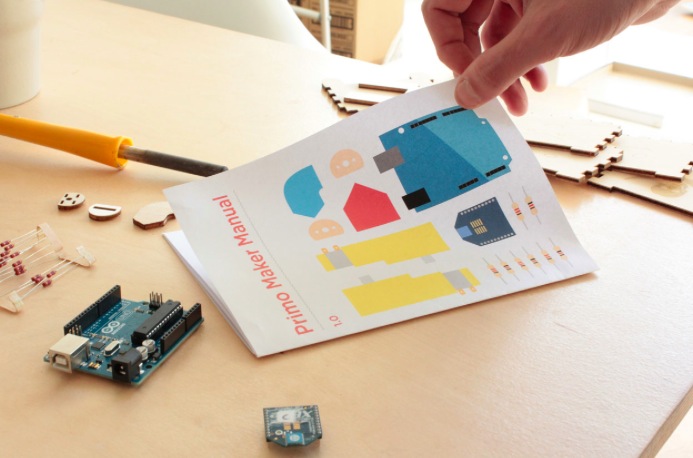
We just finished the first edition of the Primo play-set open documentation, that includes the design files that we used to make our first prototype and a step-by-step guide to make your own version of the Primo play set. This “maker” version of our product can be assembled using rapid prototyping techniques and common tools like Arduino boards.

We recently published a preview of this documentation just for our Kickstarter backers, who already started to build their projects and to translate the document in their language. The FabLab in São Paulo for example already translated it in Brasilian Portuguese, while other languages like Dutch, Italian and Japanese are now in progress.

The whole documentation is completely transparent: it’s written in Markdown using Jekyll and GitHub pages. In this way it is very easy for creators to modify, translate and use it as a starting point for their projects.

In parallel we are developing an industrial version of our product, using manufacture-quality materials and custom Arduino-compatible electronic boards.


And if you want to read about the experience of a dad making a DIY version in 1 month and a half of work, follow this link.

Primo is an Arduino At Heart partner. If you have a great project based on Arduino and want to join the program, read the details and then get in touch with us.

Arduino Blog 16 Apr 22:17

How many versions of arduino have you got?

I've got a few versions of arduino on my pc and I'm probably wasting space but I bet I'm not the only one.
Just wondering what versions are best to keep. I believe there are incompatabilities with existing code for some older or newer versions.
At the moment I've got 21,22 and 23 and 1.0.3.
Are there any I haven't got I should have and which of these should I ditch.
Also is there a way to tell each version where it's sketchbook is and keep it. I've noticed that when I switch ide's I have to change the sketchbook back. Really annoying.

Let's Make Robots 08 Mar 05:29

Punch Through's new Arduino board can stay wireless forever (video)

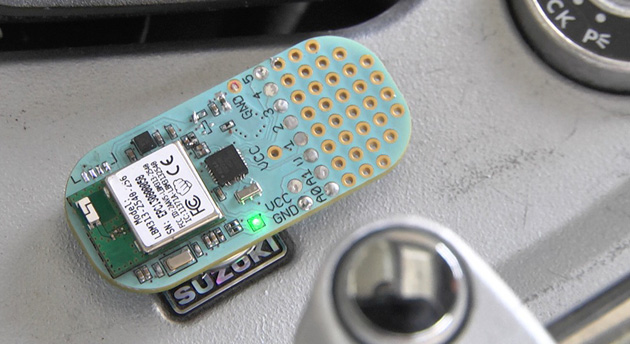
You'll have to plug in a typical Arduino-compatible board at some point in its life, whether it's to add code or just to supply power. Not Punch Through Design's upcoming Cortado, however. The tiny device centers on a custom Bluetooth 4.0 LE module that both enables wireless programming (including through mobile apps) and helps the board last for more than a year on a replaceable watch battery. In fact, the Cortado will already be powered up when you get it -- you can start coding before you've opened the shipping box. It should also be relatively flexible for its size with a built-in accelerometer and the ability to serve as an Apple iBeacon transmitter. Punch Through is crowdfunding the board with hopes of shipping its first units in May. If you're interested, you can pledge $18 to pre-order a Cortado; there's also a helpful promo video after the break.

Filed under: Peripherals

Comments

Via: Make

Source: Punch Through Design

Review – “Ardublock” graphical programming for Arduino

Introduction

After helping many people get started with the world of Arduino and electronics,  we still find a small percentage of people who are turned off by the concept of programming or have trouble breaking larger tasks into smaller ones with regards to writing algorithms for their code/sketch.

So after being introduced to a new graphical programming tool called “Ardublock“, we were excited about the possibilities wanted to share it with our readers. Ardublock provides a truly graphical and non-coding solution to controlling an Arduino, that is an open-source product and thus free to download and try for yourself.

Installation

Ardublock is a Java application that runs from inside the Arduino IDE, which can be downloaded from here. It’s only one file, that needs to be placed in a new folder in the Arduino IDE. The folder names must be the same as shown below:

Once you’ve copied the file, simply open the Arduino IDE and select Ardublock from the Tools menu:

From which point a new window appears – the Ardublock “development environment”:

 Using Ardublock

It’s quite simple – you simply select the required function from the menu on the left and drag it into the large area on the right. For a quick example where we blink the onboard LED on and off – watch the following video:


The following image is the screen capture of the program from the video:

As you can see the “blocks” just fit together, and parameters can be changed with the right mouse button. After a few moments experimenting with the Ardublock software you will have the hang of it in no time at all.

And thus you can demonstrate it to other people and show them how easy it is. And there is much more than just digital output controls, all the functions you’re used to including I2C, variables, constants, servos, tone and more are available.

The only technical thing you need to demonstrate is that the Arduino IDE needs to stay open in the background – as once you have finished creating your program, Ardublock creates the required real Arduino sketch back in the IDE and uploads it to the board.

This is also a neat function – the user can then compare their Ardublock program against the actual sketch, and hopefully after a short duration the user will have the confidence to move on with normal coding.

Conclusion

Ardublock provides a very simple method of controlling an Arduino, and makes a great starting point for teaching the coding-averse, very young people or the cognitively-challenged. It’s open source, integrates well with the official IDE and works as described – so give it a go.

And if you enjoyed this review, or want to introduce someone else to the interesting world of Arduino – check out my book (now in a third printing!) “Arduino Workshop” from No Starch Press.

In the meanwhile have fun and keep checking into tronixstuff.com. Why not follow things on twitterGoogle+, subscribe  for email updates or RSS using the links on the right-hand column? And join our friendly Google Group – dedicated to the projects and related items on this website. Sign up – it’s free, helpful to each other –  and we can all learn something.

The post Review – “Ardublock” graphical programming for Arduino appeared first on tronixstuff.

Hexy’s Back in the Maker Shed

After selling out completely over the Holidays, a new shipment of Arcbotics' Hexy the Hexipod has arrived in the Maker Shed. Hexy comes in kit form with well written documentation and tutorials which make learning complex robotics straightforward and fun!

Read the full article on MAKE