Posts with «peripherals hacks» label

Learning to Reverse Engineer on a Broken Printer

When a Lexmark inkjet printer stopped working, [Mojobobo] was able to claim it as his own. He quickly realized that the machine was flooded with ink and not worth repairing, but that didn’t mean he couldn’t still find a use for it. When he learned that the printer’s firmware was not only upgradable but also unprotected, he knew he should be able to get the printer to do his own bidding.

[Mojobobo] started his journey with the motherboard. The unit still powered up, but it was asking to insert a “duplex module” before it would boot any further. [Mojobobo] first tried to find a way to trick the duplex module sensor, but was unsuccessful. His next step was to search for some kind of serial communications port. He didn’t have an oscilloscope, so instead he used a speaker with a wire probe. In theory, if the wire was pressed against an active serial port, he would be able to hear varying tones through the speaker. Sure enough, he found some interesting tones after probing around some ports next to a “JTAG” label. He looked up some information about the nearby chip and found that it included an SPI bus.

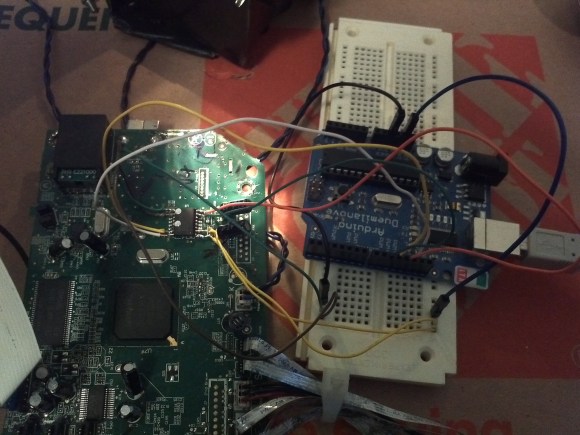
After some internet research, [Mojobobo] learned enough about SPI to have a rough idea of how to use it. Having limited tools available to him, he decided to use his Arduino to try to communicate with the motherboard. After wiring up a simple circuit, (and then re-wiring it) he was able to dump the first 4096 bytes of the motherboard’s boot loader to the Arduino via the SPI interface.

[Mojobobo's] next steps will be to find a faster way to dump the boot loader. At 9600 baud, he grew tired of waiting after three hours. Once he has the full boot loader he intends to search for a way to bypass the duplex sensor and get the board to finish booting. Then he may just use the printer for its scanning functions, or he might find other interesting uses for it.


Filed under: peripherals hacks

Fruit piano uses a different circuit than the Makey Makey

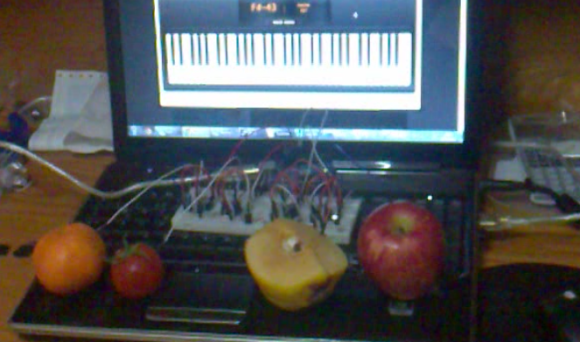
[Hasbi Sevinç] is using perishable goods in his electronics project. The orange, tomato, and two apples seen above act as keys for the virtual piano. The concept is the same as the Makey Makey which is often demonstrated as a banana piano. This implementation uses an Arduino to read the sensors and to connect to the computer running the piano program.

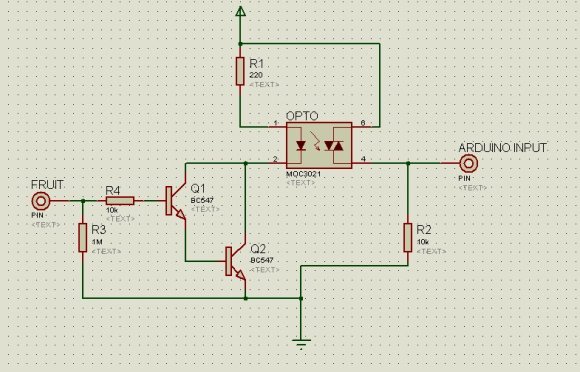
You can see there’s a fair amount of circuitry built on the breadboard. Each piece of fruit has its own channel to make it into a touch sensor. The signal produced when your finger contacts the food is amplified by transistors connected in a Darlington pair. That circuit drives the low side of a optoisolator transmitter. The receiving side of it is connected the I/O pin of the Arduino. You can see the schematic as well as a demo clip after the break.

This use of hardware frees up a lot of your microcontroller cycles. That’s because projects like this banana piano use the timers to measure RC decay. [Hasbi's] setup provides a digital signal that at most only needs to be debounced.


Filed under: arduino hacks, peripherals hacks

Turning an Arduino into a USB keyboard

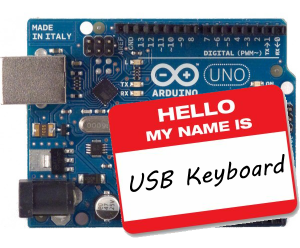
The newly released Arduino Leonardo has a few very interesting features, most notably the ability to act as a USB keyboard and mouse thanks to the new ATmega 32U4 microcontroller. This feature isn’t exclusive to the Leonoardo, as [Michael] explains in a build he sent in – the lowly Arduino Uno can also serve as a USB HID keyboard with just a firmware update.

The Arduino Uno (and Mega) communicate to your computer through a separate ATmega8U2 microcontroller. Simply by uploading new firmware with the Arduino Device Firmware Upgrade, it’s easy to have your old Arduino board gain some of the features of newer boards such as the Teensy or Leonardo.

[Michael] goes through the steps required to make this upgrade work and ends his build by showing off an Arduinofied ‘cut, copy and paste’ button project as well as a few multimedia controls. You can check those builds out in the video after the break.

If emulating a USB keyboard isn’t your thing, it’s also possible to install LUFA firmware to emulate everything from joysticks to USB audio devices. Very cool, and very useful.


Filed under: arduino hacks, peripherals hacks
Hack a Day 29 Jun 12:01

NES controllers for any Bluetooth application

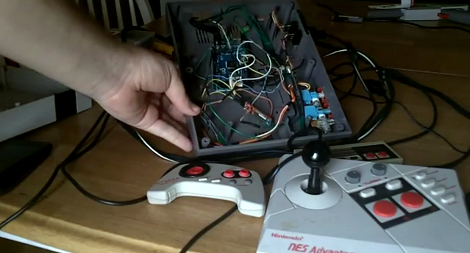
[Dustin Evans] wanted to used his original NES controllers to play emulated games. The problem is he didn’t want to alter the classic hardware. His solution was to use the connectors and enclosure from a dead NES to build a Bluetooth translator that works with any NES controller.

Here he’s showing the gutted half of an original NES. Although the motherboard is missing, the connectors for the controllers are still there. They’ve been rewired to an Arduino board which has a BlueSMiRF modem. The controller commands are harvested by the Arduino and sent to whatever is listening on the other end of the Bluetooth connection. He also has plans to add a couple of SNES ports to the enclosure so that those unaltered controllers may also be used.

In the video after the break [Dustin] walks us through the hardware setup. He then demonstrates pairing the device with an Android phone and playing some emulators with the pictured controllers.


Filed under: nintendo hacks, peripherals hacks