Posts with «mkr1000» label

Creating an online robot fighting game using Arduino MKR1000 WiFi

This is a guest post from Surrogate, a team of developers building games that people play in real-life over the internet.
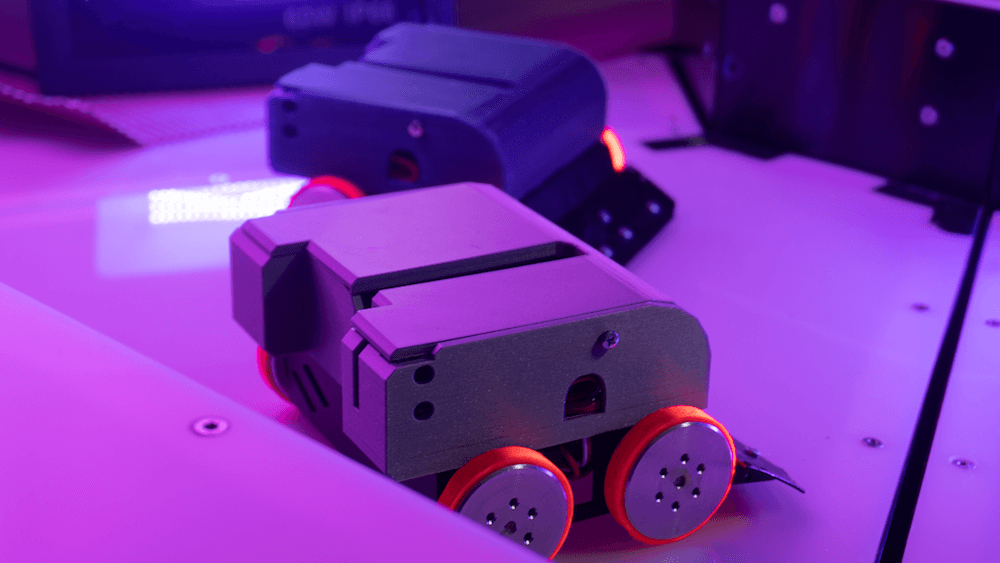
We introduced this concept last year, and have launched 3 games so far. Our final game of 2019 was SumoBots Battle Royale — where players from anywhere in the world can fight real robots on a battle royale style arena. The aim of the project was to have the game run semi-autonomously, meaning that the bots could self-reset in between the games, and the arena could run by itself with no human interaction. This was our most complex project to date, and we wanted to share some parts of the build process in more detail, specifically, how we’ve built these robots and hooked them online for people to control remotely.

Robot selection

We’ve started our process by choosing which robots we’d want to use for the game. There were a couple of requirements for the robots when making the evaluation:

  • Are able to withstand 24/7 collision
  • Easily modifiable and fixable
  • Can rotate on the same spot
  • Must have enough space to fit the electronics

After looking at a lot of different consumer robots, maker projects, and competitive fighting bots, we’ve decided to use the JSUMO BB1 robots for this game. We liked the fact that these bots have a metal casing which makes them very durable, all parts are easily replaceable and can be bought separately, and it has 4 independent motors (motor shields included), one for each wheel, which allows it to rotate on the same spot.

We were pretty skeptical of being able to fit all the electronics into the original casing, but we decided to go with this robot anyways, as it had the best overall characteristics. As this robot is easily modifiable, we can always 3D print an extra casing to fit all the parts.

What is the board?

Now that we’ve decided on the robot, it was the time to define what electronics should we use in this build. As usual, it all starts with the requirements. Here’s what we need for the game to run smoothly:

  • The robot should be able to recover from any position
  • Can stay online while charging
  • Supports WiFi network connection and offers reliable connectivity
  • Easily programmable and supports OTA updates
  • Can control 4 motors simultaneously

Based on these requirements we had the following electronics layout in mind:

We had to find a board that is energy efficient, can send commands to motors, supports parallel charging and has a small footprint on the robot size. With so many requirements, finding the perfect board can be a challenge.

Arduino to the rescue

Fortunately, Arduino was there to help us out. They offer a rich selection of boards to fit every possible robotics project out there and have very detailed documentation for each of the boards. 

More importantly, Arduino is known for its high quality, something that is crucial for semi-autonomous types of applications. Coming from an embedded software background and having to work with all sorts of hardware, we often see that some features or board functionalities are not fully finished which can lead to all sorts of unpleasant situations.

After looking at the Arduino’s collection of boards we quickly found a perfect candidate for our project, the Arduino MKR1000 WiFi. This board fits all of our main requirements for the motor controls, is easily programmable via Arduino IDE, and due to its low power design is extremely power efficient, allowing us to have a lower capacity battery. Additionally, it has a separate WiFi chip onboard, which solely focuses on providing a reliable WiFi connection, something that is very important in our use case.

Now that we’ve decided on the “brain” of our robot, it was time to choose the rest of the components.

Robust hardware means working software

Something to keep in mind is that when working with hardware, you should always try to avoid any possible risks. This means that you should always over-do your minimal hardware requirements where possible. The reason is — if your hardware doesn’t work as intended, your whole software stack becomes unusable too. Always chose reliable hardware components for mission-critical applications.

Some of our electric components might look a bit overkill, but due to the nature of our projects, they are a critical requirement.

Avoiding the battery explosions

As there is a lot of robot collision involved in the game, we decided to go with a high safety standard battery solution. After evaluating multiple options on the market, we decided to go with the RRC2040 from RRC (Germany). It has a capacity of 2950 MaH that allows us to run the robots for up to 5 hours on a single charge. It has an internal circuitry for power management, protection features and it supports SMBUS communications (almost like I2C), and is certified for all of the consumer electronics battery standards. For charging, we used RRC’s charging solution designed specifically for this battery and that offers the possibility to feed power to the application while the battery is being charged.

Note: the Arduino MKR1000 has a pretty neat charging solution on the board itself. You can connect the battery to the board directly as the main power source, and you charge it directly through the MKR1000’s micro USB port. We really wanted to use it to save space and have a more robust design, but due to the large capacity of our battery, we couldn’t use it at full potential. In our future projects with smaller scale robots, we definitely plan to use the board’s internal charging system, as it works perfectly for 700-1800 MaH power packs.

Bot recovery

For the bot to be able to recover from falling on its head, we’ve implemented a flipping servo. We didn’t want to have any risk of not enough torque, so we went with DS3218, which is capable of lifting up to 20KG of weight. Here’s how it works:

Hooking everything together

Now that we’ve decided on all of the crucial elements of this setup, it was time to connect all the elements together. As the first step, we figured what would be the best step way to locate all the pieces within the bot. We then 3D-printed a casing to protect the electronics. With all of the preliminary steps completed, we’ve wired all of the components together and mounted them inside of the casing. Here’s how it looks:

It was really convenient for us that all the pins on the board could be connected just by plugging them in, this avoids a lot of time spent on soldering the cables for 12 robots and more importantly, allowed us to cut out the risk of bad soldering that usually can’t be easily identified.

Arduino = Quick code

Arduino MKR1000 offered us the connectivity we needed for the project. Each sumo robot hosts their own UDP server using MKR1000 WiFi libraries to receive their control commands for a central control PC and broadcasting their battery charge status. The user commands are translated to 3 different PWM signals using Arduino Servo library for the flipping, left and right side motor controllers. The board used has support for hardware PWM output which was useful for us.  Overall we managed to keep the whole Arduino code in a few hundred lines of code due to the availability of Servo and Wifi libraries.

The out of the box ArduinoOTA support for updating the code over the WiFi came in handy during the development phase, but also anytime we update the firmware for multiple robots at the same time. No need to open the covers and attach a USB cable! We created a simple Bash script using the OTA update tool bundled in Arduino IDE to send firmware updates to every robot at the same time.  

To summarize

It’s pretty amazing that we live in the age where you can use a mass market tiny, small form factor board like the Arduino MKR1000 and have so much functionality. We’ve had a great experience developing our SumoBots Battle Royale game using the MKR1000 board. It made the whole process very smooth and streamlined, the documentation was right on point, and we never had to hit a bottleneck where the hardware wouldn’t work as expected.

More importantly, the boards have proven to be very robust throughout the time. These SumoBots have been used for more than 3000 games already, and we haven’t seen a single failure from the Arduino MKR1000. For a game where you literally slam the robots in to each other at a high speed, that’s pretty impressive to say the least.

We look forward to working with Arduino on our future games, and we can’t wait to see what they will be announcing in 2020!

GesturePod is a clip-on smartphone interface for the visually impaired

Smartphones have become a part of our day-to-day lives, but for those with visual impairments, accessing one can be a challenge. This can be especially difficult if one is using a cane that must be put aside in order to interact with a phone.

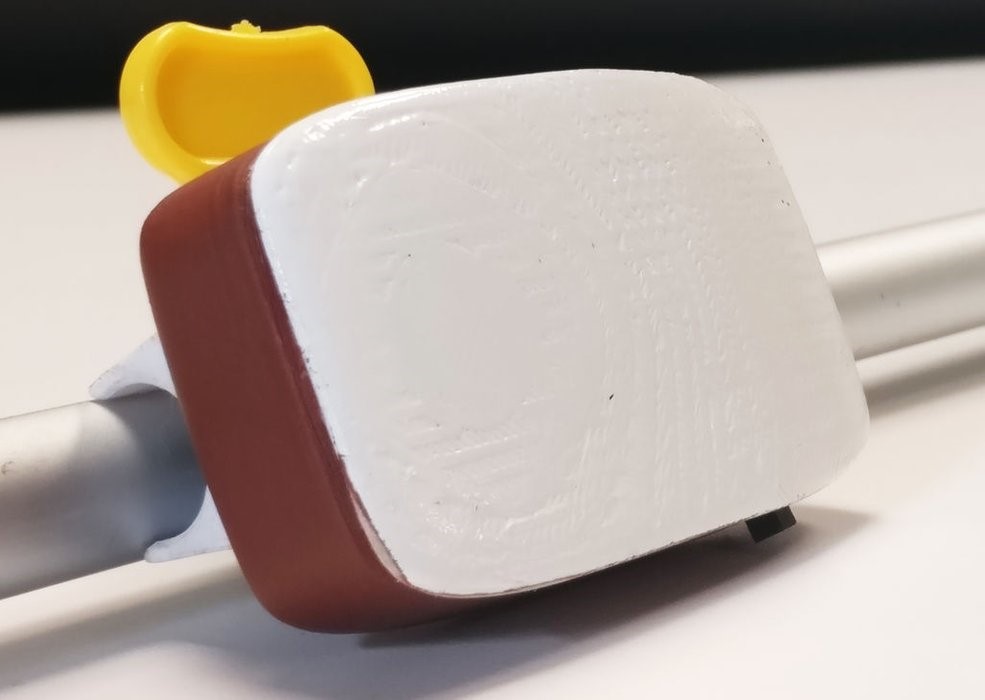
The GesturePod offers another interface alternative that actually attaches to the cane itself. This small unit is controlled by a MKR1000 and uses an IMU to sense hand gestures applied to the cane. 

If a user, for instance, taps twice on the ground, a corresponding request is sent to the phone over Bluetooth, causing it to output the time audibly. Five gestures are currently proposed, which could expanded upon or modified for different functionality as needed.

People using white canes for navigation find it challenging to concurrently access devices such as smartphones. Build­ ing on prior research on abandonment of specialized devices, we explore a new touch free mode of interaction wherein a person with visual impairment can perform gestures on their existing white cane to trigger tasks on their smartphone. We present GesturePod, an easy-to-integrate device that clips on to any white cane, and detects gestures performed with the cane. With GesturePod, a user can perform common tasks on their smartphone without touch or even removing the phone from their pocket or bag. We discuss the challenges in build­ ing the device and our design choices. We propose a novel, efficient machine learning pipeline to train and deploy the gesture recognition model. Our in-lab study shows that Ges­ turePod achieves 92% gesture recognition accuracy and can help perform common smartphone tasks faster. Our in-wild study suggests that GesturePod is a promising tool to im­ prove smartphone access for people with VI, especially in constrained outdoor scenarios.

Arduino, Accelerometer, and TensorFlow Make You a Real-World Street Fighter

A question: if you’re controlling the classic video game Street Fighter with gestures, aren’t you just, you know, street fighting?

That’s a question [Charlie Gerard] is going to have to tackle should her AI gesture-recognition controller experiments take off. [Charlie] put together the game controller to learn more about the dark arts of machine learning in a fun and engaging way.

The controller consists of a battery-powered Arduino MKR1000 with WiFi and an MPU6050 accelerometer. Held in the hand, the controller streams accelerometer data to an external PC, capturing the characteristics of the motion. [Charlie] trained three different moves – a punch, an uppercut, and the dreaded Hadouken – and captured hundreds of examples of each. The raw data was massaged, converted to Tensors, and used to train a model for the three moves. Initial tests seem to work well. [Charlie] also made an online version that captures motion from your smartphone. The demo is explained in the video below; sadly, we couldn’t get more than three Hadoukens in before crashing it.

With most machine learning project seeming to concentrate on telling cats from dogs, this is a refreshing change. We’re seeing lots of offbeat machine learning projects these days, from cryptocurrency wallet attacks to a semi-creepy workout-monitoring gym camera.

Getting started with the Arduino IoT Cloud

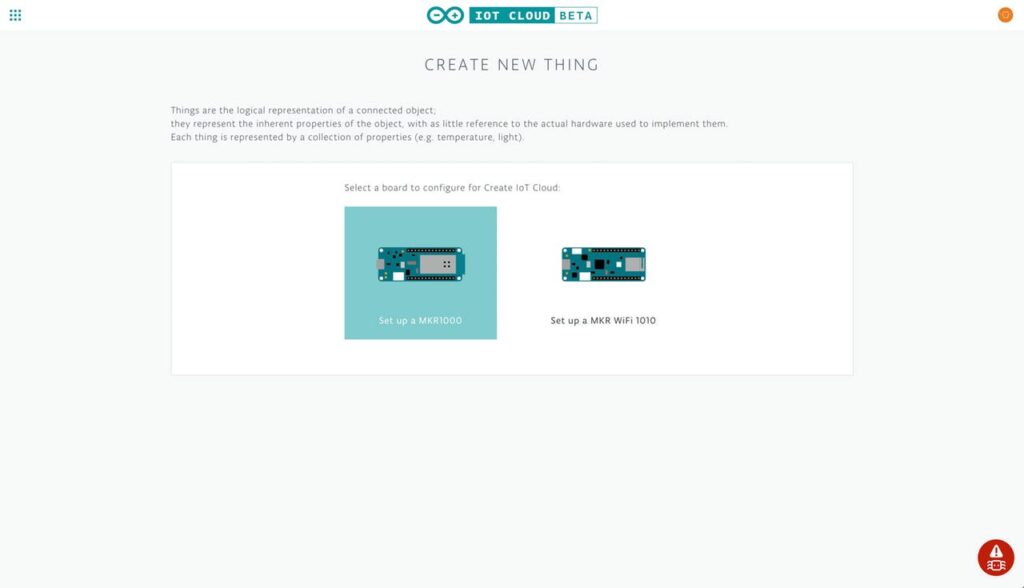
As previously announced, the Arduino IoT Cloud is an easy to use Internet of Things application platform that enables developers to go from unboxing their board to a working device in just minutes.

To help you get started, we’ve put together a quick project that’ll walk you through connecting a MKR1000 (or MKR WiFi 1010) to the Arduino IoT Cloud.

By the end of the tutorial, you’ll be able to control and monitor your board over the Internet using the Arduino IoT Cloud site.

First, we’ll add the board to the Arduino IoT Cloud as a Thing — a representation of the board in the cloud. We’ll then give the Thing a set of Properties which represent sensors, LEDs, motors, and many other components in the project that you’ll want to access from the cloud.

Want to see more? You can find the entire step-by-step guide here.

Badland Brawler Lets Arduino Tackle Terrain

For an electronics person, building the mechanics of a robot — especially a robust robot — can be somewhat daunting. [Jithin] started with an off-the-shelf 4 wheel drive chassis to build an off-road Arduino robot he calls the Badland Brawler. The kit was a bit over $100, but as you can see in the video below, it is pretty substantial, with an enclosed frame and large mud tires.

The remaining parts include an Arduino, a battery, and a motor driver IC. The Arduino is one with WiFi (an MKR 1000, in fact) and there’s a phone app for controlling the robot.

Honestly, once you have the chassis taken care of, the rest is pretty easy. Of course, the phone app is a bit more effort, but you could replace it in a number of ways. Blynk, comes to mind, for example.

The motor drivers are easy to figure out. This would be a great platform for some sensors to allow for more autonomy. We liked how the frame had mount points for a lot of different boards and sensors and could hold everything, for the most part, inside. That’s probably a good idea for a robot which will be traversing rugged terrain.

If you do decide to roll your own app with Blynk, we’ve done it with a very different kind of robot. Four-wheel drive robots don’t have to be big, as we’ve seen in the past.

InfiniTouch: Interact with both sides of your smartphone

Besides, perhaps a longer battery life, what would make your smartphone experience better? If you said a more versatile interaction method than poking one side with your thumb, researchers in Germany may have just the thing.

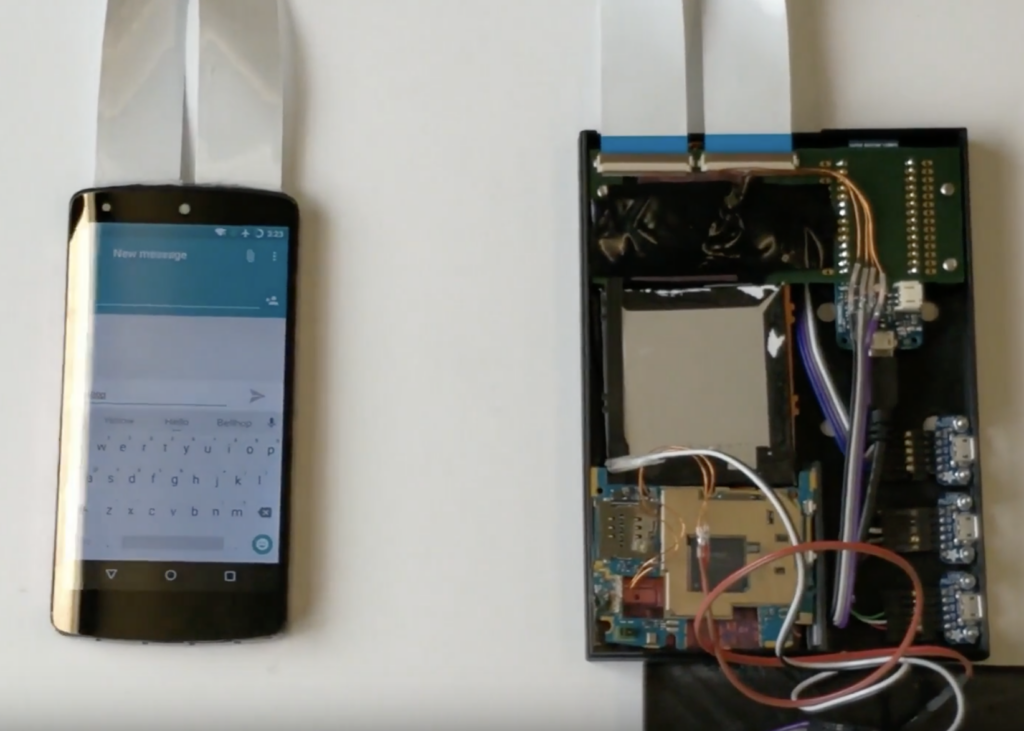
InfiniTouch morphs two LG Nexus 5 phones into one, with their touchscreens stacked back-to-back. This allows for not only thumb interaction, but also program control with the four fingers that normally only grip the device. It can even tell what finger your using via a convolutional neural network. 

In order to save space, most of the electronics are housed in a separate hardware container, including the phone boards as well as an Arduino MKR1000. 

More info is available in the project’s research paper, and a short demo can be seen in the video below.

Control your GoPro wirelessly with an Arduino MKR1000

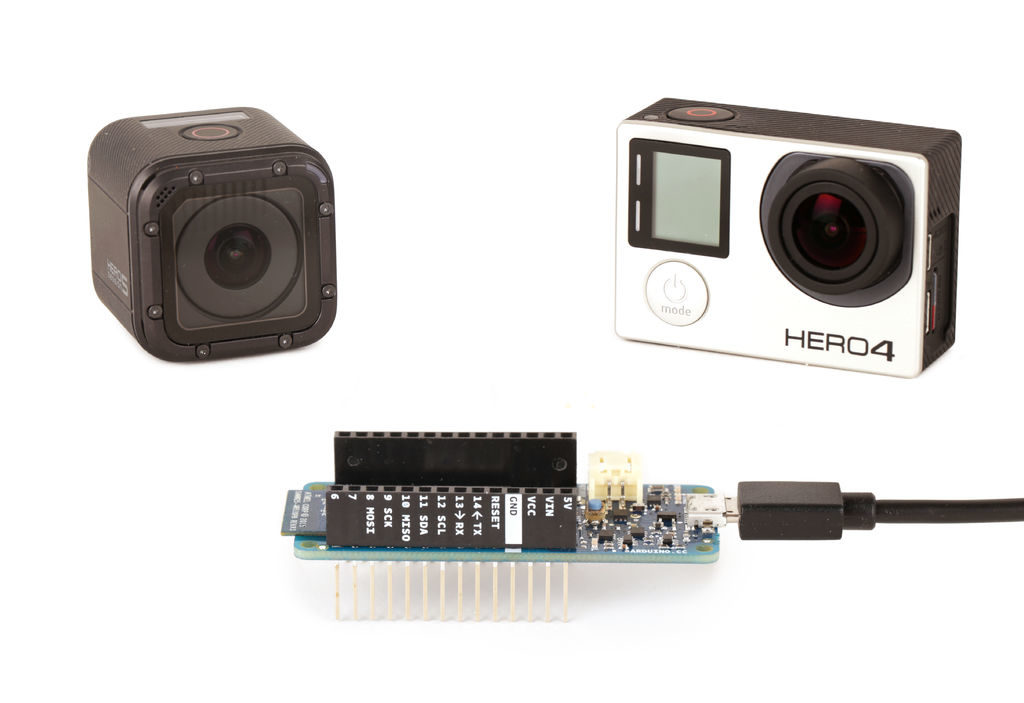
As Arduino boards have revolutionized what people can make at home, you might say that GoPros have done the same thing for portable cameras. Later generations of these devices even feature WiFi capabilities, so with the proper programming, Arduinos like the MKR1000 can be used for control!

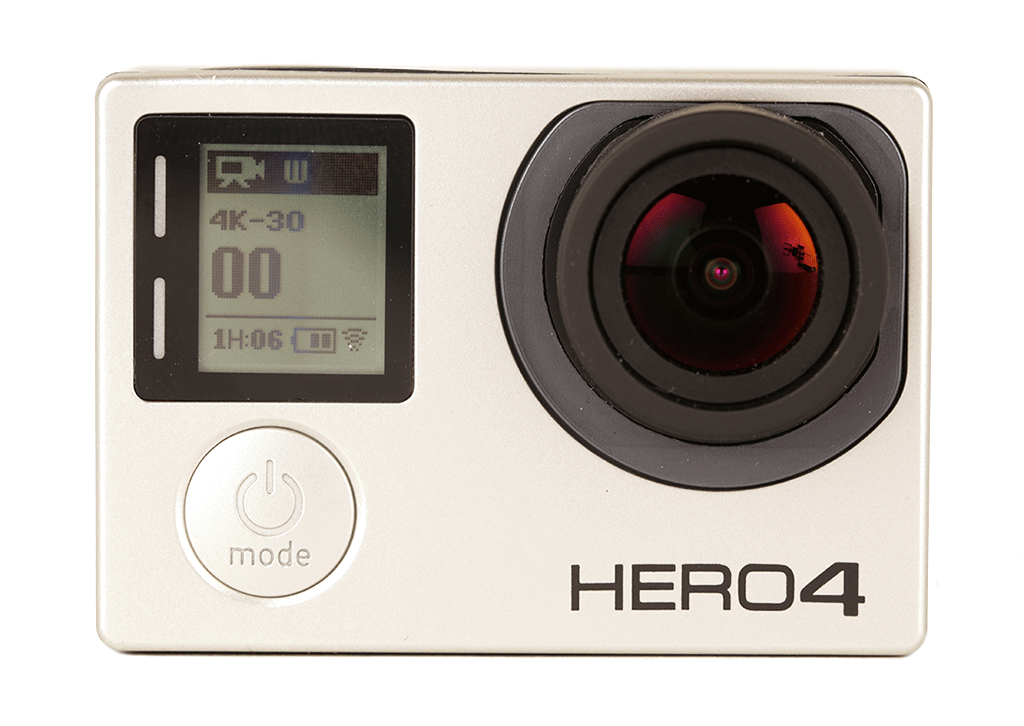
In this project write-up, maker Randy Sarafan (AKA “randofo”) takes us through how he was able to set up a MKR1000 to communicate with a Hero 4 as well as a Session 5, including sending a “magical” Wake-on-LAN signal to power up the Session camera. 

While he’s not the first to control a GoPro using an Arduino, it’s certainly more elegant than methods like hot-wiring a remote or even recording your own voice to speak commands to it remotely!

Arduino goes to college with the new Arduino Engineering Kit!

We’re excited to announce the Arduino Engineering Kit, the first product released as a result of our new partnership with MathWorks, to reinforce the importance of Arduino at the university level in the fields of engineering, Internet of Things, and robotics.

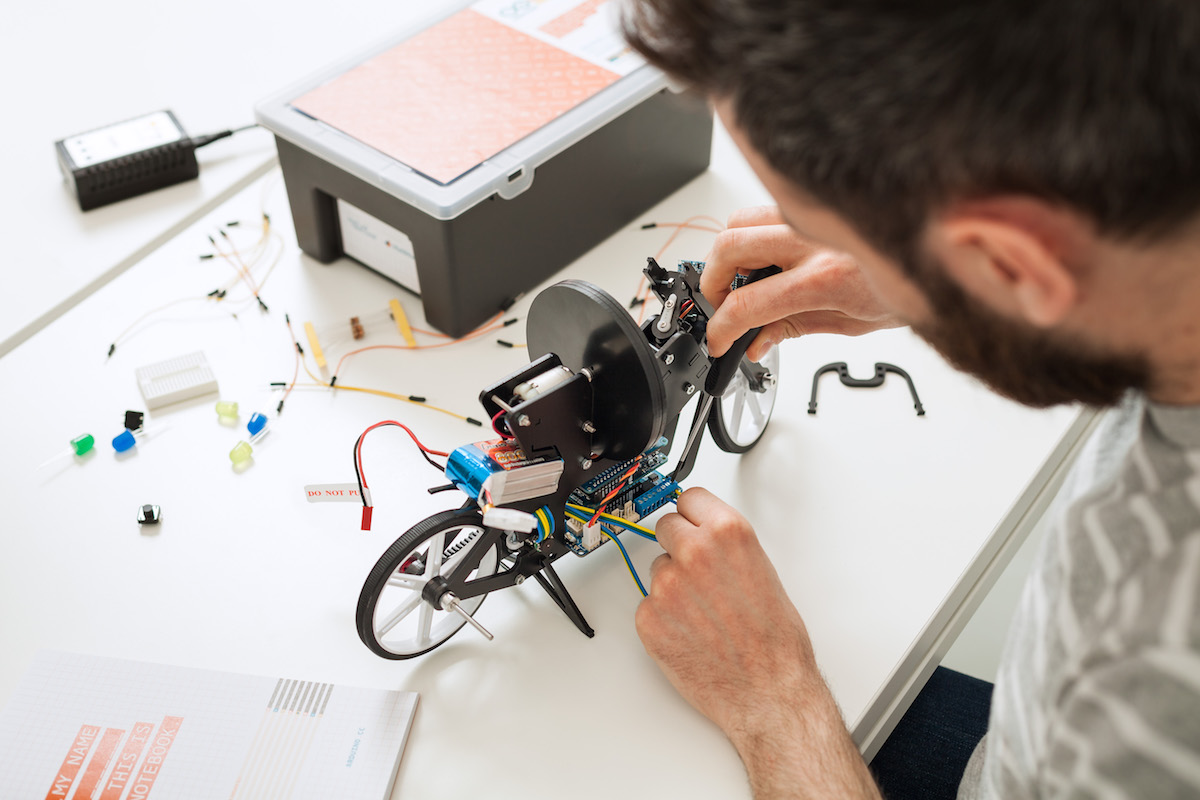
The Arduino Engineering Kit, which will be available for purchase starting today on the Arduino online store, consists of three cutting-edge, Arduino-based projects and will teach students how to build modern electronic devices – challenging them intellectually and helping them develop physical engineering skills that will better prepare them to enter the commercial market following graduation. In addition to the hardware, after registering online, students and educators will have access to a dedicated e-learning platform and other learning materials. The kit also includes a one-year individual license for MATLAB and Simulink, providing the user with hands-on experience in system modeling and embedded algorithm development.

Following the global success of Arduino CTC 101, a program tailored for upper secondary schools, the Arduino Engineering Kit enables college students and educators to incorporate core engineering concepts like control systems, inertial sensing, signal and imaging processing, and robotics with the support of MATLAB and Simulink programming. These software packages are the base of industry-standard tools for algorithm development, system modeling, and simulation, all of which will be required in their future careers.

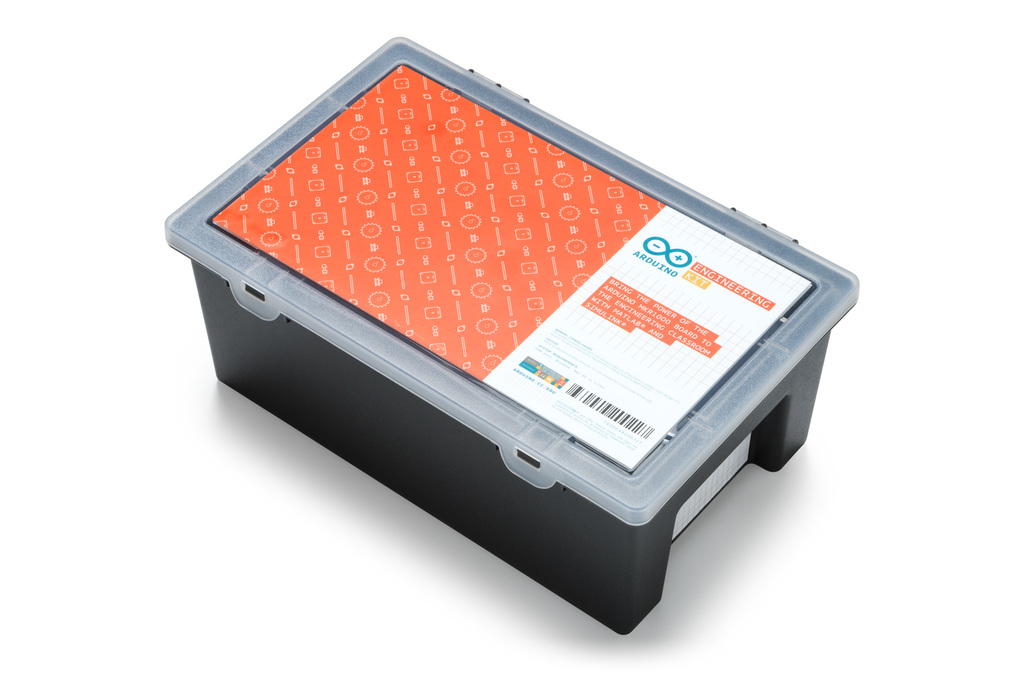
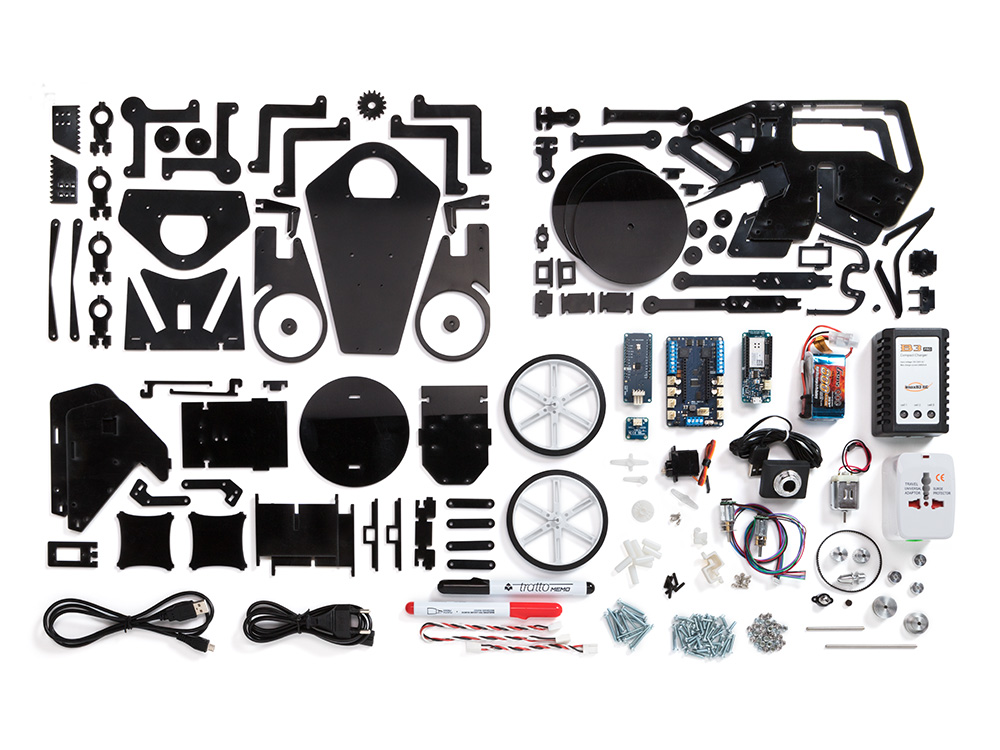
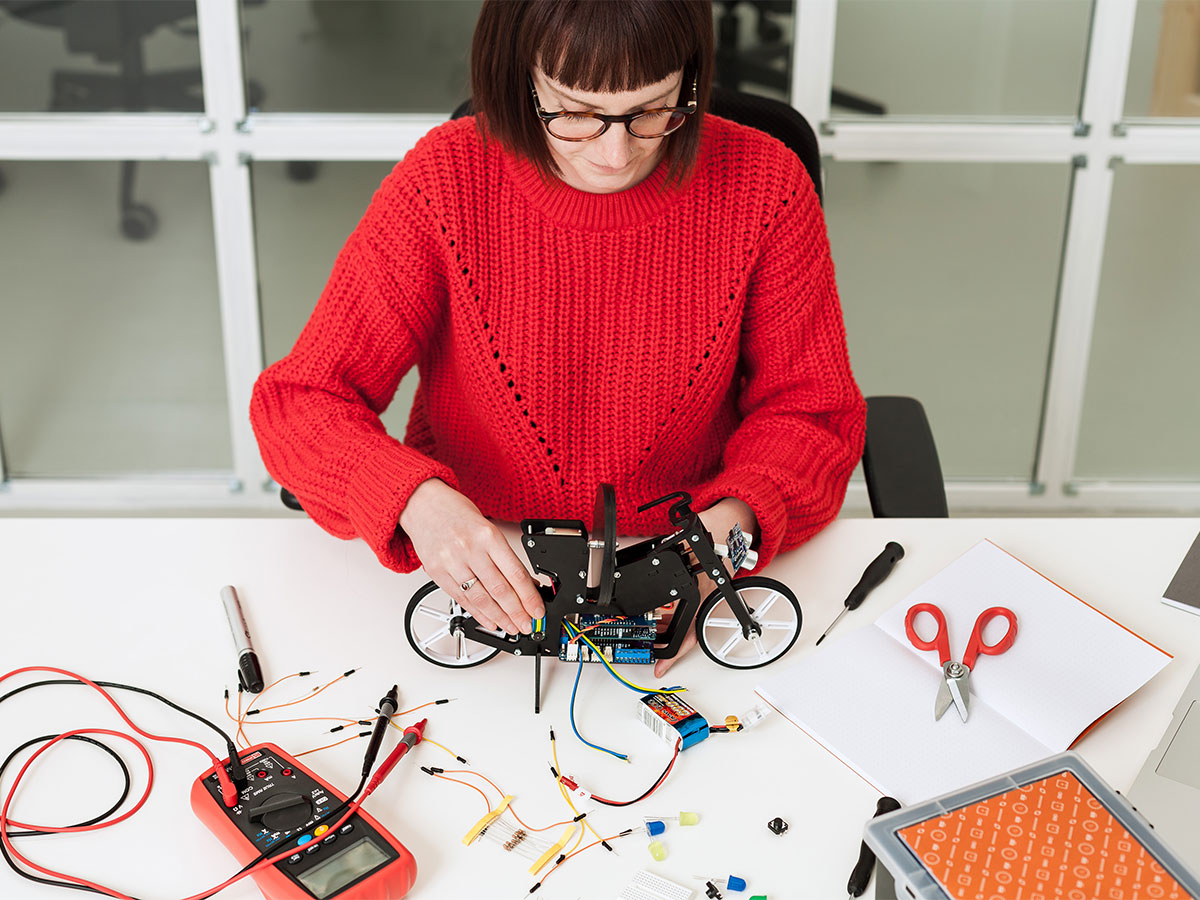
Each Arduino Engineering Kit comes with a durable and stackable plastic toolbox for easy storage and years of reuse. Inside the box is an Arduino MKR1000 board, several customized parts, and a complete set of electrical and mechanical components needed to assemble all three projects:

  • Self-Balancing Motorcycle: This motorcycle will maneuver on its own on various terrains and remain upright using a flywheel for balance.
  • Mobile Rover: This vehicle can navigate between given reference points, move objects with a forklift, and much more.
  • Whiteboard Drawing Robot: This amazing robot can take a drawing it’s given and replicate it on a whiteboard.

“We designed the Arduino Engineering Kit the way we would have liked to have learned mechatronics, control algorithms, state machines, and complex sensing when we were in our first years of engineering school: in a fun and challenging way,” said David Cuartielles, Arduino co-founder and Arduino Education CTO. “It’s all about hands-on activities built on top of well-grounded theoretical concepts. But more importantly, after finishing the basic materials, there’s plenty of flexibility to experiment, for the students to deviate and test their engineering creativity.”

https://youtu.be/pymRl7FCV0A

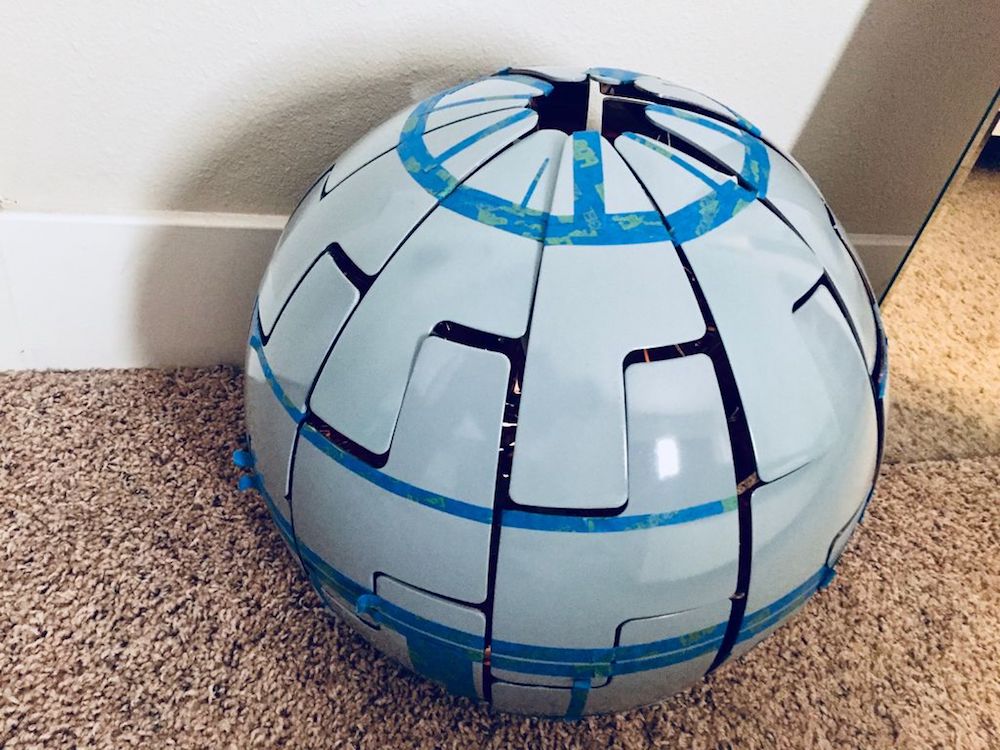
Expanding Death Star lamp with MKR1000

What could be better than a lamp that expands with the pull of a control cord? How about one that looks like the Death Star and is controlled with your voice? 

That’s exactly what maker Adi Singh created using a popular IKEA lamp and embedding it with an Arduino MKR1000 to take voice commands via Alexa. A stepper motor is tasked with opening and closing the exterior segments, and a solid-state relay turns the light on and off. It also features a spectacular custom paint job, making this lamp/superweapon stand out even more.

You can see the results in the video below as it changes shape and blinks to the soothing sounds of the Imperial March!

Lift takes finger tracking accuracy to a new level

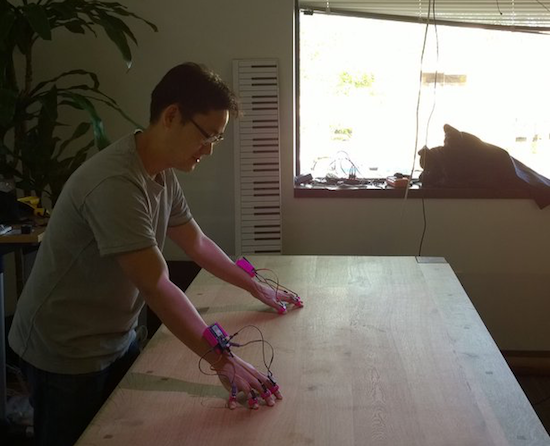
Using a pair of Arduino MKR1000s, researchers at the University of California, Irvine and FX Palo Alto Laboratory have come up with a new way to track 10 fingers to within less than two millimeters.

In this technique, called “Lift,” a normal DLP projector is used to display a series of tiny encoded images onto any flat surface. Instead of using an external vision system, or even an accelerometer, Lift employs tiny light sensors on each finger to detect this pattern, then relay this information to the MKR1000 mounted on each wrist. From there, the Arduino is able to translate these light signals into positional data with an average accuracy of 1.7 millimeters and an average refresh rate of 84Hz.

By projecting encoded visible patterns onto an object’s surface (e.g. paper, display, or table), and localizing the user’s fingers with light sensors, Lift offers users a richer interactive space than the device’s existing interfaces. Additionally, everyday objects can be augmented by attaching sensor units onto their surface to accept multi-touch gesture input.

You can find a quick summary of this project here, and download the team’s entire paper to learn more.

Photos: Shang Ma

Arduino Blog 14 Apr 02:21