Facere-Bot is a portable machine that draws iconic photos

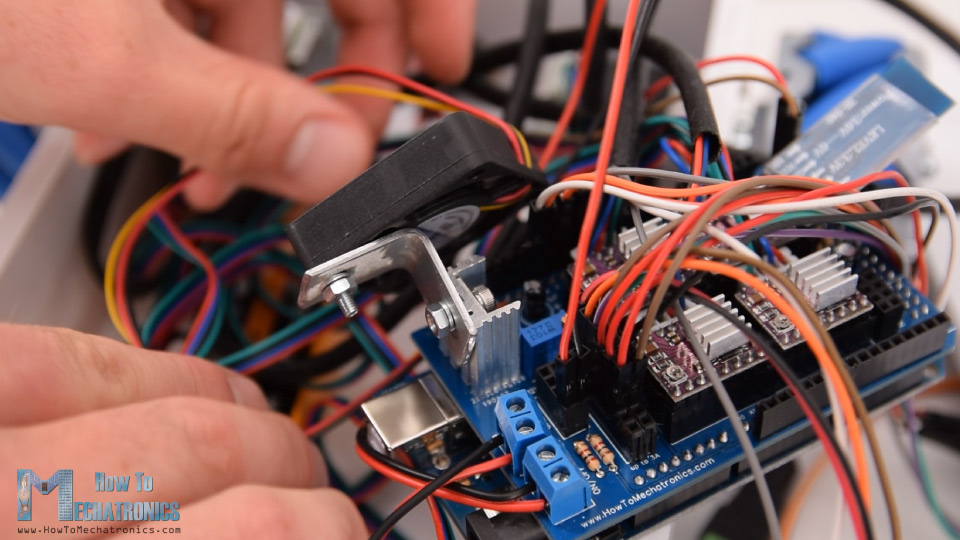
Inventor Artist Darcy Whyte wanted a drawing robot that was light enough to carry around, and could quickly produce drawings. Naturally, he turned to an Arduino Uno, along with a CNC shield and a trio of A4988 stepper drivers. These control a NEMA 8 and two NEMA17 stepper motors in a gantry-style artistic setup.
The build is able to drag a marker across a page, apparently varying pressure applied with the z-axis, and thus how much ink is applied. In another mode, a pen can be used, which wobbles back and forth to create volume when needed.

Both methods, as seen in the clips below, can sketch a very recognizable—though certainly distinct—portrait of Marilyn Monroe, or presumably whatever other image you choose to program in.
View this post on InstagramBrush work #painting #drawing #portrait #arduino #rasberrypi #cnc #robotics #grbl #stepper
A post shared by darcy (@inventorartist) on
View this post on InstagramPortable draw-bot test. #marilynmonroe #cnc #grbl #processing #processing #g-code #diy #diycnc
A post shared by darcy (@inventorartist) on