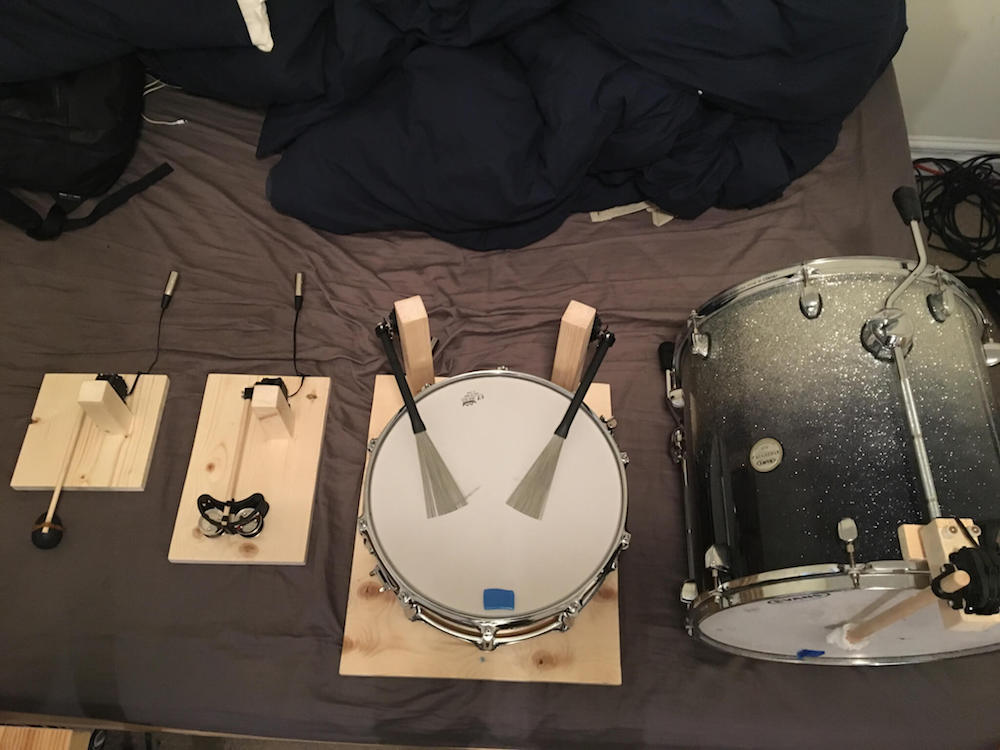
As shown in the video below, Tristan Calderbank is a very talented singer and guitar player, but what’s perhaps most interesting about his performance is the percussion section. Instead of a person (or an entire band) standing beside him, a robotic shaker, tambourine, snare drum and bass drum all play together under MIDI control.
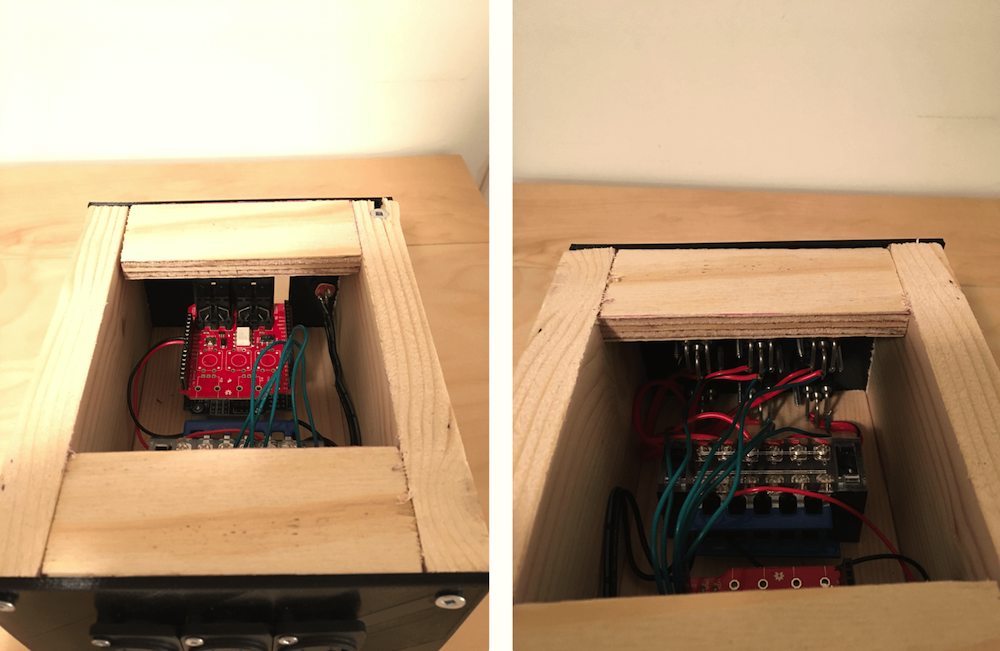
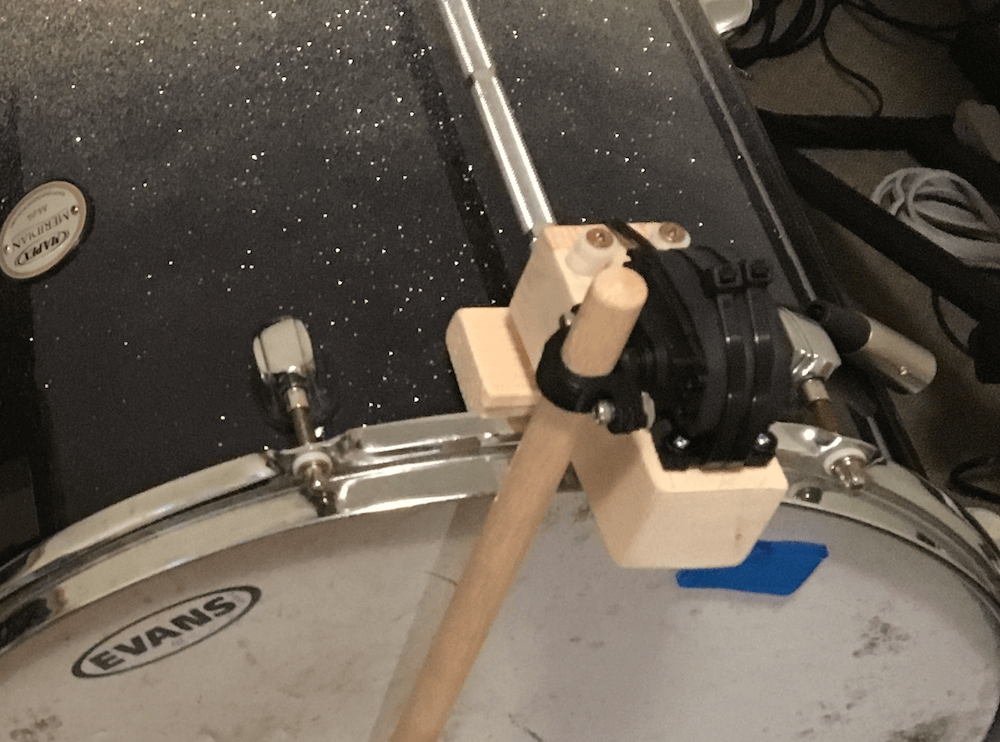
Each device is activated by an HS-311 servo—or two in the case of the snare—powered by an Arduino Uno and MIDI shield. Signals are sent to the Arduino by a laptop running Ableton Live, and servo velocity can be varied to further control sound.
A write-up on Calderbank’s build process can be found here, including what didn’t work, plus info on sound isolation from the servos. Arduino code is available on GitHub.
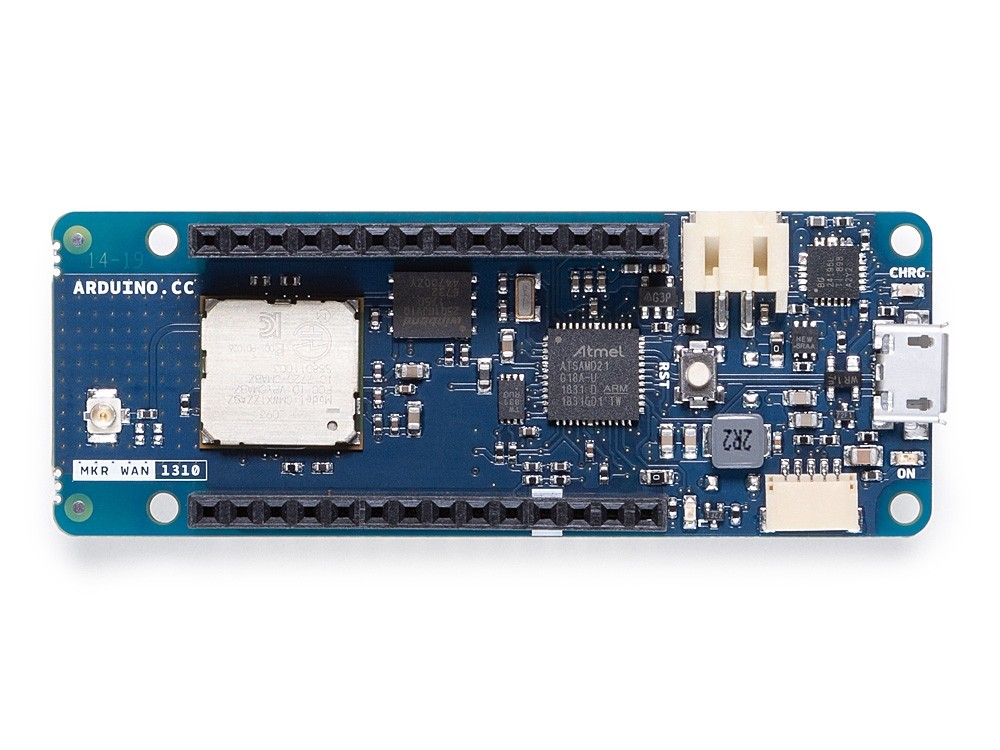
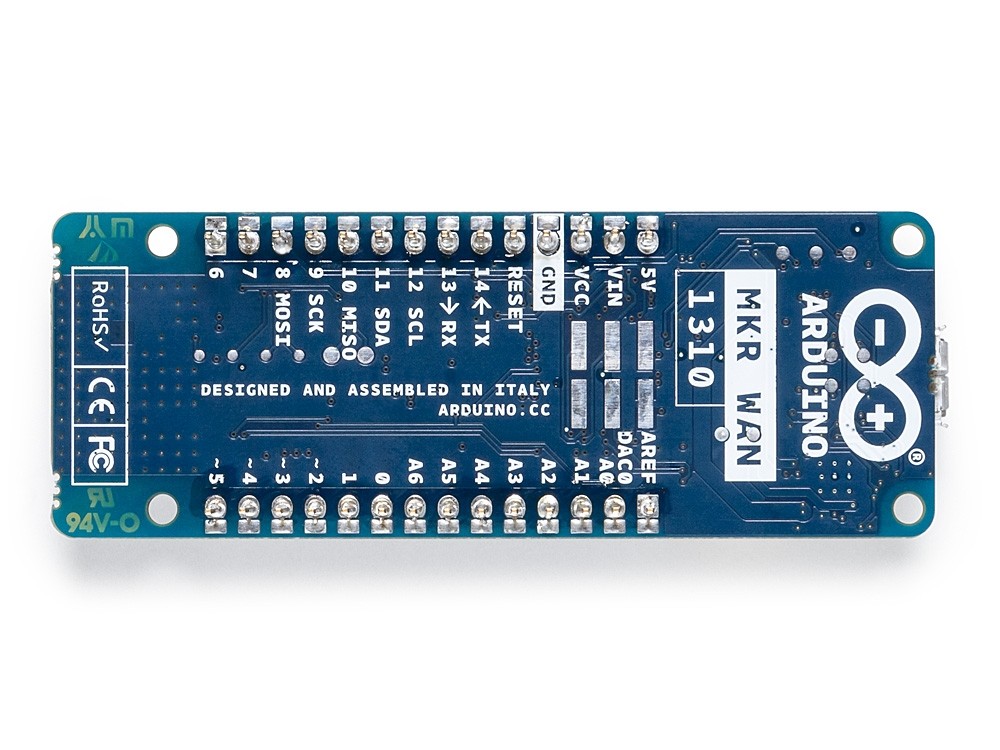
We’re excited to announce the launch of the Arduino MKR WAN 1310, which offers a practical and cost-effective solution for those looking to add LoRa connectivity to their projects.
The new MKR WAN 1310 enables you to connect your sensors and actuators over long distances harnessing the power of the LoRa wireless protocol or throughout LoRaWAN networks.
To your own LoRa network using the Arduino Pro Gateway for LoRa
To existing LoRaWAN infrastructure like The Things Network
Or even to other boards using the direct connectivity mode
The latest low-power architecture has considerably improved the battery life on the MKR WAN 1310. When properly configured, the power consumption is now as low as 104uA! It is also possible to use the USB port to supply power (5V) to the board; run the board with or without batteries – the choice is yours.
Based on the Microchip SAM D21 low-power processor and a Murata CMWX1ZZABZ LoRa module, the MKR WAN 1310 comes complete with an ECC508 crypto chip, a battery charger and 2MByte SPI Flash, as well as improved control of the board’s power consumption.
Data logging and other OTA (Over-the-Air) functions are now possible since the inclusion of the on board 2MByte Flash. This new exciting feature will let you transfer configuration files from the infrastructure onto the board, create your own scripting commands, or simply store data locally to send it whenever the connectivity is best. While the MKR WAN 1310’s crypto chip adds further security by storing credentials and certificates in the embedded secure element.
These features make it the perfect IoT node and building block for low-power wide area IoT devices.
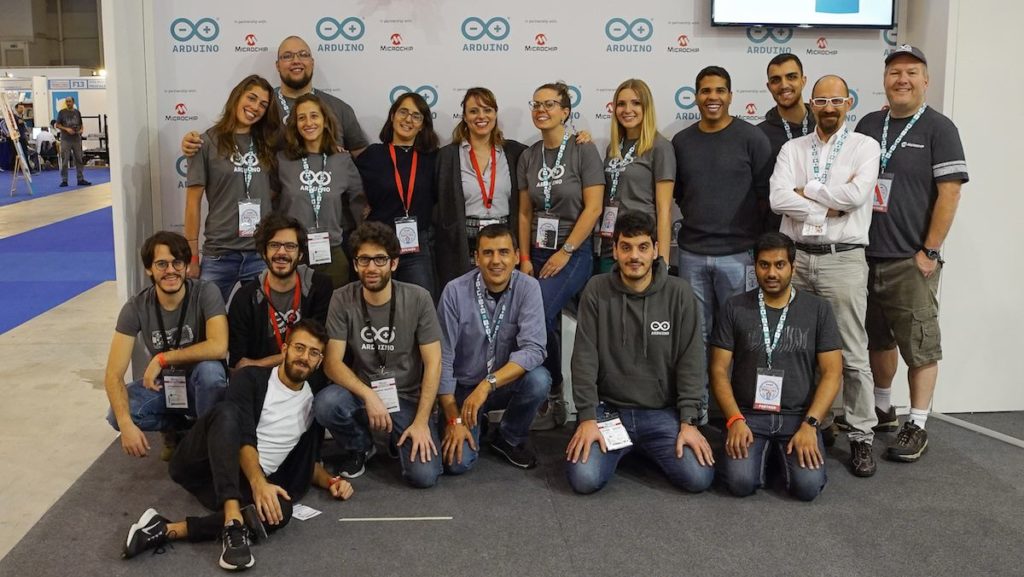
Planning to attend Maker Faire Rome later this month? We’re currently seeking volunteers to join our team during the event—staffing tables and displays, helping with demos, and providing technical assistance when necessary.
If you volunteer with us for one shift, you won’t leave empty-handed! You’ll receive a day pass; spend two days with us, and you’ll have a ticket for the entire weekend to explore the show. Water and snacks will be provided, of course, along with some Arduino goodies.
Interested? Please fill out this questionnaire and we’ll get back to you soon! If you are under the age of 18, we will need your parents’ permission.
Hai in programma di partecipare a Maker Faire Roma? Entra a far parte del team di volontari/e all’Arduino booth! Stiamo cercando appassionati/e di Arduino che ci aiutino durante l’evento dando il benvenuto ai visitatori e fornendo assistenza tecnica e supporto durante le demo.
Con un turno di volontariato allo stand Arduino, avrai a disposizione un pass per l’intera giornata; se, invece, sarai al nostro booth per almeno due turni avrai il pass per i tre giorni di evento. Sappiamo quanto sia importante il tuo tempo e quanto sia fondamentale il tuo aiuto al nostro booth, per questo motivo saremo felici di offrirti il pranzo e un piccolo regalo, ovviamente Arduino.
Ti interessa aiutarci al booth Arduino? Per favore completa questo form, ti faremo sapere prestissimo!
Se hai meno di 18 anni puoi partecipare, ma con il consenso firmato dei tuoi genitori!
Quando: 18 – 20 Ottobre 2019 (Venerdì, Sabato, Domenica)
[Ryan Schenk] had a problem: he built the perfect surfboard. Normally that wouldn’t present a problem, but in this case, it did because [Ryan] had no idea how he carved the gentle curves on the bottom of the board. So he built this homebrew 2D-scanner to make the job of replicating his hand-carved board a bit easier.
Dubbed the Scanbot 69420 – interpretation of the number is left as an exercise for the reader, my dude – the scanner is pretty simple. It’s just an old mouse carrying a digital dial indicator from Harbor Freight. The mouse was gutted, with even the original ball replaced by an RC plane wheel. The optical encoder and buttons were hooked to an Arduino, as was the serial output of the dial indicator. The Arduino consolidates the data from both sensors and sends a stream of X- and Z-axis coordinates up the USB cable as the rig slides across the board on a straightedge. On the PC side, a Node.js program turns the raw data into a vector drawing that represents the profile of the board at that point. Curves are captured at various points along the length of the board, resulting in a series of curves that can be used to replicate the board.
Yes, this could have been done with a straightedge, a ruler, and a pencil and paper – or perhaps with a hacked set of calipers – but that wouldn’t be nearly as much fun. And we can certainly see applications for this far beyond the surfboard shop.
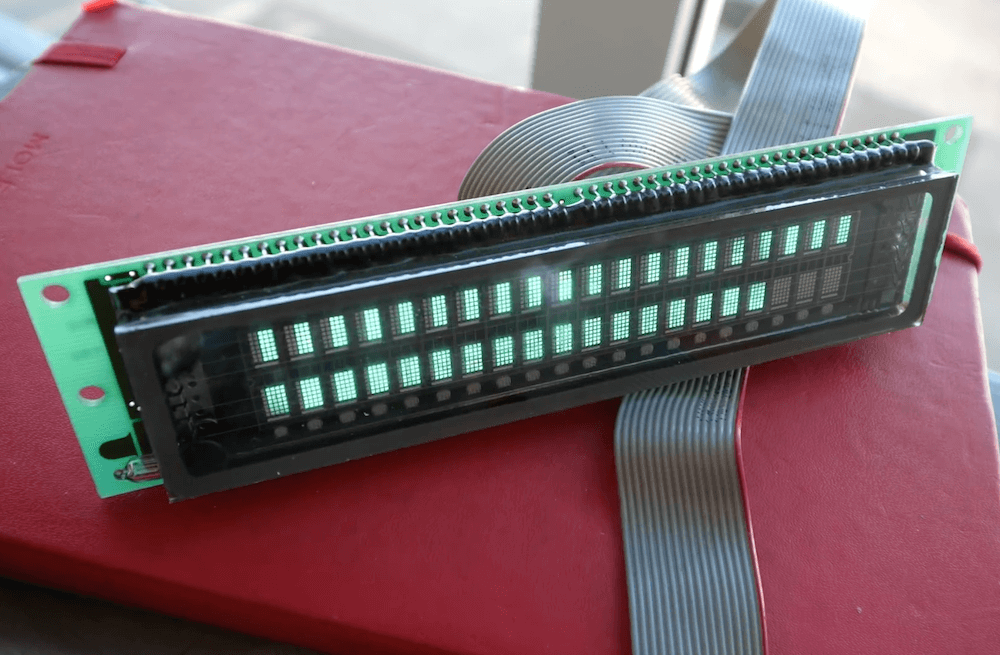
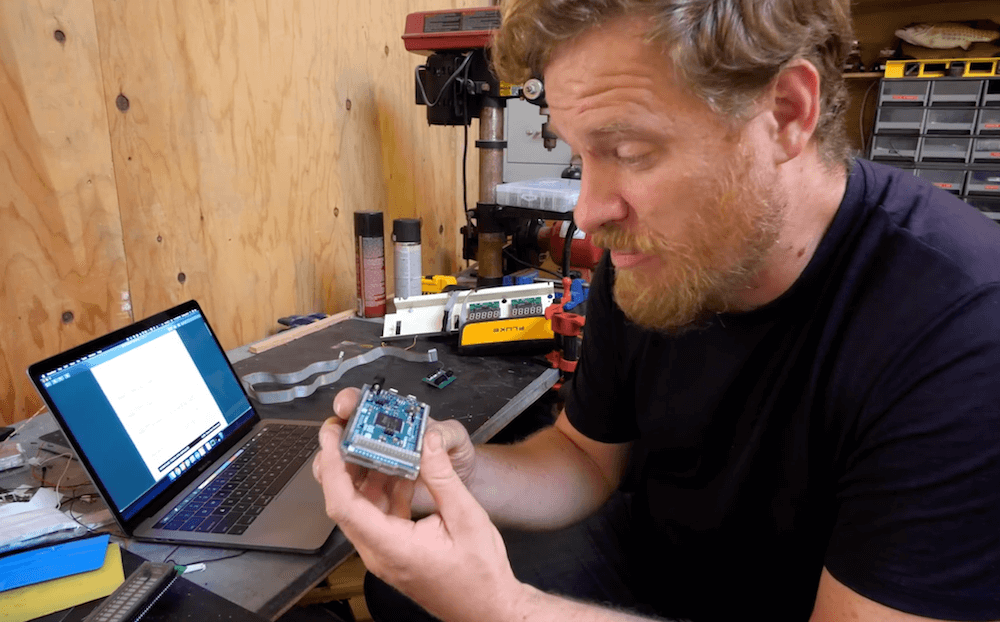
Vacuum fluorescent displays (VFDs) have a distinct cool blue-greenish glow, and were once used in a wide range of devices, from VCRs to microwave ovens and even car dashboards. Although extremely popular way back when, they can be more difficult to source today. In the video below, Scotty Allen of the Strange Parts YouTube channel takes on the challenge of getting a $600 ISE (now Noritake) display up and running with an Arduino Due.
The process starts with examining the datasheet to find that the Due’s 3.3V logic can indeed drive the 20×2 character display, then he constructs a custom adapter board to do just that. After more datasheet lurking, head scratching and hacking, he finally got it to show “Hello world!” toward the end of the clip, along with some simple animations.
The VFD control is part of a larger build that will be revealed in the future, and a good reminder of just how much trial and error is needed to succeed in making something awesome.
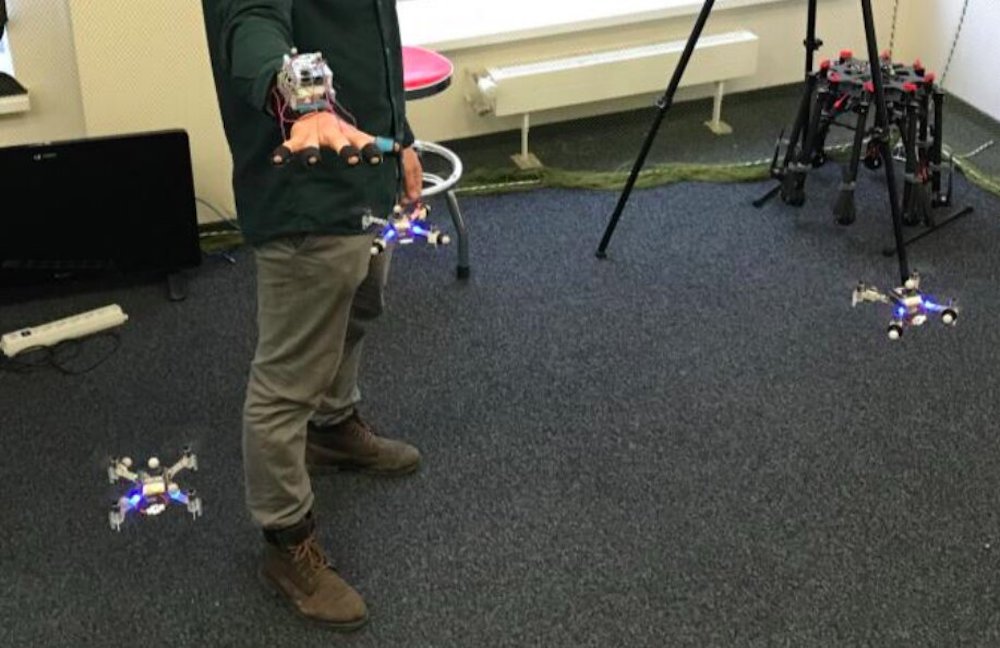
If you fly drones for fun—or perhaps even for work—you know that piloting them can sometimes be a difficult tasks. Imagine, however, trying to control four drones simultaneously. While also “challenging,” researchers at the Skolkovo Institute of Science and Technology in Russia have come up with a new approach for commanding such a swarm using only arm movements.
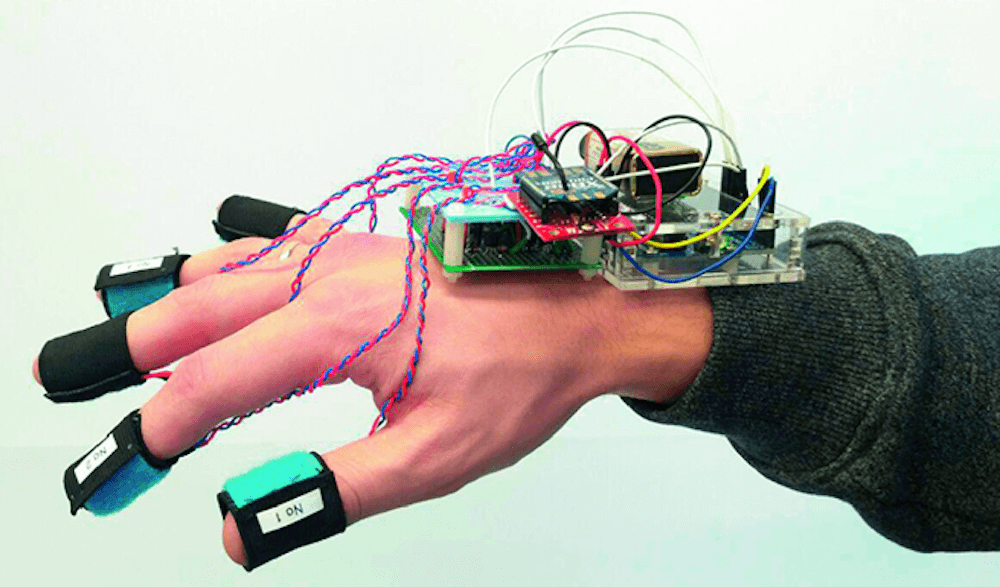
SwarmTouch takes the form of a wrist and finger-mounted device, with an array of eight cameras tracking its position. When the operator moves their arm, the drones react to the hand motion and the other flying robots in the group, as if there was a mechanical system linking each one together.
Feedback is provided by an Arduino Uno connected to the control station via an XBee radio, which tells the operator whether the swarm is expanding or contracting using vibration motors on a wearer’s fingertips. The setup is on display in the video below and its research paper can be found here.
We propose a novel interaction strategy for a human-swarm communication when a human operator guides a formation of quadrotors with impedance control and receives vibrotactile feedback. The presented approach takes into account the human hand velocity and changes the formation shape and dynamics accordingly using impedance interlinks simulated between quadrotors, which helps to achieve a life-like swarm behavior. Experimental results with Crazyflie 2.0 quadrotor platform validate the proposed control algorithm. The tactile patterns representing dynamics of the swarm (extension or contraction) are proposed. The user feels the state of the swarm at his fingertips and receives valuable information to improve the controllability of the complex life-like formation. The user study revealed the patterns with high recognition rates. Subjects stated that tactile sensation improves the ability to guide the drone formation and makes the human-swarm communication much more interactive. The proposed technology can potentially have a strong impact on the human- swarm interaction, providing a new level of intuitiveness and immersion into the swarm navigation.
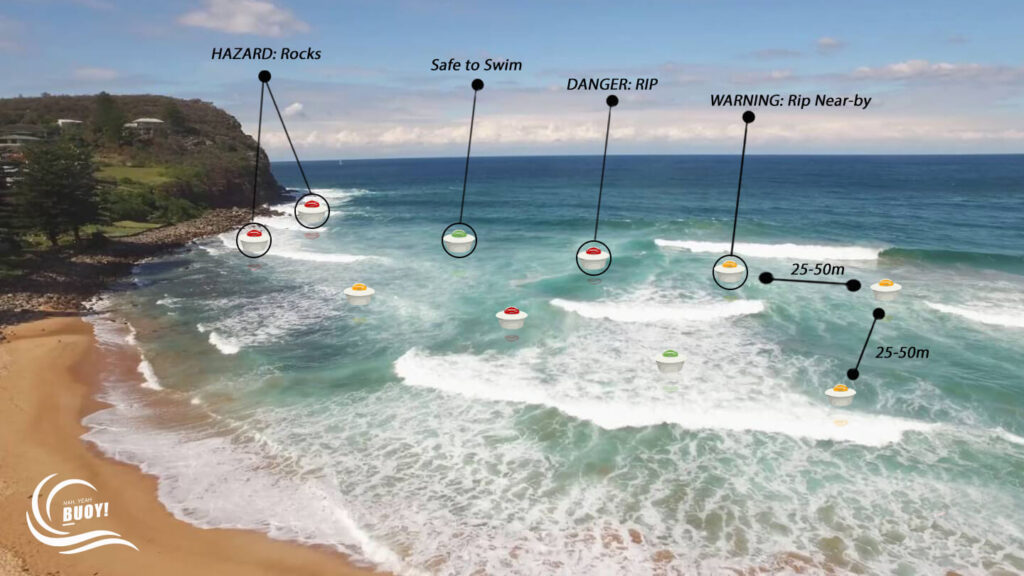
Drowning is the third leading cause of accidental death in New Zealand, and the vast majority of lifeguard rescues are due to rip currents—hard to observe unless you’re already in peril. In order to help fix this problem, Victoria University of Wellington students Hannah Tilsley and Chamonix Stuart designed the “Nah Yeah Buoy” water safety system.
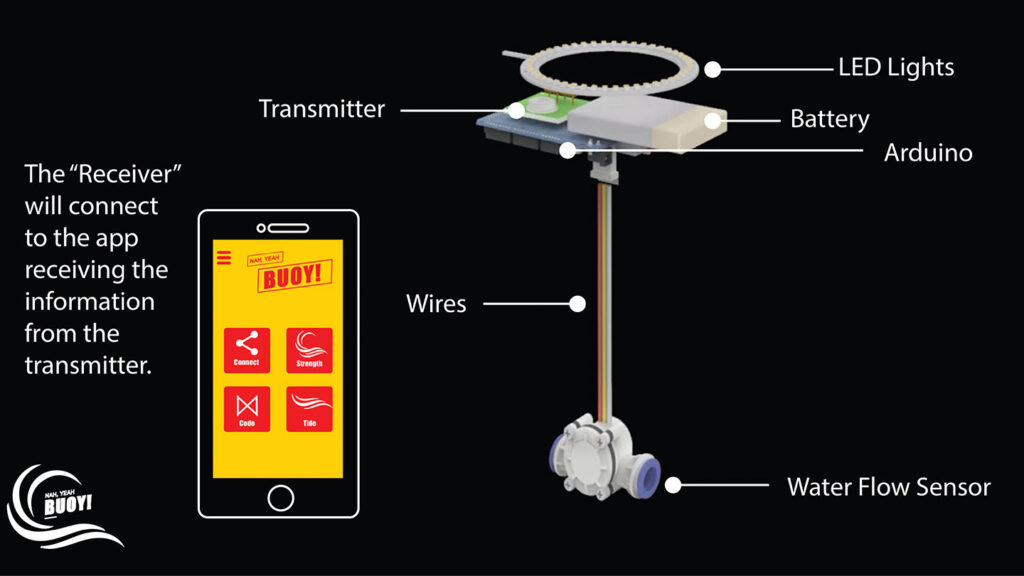
The system consists of a network of sensing buoys and a mobile app. The buoys feature a water flow sensor on their base to measure currents, and use an Arduino to control lights on the top to shine according to the water speed. Green means it’s safe to swim, yellow is for caution, and red indicates danger, in similar manner to how traffic lights. Additionally, two-way wireless communication sends alerts to lifeguards on the shore, who can override the lights to warn of danger when needed.
The “Nah Yeah Buoy” is an adaptive system for water safety designed to identify rip currents near beaches, visualise their locations and movements, and provide interactive alerts and warnings for lifeguards and water users.
Our “Nah Yeah buoy” consists of a network of sensing buoys and a mobile app for lifeguards. Rip currents are characterised by a localised strong flow of water that moves away from the shore at a typical speed of 0.5 to 2.5 meters per second. Each buoy of the network has a customised fluid flow sensor at its bottom to measure the strength/speed of the water as it flows through, and the value is compared to a set of thresholds by a built-in microcontroller real time. A high-intensity light placed on top then indicates the level of danger in three colours: green for “Yeah” (good to swim); orange for an alert; and red for “Nah” (do not swim). The buoys also transmit the information wirelessly to an app on the lifeguards’ mobile devices which allows them to adjust the thresholds as needed. The buoys are lightweight, very easy to install and individually manageable and form a network automatically.
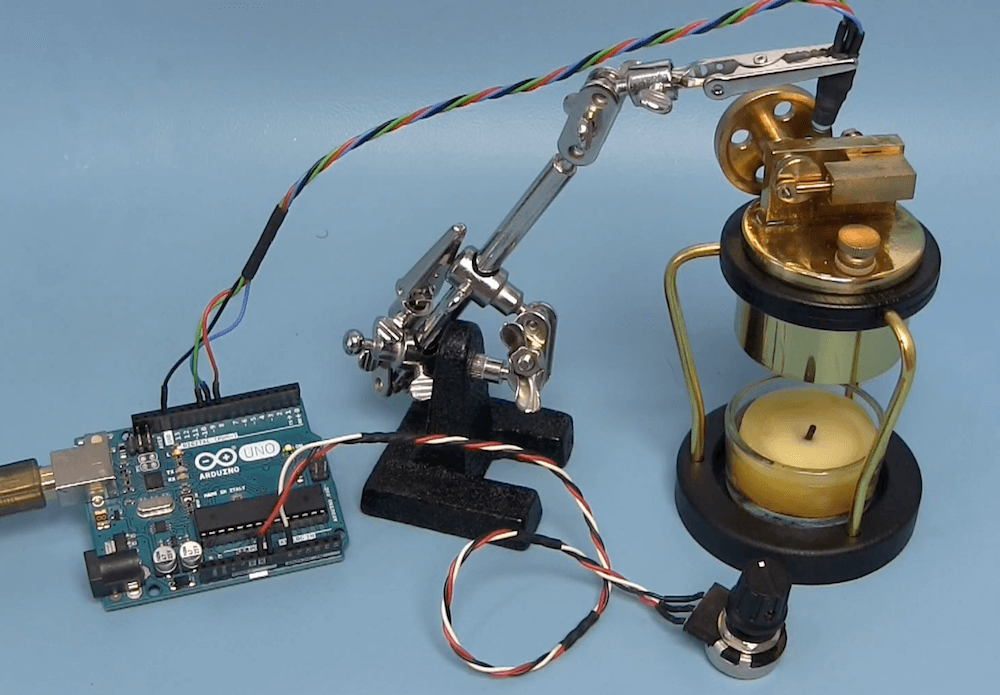
Joop Brokking has been experimenting with a miniature candle-powered steam engine. It’s an amazing little device, able to push a piston over and over to turn a flywheel, releasing the steam via a mechanically-controlled valve. But just how fast does it go?
Of course, there are a plethora of ways to determine its speed, but Brokking chose to do so using an Arduino Uno, a potentiometer and an LED that’s arranged over the piston assembly.
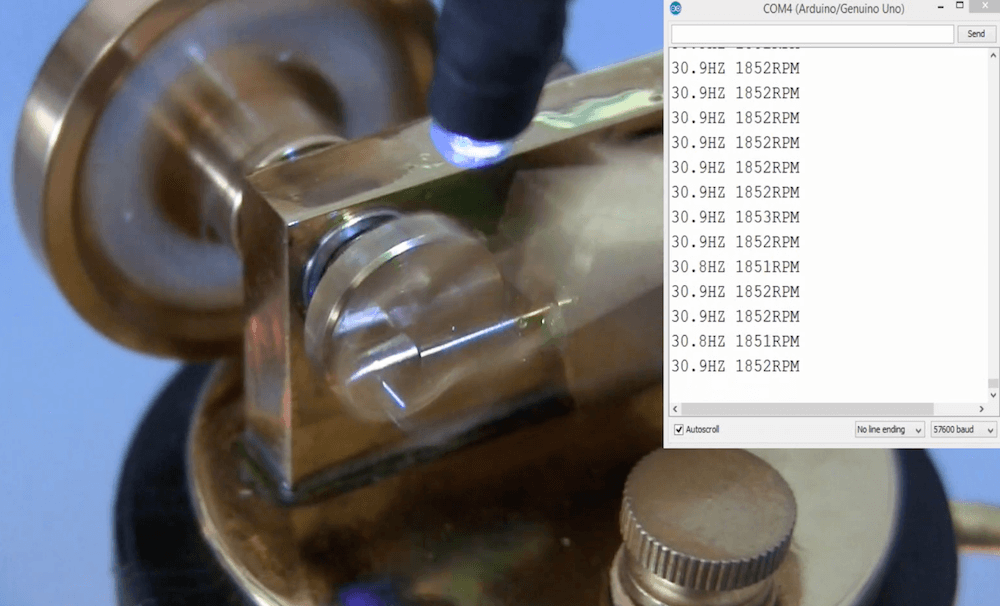
The light source is programmed to pulse on and off, with a frequency that can be adjusted using the potentiometer. He then aligned this pulsing with the piston’s cyclic rate, visually “freezing” the device in time. This frequency and RPM numbers are output over the serial monitor, giving him a speed of around 1850 RPM.
While the “M” in MIDI stands for “musical”, it’s possible to use this standard for other things as well. [s-ol] has been working on a VJ setup (mixing video instead of music) using various potentiometer-based hardware and MIDI to interface everything together. After becoming frustrated with drift in the potentiometers, he set out to outfit the entire rig with custom-built encoders.
[s-ol] designed the rotary-encoder based boards around an FPGA. It monitors the encoder for changes, controls eight RGB LEDs per knob, and even does capacitive touch sensing on the aluminum knob itself. The FPGA communicates via SPI with an Arduino master controller which communicates to a PC using a serial interface. This is [s-ol]’s first time diving into an FPGA project and it looks like he hit it out of the park!.
Even if you’re not mixing video or music, these encoders might be useful to any project where a standard analog potentiometer isn’t accurate or precise enough, or if you just need something that can dial into a specific value quickly. Potentiometers fall short in many different ways, but if you don’t want to replace them you might modify potentiometers to suit your purposes.
Do you want to make your own springs? Yeah, that’s what we thought. Well, blow the dust off of that spare Arduino and keep reading. A few months ago, we let you know that renowned circuit sculptor [Jiří Praus] was working on a precision wire-bending machine to help him hone his craft. Now it’s real, it’s spectacular, and it’s completely open source.
Along with that ‘duino you’ll need a CNC shield and a couple of NEMA 17 steppers — one to feed the wire and one to help bend it. Before being bent or coiled into springs, the wire must be super straight, so the wire coming off the spool holder runs through two sets of rollers before being fed into the bender.
[Jiří]’s main goal for this build was precision, which we can totally get behind. If you’re going to build a machine to do something for you, ideally, it should also do a better job than you alone. It’s his secondary goal that makes this build so extraordinary. [Jiří] wanted it to be easy to build with commonly-available hardware and a 3D printer. Every part is designed to be printed without supports. Bounce past the break to watch the build video.