Posts with «capacitive touch» label

REMOTICON 2021 // Hal Rodriguez and Sahrye Cohen Combine Couture and Circuitry

[Hal Rodriguez] and [Sahrye Cohen] of Amped Atelier focus on creating interactive wearable garments with some fairly high standards. Every garment must be pretty, and has to either be controllable by the wearer, through a set of sensors, or even by the audience via Bluetooth. Among their past creations are a dress with color sensors and 3D-printed scales on the front that change color, and a flowing pantsuit designed for a dancer using an accelerometer to make light patterns based on her movements.

Conductive Melody — a wearable musical instrument that is the focus of [Sahrye] and [Hal]’s Remoticon 2021 talk — was created for a presentation at Beakerhead Festival, a multi-day STEAM-based gathering in Calgary. [Sahrye] and [Hal] truly joined forces for this one, because [Sahrye] is all about electronics and costuming, and [Hal] is into synths and electronic music. You can see the demo in the video after the break.

The dress’s form is inspired by classical instruments and the types of clothing that they in turn inspired, such as long, generous sleeves for harp players and pianists. So [Hal] and [Sahrye] dreamed up a dress with a single large playable sleeve that hangs down from the mid- and upper arm. The sleeve is covered with laser-cut conductive fabric curlicues that look like a baroque interpretation of harp strings. Play a note by touching one of these traces, and the lights on the front of the dress will move in sync with the music.

[Sahrye] started the dress portion of Conductive Melody with a sketch of the garment’s broad strokes, then painted a more final drawing with lots of detail. Then she made a muslin, which is kind of the breadboard version of a project in garment-making where thin cotton fabric is used to help visualize the end result. Once satisfied with the fit, [Sahrye] then made the final dress out of good fabric. And we mean really good fabric — silk, in this case. Because as [Sahrye] says, if you’re going to make a one-off, why not make as nicely as possible? We can totally get behind that.

[Sahrye] says she is always thinking about how a wearable will be worn, and how it will be washed or otherwise cared for. That sequined and semi-sheer section of the bodice hides the LEDs and their wiring quite well, while still being comfortable for the wearer.

Inside the sleeve is an MPRP121 capacitive touch sensor and an Arduino that controls the LEDs and sends the signals to a Raspberry Pi hidden among the ruffles in the back of the dress.

The Pi is running Piano Genie, which can turn eight inputs into an 88-key piano in real time. When no one is playing the sleeve, the lights have a standby mode of mellow yellows and whites that fade in and out slowly compared to the more upbeat rainbow of musical mode.

We love to see wearable projects — especially such fancy creations! — but we know how finicky they can be. Among the lessons learned by [Sahrye] and [Hal]: don’t make your conductive fabric traces too thin, and silver conductive materials may tarnish irreparably. We just hope they didn’t have to waste too much conductive fabric or that nice blue silk to find this out.

It’s Time for Watch Clocks to Make a Comeback

Along with all the colorful, geometric influence of Memphis design everywhere, giant wristwatch clocks were one of our favorite things about the 80s. We always wanted one, and frankly, we still do. Evidently, so did [Kothe]. But instead of some splashy Swatch-esque style, [Kothe] went the nerdy route by building a giant Casio F-91W to hang on the wall.

Not only does it look fantastic, it has the full functionality of the original from the alarm to the stopwatch to the backlit screen. Well, everything but the water resistance. The case is 3D-printed, as are the buckle and the buttons. [Kothe] might have printed the straps, but they were too big for the bed. Instead, they are made of laser-cut foam and engraved with all the details.

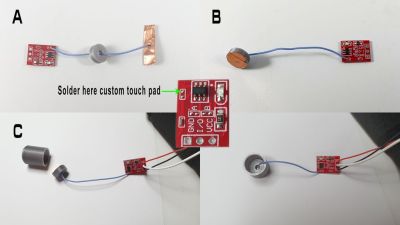
Inside there’s a 7″ touch display, a real-time clock module, and an Arduino Mega to make everything tick. To make each of the printed buttons work, [Kothe] cleverly extended a touch sensor module’s input pad with some copper tape. We think this could only be more awesome if it were modeled after one of Casio’s calculator watches, but that might be asking too much. Take a few seconds to watch the demo after the break.

Prefer your clocks less clock-like? Get a handle on the inner workings of this slot machine-based stunner.

Rapidly create your own capacitive multi-touch sensors with this kit

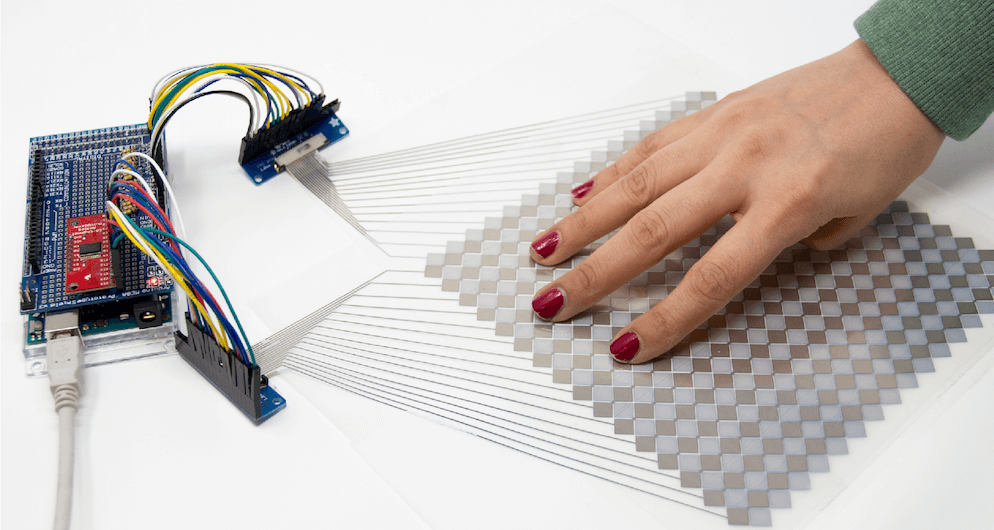
You likely use touchscreens every day when interacting with your phone — perhaps even to read this article — but prototyping your own capacitive matrix is unfortunately out of reach for most makers and electronics novices. As seen here, researchers have devised a new technique that will allow for easier prototyping of this type of interface, which can function on both flat and curved surfaces, over a variety of materials.

To accomplish this, the team developed an Arduino library, as well as one for Processing, and used OpenCV to track multiple finger positions. Interactions have been tested with an Uno, Mega and LilyPad, and would presumably work with almost any other Arduino board as needed!

We introduce Multi-Touch Kit, a low-cost do­ it-yourself technique to enable interaction designers, makers, and electronics novices alike to rapidly create and experiment with high-resolution multi-touch sensors of custom sizes, ge­ometries, and materials. 

In contrast to existing solutions, the Multi-Touch Kit is the first technique that works with a commodity microcontroller (our implementation uses a standard Arduino) and does not require any specialized hardware. As a technical enabler, we contribute a modified multi-touch sensing scheme that lever­ ages the human body as a transmission channel of MHz range signals through a capacitive near-field coupling mechanism. This leads to a clean signal that can be readily processed with the Arduino’s built-in analog-to-digital converter, resulting in a sensing accuracy comparable to industrial multi-touch con­ trollers. Only a standard multiplexer and resistors are required alongside the Arduino to drive and read out a touch sensor matrix. 

The technique is versatile and compatible with many types of multi-touch sensor matrices, including flexible sensor films on paper or PET, sensors on textiles, and sensors on 3D printed objects. Furthermore, the technique is compatible with sensors of various scale, curvature, and electrode materials (silver, copper, conductive yarn) fabricated using conductive printing, hand-drawing with a conductive pen, cutting, or stitching. 

Upgrading a MIDI Controller with an FPGA

While the “M” in MIDI stands for “musical”, it’s possible to use this standard for other things as well. [s-ol] has been working on a VJ setup (mixing video instead of music) using various potentiometer-based hardware and MIDI to interface everything together. After becoming frustrated with drift in the potentiometers, he set out to outfit the entire rig with custom-built encoders.

[s-ol] designed the rotary-encoder based boards around an FPGA. It monitors the encoder for changes, controls eight RGB LEDs per knob, and even does capacitive touch sensing on the aluminum knob itself. The FPGA communicates via SPI with an Arduino master controller which communicates to a PC using a serial interface. This is [s-ol]’s first time diving into an FPGA project and it looks like he hit it out of the park!.

Even if you’re not mixing video or music, these encoders might be useful to any project where a standard analog potentiometer isn’t accurate or precise enough, or if you just need something that can dial into a specific value quickly. Potentiometers fall short in many different ways, but if you don’t want to replace them you might modify potentiometers to suit your purposes.

A capacitive touch Jankó keyboard

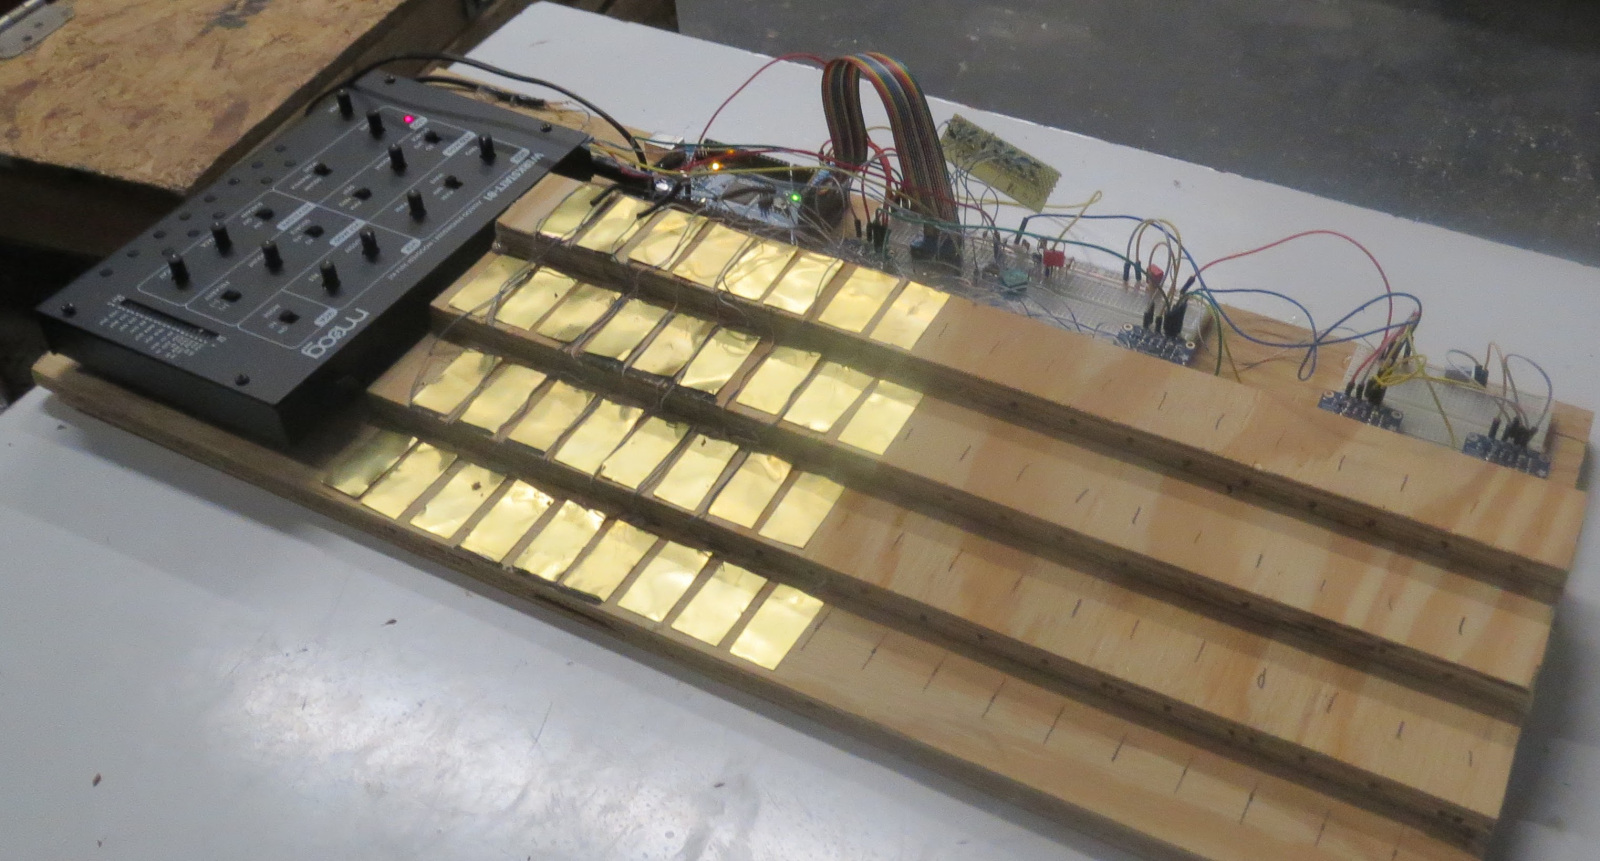
If you have even a passing familiarity with how to play a piano, you know that there are a bunch of long white keys, with a lesser number of black keys in a nearly-universal arrangement. On the other hand, like the standard and much lesser-known Dvorak keyboard for typing, there are alternatives. One such alternative is the Jankó keyboard, which Ben Bradley decided to reconstruct for the Moog Werkstatt using a capacitive touch sensor setup.

His new instrument, which as of his write-up only had 13 keys connected, was constructed for the 2017 Moog Hackathon at Georgia Tech. It uses an Arduino Mega for control along with four MPR121 capacitive touch breakout boards, and as seen in the video below, can be played quite well after only one day of practice!

You can find more details on his build, including its Arduino code, on the Freeside Atlanta website and check out its feature on Hackaday here.

(Photo: Nathan Burnham)

Capacitive Christmas Organ with Living Lenses of Slappable Light

We’ve seen capacitive touch organs manifest in pumpkin form. Though they are a neat idea, there’s something about groping a bunch of gourds that stirs a feeling of mild discomfort every time I play one. [mcreed] probably felt the same way and thus created this light-up Jello organ, so he can jiggle-slap Christmas carols, removing any sense of doubt that touching food to play music is weird…

This take on the capacitive tone producing instrument makes clever use of the transparent properties of Jello as well as its trademark wiggling. [mcreed] fills several small mold forms with festively colored strawberry and lime mix. One end of a wire connection is submerged in the liquid of each cup before it has a chance to solidify along with a bright LED. Once chilled and hardened, the gelatinous mass acts as a giant light emitting contact pad. An Arduino is the micro-controller used for the brain, assigning each Jello shape with a corresponding note. By holding onto a grounding wire and completing the acting circuit, one can play songs on the Jello by poking, spanking, or grazing the mounds.

Though I’m not entirely sure if the video is Jello propaganda or not, the idea is applaudable. I prompt anyone to come up with a more absurd item to use for a capacitive organ (zucchinis have already been done).


Filed under: Arduino Hacks, musical hacks

Pantry Light Demo

The pantry light is installed and working perfectly: I'll post code and circuit details eventually, not much to it though.

1-Day Project: Pantry Light

We have two pantries in our flat, one of which could use some light.

There's an outlet in there, but a simple solution won't do: I have more circuitry and time on my hands than I can handle, and the least I can do is make an over-complicated pantry light.

Parts lying around to use:

  • AC-DC converter blocks with screw-terminals outputting 12V at 2A. I have a bunch of these-- came with the LED strips.
  • A length of white LED strip.
  • Lots of TIP-120-style MOSFETs, intended for a second light suit. It's fun to have a lot of high power switches around.
  • Spare Arduino-compatible boards, including the "StripDuino" by "Tinkeract.com," here I quote the names since links go nowhere.
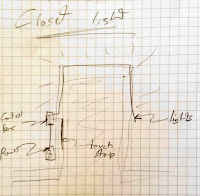
The idea is simple-- rest your hand on the large strip on the door sill as you scan the pantry contents. The light will turn on if you tap the strip, or it will fade if you leave your hand on it.

This design solves the problem uniquely with:

  1. Very large switch surface,
  2. Variable brightness by holding the switch,
  3. Indirect lighting from compact, dense LED strip tucked out of view.
I have a hardware sketch working in terms of the key elements of the controlling Arduino system:
  • Capacitive touch sensing works between pins D5 and D6 with a 1M resistor
  • Touch surface works: aluminum foil with soldered wire plus a layer of hot glue and tape.
  • PWM works with the MOSFET to control the LED strip nicely, with the board's 3.3V logic.
For the light strip at full power, I measure 240.8 mA at 11.85 V, so 2.85 W of power. This is not much but it scales proportionally to the length of the strip.

To do:

  1. Capture the working circuit in an Eagle schematic.
  2. Build a looping sketch with the tap/hold fading behavior.
More to come...

Droplet and StackAR bring physical interface to virtual experiences, communicate through light (hands-on)

Light-based communication seems to wind throughout the MIT Media Lab -- it is a universal language, after all, since many devices output light, be it with a dedicated LED or a standard LCD, and have the capacity to view and interpret it. One such device, coined Droplet, essentially redirects light from one source to another, while also serving as a physical interface for tablet-based tasks. Rob Hemsley, a research assistant at the Media Lab, was on hand to demonstrate two of his projects. Droplet is a compact self-contained module with an integrated RGB LED, a photodiode and a CR1216 lithium coin battery -- which provides roughly one day of power in the gadget's current early prototype status. Today's demo used a computer-connected HDTV and a capacitive-touch-enabled tablet. Using the TV to pull up a custom Google Calendar module, Hemsley held the Droplet up to a defined area on the display, which then output a series of colors, transmitting data to the module. Then, that data was pushed to a tablet after placing the Droplet on the display, pulling up the same calendar appointment and providing a physical interface for adjusting the date and time, which is retained in the cloud and the module itself, which also outputs pulsing light as it counts down to the appointment time.

StackAR, the second project, functions in much the same way, but instead of outputting a countdown indicator, it displays schematics for a LilyPad Arduino when placed on the tablet, identifying connectors based on a pre-selected program. The capacitive display can recognize orientation, letting you drop the controller in any position throughout the surface, then outputting a map to match. Like the Droplet, StackAR can also recognize light input, even letting you program the Arduino directly from the tablet by outputting light, effectively simplifying the interface creation process even further. You can also add software control to the board, which will work in conjunction with the hardware, bringing universal control interfaces to the otherwise space-limited Arduino. Both projects appear to have incredible potential, but they're clearly not ready for production just yet. For now, you can get a better feel for Droplet and StackAR in our hands-on video just past the break.

Continue reading Droplet and StackAR bring physical interface to virtual experiences, communicate through light (hands-on)

Droplet and StackAR bring physical interface to virtual experiences, communicate through light (hands-on) originally appeared on Engadget on Tue, 24 Apr 2012 15:03:00 EST. Please see our terms for use of feeds.

Permalink | Email this | Comments