Adaptive Field Robot changes wheel shape to overcome various terrain
If your robotic vehicle will only work on smooth surfaces, the choice of a wheel is obvious. For more rugged bots, the same applies with knobby wheels. For those that need to operate in both environments, however, the Adaptive Field Robot presents a new solution in the form of wheels that actually change dynamically depending on the terrain.
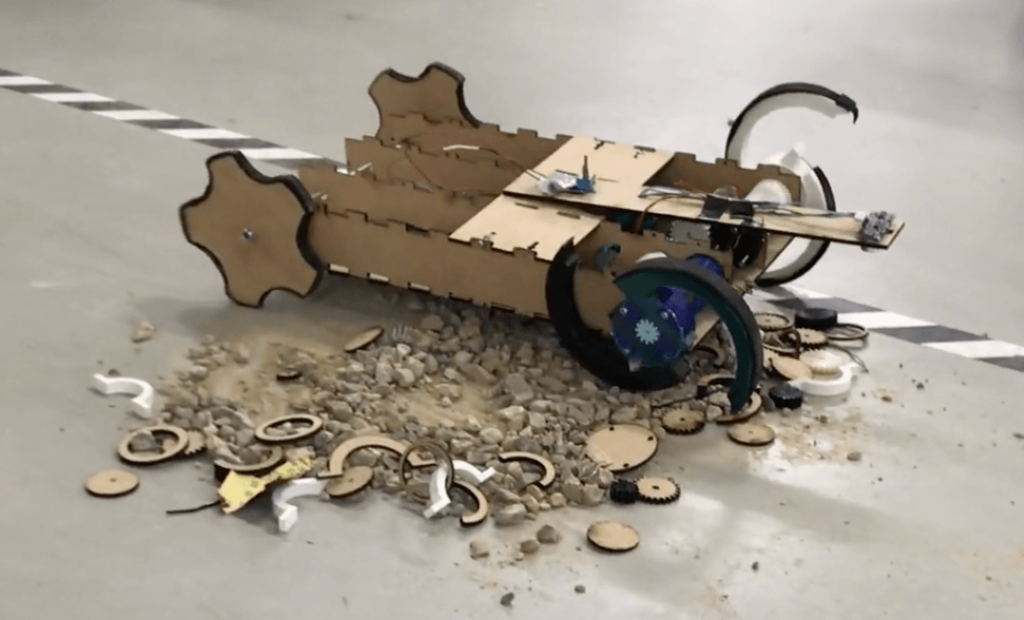
This Arduino-powered robot is able to transform its two driving wheels from a nearly circular shape into a claw-like arrangement using secondary motors that rotate along with the wheel assembly.
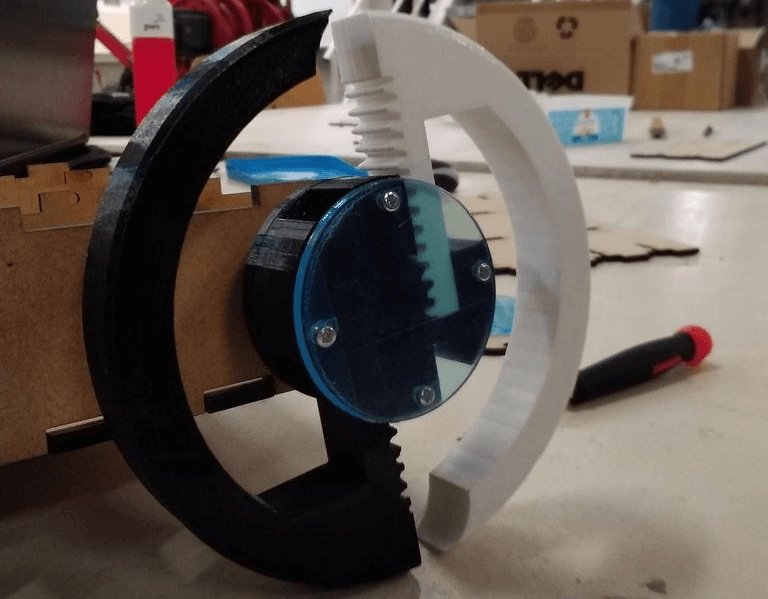
When the bot detects a difference in terrain via an ultrasonic sensor, the motors springs into action, activating a rack-and-pinion system that expands the two halves of the wheel into “claw mode.”
Be sure to check out this innovative robot in the video below, including some trial-and-error during the development process.