

Battery Shield Mounts Underneath The Arduino

So, what do you do when your Arduino project needs to operate in a remote area or as a portable device? There are LiPo battery shields available, and although they may work well, recharging requires access to a USB port. You can also go the 9v battery route plugged into the on-board regulator of the Arduino but the low mAh rating of a 9v won’t allow your project to stay running for very long. [AI] needed a quick-change battery option for his Arduino project and came up with what he is calling the AA Undershield.
As the name implies, AA sized batteries are used in the project, two of them actually. Yes, two AA batteries at 1.5v each would equal only 3 volts when connected in series. The Arduino needs 5v so [AI] decided to use a MAX756 DC-to-DC step-up regulator to maintain a steady stream of 5v. This article has some nice graphs showing the difference in performance between a 9v battery being stepped down to 5v verses two AA’s being bumped up to 5v.
The ‘under’ in Undershield comes from this shield being mounted underneath the Arduino, unlike every other shield on the planet. Doing so allows use of a standard 0.100″-spaced prototype PCB and is an easy DIY solution to that odd-sized space between the Arduino’s Digital 7 and 8 pins. The Arduino mounts to the Undershield via its normal mounting holes with the help of some aluminum stand offs.
[AI] did a great job documenting his build with schematics and lots of photos so that anyone that is interested in making one for themselves can do so with extreme ease.
Filed under: Arduino Hacks


 We’re well past the time when Halloween costume submissions stop hitting the tip line, but like ever year we’re expecting a few to trickle in until at least Thanksgiving. Remember, kids: documentation is the worst part of any project.


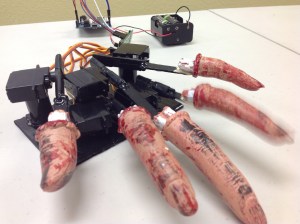 Impatient Severed Fingers – [Amanda] came up with a cute use for some mini servos and a zombie hand prop. The five severed fingers were attached to one end of a plastic rod. The other end was mounted to each of five servos which were laid out in the appropriate hand shape and attached to a fixed base. An Arduino running a basic sweep sketch animated the motors at slightly staggered intervals, creating a nice rolling effect. Even with the moving parts exposed this prop would be awesome to have on display, or set the ambiance with its continuous tapping…
 Angry Spectral Delta – [Nathan Bryant] made an actual costume for his delta robot from Robot Army. By attaching a small plastic skull to the end effector and draping a tattered piece of fabric over the rest of the mechanism he effectively transformed the delta into a little ghost with a sassy personality. The head swiftly bobbed about, all while staying parallel to the table… until it intermittently came unhinged and hung limply, which was a nice added effect!
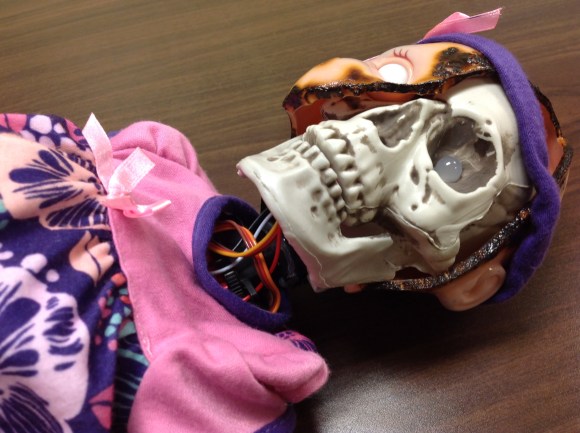
 Robotic Exorcism Baby – This doll could turn its half skeleton, half baby face 180 degrees and then laugh at your fear. By attaching two servo motors together, [Jeremy] was able to create a pan and tilt mechanism which acted as the baby’s contorting neck and chattering jaw. The micro controller sending commands to the motors was hidden modestly under her dress.
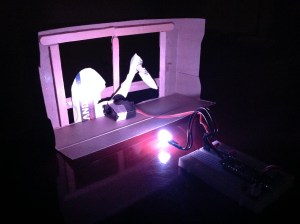 Stabby Animated Cardboard Shadowbox - Among the animatronic devices seen at the event was a shadowbox made by [Brandon] hidden in a dark conference room nearby. When one happened to walk past the seemingly unoccupied space, they’d glimpse the silhouette of an arm stabbing downward with a knife through a windowsill. Being lured in for further investigation you’d find that the shadow was being cast by some colored LEDs through a charmingly simple device. A cutout made from recycled card stock was attached to a single servo. This whole mechanism itself rocked back and forth slightly as the motor moved, which wasn’t intentional but added some realism to the motion of the stabby arm.


