Send HEX values to Arduino

FIVE MINUTE TUTORIAL
Project Description: Sending Hex values to an Arduino UNO
This simple tutorial will show you how to send Hexadecimal values from a computer to an Arduino Uno. The "Processing" programming language will be used to send the HEX values from the computer when a mouse button is pressed. The Arduino will use these values to adjust the brightness of an LED.

Learning Objectives
- To Send Hexadecimal (Hex) values from a computer to the Arduino
- Trigger an action based on the press of a mouse button
- Learn to create a simple Computer to Arduino interface
- Use Arduino's PWM capabilities to adjust brightness of an LED
- Learn to use Arduino's analogWrite() function
- Create a simple LED circuit
Parts Required:
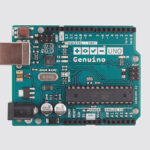
- Arduino Uno or compatible board
- LED
- Breadboard
- 330 Ohm Resistor
- Computer - with Arduino IDE and Processing IDE installed
Fritzing Sketch
The diagram below will show you how to connect an LED to Digital Pin 10 on the Arduino.
Don't forget the 330 ohm resistor !

Arduino Sketch
The latest version of Arduino IDE can be downloaded here.
1 | /* ================================================================================================================================================== |
Processing Sketch
The latest version of the Processing IDE can be downloaded here.
1 | /* ================================================================================================================================================== |
The Video

The tutorial above is a quick demonstration of how to convert Hex strings on your computer and send them to an Arduino. The Arduino can use the values to change the brightness of an LED as shown in this tutorial, however you could use it to modify the speed of a motor, or to pass on commands to another module. Hopefully this short tutorial will help you with your project. Please let me know how it helped you in the comments below.
If you like this page, please do me a favour and show your appreciation :
Visit my ArduinoBasics Google + page.
Follow me on Twitter by looking for ScottC @ArduinoBasics.
I can also be found on Pinterest and Instagram.
Have a look at my videos on my YouTube channel.
Visit my ArduinoBasics Google + page.
Follow me on Twitter by looking for ScottC @ArduinoBasics.
I can also be found on Pinterest and Instagram.
Have a look at my videos on my YouTube channel.

However, if you do not have a google profile...
Feel free to share this page with your friends in any way you see fit.